Aerosol Barrier Filter Tips: The Ultimate Guide to Preventing PCR Contamination
This comprehensive guide delves into the critical role of aerosol barrier filter tips in safeguarding the integrity of sensitive PCR and qPCR experiments.
Aerosol Barrier Filter Tips: The Ultimate Guide to Preventing PCR Contamination
Abstract
This comprehensive guide delves into the critical role of aerosol barrier filter tips in safeguarding the integrity of sensitive PCR and qPCR experiments. Designed for researchers, scientists, and drug development professionals, the article provides a foundational understanding of pipette-generated aerosols and contamination mechanisms. It offers a detailed methodological framework for the correct selection and application of filter tips, alongside advanced troubleshooting strategies to identify and resolve persistent contamination issues. Furthermore, the guide presents a rigorous validation and comparative analysis of filter tips against alternative contamination control methods, empowering laboratories to establish robust, reproducible, and contamination-free workflows for molecular diagnostics and biomedical research.
Understanding the Invisible Threat: How Pipetting Aerosols Compromise PCR Integrity
In molecular biology, particularly in polymerase chain reaction (PCR), the integrity of results is paramount. A significant yet often overlooked threat comes from the pipetting process itself, which can introduce contamination through multiple pathways. This application note delineates the three primary mechanisms of pipette-induced contamination—pipette-to-sample, sample-to-pipette, and sample-to-sample—and frames them within the critical context of preventing PCR aerosol contamination. A clear understanding of these pathways is the first step in implementing effective countermeasures, such as the use of certified filter tips, to safeguard experimental validity, ensure reproducibility, and protect valuable laboratory equipment [1] [2].
The Three Contamination Pathways
Pipette-induced contamination primarily occurs through three distinct mechanisms, each with unique triggers and consequences. The following diagram illustrates these pathways and their relationships.
Pathway 1: Pipette-to-Sample Contamination
This pathway occurs when a contaminated pipette or pipette tip introduces pollutants into a clean sample.
- Mechanism: Contaminants present on the pipette's barrel, piston, or the interior of a non-sterile tip are transferred directly into the sample during liquid aspiration. This is a direct physical transfer.
- Common Contaminants:
- RNase and DNase: Trace amounts of these powerful enzymes can degrade nucleic acids, leading to complete failure in PCR and other amplification techniques [1] [2]. They are introduced via human contact, saliva, or bacterial residues [1].
- Endotoxins (Pyrogens): Lipopolysaccharides from gram-negative bacteria can impair cell culture growth and cause fever in humans, invalidating biological assays [1].
- Microbial Life: Bacteria or viruses from non-sterile tips or a contaminated pipette body can grow in samples [1].
- PCR Inhibitors: Chemical residues or leachables from the tip material itself can inhibit polymerase activity [2].
- Impact on PCR: This pathway is a primary cause of false negatives in PCR, as nucleases can destroy target templates or reagents, preventing amplification.
Pathway 2: Sample-to-Pipette Contamination
This pathway involves the sample itself contaminating the internal mechanism of the pipette.
- Mechanism: During pipetting, rapid or forceful dispensing can create aerosols—microscopic suspensions of liquid or solid particles in air [1] [2]. If unfiltered tips are used, these aerosols can be drawn back into the pipette's barrel and shaft.
- Triggers:
- Rapid release of the pipette plunger.
- Pipetting volatile, viscous, or corrosive liquids.
- Bubbling or foaming during mixing or aspiration.
- Consequences:
- Pipette Damage: Corrosive reagents or viscous biological samples can damage the pipette's piston and seals, leading to calibration drift and mechanical failure [2].
- Carryover Contamination: Once inside the pipette, the contaminant creates a reservoir for cross-contamination, enabling Pathway 1 in future experiments [1].
Pathway 3: Sample-to-Sample Contamination (Carryover)
This is the most common form of cross-contamination, where a residue from one sample is carried over to the next.
- Mechanism: Aerosols or liquid residue from one sample either contaminate the pipette's exterior, are transferred via a reused pipette tip, or escape from the tip and settle into adjacent wells or tubes.
- Primary Cause: Reusing non-barrier pipette tips is a major contributor, as the aerosol retained in the tip during the first dispensing cycle can be ejected during the next [1].
- Impact on PCR: This pathway is a leading cause of false positives in PCR and qPCR. Trace amounts of amplicon from a previous reaction can contaminate subsequent setups, leading to amplification in no-template controls and completely invalidating experimental data [2].
Quantitative Analysis of Contamination Risks
The table below summarizes the key characteristics and quantitative impacts of the three contamination pathways.
Table 1: Quantitative Summary of Pipette-Induced Contamination Pathways
| Contamination Pathway | Primary Vector | Key Contaminants | Impact on PCR | Reported Filtration Efficiency of Mitigation Tools |
|---|---|---|---|---|
| Pipette-to-Sample | Direct physical transfer | RNase, DNase, Endotoxins, PCR inhibitors [1] [2] | False negatives (target degradation) | Certified filter tips are validated for RNase/DNase-free status (e.g., ≤0.001 pg/µL residual activity) [2] |
| Sample-to-Pipette | Aerosols (0.5 - 10 µm) | Sample components, reagents, volatiles [1] [2] | Pipette damage & future false positives/negatives | High-quality filter tips can achieve ≥99% aerosol retention for 0.2–5 µm particles [2] |
| Sample-to-Sample | Aerosols & liquid carryover | Amplicons, previous sample contents [1] | False positives (amplicon contamination) | Filter tips are the standard for prevention; positive displacement pipettes offer a non-filter alternative [3] |
Experimental Protocol: Demonstrating and Preventing Aerosol Contamination
This protocol outlines a method to visualize aerosol contamination and validate the efficacy of filter barriers.
Aerosol Visualization and Filtration Efficiency Test
Objective: To demonstrate the generation of aerosols during pipetting and to test the ability of filter tips to prevent sample-to-pipette contamination.
Table 2: Research Reagent Solutions for Aerosol Test
| Item | Function/Description |
|---|---|
| Methylene Blue Solution (0.1%) | A visible tracer dye to visualize aerosol formation and contamination. |
| Filter Pipette Tips (Certified) | Test article; features a hydrophobic, porous polymer filter to block aerosols [2]. |
| Non-Filter Pipette Tips | Control article; standard tips without an internal barrier. |
| Microcentrifuge Tubes (1.5 mL) | Containment for the dye solution and receiving tubes for testing. |
| Pipette (10-100 µL) | A standard air-displacement pipette. |
| Deionized Water | Used as a receiving solution to check for dye carryover. |
| White Absorbent Pad | Placed inside pipette upon disassembly to check for internal contamination. |
Methodology:
- Setup: Fill a 1.5 mL microcentrifuge tube with 500 µL of 0.1% methylene blue solution. Prepare a second tube with 500 µL of clear deionized water.
- Contamination Simulation (Control):
- Attach a non-filter tip to the pipette and set it to 50 µL.
- Aspirate the methylene blue solution from the first tube. Slowly dispense it back into the same tube. Repeat this process 10-20 times to simulate vigorous pipetting and generate aerosols.
- Eject the used tip. Without changing the tip, aspirate 50 µL of clean water from the second tube and dispense it into a fresh, empty tube. Observe if the water shows any blue tint, indicating sample-to-sample carryover.
- Pipette Inspection:
- Using a fresh non-filter tip, repeat step 2 to ensure heavy exposure.
- Carefully disassemble the pipette's shaft according to the manufacturer's instructions. Place a white absorbent pad inside the pipette body. The presence of blue spots on the pad indicates sample-to-pipette contamination via aerosol ingress.
- Test of Mitigation:
- Repeat Steps 2 and 3 using certified filter tips. The aspiration and dispensing of the dye solution should be followed by the transfer of clean water. The water should remain clear, and the pipette interior should be free of dye, demonstrating the filter's efficacy.
The Scientist's Toolkit: Essential Materials for Contamination Control
Selecting the right tools is critical for implementing an effective contamination control strategy in sensitive applications like PCR.
Table 3: Key Research Reagent Solutions for Contamination Prevention
| Material/Reagent | Critical Function | Certification Requirements |
|---|---|---|
| Filter Pipette Tips | Acts as a hydrophobic barrier to prevent aerosol-based contamination (Pathways 2 & 3) and protects the pipette [4] [2]. | Certified free of RNase, DNase, DNA, PCR inhibitors, and endotoxins; sterilized [5] [1] [2]. |
| Positive Displacement Pipette & Tips | An alternative to filter tips; uses a disposable piston that makes direct contact with the liquid, eliminating the air interface and thus the risk of aerosols [3]. | Tips must be certified with the same purity standards as filter tips for sensitive applications. |
| Nuclease-Free Water | Used for preparing master mixes and reagents to ensure no background nuclease activity degrades reaction components. | Validated via fluorometric assays (e.g., RNaseAlert) to be nuclease-free. |
| Laboratory Disinfectants | For surface decontamination (e.g., benches, pipette exteriors) to remove microbial contaminants and nucleases [1]. | Selected based on target contaminants (e.g., alcohols, halogens). Effective against a broad spectrum of pathogens. |
| UV Chamber | Used to decontaminate surfaces of open tubes, racks, and other equipment by degrading nucleic acids through UV irradiation. | N/A |
In molecular biology laboratories, the integrity of sensitive experiments is perpetually threatened by an invisible adversary: airborne aerosol contamination. These microscopic droplets, often measuring less than 5 micrometers in diameter, can carry biological agents such as DNA, RNA, enzymes, and pathogens, becoming vectors for cross-contamination [6]. The profound sensitivity of techniques like Polymerase Chain Reaction (PCR), which can amplify a single DNA molecule millions of times, makes them exceptionally vulnerable. Even trace contamination can lead to false-positive results, false negatives, and a complete loss of experimental reproducibility, ultimately wasting precious resources, time, and scientific credibility [7].
The consequences are not merely theoretical; they have impacted public health on a significant scale. For instance, in April 2020, contamination issues at the CDC laboratories led to a delay in the deployment of COVID-19 testing kits across the United States after 24 out of 26 public health laboratories reported false-positive results [6]. Such incidents underscore that understanding and mitigating aerosol contamination is not just a matter of procedural hygiene but a fundamental requirement for robust scientific research and diagnostic accuracy.
The Mechanisms of Aerosol Formation and Dispersion
Aerosols are solid or liquid particles suspended in a gas medium. In a laboratory setting, they are generated through a surprising variety of routine activities. The friction between a pipette plunger and the air-liquid interface during rapid dispensing is a primary source, but many other common procedures contribute significantly.
Common Aerosol-Generating Procedures
The table below summarizes key laboratory activities known to produce aerosols, illustrating the ubiquity of the risk [8].
Table 1: Common Aerosol-Generating Activities in the Laboratory
| Activity Category | Specific Examples |
|---|---|
| General Liquid Handling | Pouring liquids, blowing out pipettes, snapping open stoppers, opening lyophilized cultures, vortexing open tubes |
| Centrifugation | Filling centrifuge tubes, removing tube caps or plugs, decanting supernatants, resuspending pellets, tube breakage |
| Sample Processing | Blending, grinding, sonicating, homogenizing, cell disruption |
| Microbiological Techniques | Flaming inoculating loops and needles, intranasal inoculation of animals, harvesting infected material from animals or eggs |
Visualization of Aerosol Contamination Pathways
The following diagram maps the core problem of aerosol contamination, its consequences, and the primary defense strategy, providing a logical framework for understanding the subsequent sections.
Quantitative Analysis of Contamination Risks
Understanding the physical and quantitative nature of the threat is crucial for implementing effective countermeasures. Aerosols generated during pipetting can contain copy numbers ranging from 10^4 to 10^6 copies of a target sequence, making even minuscule volumes a significant source of contamination [6]. The sensitivity of qPCR means that this contamination can manifest in no-template controls (NTCs) with varying Cycle threshold (Ct) values, providing a measurable indicator of contamination severity: heavy contamination may yield Ct values around 24, moderate around 30, and light contamination around 33 [6].
The persistence of aerosols is another critical factor. Experimental work has confirmed that an aerosolized virus like SARS-CoV-2 can remain infectious in the air for hours, and similar principles apply to nucleic acids, which can persist on surfaces for days [9]. This longevity allows contaminants to circulate in the laboratory environment, threatening subsequent experiments.
Efficacy of Filter Tips as a Primary Barrier
Filter pipette tips are a first-line defense, but their efficacy is not absolute. A seminal application note published in Nature Methods demonstrated that while filter tips are widely accepted as a solution, fundamentals of aerosol behavior show they cannot achieve 100% protection over the full range of particle sizes [3]. The study compared filter tips to positive displacement pipettes, concluding that for the utmost contamination control, the latter provides a more effective alternative.
The protection mechanism relies on a hydrophobic filter, typically made of polyethylene (PE) or polypropylene (PP), which acts as a physical sieve. High-quality filters are engineered with pores ≤20 µm, designed to block aerosols typically ranging from 0.5–10 µm while permitting smooth airflow for volumetric accuracy [2]. The filtration efficiency of premium filter tips can be as high as 99.7% retention of 0.2–5 µm particles [2].
Table 2: Quantitative Data on Aerosol Contamination and Protection
| Parameter | Data / Observation | Source / Context |
|---|---|---|
| Aerosol Copy Number | 10^4 to 10^6 copies | Sufficient to cause false positives in PCR [6] |
| qPCR Ct Value Indication | Ct ~24 (Heavy), ~30 (Moderate), ~33 (Light) | Observation in No-Template Controls (NTCs) [6] |
| Virus Aerosol Viability | Stays infectious for hours | Experimental study on SARS-CoV-2 [9] |
| Filter Tip Efficiency | Cannot achieve 100% protection; >99% aerosol retention for high-quality tips | Comparison to positive displacement pipettes [3]; manufacturer data [2] |
| Pore Size in Filter Tips | ≤20 µm | Designed to block aerosols (0.5-10 µm) [2] |
Detailed Experimental Protocols
To ensure the validity of PCR-based experiments, researchers must adopt rigorous protocols aimed at both preventing and detecting aerosol contamination. The following sections provide actionable methodologies.
Protocol: Establishing a Contamination-Minimized PCR Workstation
This protocol outlines the setup of a laboratory space designed to prevent the introduction and amplification of contaminants.
I. Principle Spatially separate the key stages of the PCR workflow to create a unidirectional flow of materials and personnel, thereby preventing amplicon carryover into pre-amplification areas [10].
II. Reagents and Equipment
- Laminar flow cabinet (Class II) equipped with a UV lamp
- Dedicated pipettes and aerosol barrier (filter) tips for each area
- Lab coats, gloves, and dedicated waste containers for each area
- Reagents: 70% ethanol, 10% sodium hypochlorite (bleach), sterile water
- Standard PCR reagents: master mix, primers, dNTPs, UNG (optional)
- Nuclease-free water and microcentrifuge tubes
III. Procedure
- Designate Physical Areas: Establish three physically separated zones:
- Reagent Storage and Preparation Area: For storing and aliquoting all PCR reagents.
- Sample Preparation Area: For extracting and preparing nucleic acid templates. This is a critical "pre-PCR" area.
- Amplification and Product Analysis Area: For running the PCR thermocycler and analyzing products via gel electrophoresis. This is a "post-PCR" area.
- Implement Unidirectional Flow: Personnel and materials must move from the pre-PCR areas to the post-PCR area only. Never bring equipment or reagents from the post-PCR area back into the pre-PCR areas [10].
- Dedicate Equipment: Assign pipettes, tip boxes, centrifuges, lab coats, and other equipment to a specific area. Clearly label them.
- Decontaminate Work Surfaces: Before and after use, clean the laminar flow cabinet and benches in the pre-PCR areas with 70% ethanol, followed by 10% bleach (with a minimum 10-minute contact time), and then wipe with sterile water [7].
- UV Irradiation: Leave pipettes and exposed surfaces inside the closed laminar flow cabinet under UV light for at least 15-30 minutes to cross-link any residual DNA [10].
Protocol: Using UDG Treatment to Prevent Carryover Contamination
This biochemical method is highly effective against one of the most common contamination sources: previous PCR amplicons.
I. Principle Uracil-DNA-glycosylase (UNG) enzymatically degrades PCR products containing uracil (dUTP) by cleaving the uracil base from the DNA backbone. It is inactivated at high temperatures, allowing the new PCR with dATP to proceed normally [6] [7].
II. Reagents and Equipment
- PCR master mix containing UNG enzyme (or available as a separate component)
- dUTP nucleotide mix (replacing dTTP in the PCR reaction)
- Standard thermal cycler
III. Procedure
- Reaction Assembly: Prepare the PCR master mix on ice, including all standard components (polymerase, buffer, primers, dNTPs) but substituting dTTP with a dUTP mixture. Include UNG enzyme in the mix.
- UNG Incubation: Program the thermal cycler to include a single hold step at 25–50°C for 2–10 minutes immediately before the initial denaturation step. During this hold, any contaminating uracil-containing DNA from previous PCRs will be degraded by the UNG enzyme.
- Enzyme Inactivation and PCR: Program the cycler to proceed to a 95°C step for 2–5 minutes. This high temperature simultaneously inactivates the UNG enzyme and activates the hot-start DNA polymerase, initiating the new amplification with dUTP incorporation.
- Cycling: Continue with the standard PCR cycling conditions.
Workflow for Contamination Prevention and Control
The following diagram integrates physical and biochemical strategies into a cohesive workflow for robust contamination control.
The Scientist's Toolkit: Essential Reagents and Materials
The following table catalogs key solutions and materials critical for preventing aerosol-driven experimental failures.
Table 3: Essential Research Reagent Solutions for Contamination Prevention
| Item | Function & Application | Key Specifications |
|---|---|---|
| Aerosol Barrier Filter Tips | Prevents aerosols and liquids from entering pipette barrel, protecting samples and the instrument. | Hydrophobic PE/PP filter; pore size ≤20 µm; certified RNase/DNase-free, endotoxin-free [11] [2]. |
| UNG Enzyme | Prevents "carryover contamination" by degrading PCR products from previous amplification reactions. | Used in a pre-PCR incubation step; often included in commercial qPCR master mixes [6] [7]. |
| Hot-Start DNA Polymerase | Increases specificity and reduces nonspecific amplification and primer-dimer formation. | Polymerase activity is chemically or antibody-inhibited until activated by high temperature [7]. |
| Nuclease-Free Water | Serves as a solvent for PCR reagents and dilutions without introducing degrading enzymes. | Validated to be free of contaminating nucleases and PCR inhibitors [7]. |
| Nucleic Acid Decontamination Reagents | Used to clean work surfaces and equipment to destroy residual DNA/RNA. | Includes 10% sodium hypochlorite (bleach), 1M HCl, and specialized commercial reagents like psoralene compounds [7]. |
The threat posed by minute aerosol droplets to molecular experiments is both significant and manageable. A comprehensive understanding of their origin and behavior, combined with a rigorous, multi-layered defense strategy, is paramount. This strategy must integrate physical controls (dedicated workspaces and equipment), mechanical barriers (high-quality filter tips), and biochemical safeguards (UNG, hot-start enzymes). By systematically implementing these protocols and diligently using controls to monitor the laboratory environment, researchers can shield their experiments from contamination, ensuring the generation of precise, reliable, and reproducible data that forms the foundation of scientific progress.
The Double-Edged Sword of PCR Sensitivity
The Polymerase Chain Reaction (PCR) is a foundational technique in molecular biology, capable of amplifying a single DNA molecule into billions of copies. [12] This exquisite sensitivity, while being PCR's greatest strength, also constitutes its most significant vulnerability. The very amplification power that enables detection of minute quantities of genetic material also means that even microscopic levels of contamination can lead to false positives, compromised data, and erroneous conclusions.
A typical PCR reaction can generate as many as 10⁹ copies of the target sequence. [13] When aerosolized, these amplicons (amplification products) can contaminate laboratory environments, reagents, and equipment. [13] The primary vulnerability lies in the risk of these previously amplified products contaminating new reactions, where they can be efficiently amplified again, leading to false positive results. [14] [13] This carryover contamination is particularly problematic in clinical and diagnostic settings, where false positives can directly impact patient care and treatment decisions. [13]
Mechanisms of PCR Contamination
Pathways of Contamination
Contamination in PCR can originate from multiple sources, each presenting unique challenges for containment. Understanding these pathways is the first step in implementing effective countermeasures.
(PCR Contamination Pathways and Consequences)
The most significant contamination source is previously generated amplicons, which accumulate in the laboratory environment over time. [13] A single aerosolized droplet can contain as many as 10⁶ amplification products, creating a persistent contamination reservoir that can infiltrate reaction setups. [13] Other critical sources include cross-contamination between samples during processing and contaminated reagents that have been exposed to amplification products. [14] [13] The laboratory personnel themselves can also act as contamination vectors through hair, clothing, jewelry, and gloves. [13]
Aerosol Generation During Pipetting
Routine pipetting operations are a major generator of contaminated aerosols. During rapid liquid dispensing or mixing, microscopic aerosol particles (<10 µm) can be created. [2] These particles can easily travel through standard non-filtered pipette tips and enter the pipette barrel, contaminating the internal mechanisms and subsequently contaminating future samples. [2] This creates an insidious contamination cycle that can persist despite surface decontamination efforts.
Table 1: Quantitative Aspects of PCR Vulnerability
| Parameter | Magnitude/Risk | Impact |
|---|---|---|
| Amplicons generated per PCR reaction | Up to 10⁹ copies [13] | Massive contamination potential if aerosolized |
| Aerosolized particles in pipetting | <10 µm in size [2] | Can penetrate pipette barrels and contaminate internal mechanisms |
| Aerosolized amplicon concentration | Up to 10⁶ copies per droplet [13] | Minute aerosols can cause significant contamination |
| High-sensitivity applications affected | qPCR, NGS, pathogen detection [2] | False results in critical diagnostic and research applications |
Comprehensive Contamination Control Strategies
Physical and Workflow Barriers
Effective contamination control begins with physical separation of PCR-related activities. A unidirectional workflow must be maintained, moving from clean pre-amplification areas to post-amplification spaces without backtracking. [14] [13]
- Dedicated Work Areas: Strictly separate laboratory areas should be maintained for: (1) reagent preparation, (2) sample preparation, (3) amplification, and (4) amplification product analysis. [13] Each area should have dedicated equipment, laboratory coats, gloves, and supplies. [13]
- Chemical Decontamination: Work surfaces should be regularly cleaned with 10% sodium hypochlorite (bleach), which causes oxidative damage to nucleic acids, followed by ethanol to remove the bleach residue. [13] Bleach treatment effectively degrades DNA, making it unsuitable for amplification. [14]
- UV Irradiation: Ultraviolet light (254-300 nm) can induce thymidine dimers in DNA, rendering contaminants unamplifiable. [13] UV irradiation is most effective when implemented as an integrated system, with UV light boxes for storing opened packages of pipettes and disposables. [13]
Procedural Safeguards and Technique
- Master Mix Preparation: Prepare a master mix containing all PCR components except template DNA in a template-free clean room. [14] [12] This reduces pipetting steps and minimizes opportunities for contamination.
- Aliquoting Reagents: Store all reagents, including oligonucleotides, in single-use aliquots to prevent contamination of entire stocks. [14] [12]
- Positive Controls: Always include appropriate positive and negative controls to detect contamination events. [11] [15]
- Proper Sealing: Ensure all reaction tubes are tightly capped or sealed before amplification to prevent amplicon escape. [12]
Critical Experimental Protocols
Protocol: Uracil-N-Glycosylase (UNG) Sterilization Method
The UNG method is one of the most effective and widely implemented techniques for preventing carryover contamination in PCR laboratories. [13]
Principle: This pre-amplification sterilization technique utilizes the bacterial DNA repair enzyme uracil-N-glycosylase, which recognizes and removes uracil residues from DNA strands. [13] By incorporating deoxyuridine triphosphate (dUTP) in place of deoxythymidine triphosphate (dTTP) during PCR, newly synthesized amplicons contain uracil instead of thymine, making them distinguishable from natural DNA templates. [13]
Procedure:
- Reaction Setup: Prepare PCR master mix containing all standard components, but substitute dTTP with dUTP, and include UNG enzyme (0.5-1.0 units/reaction). [13]
- Contaminant Hydrolysis: After adding template DNA, incubate the reaction mix at room temperature (20-25°C) for 10 minutes. During this step, UNG hydrolyzes any contaminating uracil-containing amplicons from previous reactions. [13]
- Enzyme Inactivation and Amplification: Heat the reaction to 95°C for 2-5 minutes to inactivate UNG, then proceed with standard PCR cycling conditions. The heat inactivation step prevents degradation of newly synthesized uracil-containing products. [13]
- Post-Amplification Handling: Store amplification products at -20°C or 72°C until analysis, as residual UNG activity might degrade products at intermediate temperatures. [13]
Optimization Notes: UNG works best with thymine-rich amplification products and has reduced activity with G+C-rich targets. [13] Optimal UNG and dUTP concentrations should be determined for each specific amplification system. [13]
Protocol: Unidirectional Workflow Implementation
Establishing a strict unidirectional workflow is fundamental to preventing amplicon contamination.
Spatial Separation Requirements:
- Reagent Preparation Area: A dedicated clean room or biosafety cabinet where master mixes are prepared without any template DNA present. [14] [13] This area should contain dedicated pipettes, tips, tubes, and reagents that never come into contact with potential sources of contamination. [14]
- Sample Preparation Area: A separate space for processing samples and adding template DNA to the master mix. [14] Template DNA should never be introduced into the reagent preparation area. [14]
- Amplification Area: Designated thermal cyclers located in a separate room where sealed reaction vessels are amplified.
- Post-Amplification Analysis Area: A dedicated area for analyzing PCR products, ideally located furthest from the clean reagent preparation area. [13]
Procedural Controls:
- Personnel must move sequentially from clean to contaminated areas without backtracking. [13]
- Dedicated laboratory coats, gloves, and equipment must be maintained for each area. [13]
- Any item moving from a contaminated area to a clean area must be decontaminated with 2-10% bleach solution overnight and extensively washed before transfer. [13]
Table 2: Research Reagent Solutions for PCR Contamination Control
| Reagent/Equipment | Function | Application Specifics |
|---|---|---|
| Filter Pipette Tips | Physical barrier against aerosols | Contain hydrophobic filter (polyethylene or polypropylene) that blocks aerosols and liquids from entering pipette barrel [11] [2] |
| Uracil-N-Glycosylase (UNG) | Enzymatic sterilization of carryover amplicons | Hydrolyzes uracil-containing DNA from previous amplifications; requires dUTP substitution for dTTP in PCR mix [13] |
| Aerosol-Resistant Tips | Prevents sample carryover | Filter barriers protect pipettes from aerosols; essential for sensitive applications (qPCR, NGS) [11] [2] |
| Low-Retention Tips | Maximizes sample recovery | Hydrophobic plastic additive prevents liquid adherence to tip interior [11] |
| Psoralen/Isopsoralen | Post-amplification sterilization | Intercalates into DNA and forms crosslinks upon UV exposure, blocking further amplification [13] |
| DNase Treatment | Degrades contaminating DNA | Treat RNA samples before reverse transcription to remove genomic DNA contamination [14] |
| Hot-Start Polymerase | Reduces non-specific amplification | Minimizes primer-dimer formation and non-specific amplification during reaction setup [15] |
Specialized Containment Workflow
The following diagram illustrates a comprehensive contamination control workflow integrating both physical barriers and procedural controls:
(PCR Laboratory Zonation and Workflow)
Quality Control and Validation
Essential Controls for Contamination Monitoring
Rigorous quality control measures are non-negotiable in sensitive PCR applications. The following controls should be implemented routinely:
- No-Template Controls (NTC): Contain all PCR components except template DNA, replaced with molecular grade water. [14] These monitor for reagent contamination.
- No-Reverse-Transcription Controls (-RT): For reverse transcription PCR, omit reverse transcriptase to detect genomic DNA contamination in RNA preparations. [14]
- Positive Controls: Contain known target sequence at the limit of detection to verify assay sensitivity. [11] [15]
- Negative Controls: Known negative samples to verify specificity.
Filter Tip Efficacy and Selection
Filter pipette tips serve as critical physical barriers against aerosol contamination. Their efficacy depends on proper selection and use:
- Filtration Efficiency: High-quality filter tips provide ≥99% aerosol retention, validated through standardized testing methods (e.g., methylene blue aerosol tests). [2]
- Certification Requirements: For molecular biology applications, select tips certified as RNase/DNase-free, PCR inhibitor-free, and for sensitive applications, endotoxin-free. [2]
- Compatibility: Ensure tips form an airtight seal with your specific pipette brand, either through manufacturer-specific designs or validated universal tips. [11] [2]
The extreme sensitivity of PCR that enables detection of minute quantities of genetic material simultaneously creates an inherent vulnerability to contamination. Effective contamination control requires a comprehensive, multi-layered approach combining physical barriers, procedural safeguards, specialized reagents, and rigorous quality control. Filter pipette tips represent one critical component in this defense system, providing essential protection against aerosol-borne contamination. When implemented as part of an integrated contamination control strategy—including UNG sterilization, unidirectional workflow, and appropriate controls—these measures enable researchers to harness the full power of PCR while maintaining data integrity and reproducibility essential for both research and diagnostic applications.
In the realm of polymerase chain reaction (PCR) and quantitative PCR (qPCR), contamination represents one of the most significant challenges to experimental integrity, particularly in sensitive applications across pharmaceutical development and clinical diagnostics. Within the broader thesis on filter tips for preventing PCR aerosol contamination, understanding the precise origin of contamination is paramount for implementing targeted prevention strategies. Contamination events broadly categorize into two primary types: cross-contamination (the transfer of amplifiable DNA between samples and reagents) and environmental contamination (the introduction of foreign DNA from the laboratory environment). This application note provides detailed protocols for distinguishing between these contamination sources and implementing effective countermeasures, with particular focus on the role of aerosol barrier pipette tips within a comprehensive contamination control framework.
The critical distinction between these contamination types lies not only in their origin but also in their prevention methodologies. Cross-contamination frequently occurs through aerosolized droplets carrying amplified PCR products from previous reactions, where filter tips serve as a primary defense barrier [16]. Environmental contamination, conversely, often stems from laboratory surfaces, skin particles, or airborne dust containing nucleases or foreign DNA [17] [18]. The extreme sensitivity of PCR—capable of amplifying a single DNA molecule—makes these distinctions crucial for researchers, scientists, and drug development professionals who require unimpeachable results for downstream applications.
Contamination Source Identification
Diagnostic Characteristics and Patterns
Different contamination sources manifest through distinctive experimental patterns. Systematic observation of these patterns enables researchers to pinpoint the contamination origin and implement appropriate remediation strategies. The table below summarizes the key diagnostic characteristics for identifying common contamination sources.
Table 1: Diagnostic Characteristics of PCR Contamination Sources
| Contamination Source | Pattern in No Template Control (NTC) | Common Origins | Key Diagnostic Features |
|---|---|---|---|
| Carryover Cross-Contamination (PCR products) | Random well-to-well amplification with varying Ct values [19] | Opening post-amplification tubes, pipetting aerosols [16] [20] | Amplification with the same primers that generated the product; fragment of expected size [20] |
| Contaminated Reagent | Consistent amplification across all NTCs with similar Ct values [19] | Master mix, water, primers exposed to aerosols [16] | Affects all reactions containing the compromised reagent; replacement eliminates issue |
| Environmental Contamination | Variable patterns depending on source | Laboratory surfaces, skin particles, contaminated equipment [17] [18] | May affect only samples handled in specific locations or with specific equipment |
| Sample-to-Sample Cross-Contamination | Amplification in specific sample patterns | Reusing pipette tips, splashing between wells [21] | Correlates with sample processing order; affected samples typically processed consecutively |
Experimental Approach for Source Identification
A systematic diagnostic protocol is essential for accurate contamination source identification. The following workflow provides a methodological approach for tracing contamination origins through controlled experimental testing.
Diagram 1: Contamination Source Identification Workflow
Protocol: Systematic Contamination Source Tracing
Objective: Determine whether contamination originates from reagents, laboratory environment, or aerosol cross-contamination.
Materials:
- Fresh, uncontaminated DNA-free water
- New reagent aliquots (master mix, primers, buffer)
- Sterile, DNase-free filter tips
- Dedicated pre-PCR area
- 10% bleach solution and 70% ethanol
- Clean lab coat and gloves
Procedure:
- Prepare Fresh NTCs: Using completely new reagents and consumables from unopened containers, prepare negative template controls with fresh DNA-free water [16].
- Individual Reagent Testing: Systematically test each reagent by replacing it with a new aliquot while keeping other reagents constant [16].
- Spatial Testing: Set up identical NTC reactions in different laboratory locations (dedicated PCR hood, main bench, post-PCR area) to identify environmental contamination.
- Equipment Testing: Use different sets of pipettes (dedicated pre-PCR vs. general use) to identify instrument-borne contamination.
- Pattern Analysis:
- If contamination persists only with specific reagents, those reagents are contaminated [19].
- If contamination appears only in specific locations, environmental contamination is likely.
- If contamination occurs randomly despite new reagents, aerosol cross-contamination from PCR products is probable [19].
Contamination Prevention and Decontamination
Physical Separation and Workflow Design
The most fundamental strategy for preventing contamination involves spatial and temporal separation of PCR workflow stages. The following diagram illustrates an optimal laboratory setup for minimizing contamination risk.
Diagram 2: Unidirectional PCR Workflow for Contamination Prevention
Protocol: Establishing Physically Separated Work Zones
Objective: Create distinct work areas to prevent amplification product carryover.
Materials:
- Dedicated rooms or physically separated benches
- Separate equipment sets (pipettes, centrifuges, coolers)
- Color-coded lab coats and gloves for each area
- UV light source for decontamination (optional)
Procedure:
- Designate Zones: Establish physically separated areas for:
- Equipment Dedication: Assign specific pipettes, tip boxes, centrifuges, and vortexers to each zone. Label clearly [22].
- Unidirectional Workflow: Implement a strict one-way workflow from pre-PCR to post-PCR areas. Personnel must not return to pre-PCR areas after handling amplified products without complete clothing change and decontamination [19].
- Personal Protective Equipment: Use dedicated lab coats for each area. Change gloves when moving between zones or after potential contamination [17] [19].
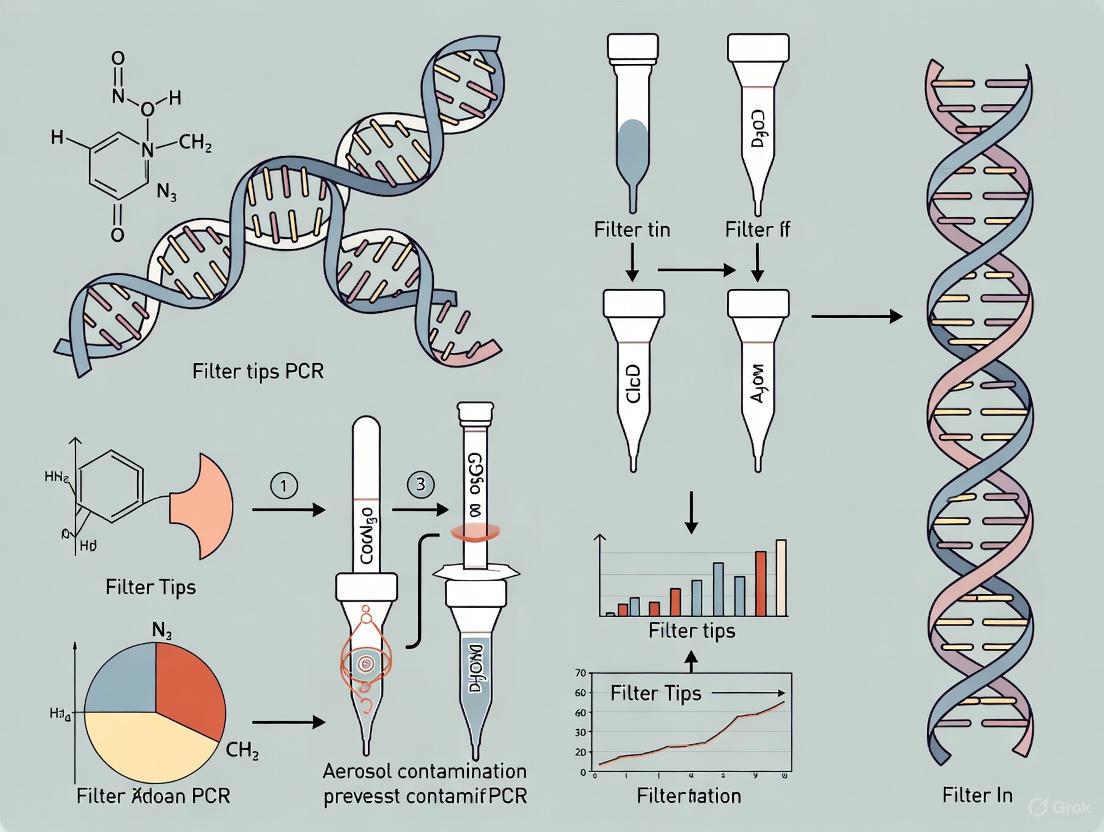
Aerosol Barrier Pipette Tips: Mechanisms and Applications
Within the context of contamination control, aerosol barrier (filter) pipette tips serve as critical tools for preventing cross-contamination. These tips incorporate a hydrophobic filter that blocks aerosols, liquids, and particles from entering the pipette barrel, thereby preventing sample carryover between pipetting operations [2].
Table 2: Filter Tip Efficacy and Application Guidelines
| Parameter | Specifications | Experimental Implications |
|---|---|---|
| Filtration Efficiency | ≥99% aerosol retention for particles 0.2-5 µm [2] | Effective barrier against PCR product aerosols; critical for preventing false positives |
| Filter Material | Hydrophobic polyethylene (PE) or polypropylene (PP) [2] | Repels aqueous solutions while maintaining air flow for volumetric accuracy |
| Pore Size | ≤20 µm [2] | Blocks aerosols (typically 0.5-10 µm) and biomolecules carried by larger particles |
| Certification Requirements | RNase/DNase-free, endotoxin-free (<0.001 EU/mL) [2] | Essential for nucleic acid workflows and cell culture applications |
| Compatibility | Manufacturer-validated or universal designs with airtight seals | Ensures pipetting accuracy; poor fit compromises both precision and contamination control |
Protocol: Optimal Use of Filter Tips for Contamination Prevention
Objective: Maximize contamination control through proper filter tip selection and usage.
Materials:
- Certified RNase/DNase-free filter tips
- Properly calibrated pipettes
- Quality control samples for validation
Procedure:
- Tip Selection: Choose filter tips with appropriate certifications for your application (RNase/DNase-free for PCR, endotoxin-free for cell culture) [2].
- Compatibility Verification: Ensure tips form an airtight seal with your pipettes. Test by pipetting water and observing for complete liquid aspiration without droplets remaining in the tip.
- Proper Pipetting Technique:
- Single-Use Adherence: Never reuse filter tips, as the filter can become saturated or damaged, compromising its barrier function [2].
- Quality Control: Regularly include NTCs in experiments to verify contamination control effectiveness [16] [22].
Decontamination Protocols
Protocol: Surface and Equipment Decontamination
Objective: Eliminate DNA contamination from laboratory surfaces and equipment.
Materials:
- Freshly prepared 10% bleach solution (sodium hypochlorite)
- 70% ethanol
- DNA decontamination solution (commercial alternatives like DNA-away)
- PPE: gloves, eye protection, lab coat
Procedure:
- Bleach Solution Preparation: Prepare fresh 10% bleach solution weekly, as hypochlorite degrades over time [19].
- Surface Decontamination:
- Equipment Decontamination:
- Routine Implementation: Perform decontamination before and after PCR setup [22].
Research Reagent Solutions
The following table outlines essential materials and reagents for implementing effective contamination control in PCR workflows, with particular emphasis on their role in preventing cross-contamination and environmental contamination.
Table 3: Essential Research Reagents and Materials for Contamination Control
| Item | Function in Contamination Control | Application Notes |
|---|---|---|
| Aerosol Barrier Filter Tips | Prevents aerosol cross-contamination; protects pipette internal components [11] [2] | Select certified RNase/DNase-free tips; ensure compatibility with pipette brand; mandatory for sensitive applications [11] |
| UNG (Uracil-N-Glycosylase) System | Enzymatically destroys carryover contamination from previous PCR products [19] | Requires use of dUTP in place of dTTP in PCR mixes; effective for thymine-rich amplicons [19] |
| Molecular Biology Grade Water | DNase/RNase-free water for reagent preparation and negative controls | Aliquot upon receipt to prevent bulk contamination [17] [18] |
| Bleach Solution (10%) | Oxidizes and destroys DNA contaminants on surfaces [22] [20] | Must be prepared fresh weekly; contact time of 10-15 minutes required for effectiveness [19] |
| Ethanol (70%) | Removes organic residues and reduces surface microbial load | Effective for routine cleaning but does not destroy DNA; often used after bleach treatment [17] |
| DNA Decontamination Solutions | Commercial alternatives to bleach for DNA removal | Products like DNA-away provide ready-to-use options; verify compatibility with equipment surfaces [16] |
Distinguishing between cross-contamination and environmental contamination is fundamental to maintaining PCR integrity in research and diagnostic applications. Cross-contamination, particularly through aerosolized PCR products, presents the most insidious challenge due to the extreme amplification potential of even minute quantities of carryover DNA. Environmental contamination, while similarly problematic, often follows different patterns and may be addressed through rigorous laboratory hygiene practices.
The implementation of aerosol barrier pipette tips represents a cornerstone technology within a comprehensive contamination control strategy, working in concert with physical workflow separation, dedicated equipment, and systematic decontamination protocols. Through adherence to the diagnostic and preventive protocols outlined in this application note, researchers can confidently identify contamination sources and implement targeted solutions, thereby ensuring the reliability of experimental results in drug development and scientific research.
The Critical Role of Filter Tips in a Comprehensive Contamination Control Strategy
In the polymerase chain reaction (PCR) laboratory, the most significant source of contamination is aerosolized PCR products [16]. These aerosols are created when researchers open reaction tubes or pipette amplified PCR product, generating microscopic droplets that can travel well throughout the laboratory environment [16]. Once these contaminated aerosols settle on equipment, benches, or other reagents, they can find their way into subsequent PCR setups, leading to false positives, erroneous data, and compromised experimental outcomes [14] [16].
Filter tips serve as a critical frontline defense in this battle against contamination. These specialized pipette tips feature an embedded, permeable barrier—typically made of polyethylene or other hydrophobic polymers—that acts as a physical shield [23]. This barrier prevents aerosols and liquids from reaching the pipette shaft, thereby protecting both the pipette and subsequent samples from cross-contamination [23]. For researchers, scientists, and drug development professionals working with sensitive molecular assays, incorporating filter tips into a comprehensive contamination control strategy is not merely optional but essential for generating reliable, reproducible data.
Filter Tip Technology and Mechanism of Action
Construction and Material Composition
High-quality filter tips are engineered with precision to maximize contamination control without compromising pipetting accuracy. Key construction elements include:
- Barrier Material: Hydrophobic polyethylene filters that are impermeable to liquids and aerosols while maintaining air flow for precise volume measurement [23]
- Tip Material: Medical-grade polypropylene that is free of DNase, RNase, and pyrogens to prevent introduction of contaminants during sensitive applications [23]
- Filter Positioning: Strategically placed within the tip to create a physical barrier between the sample and the pipette shaft without increasing dead volume [23]
Comparative Performance Data
The performance advantages of filter tips over standard tips become particularly evident in sensitive molecular applications. The table below summarizes key comparative data:
Table 1: Performance Comparison of Filter Tips vs. Standard Tips
| Performance Characteristic | Filter Tips | Standard Tips |
|---|---|---|
| Contamination Control | Excellent | Limited |
| Pipette Protection | Yes | No |
| Aerosol Prevention | Complete barrier | No barrier |
| Suitable for PCR | Mandatory | Not recommended |
| Result Reproducibility | High | Variable |
| Application Specificity | Sensitive work | General use |
Integration into a Comprehensive Contamination Control Strategy
The Contamination Control Workflow
A comprehensive approach to preventing PCR contamination extends beyond simply using filter tips. The following diagram illustrates the integrated workflow that combines physical workspace management, practical techniques, and filter tips as the final barrier against aerosol contamination.
Complementary Contamination Control Measures
While filter tips provide essential protection at the pipetting stage, they function most effectively as part of a multi-layered strategy:
- Unidirectional Workflow: Maintaining separate pre- and post-amplification areas is fundamental to preventing contamination. PCR master mixes should be prepared in a template-free environment, while template addition and PCR product analysis should occur in dedicated, separated spaces [14]
- Environmental Decontamination: Regular cleaning of equipment and workspaces with 5% bleach solution or specialized DNA-decontaminating solutions degrades any DNA present on surfaces. UV sterilization of equipment provides an additional decontamination method [14]
- Reagent Management: Storing oligonucleotides and PCR reagents in single-experiment aliquots prevents contamination of entire stock solutions and allows for easy replacement if contamination occurs [14] [16]
- Technical Practices: Using master mixes with template added last minimizes handling of concentrated template solutions. Carefully opening tubes without flicking prevents aerosol generation [16]
Experimental Protocols for Validation and Application
Protocol: Establishing Filter Tip Efficacy in PCR Contamination Control
Purpose: To validate the effectiveness of filter tips in preventing cross-contamination during PCR setup.
Materials:
- Research Reagent Solutions and Essential Materials:
Table 2: Essential Research Reagents and Materials
| Item | Specification | Function in Protocol |
|---|---|---|
| Filter Tips | DNase/RNase-free, aerosol barrier | Prevent aerosol contamination during pipetting |
| Standard Tips | DNase/RNase-free | Control comparison without barrier protection |
| PCR Master Mix | Contains polymerase, dNTPs, buffer | Core reaction components |
| High-Copy Template | >10^8 copies/μL target DNA | Source of potential contamination |
| Negative Control | Nuclease-free water | Detection of contamination events |
| PCR Plates/Tubes | Sterile, DNA-free | Reaction vessels |
| Thermal Cycler | Standard model | DNA amplification |
| Electrophoresis System | Gel documentation capability | Result visualization |
Methodology:
- Prepare a concentrated DNA template solution (>10^8 copies/μL) in a separate area from PCR setup
- In the pre-PCR clean area, prepare two identical master mixes lacking only template
- Using the same pipette:
- Aliquot master mix into two separate sets of reaction tubes
- Pipette the concentrated DNA template using filter tips for Set A and standard tips for Set B
- Immediately after template handling, pipette negative control reactions (nuclease-free water instead of template) using the same tip types
- Perform PCR amplification using standard cycling conditions
- Analyze results by gel electrophoresis and record presence/absence of amplification in negative controls
Expected Results: Reactions using filter tips should show no amplification in negative controls, while those using standard tips may show false positive amplification due to aerosol transfer.
Protocol: Quantitative Assessment of Aerosol Containment
Purpose: To quantitatively measure the barrier efficiency of filter tips against aerosolized DNA.
Materials:
- Fluorescently-labeled DNA solution (0.5 μg/μL)
- Filter tips and standard tips
- Real-time PCR system
- SYBR Green qPCR reagents
- Spectrofluorometer or plate reader
Methodology:
- Prepare a concentrated DNA solution labeled with fluorescent dye
- Pipette the DNA solution repeatedly using both filter tips and standard tips
- Following pipetting, prepare a qPCR reaction mix sensitive to the labeled DNA sequence
- Test the interior of pipette shafts using swabs eluted in buffer as template for qPCR
- Run qPCR and compare Ct values between filter tip and standard tip conditions
- Additionally, measure fluorescent contamination in the pipette shafts using a plate reader
Analysis: Calculate the logarithmic reduction in contamination using the formula: Contamination Reduction = Ct(filter tip) - Ct(standard tip) A difference of ≥3 Ct values represents a 10-fold reduction in contamination.
Application-Specific Implementation Guidelines
Recommended Practices Across Disciplines
The specific implementation of filter tips varies based on application sensitivity and consequence of false results:
Table 3: Filter Tip Applications Across Research Fields
| Application Field | Criticality of Filter Tips | Implementation Guidelines |
|---|---|---|
| Diagnostic PCR | Mandatory | Use for all liquid handling steps; combine with unidirectional workflow |
| Forensic DNA Analysis | Essential | Apply in all pre-amplification steps; maintain chain of custody documentation |
| Drug Development | High | Implement throughout QC and validation processes; essential for regulatory compliance |
| Food Safety Testing | High | Use when testing multiple samples simultaneously; prevent cross-contamination |
| Research PCR | Recommended | Apply when working with high-copy templates or precious samples |
Troubleshooting Common Filter Tip Issues
- Reduced Precision: Ensure proper tip attachment; avoid excessive force that may damage the filter barrier [23]
- Flow Resistance: Use consistent, smooth pipetting motions; pre-wet tips for volatile organic solutions [23]
- Sample Retention: Select low-retention filter tips for viscous samples; use reverse pipetting when appropriate [23]
Filter tips represent an indispensable component in the multifaceted strategy to control PCR contamination. By providing a physical barrier against aerosol transfer, they address the most significant vector for false positives in molecular diagnostics and research [16] [23]. When integrated with proper laboratory workflow design, rigorous technical practices, and appropriate validation protocols, filter tips enable researchers and drug development professionals to achieve the high levels of reliability and reproducibility demanded in contemporary molecular biology. The implementation of filter tips should not be viewed as a standalone solution but rather as an essential element within a comprehensive contamination control framework that encompasses spatial separation, environmental management, and disciplined technique.
Implementing Best Practices: A Step-by-Step Guide to Using Filter Tips Effectively
The precision of polymerase chain reaction (PCR) and other sensitive molecular biology techniques can be effortlessly compromised by an unseen adversary: aerosol contamination. During routine pipetting, rapid liquid dispensing or mixing can generate microscopic aerosols (particles <10 µm), which can travel through standard pipette tips and contaminate the pipette barrel, leading to sample carryover and potentially ruining subsequent experiments [2]. This application note, framed within a broader thesis on contamination control, details the critical selection criteria for filter tips—emphasizing quality, purity, and fit—to safeguard the integrity of your research in PCR and drug development.
The Science of How Filter Tips Work
Filter tips function as a single-use, physical barrier within the pipette tip. The core of the tip is a membrane crafted from hydrophobic polymers like polyethylene (PE) or polypropylene (PP) [2]. These materials have low surface energy, causing aqueous liquids and aerosols to bead up and be repelled rather than penetrate the barrier [2].
The protection is a two-fold mechanism:
- Physical Filtration: The filter acts as a mechanical sieve. Aerosols generated during pipetting collide with the hydrophobic filter and are trapped, adhering due to surface tension [2].
- Chemical Inertness: The filter material itself is chemically inert and certified to be free of contaminants like RNases, DNases, and PCR inhibitors, eliminating this hidden risk [2].
It is crucial to note that while filter tips offer significant protection, fundamental studies of aerosol behavior demonstrate that they cannot achieve 100% protection over the full range of particle sizes. For applications where contamination risks are absolutely unacceptable, positive displacement pipettes provide an effective alternative, as they have no air interface between the piston and the liquid [3] [14].
The following diagram illustrates the pathway of aerosol contamination and how a filter tip provides a barrier to protect the pipette and subsequent samples.
Critical Selection Criteria for Filter Tips
Choosing the right filter tip is not a one-size-fits-all process. It requires a careful evaluation of several interconnected criteria to ensure optimal performance for your specific application.
Purity and Quality Certifications
For sensitive applications like PCR, NGS, or cell culture, the purity of the tip itself is non-negotiable. The filter tip must be a guardian of your sample, not a source of contamination.
Table 1: Essential Purity Certifications for Molecular Biology Applications
| Certification | Critical For | Validated Via | Acceptance Level |
|---|---|---|---|
| RNase/DNase-free | PCR, qPCR, RNA/DNA work | Fluorometric assays (e.g., RNaseAlert) | ≤0.001 pg/µL residual activity [2] |
| PCR Inhibitor-free | qPCR, Digital PCR | Spike-and-recovery tests | 95–105% recovery rates for Taq polymerase [2] |
| Endotoxin-free | Cell culture, in vivo applications | Limulus Amebocyte Lysate (LAL) test | <0.001 EU/mL [2] [24] |
| General Biocertification | High-sensitivity assays | Manufacturing process controls | Free of human DNA, ATP, pyrogens [24] |
Always look for tips manufactured under ISO 13485 (medical device manufacturing) or USP Class VI (biocompatibility) standards, as these guarantee production in controlled, cleanroom environments without the use of problematic parting agents [2] [24].
Filtration Efficiency and Material
The primary function of a filter tip is to block aerosols and liquid. Filtration efficiency is determined by the material's hydrophobicity and the engineering of its pore size.
- Filter Material: Polyethylene (PE) and polypropylene (PP) are standard due to their strong hydrophobicity (water contact angles >90°) [2].
- Pore Size: Filters are typically laser-drilled with pores ≤20 µm in diameter. This is small enough to block most aerosols (typically 0.5–10 µm) and biomolecules carried by larger particles, yet large enough to permit smooth airflow for volumetric accuracy [2].
- Efficiency Validation: Select tips from manufacturers that provide quantitative data, such as ≥99% aerosol retention of 0.2–5 µm particles, validated via standardized methods like methylene blue or fluorescent particle assays [2].
Compatibility and Fit
A filter tip, no matter how pure, is useless if it does not form a perfect seal with your pipette. A poor seal allows air to escape, leading to inaccurate volumes and compromising the filtration barrier itself [11].
- Universal vs. Brand-Specific Tips: "Universal" tips are designed to fit a wide range of pipette brands and often feature flexible proximal ends (e.g., FlexFit technology) for a better seal [11]. However, they require validation. ISO 8655-2 recommends using tips from the same manufacturer as your pipette for guaranteed performance [25].
- Validation Test: A simple "tip ejection force test" can help—excessive resistance (>5 N) indicates poor compatibility [2].
Application-Specific Selection Guide
Matching the tip to your task ensures both protection and cost-effectiveness.
Table 2: Filter Tip Selection Guide for Common Applications
| Application | Recommended Tip Type | Rationale & Critical Certifications |
|---|---|---|
| PCR / qPCR / NGS | Certified Filter Tip | Prevents amplicon carryover and false positives. Must be RNase/DNase-free and PCR inhibitor-free [2] [26] [14]. |
| RNA/DNA Extraction | Certified Filter Tip | Ensures an RNase-free environment. Must be RNase-free to prevent degradation of precious nucleic acids [2] [26]. |
| Cell Culture | Endotoxin-free Filter Tip | Prevents introduction of pyrogens that can affect cell growth. Endotoxin-free certification is critical [2]. |
| Pathogen Handling / Toxicology | High-Efficiency Filter Tip | Provides biosafety containment. Tips should comply with BSL-2+ requirements and retain viral particles [2]. |
| Volatile/Corrosive Solvents | Chemical-Resistant Filter Tip | Protects pipette internal components from damage. The filter barrier prevents corrosive vapors from entering the barrel [11] [25]. |
The Scientist's Toolkit: Research Reagent Solutions
The following table details essential materials and their functions for implementing a robust contamination-control protocol in aerosol-sensitive research.
Table 3: Essential Research Reagent Solutions for Contamination Control
| Item | Function & Application |
|---|---|
| PCR-Grade Filter Tips | Certified free of RNase, DNase, DNA, and PCR inhibitors. The primary tool for preventing aerosol-based cross-contamination during reaction setup [2] [26]. |
| Positive Displacement Pipette | An alternative to air-displacement pipettes; has no air interface, thereby limiting aerosol risk. Used for the highest-risk applications where filter tips may not offer 100% protection [3] [14]. |
| DNase I Enzyme | Used to degrade contaminating genomic DNA in RNA samples before reverse transcription, a key step in preventing false positives in RT-PCR [14]. |
| UV Sterilization Cabinet | Used to decontaminate surfaces, racks, and pipettes by degrading any contaminating DNA present, complementing the use of filter tips [14]. |
| Bleach Solution (5%) / DNA Decontaminant | For manual decontamination of non-porous surfaces like pipette exteriors and benchtops to degrade DNA [14]. |
| RNase/DNase Decontamination Spray | Validated to destroy residual nucleases on surfaces without damaging sensitive equipment [2]. |
| Molecular Grade Water | Certified to be free of nucleases and PCR inhibitors. Used in preparing master mixes to prevent introduction of contaminants [14]. |
Experimental Protocols for Validation
Protocol: Validating Filter Tip Filtration Efficiency
This protocol is adapted from industry practices that use methylene blue or fluorescent particles to quantitatively assess a filter tip's ability to block aerosols [2].
Objective: To visually and quantitatively demonstrate the efficacy of a filter tip in preventing liquid and aerosol penetration compared to a non-filtered tip.
Materials:
- Pipette and compatible filter tips (test article) and non-filtered tips (control)
- Methylene blue solution (1% w/v) or a fluorescent dye solution
- A container with clean, deionized water
- A white absorbent pad or tissue
- (For quantitative analysis) Fluorometer
Method:
- Setup: Place the white absorbent pad inside the pipette barrel's tip cone area where aerosols would normally enter. Reassemble the pipette.
- Aspiration: Using the test filter tip, aspirate a volume of the methylene blue solution. Perform several mock dispensing and mixing actions to simulate vigorous pipetting.
- Control: Repeat step 2 using a non-filtered tip on the same pipette (replace the pad after the control test).
- Ejection: Eject the tips and carefully remove the white pads from both the test and control pipettes.
- Analysis: Inspect the pads for any blue staining.
- Visual Result: The pad from the control (non-filtered) pipette will show clear blue spots, indicating aerosol and liquid penetration. The pad from the filter tip test should show no staining, demonstrating effective barrier function.
- Quantitative Result: If using a fluorescent dye and a fluorometer, the pads can be eluted and measured for fluorescence intensity, providing a numerical value for filtration efficiency.
Protocol: Implementing a Unidirectional Workflow for PCR Setup
This procedural framework is critical for preventing amplicon contamination and should be used in conjunction with filter tips [14].
Objective: To physically separate pre- and post-amplification activities to prevent contamination of reagents, equipment, and areas with PCR products (amplicons).
Materials:
- Dedicated rooms or separated bench areas with dedicated equipment (pipettes, centrifuges, lab coats)
- Certified sterile, filtered pipette tips
- PCR reagents (aliquoted)
- Template DNA/RNA
Method:
- Establish Zones:
- Pre-PCR Zone (Clean Area): A dedicated room or hood for preparing the PCR master mix. This area should contain all reagents (polymerase, dNTPs, buffer, primers, water) but must never contain amplified PCR products or template samples.
- Post-PCR Zone: A separate room for analyzing PCR amplicons on gels or other instrumentation.
- Workflow:
- In the Pre-PCR Zone, prepare the master mix using filter tips. Cap the tubes containing the master mix.
- Move to a separate, designated area (or a template addition station) to add the template nucleic acid to the reaction tubes. This area can be within the pre-PCR room but should be a defined space that is easily decontaminated.
- After sealing the reaction plates/tubes, transfer them to the thermocycler located in the Post-PCR Zone.
- Never bring amplified products, open tubes, or used tips back into the Pre-PCR Zone.
- Decontamination: Regularly clean all surfaces and equipment in the Pre-PCR Zone with a 5% bleach solution or a DNA-decontaminating agent to degrade any potential contaminating DNA [14].
The integrity of Polymerase Chain Reaction (PCR) is paramount in molecular biology, diagnostics, and drug development. While the scientific community is rightly focused on preventing aerosol-based contamination through the use of filter tips, a more insidious danger often goes unnoticed: the introduction of PCR inhibitors from the filter tips themselves. Contaminating elements such as calcium, zinc, and silicon, which can leach from the filter material during pipetting, are known to disrupt enzyme kinetics and primer annealing, leading to assay failure and unreliable data [27]. This application note provides a detailed assessment of this hidden risk, presenting quantitative data and robust experimental protocols to empower scientists in selecting and validating filter tips for critical PCR workflows.
Quantifying the Contaminant Risk
Elemental analysis via Inductively Coupled Plasma Mass Spectrometry (ICP-MS) reveals significant levels of disruptive ions in commercially available filter tips. These elements directly interfere with the PCR process.
Table 1: PCR-Inhibiting Elements Identified in Filter Tips and Their Mechanisms of Action
| Element | Mechanism of PCR Inhibition | Relative Abundance in Competing Tips vs. Labcon |
|---|---|---|
| Calcium (Ca) | Acts as a Taq polymerase inhibitor via competitive binding, resulting in less efficient DNA amplification [27]. | Up to 20-fold higher [27] |
| Zinc (Zn) | Worsens enzyme performance of Taq polymerase [27]. | Up to 38-fold higher [27] |
| Silicon (Si) | Causes Taq polymerase to adhere to silicon during amplification, reducing efficiency [27]. | Up to 10-fold higher [27] |
Table 2: Impact of Aerosol Barrier Tips on Key Applications
| Application | Role of Filter Tips | Key Outcome Metric |
|---|---|---|
| PCR & qPCR | Prevents carryover contamination of sample DNA/RNA, protecting both the sample and the pipette [11] [28] [14]. | Up to 50% reduction in false positives [28]. |
| Cell Culture | Maintains sterility during media transfers and sample handling [28]. | Higher cell viability and fewer culture failures [28]. |
| Clinical Diagnostics | Prevents cross-contamination between patient samples in high-throughput settings [28]. | Improved diagnostic accuracy and reduced repeat testing [28]. |
| Next-Generation Sequencing (NGS) | Critical for preventing contamination during library preparation in automated workflows [29]. | More reliable sequencing data. |
Experimental Protocol: Assessing Filter Tips for Elemental Contaminants
This protocol outlines a method for the independent verification of elemental contaminants in pipette filter tips using ICP-MS.
Materials and Reagents
Table 3: Research Reagent Solutions for ICP-MS Analysis of Filter Tips
| Item | Function/Description | Example Specifications |
|---|---|---|
| ICP-MS System | Performs high-sensitivity elemental analysis to quantify metals and other ions. | Equipped with a collision/reaction cell for interference removal. |
| Ultrapure Water | Serves as the extraction medium; must be free of the target analytes. | Resistivity of 18.2 MΩ·cm at 25°C [27]. |
| Nitric Acid (TraceMetal Grade) | Acidifies water samples to prevent adsorption of metals to container walls. | Purified by sub-boiling distillation. |
| Multi-Element Calibration Standard | Used to calibrate the ICP-MS for accurate quantification. | Contains certified concentrations of Ca, Zn, Si, et al. |
| Polypropylene Tubes | Sample containers for leaching and storage. | Certified as pre-cleaned and free of DNase/RNase. |
| Filter Tips for Testing | The consumables under investigation. | Various brands and lots. |
Method: Leachate Preparation and ICP-MS Analysis
Leachate Preparation:
- Aseptically place 10 filter tips from a single brand and lot into a clean 50 mL polypropylene tube.
- Add 30 mL of ultrapure, acidified water (pH 2.0, adjusted with trace metal grade nitric acid) to completely submerge the tips.
- Prepare a method blank containing only the acidified water.
- Cap the tubes and place them in a shaking water bath at 37°C for 24 hours.
- After incubation, carefully decant the leachate into a fresh tube, avoiding any particulates.
ICP-MS Analysis:
- Calibration: Prepare a calibration curve using the multi-element standard, typically across a range of 0.1 to 100 ppb.
- Sample Introduction: Introduce the leachates and the method blank into the ICP-MS via an autosampler.
- Data Acquisition: Monitor specific isotopes for each element of interest (e.g., (^{44}\text{Ca}), (^{66}\text{Zn}), (^{28}\text{Si})). Use kinetic energy discrimination (KED) with helium gas to mitigate polyatomic interferences.
- Quantification: Quantify the concentration of each element in the leachate by interpolating from the calibration curve. Subtract the blank values from all sample results.
Data Interpretation and Quality Control
- Report the final contaminant levels as nanograms per tip (ng/tip) or parts per billion (ppb) in the leachate.
- Compare the results against internal purity specifications or benchmark against data from known high-purity tip manufacturers.
- Include quality control measures such as continuous calibration verification (CCV) and internal standards (e.g., (^{115}\text{Indium}) or (^{159}\text{Terbium})) to correct for instrumental drift and matrix effects.
The experimental workflow below visualizes the contaminant pathway and the validation process.
Best Practices for Filter Tip Selection and Use
To ensure PCR integrity, researchers should adopt the following practices:
- Demand Certified Purity: Select filter tips that are certified by the manufacturer to be free of PCR inhibitors. Look for lot-specific quality control data demonstrating low levels of elements like calcium, zinc, and silicon [27].
- Verify Compatibility: Ensure tips are designed for a secure fit on your specific pipettors or automated liquid handlers to ensure accuracy and prevent damage [29] [30]. A poor seal can affect performance.
- Prioritize Low-Retention Tips: For precious samples, use low-retention tips made from a hydrophobic polypropylene blend rather than a silicone coating, which can leach and contaminate samples [30].
- Implement a Unidirectional Workflow: Always use filter tips in a clean, pre-amplification area that is physically separated from post-PCR and template handling areas to prevent amplicon contamination [14].
Filter tips are indispensable for preventing aerosol contamination in sensitive PCR applications. However, their potential to introduce elemental PCR inhibitors represents a significant and often overlooked risk to data fidelity. By understanding the mechanisms of inhibition, utilizing rigorous validation protocols like ICP-MS, and adhering to strict selection criteria for high-purity consumables, researchers can mitigate this hidden danger. Ensuring the quality of every component in the reaction, down to the pipette tip, is fundamental to achieving robust, reproducible, and reliable results in research and diagnostic pipelines.
Integrating Filter Tips into a Unidirectional Pre-PCR and Post-PCR Workflow
Polymersse chain reaction (PCR) is a cornerstone technique in molecular biology, but its extreme sensitivity to contamination poses a significant challenge for researchers and diagnostic professionals [14]. The technique's capacity to generate millions of DNA copies from a single template makes it vulnerable to false-positive results from minuscule contaminants, including aerosolized amplicons from previous reactions [31]. This application note examines the integration of filter pipette tips within a rigorously maintained unidirectional workflow—a critical strategy for preventing aerosol contamination in PCR laboratories. We present a structured framework encompassing laboratory design, operational protocols, and validation procedures to safeguard the integrity of PCR-based assays in research and drug development contexts.
The Scientific Basis for Aerosol Contamination in PCR
Nature and Origins of PCR Contaminants
PCR contamination primarily manifests through two mechanisms: cross-contamination between samples and carry-over contamination from previously amplified PCR products (amplicons) [22]. During routine pipetting, rapid liquid dispensing or mixing can generate microscopic aerosols, which are particles typically smaller than 10 micrometers [2]. These aerosols, invisible to the naked eye, can easily travel through standard non-filtered pipette tips and enter the pipette barrel, thereby contaminating subsequent samples and compromising data integrity [2]. Amplicon contamination is particularly problematic because these fragments are identical to the target sequence and amplify with high efficiency, leading to false-positive results that can misdirect research conclusions and diagnostic decisions [14].
Mechanism of Action of Filter Tips
Filter pipette tips address aerosol contamination through a hydrophobic barrier—typically manufactured from polyethylene (PE) or polypropylene (PP) [2]. This barrier is engineered with precise pore sizes (usually ≤20 µm) that are small enough to block aerosols (typically 0.5–10 µm) and biomolecules, yet sufficiently large to permit smooth airflow for volumetric accuracy during pipetting [2]. The inherent hydrophobicity of the filter material (with water contact angles >90°) causes aqueous liquids and aerosols to bead up rather than penetrate the barrier, thus providing dual physical and chemical protection [2].
Table 1: Comparative Analysis of Contamination Prevention Methods
| Prevention Method | Mechanism of Action | Effectiveness Against Aerosols | Implementation Complexity |
|---|---|---|---|
| Filter Tips | Physical barrier with hydrophobic properties | High (>99% retention) [2] | Low |
| UDG/UNG Treatment | Enzymatic degradation of dUTP-containing contaminants | Moderate (limited to previous PCR products) [31] | Medium |
| Physical Separation | Spatial segregation of pre-and post-PCR activities | High (when strictly enforced) [31] | High |
| UV Decontamination | Nucleic acid degradation by UV irradiation | Moderate (surface contamination only) [31] | Medium |
Figure 1: Aerosol Contamination Pathway and Filter Tip Protection Mechanism. This diagram contrasts the outcomes of aerosol generation during pipetting with standard tips versus filter tips, illustrating how filter tips prevent cross-contamination.
Implementing a Unidirectional PCR Workflow with Filter Tips
Laboratory Design and Physical Separation
A properly designed PCR laboratory establishes three physically separated work areas arranged to enforce a unidirectional workflow [31]. This physical separation is fundamental to preventing the backward flow of amplicons into clean pre-PCR areas.
Reagent Preparation Area: This dedicated clean room should be maintained with positive air pressure to prevent the introduction of contamination from other areas [31]. All master mix preparation and reagent aliquoting should occur in this space, ideally within a laminar flow cabinet equipped with UV light [31]. Critically, no template DNA or amplified PCR products should ever be introduced into this area.
Sample Preparation Area: Designed for nucleic acid extraction and template addition, this area should be kept at negative air pressure to contain template nucleic acids within the room [31]. Samples should be added in a designated biosafety cabinet, following a specific order: first add samples and negative controls, followed by positive controls to minimize potential contamination [31].
Amplification and Product Detection Area: This post-PCR zone, also maintained under negative pressure, houses thermal cyclers and analysis equipment [31]. Any manipulation of amplified products after PCR must be confined to this area, preferably within a laminar flow cabinet.
Figure 2: Unidirectional PCR Laboratory Workflow. This diagram illustrates the mandatory one-way workflow through physically separated laboratory areas with specified pressure controls to prevent amplicon contamination.
Integration of Filter Tips into Standard Operating Procedures
The integration of filter tips must be implemented within a comprehensive contamination control strategy that encompasses equipment, consumables, and personnel practices.
Dedicated Equipment and Consumables
All supplies and equipment—including pipettors, centrifuges, refrigerators, tips, tubes, and racks—must be dedicated to each specific area and never interchanged between zones [31]. Lab coats and personal protective equipment should similarly be area-specific. This prevents the physical transfer of contaminants on surfaces.
Procedural Implementation of Filter Tips
Pre-PCR Procedures (Reagent and Sample Preparation Areas):
- Use filter tips for all liquid handling when preparing master mixes and aliquoting reagents [12] [22].
- Prepare a master mix from all components except template DNA to minimize pipetting steps and improve accuracy [12].
- Add template DNA to the master mix as a separate step, using fresh filter tips for each sample [12].
- Store oligonucleotides and reagents in single-use aliquots to preserve stock solutions in case of contamination [14].
Post-PCR Procedures (Amplification and Analysis Area):
- Continue using filter tips when handling amplified products, as these tips prevent the accumulation of high-concentration amplicons in pipette barrels that could contaminate future post-PCR analyses [2].
- Carefully open and close reaction tubes to prevent splashing and aerosol formation [31].
- Never return tubes or plates containing amplified products to the pre-PCR areas [31].
Complementary Contamination Control Practices
- Surface Decontamination: Regularly clean work surfaces and equipment with 5% bleach (sodium hypochlorite), which effectively degrades DNA, followed by wiping with de-ionized water [14] [22]. For equipment incompatible with bleach, use 70% ethanol supplemented with UV irradiation [31].
- UV Irradiation: Expose workstations, cabinets, and equipment to UV light before and after use to degrade any nucleic acids present on surfaces [31].
- Workflow Discipline: Personnel who have worked in post-PCR areas should not return to pre-PCR areas without changing gloves and lab coats [31].
Experimental Validation and Quality Control
Validation Protocol for Filter Tip Efficacy
Researchers should implement the following experimental protocol to validate the effectiveness of their contamination control system, including filter tips:
Experimental Setup:
- Prepare a master mix containing all PCR components except template DNA in the reagent preparation area.
- In the sample preparation area, aliquot the master mix into PCR tubes or plates.
- To test for carryover contamination, intentionally add a high concentration of previous PCR amplicons (≥10^9 copies/µL) to select wells as a positive control for contamination.
- Set up negative controls (No-Template Controls, NTCs) where nuclease-free water is added instead of template DNA [31] [22].
- Use filter tips for all liquid handling steps.
Amplification and Analysis:
Quality Control Measures
- Routine Controls: Incorporate NTCs in every PCR experiment to continuously monitor for contamination [31] [22].
- Regular Monitoring: Perform the validation protocol quarterly or whenever contamination is suspected.
- Equipment Calibration: Ensure pipettes are regularly calibrated and maintained, as proper pipette function is essential for accurate liquid handling when using filter tips [12].
Table 2: Quantitative Comparison of Filter Tip Performance Characteristics
| Performance Metric | Standard Tips | Filter Tips | Testing Method |
|---|---|---|---|
| Aerosol Retention Efficiency | None | ≥99% [2] | Methylene blue aerosol test |
| RNase/DNase Contamination | Variable | ≤0.001 pg/µL [2] | Fluorometric assays (e.g., RNaseAlert) |
| Endotoxin Level | Variable | <0.001 EU/mL [2] | Limulus Amebocyte Lysate (LAL) test |
| Impact on Pipetting Accuracy | None (baseline) | No significant reduction with quality tips [2] | Gravimetric measurement |
| Cost Impact | Baseline | 20-30% higher upfront cost [2] | - |
The Scientist's Toolkit: Essential Research Reagent Solutions
Table 3: Key Materials and Reagents for PCR Contamination Control
| Item | Function/Description | Application Notes |
|---|---|---|
| Filter Pipette Tips | Hydrophobic barrier to prevent aerosol contamination [2] | Certified RNase/DNase-free, PCR inhibitor-free; essential for all sensitive molecular workflows. |
| Aerosol Barrier Tips | Alternative name for filter tips with same protective function [11] | Particularly critical when pipetting positive controls or previous amplicons. |
| UDG/UNG Enzyme | Enzyme that degrades carryover contamination from previous PCRs [31] | Most effective with T-rich amplicons; limited effectiveness with GC-rich targets. |
| Hot-Start Polymerase | Polymerase activated only at high temperatures to reduce non-specific amplification [32] | Minimizes primer-dimer formation and improves specificity during reaction setup. |
| No-Template Control (NTC) | Quality control containing all components except template DNA [22] | Essential for every run to detect contamination; should show no amplification. |
| 10-15% Sodium Hypochlorite | Surface decontaminant that degrades DNA [31] | Freshly prepared solution recommended for cleaning work surfaces and equipment. |
| UV Light Source | Nucleic acid degradation through UV irradiation [31] | Used for decontaminating workstations, hoods, and equipment; requires appropriate exposure time. |
Troubleshooting and Contamination Management
Addressing Confirmed Contamination
When contamination is detected through positive NTCs, implement the following containment protocol immediately:
- Discard Compromised Reagents: Dispose of all reagents suspected of contamination, including master mixes, primers, and buffers [22]. Use fresh aliquots from stock solutions.
- Decontaminate Workspaces: Thoroughly clean all work surfaces with 10% bleach solution, followed by 70% ethanol if needed [22]. Launder lab coats dedicated to the contaminated area.
- Replace Consumables: Discard opened boxes of pipette tips and tubes, replacing them with fresh, uncontaminated supplies [22].
- Document Incidents: Maintain records of contamination events to identify potential systematic errors or procedural lapses [22].
Economic Considerations and Cost-Benefit Analysis
While filter tips incur a 20-30% higher upfront cost compared to standard tips, they provide significant long-term economic benefits by reducing repeat experiment rates by approximately 50% in PCR workflows and preventing costly pipette repairs by blocking liquid ingress [2]. The investment in filter tips should be prioritized for sensitive applications including qPCR, next-generation sequencing library preparation, and clinical diagnostics, while non-filtered tips may be sufficient for routine, non-critical applications [2].
The integration of filter tips into a rigorously maintained unidirectional workflow represents a scientifically validated and practically essential strategy for controlling aerosol contamination in PCR laboratories. This multi-layered approach—combining engineered safety components (filter tips) with systematic procedural controls (physical separation, unidirectional workflow, and dedicated equipment)—provides a robust defense mechanism against the pervasive challenge of PCR contamination. For researchers and drug development professionals, adherence to these protocols ensures the generation of reliable, reproducible data, ultimately safeguarding research integrity and diagnostic accuracy in molecular biology applications.
Within the framework of a comprehensive strategy to prevent PCR aerosol contamination, filter tips are a critical first line of defense [2]. However, their efficacy is significantly amplified when used in concert with robust personal and laboratory practices. This protocol details three essential companion techniques—proper glove use, surface decontamination, and reagent aliquoting—that are fundamental to ensuring sample integrity and experimental reproducibility in sensitive molecular biology workflows [17] [33] [19]. Contamination from amplicons, nucleases, or foreign nucleic acids can lead to false positives, misleading data, and costly experimental failures [33] [19]. By integrating these foundational methods with the use of filter tips, researchers can construct a multi-layered defense system, thereby safeguarding the validity of high-sensitivity applications such as qPCR, next-generation sequencing, and clinical diagnostics [2] [33].
Application Notes
The Role of Proper Glove Use
Gloves act as a primary interface between the researcher and the experiment. Ill-fitting or contaminated gloves can readily transfer nucleases, amplify DNA, or other contaminants to tubes, pipettes, and reagents [17]. This is a prevalent yet often overlooked source of contamination. Gloves that are too large can bag and touch surfaces unintentionally, while overly tight gloves are prone to tearing. The simple act of ensuring a proper fit, coupled with frequent changing—especially after contacting any potentially contaminated surface or equipment—is a cost-effective and vital practice for maintaining a sterile pre-amplification environment [17] [19].
Surface and Equipment Decontamination
Laboratory surfaces and equipment are constant reservoirs for contaminating agents. Regular decontamination is non-negotiable for sensitive molecular work [19]. The choice of decontaminating agent depends on the target and the surface material. A 70% ethanol solution is effective for general cleaning and wiping down surfaces, gloves, and equipment before work begins, as it denatures proteins and is a potent germicide [17] [34]. However, for the definitive inactivation of nucleic acids, particularly tenacious amplicons, a 10% bleach solution (sodium hypochlorite) is recommended [19]. It is critical to prepare fresh bleach dilutions regularly, as it degrades over time, and to allow a contact time of 10-15 minutes for complete inactivation before wiping with deionized water to prevent corrosion [19].
Strategic Reagent Aliquoting
The practice of aliquoting reagents into single-use volumes is a cornerstone of contamination prevention and reagent stability [17]. Each time a master stock tube is opened, it is exposed to laboratory aerosols, increasing the risk of contamination that can compromise every subsequent experiment using that stock. Aliquoting creates a physical firewall, ensuring that if one aliquot becomes contaminated, the entire reagent inventory is not lost [17]. This practice also minimizes repeated freeze-thaw cycles, which can degrade reagents like enzymes, primers, and dNTPs, thereby enhancing experimental consistency and reproducibility [17] [19].
Experimental Protocols
Protocol: Aseptic Glove Technique for Pre-PCR Setup
This protocol ensures that gloves protect rather than compromise the experiment.
Materials:
- Nitrile gloves (correct size)
- 70% Ethanol solution
- Dedicated waste bin for contaminated gloves
Procedure:
- Selection: Obtain gloves that fit snugly without constricting movement, acting as a "second skin" [17].
- Donning: Wash and dry hands thoroughly. Don gloves without touching the exterior surface with bare skin.
- Decontamination: Spray or wipe gloved hands thoroughly with 70% ethanol before touching any equipment or reagents [17] [19].
- Maintenance: Change gloves immediately if they touch any surface not part of the clean pre-PCR setup (e.g., door handles, phones, computer keyboards, skin, or hair) [19].
- Disposal: Discard gloves after completing the pre-PCR setup or when moving from a post-PCR to a pre-PCR area. Do not wear the same gloves in different laboratory zones [19].
Protocol: Surface and Equipment Decontamination
This protocol outlines a two-step process for effective decontamination of work surfaces and equipment.
Materials:
- 70% Ethanol solution
- 10% fresh bleach solution (prepared weekly)
- Deionized water
- Disposable wipes
- Personal protective equipment (gloves, eye protection)
Procedure:
- Pre-Cleaning (Soiling Removal): Wipe the surface or equipment with a wipe dampened with 70% ethanol to remove soil and organic material [34].
- Nucleic Acid Inactivation: a. For surfaces tolerant to bleach, apply a 10% bleach solution [19]. b. Allow the bleach to remain on the surface for 10-15 minutes of contact time [19]. c. Wipe the surface with deionized water to remove residual bleach and prevent corrosion [19].
- Final Disinfection: Wipe the surface again with 70% ethanol. This step is particularly important for metal parts of pipettes or centrifuges that may be corroded by bleach [19].
- Frequency: Perform this decontamination before and after each PCR setup session [19].
Protocol: Reagent Aliquoting for Contamination Prevention
This protocol describes how to create single-use aliquots of critical PCR reagents.
Materials:
- Master stock of reagent (e.g., nuclease-free water, buffers, dNTPs, MgCl₂, polymerase)
- Sterile, nuclease-free microcentrifuge tubes
- Sterile, aerosol-barrier pipette tips [2] [11]
- Calibrated pipettes
- Cooler or freezer for storage at appropriate temperature
Procedure:
- Preparation: Clean the work surface and pipettes following the decontamination protocol above. Wear properly fitted gloves [17].
- Volume Calculation: Determine an aliquot volume suitable for a single experiment or a small batch of experiments to minimize freeze-thaw cycles [17] [19].
- Aseptic Transfer: a. Use sterile, aerosol-barrier filter tips for all pipetting steps to prevent contamination of the master stock [2] [11]. b. Gently mix the master stock by flicking the tube. Avoid vortexing if it creates aerosols. c. Briefly centrifuge the stock to bring the contents to the bottom. d. Transfer the calculated volume into multiple sterile microcentrifuge tubes. e. Always use a new pipette tip for each aliquot to prevent cross-contamination [17].
- Labeling and Storage: Clearly label each aliquot with the reagent name, date, concentration, and passage number. Store at the recommended temperature [17] [19].
Workflow and Data Visualization
Integrated Workflow for PCR Contamination Control
The diagram below illustrates the logical and spatial relationships between the three companion techniques and their integration with filter tip use within a segregated laboratory workflow.
Research Reagent Solutions
The following table details key materials and their functions for implementing the described contamination control techniques.
Table 1: Essential Materials for Contamination Control
| Item | Function & Rationale |
|---|---|
| Nitrile Gloves | Provide a physical barrier against nuclease and amplicon transfer from skin and the environment. Nitrile is preferred for its chemical resistance and low allergenicity [17]. |
| 70% Ethanol | Used for general disinfection of surfaces, equipment, and gloved hands. Its effectiveness relies on protein denaturation and is optimal at 70% concentration [17] [34]. |
| Sodium Hypochlorite (Bleach) | A chemical sterilant effective for inactivating nucleic acids (e.g., PCR amplicons). A 10% dilution with a 10-15 minute contact time is required [19]. |
| Nuclease-Free Water | Certified to be free of RNases and DNases. Used for preparing reagent aliquots and reactions to prevent enzymatic degradation of nucleic acids [17]. |
| Sterile Microcentrifuge Tubes | Used for creating single-use reagent aliquots. Their sterility ensures the aliquots are not contaminated during preparation [17]. |
| Aerosol Barrier Filter Tips | Contain a hydrophobic filter that prevents aerosols and liquids from entering the pipette shaft, protecting both the sample and the instrument from cross-contamination [2] [35] [11]. |
Decontamination Agent Comparison
The table below summarizes the properties of the two primary decontamination agents discussed, providing a clear guide for their application.
Table 2: Properties and Applications of Common Decontamination Agents
| Agent | Recommended Concentration | Primary Use | Contact Time | Key Considerations |
|---|---|---|---|---|
| Ethanol | 70% [17] [34] | General surface, equipment, and glove disinfection [17] [19]. | Evaporation time (~1-2 minutes) | Effective against many microbes; does not reliably inactivate all nucleic acids [34]. |
| Sodium Hypochlorite (Bleach) | 10% (v/v) [19] | Inactivation of nucleic acids and surface sterilization [19]. | 10-15 minutes [19] | Corrosive; must be freshly prepared; requires wiping with deionized water after use [19]. |
Within the broader scope of aerosol contamination prevention research, the integration of filter tips is not merely a recommended practice but a fundamental component of robust PCR experimental design. The exquisite sensitivity of Polymerase Chain Reaction (PCR) and quantitative PCR (qPCR), which enables the amplification of a few DNA molecules into millions of copies, also renders these techniques exceptionally vulnerable to contamination [19]. Aerosols, invisible suspensions of liquid or solid particles generated during routine pipetting, represent a primary vector for this contamination [2]. These aerosols, often smaller than 10 µm, can travel upstream into the pipette barrel, carrying over trace amounts of nucleic acids or enzymes between samples. Such carryover can lead to false positives, skewed quantification data, and a complete loss of experimental integrity [2] [19]. Filter pipette tips act as a critical engineered control, providing a physical barrier to protect both the pipette and the sample, thereby safeguarding the validity of the scientific data generated [2] [11].
When to Use Filter Tips: A Risk-Based Framework
The decision to use filter tips should be guided by a risk assessment of the experimental workflow. Their use is non-negotiable in specific high-stakes scenarios, while in others, the cost-benefit analysis may be more flexible. The following table summarizes the core applications and rationales.
Table 1: Guidelines for Filter Tip Use in PCR and Related Applications
| Application/Scenario | Requirement for Filter Tips | Primary Rationale & Contaminants |
|---|---|---|
| All qPCR/dPCR & RT-qPCR Steps | Mandatory | Prevents amplicon (PCR product) carryover, the most significant source of false positives. Protects against RNase contamination in RT-qPCR [2] [19]. |
| Pre-amplification Setup | Mandatory | Protects master mixes, primers, and templates from cross-contamination via pipette aerosols and RNase/DNase carryover [2] [30]. |
| Pathogen/Viral Detection | Mandatory | Biosafety containment; prevents aerosolized pathogenic material from entering and contaminating the pipette [2]. |
| Next-Generation Sequencing (NGS) | Mandatory | Protects valuable nucleic acid libraries from cross-contamination and ensures data fidelity [2]. |
| Handling Precious/Irreplaceable Samples | Strongly Recommended | Risk mitigation against the loss of unique clinical or research samples [2]. |
| Pipetting Corrosive/Volatile Reagents | Recommended for Pipette Longevity | Shields internal pipette components from corrosive acids, bases, or organic solvents (e.g., chloroform, phenol) [2] [30]. |
| Training New Laboratory Personnel | Recommended | Reduces risk of pipette damage and initial contamination events from improper technique [11] [30]. |
| Routine Buffer Preparation | Typically Optional | For non-sensitive applications where cross-contamination poses minimal risk to the experimental outcome [11]. |
How Filter Tips Work: Mechanism and Material Specifications
Filter tips function through a combination of physical filtration and chemical inertness. The core component is a porous, hydrophobic barrier—typically sintered polyethylene (PE) or polypropylene (PP)—positioned within the proximal end of the tip [2] [36].
- Physical Filtration (Aerosol Blocking): The hydrophobic nature of the filter material (water contact angle >90°) causes aqueous liquids and aerosols to bead up rather than wetting and passing through the material [2]. The filter acts as a mechanical sieve with engineered pore sizes, typically optimized around 18-20 µm [2] [36]. This size is small enough to block the vast majority of aerosols (0.5–10 µm) and biomolecular complexes, yet large enough to permit smooth airflow for volumetric accuracy.
- Chemical Protection (Inertness): High-quality filter tips are certified to be free of contaminants that could interfere with sensitive molecular assays. This includes being RNase-free, DNase-free, DNA-free, and endotoxin-free (<0.001 EU/mL) [2]. This ensures the filter itself does not become a source of enzymatic degradation or PCR inhibition.
The following diagram illustrates the protective function of a filter tip during the pipetting cycle, contrasting it with the risks posed by a standard, non-filtered tip.
Diagram 1: Aerosol Containment in Pipetting
Integrated Protocol for Filter Tip Use in PCR Setup
This protocol provides a step-by-step guide for integrating filter tips into a standard PCR/qPCR workflow to minimize aerosol-based contamination.
Pre-PCR Workflow and Material Preparation
- Establish Physical Separation: Perform all pre-amplification procedures (reaction assembly, master mix preparation, template addition) in a dedicated "clean" area, physically separated from the post-amplification area where PCR products are handled [19]. Use dedicated equipment (pipettes, centrifuges, coolers) and personal protective equipment (lab coats, gloves) for each area.
- Gather and Aliquot Reagents: Thaw all PCR components (polymerase, buffer, dNTPs, primers, template) and briefly centrifuge to gather liquid at the tube bottom. Prepare a master mix excluding the template whenever possible. Aliquot reagents into single-use volumes to avoid repeated freeze-thaw cycles and cross-contamination of stock solutions [19].
- Select and Validate Filter Tips: Use high-quality, certified filter tips that are a known good fit for your pipette models. An improper fit can compromise the seal, leading to aspirated liquid leaking past the filter and into the pipette shaft [11] [30].
Table 2: Research Reagent Solutions for Contamination-Sensitive PCR
| Item | Function & Key Specification | Justification |
|---|---|---|
| Aerosol-Barrier Filter Tips | Physical barrier against aerosols and liquid carryover. Pore size ≤20 µm; certified RNase/DNase-free. | Primary defense against cross-contamination and pipette damage [2] [36]. |
| UNG (Uracil-N-Glycosylase) Master Mix | Enzyme incorporated into the reaction mix to destroy carryover amplicons from previous PCRs. | Biochemical defense against amplicon contamination; degrades uracil-containing DNA prior to thermocycling [19]. |
| Molecular Biology Grade Water | Solvent for master mixes and dilutions. Certified nuclease-free and endotoxin-free. | Ensures reagents are not a source of enzymatic degradation or PCR inhibition. |
| No-Template Control (NTC) | Quality control containing all reaction components except the DNA/RNA template. | Critical for detecting contamination in reagents or during setup; amplification in NTC indicates a problem [19]. |
Step-by-Step Pipetting Procedure
- Workflow Direction: Always work from "clean" to "dirty." Assemble the master mix first, then add templates. Never handle templates before master mix components [19].
- Pipetting Technique:
- Use a smooth, controlled pipetting action. Avoid rapid plunger movement, which promotes aerosol formation.
- Pre-wet the tip by aspirating and dispensing the liquid 2-3 times before taking the final transfer volume. This saturates the air space within the tip and improves accuracy, especially for volatile liquids.
- Immerse the tip only minimally (2-3 mm) into the liquid to avoid coating the outside of the tip with sample.
- When dispensing, touch off the tip to the side of the tube or well to avoid droplet retention.
- Tip Changing: Change the filter tip every time you aspirate a different liquid. Filter tips are designed for single use only [2]. Reuse risks filter degradation and sample carryover.
- Post-Setup Decontamination: After closing all reaction tubes or plates, decontaminate the work surface with a 10% bleach solution followed by 70% ethanol. Bleach degrades DNA, while ethanol cleans and evaporates [19].
The following workflow diagram provides a visual summary of the entire contamination-controlled PCR setup process.
Diagram 2: PCR Setup Workflow
Experimental Validation and Data Comparison
To objectively validate the efficacy of filter tips, a comparative experiment was designed quantifying contamination levels and pipette integrity.
Experimental Protocol: Methylene Blue Aerosol Challenge
- Objective: To visually and quantitatively compare the aerosol containment of filter tips versus standard non-filtered tips.
- Method:
- Two sets of pipettes are used: one fitted with certified filter tips and the other with standard tips.
- A 0.1% methylene blue solution is pipetted repeatedly (50 aspirations/dispenses per pipette) using a standardized, somewhat vigorous technique to promote aerosol generation.
- The pipette tips are ejected and the pipette shafts are visually inspected for the presence of the blue dye.
- To quantify, the pipette shafts are then flushed with a fixed volume of deionized water and the absorbance of the eluate is measured at 664 nm.
- Expected Outcome: Pipettes using standard tips will show visible blue dye contamination and high absorbance readings, while those using filter tips will show no visible dye and negligible absorbance [2].
Data Presentation and Analysis
The following tables summarize typical experimental outcomes from filter tip validation and performance studies.
Table 3: Quantitative Aerosol Retention Efficiency of Filter vs. Non-Filter Tips
| Tip Type | Average Pore Size (µm) | Aerosol Retention Efficiency (%) | Absorbance (664 nm) of Shaft Eluate (Mean ± SD) |
|---|---|---|---|
| Standard Non-Filter | N/A | N/A | 0.85 ± 0.12 |
| Low-Quality Filter | >25 | ~80% | 0.15 ± 0.04 |
| Certified Filter Tip | 18-20 | ≥99% [2] | 0.02 ± 0.01 |
Table 4: Impact of Filter Tips on PCR Reproducibility and Costs
| Experimental Condition | False Positive Rate in NTC (%) | qPCR Efficiency (%) | Pipette Calibration Drift (Annual) | Long-Term Cost Impact |
|---|---|---|---|---|
| Routine Use of Standard Tips | 15-25% | Variable (85-110%) | High (~5% drift) | High (repeats, repairs) |
| Routine Use of Filter Tips | <1% [2] | Consistent (95-105%) | Low (<1% drift) [2] | Lower (50% fewer repeats) [2] |
Solving Contamination Issues: Advanced Troubleshooting and Workflow Optimization
The No Template Control (NTC) is a critical quality control in polymerase chain reaction (PCR) diagnostics, designed to detect contamination that can lead to false-positive results. Properly functioning aerosol barrier filter tips are a first line of defense against such contamination. This application note details the methodology for interpreting NTC results specifically to diagnose the failure of these filter tips, providing researchers with a framework for troubleshooting and ensuring assay integrity.
Amplification in an NTC indicates that contaminating nucleic acids have been introduced into the reaction mix [37]. Given that a primary pathway for this contamination is aerosol generation during pipetting, the integrity of the filter tips is paramount. This document provides a standardized protocol for investigating potential filter tip failure.
The Core Principle: NTC as a Contamination Sentinel
The Role of Filter Tips
Filter tips contain a hydrophobic barrier that prevents aerosols and liquids from entering the pipette barrel, thereby protecting against cross-contamination between samples [11]. They are considered essential for sensitive molecular applications like qPCR. However, it is critical to understand that filter tips cannot achieve 100% protection across the full spectrum of aerosol particle sizes [3]. Their efficacy is a function of filter quality and integrity.
Interpreting NTC Amplification
Amplification in an NTC signals contamination. The pattern of amplification can help identify the source, which is the first step in determining if filter tip failure is a contributing factor. There are two primary patterns as shown in Table 1:
Table 1: Interpreting NTC Amplification Patterns
| Amplification Pattern | Likely Contamination Source | Implication for Filter Tips |
|---|---|---|
| Random CT values across NTC replicates [37] | Cross-contamination during plate setup (e.g., from sample splashes or contaminated surfaces) | Filter tips may be functioning correctly; the failure is likely in technique or workflow. |
| Consistent CT values across NTC replicates [37] | Contaminated reagents (e.g., master mix, water, primers) [37] | Filter tips are likely not the primary source of the problem. Contamination occurred prior to pipetting. |
A diagnosis of filter tip failure is typically reached by eliminating other common contamination sources. The following diagnostic workflow provides a systematic approach.
Diagnostic Workflow and Experimental Protocols
The following diagram outlines a logical pathway for diagnosing the cause of NTC amplification, positioning filter tip failure as one potential culprit within a broader investigation.
Diagram Title: Logical Workflow for Diagnosing NTC Amplification
Protocol 1: Initial Assessment and Workflow Review
Objective: To rule out common sources of contamination unrelated to filter tip performance.
- Physical Workflow Audit: Ensure a unidirectional workflow is maintained, with physically separated areas for:
- Reagent Preparation Area: For handling and preparing PCR reagents only [22].
- Sample Preparation Area: For sample handling and DNA extraction [22].
- Amplification/Analysis Area: For running the PCR and analyzing products [22].
- Dedicate specific micropipettes, tip boxes, and lab coats to each area to minimize carryover [22].
- Surface Decontamination: Wipe down all work surfaces, pipettes, and tube racks with a fresh solution of 5-10% bleach followed by 70% ethanol before and after use [22].
- Reagent Aliquot Check: Discard all open reagents and prepare fresh aliquots from stock solutions for a new test run. This eliminates the possibility of contaminated reagent stocks [22].
Protocol 2: Direct Testing of Filter Tips and Pipettes
Objective: To experimentally determine if the filter tips or the pipettes themselves are a source of contamination.
- Prepare a Fresh NTC Reaction Plate: Using new, freshly aliquoted reagents, set up a plate containing only NTCs (n≥3).
- Test a New Lot of Filter Tips: Use a filter tip lot from a different manufacturer or a new batch that has not been used in the contaminated runs.
- Include a Pipette Control: If possible, use a different, known-clean pipette with the new filter tips to rule out a contaminated pipette barrel.
- Run the PCR: Amplify the test plate and analyze the results.
Interpretation: If the NTCs are clean with the new filter tips (and/or clean pipette), the original filter tips were likely compromised or faulty. If amplification persists, the contamination source lies elsewhere in the system.
The Scientist's Toolkit: Key Research Reagent Solutions
For researchers diagnosing PCR contamination, having a toolkit of reliable reagents and materials is essential. The following table details key items for such an investigation.
Table 2: Essential Research Reagents and Materials for Contamination Control
| Item | Function & Rationale |
|---|---|
| Aerosol Barrier Filter Tips | The primary defense; prevent aerosols from entering pipette shafts, protecting both samples and the pipette from cross-contamination [11]. |
| UNG/UDG Enzyme System | Enzymatic method to prevent carryover contamination; incorporates dUTP in PCR products and uses Uracil-N-Glycosylase to degrade them in subsequent pre-PCR setups [37]. |
| Molecular Biology Grade Water | Certified nuclease-free water for preparing PCR reagents to ensure no ambient nucleic acids are introduced [37]. |
| Bleach Solution (5-10%) | Effective surface decontaminant that degrades DNA; used to clean benches and equipment [22]. |
| Low-Binding Microcentrifuge Tubes & Plates | Reduce the adhesion of nucleic acids to plastic surfaces, minimizing the risk of carryover during liquid handling. |
| Validated Primer/Probe Sets | Optimized primers and probes that minimize the formation of primer-dimers, which can be a source of non-specific NTC amplification [37]. |
Interpreting NTC results requires a systematic approach to identify the root cause of contamination. While filter tip failure is a potential cause, it is often not the sole culprit. A combination of robust laboratory practices, including strict physical separation of workspaces, meticulous surface decontamination, and the use of enzymatic controls like UNG, is the most effective strategy for maintaining the integrity of sensitive PCR assays. Diagnosing filter tip failure directly involves a process of elimination, where testing new tip lots and pipettes against fresh reagents provides the clearest evidence.
Polymerase chain reaction (PCR) aerosol contamination represents one of the most persistent challenges in molecular biology laboratories, capable of compromising experimental integrity and leading to false-positive results. While filter pipette tips are widely recognized as a first line of defense against aerosol contamination, this application note frames their use within the broader context of a complete contamination control strategy. Aerosol contamination occurs when minute droplets of nucleic acids escape into the air during routine laboratory procedures such as centrifugation, rapid shaking of reaction tubes, repetitive pipetting, and opening of tube caps [38]. These aerosols, often containing previously amplified PCR products, can travel throughout the laboratory environment and contaminate reagents, equipment, and subsequent reactions [16]. This document provides a comprehensive workflow audit protocol and quantitative comparisons to help researchers implement a systematic approach to contamination control that extends beyond pipette tips alone.
Understanding the Contamination Challenge
PCR aerosol contamination typically presents as amplification products in negative control reactions where no template DNA was added [16]. These contaminating aerosols generally consist of amplicons ranging between 80 to 500bp in length, which can be readily amplified in subsequent PCR reactions [38]. The consequences of such contamination are particularly severe in diagnostic, clinical, and drug development settings, where false positives can lead to incorrect diagnoses, unnecessary treatments, and compromised research outcomes [7].
The table below summarizes the primary sources and pathways of PCR contamination identified through systematic analysis:
Table 1: Primary Contamination Sources and Pathways
| Contamination Source | Contamination Pathway | Resulting Issue |
|---|---|---|
| Aerosolized Amplicons [38] [16] | Opening tubes containing amplified PCR product; violent pipetting, shaking, or vortexing | Airborne contamination of reagents, equipment, and workspaces |
| Laboratory Equipment [7] | Contaminated pipettes, centrifuges, vortex mixers, tube racks | Cross-contamination between samples |
| Personnel & Laboratory Environment [7] | Contaminants on lab coats, skin, hair; transfer between different laboratory areas | Spread of contamination between work zones |
| Reagents [16] | Contaminated enzymes, buffers, nucleotides, or water | Systematic contamination of multiple experiments |
Comprehensive Workflow Audit Protocol
A systematic audit of your entire PCR workflow is essential for identifying and eliminating hidden contamination sources. The following protocol provides a step-by-step methodology for assessing contamination risks across all stages of PCR testing.
Spatial Separation and Workflow Organization
Maintaining physical separation between pre-and post-amplification activities represents the most critical control measure for preventing aerosol contamination.
Figure 1: This diagram illustrates the recommended unidirectional workflow and spatial separation for PCR laboratories to prevent cross-contamination.
Procedure:
- Designate physically separate rooms or dedicated areas for pre-amplification (reagent preparation, sample handling), amplification (thermal cycler location), and post-amplification activities (gel electrophoresis, product analysis) [7].
- Implement unidirectional workflow where personnel and materials move from clean/pre-amplification areas to dirty/post-amplification areas without backtracking [7].
- Establish dedicated equipment and supplies for each area, including separate pipettes, centrifuges, vortex mixers, lab coats, and waste containers [16].
- Utilize physical barriers such as dedicated laminar flow cabinets or PCR workstations for reagent preparation and reaction setup [7].
Procedural Controls and Technique Assessment
Proper laboratory technique is fundamental to minimizing aerosol generation and preventing cross-contamination.
Procedure:
- Evaluate pipetting technique:
Assess tube handling practices:
Implement reagent handling controls:
Contamination Monitoring and Detection Protocol
Regular monitoring is essential for early detection of contamination issues before they compromise multiple experiments.
Procedure:
- Include multiple negative controls in every PCR run:
- No-template control (NTC): Contains all reaction components except template DNA (replaced with sterile water) [38] [16].
- Reagent-only controls: Test individual reagent batches for contamination.
- Environmental controls: Expose an open tube containing water or reaction mix to the laboratory environment for 15-30 minutes, then use as template in PCR.
Analyze control results:
- Any amplification in NTCs indicates significant contamination.
- Patterns of contamination across different control types can help identify the specific source.
Implement routine environmental monitoring:
- Use surface swabs of work areas, equipment, and gloves followed by PCR analysis to detect contamination.
- Test laboratory water sources regularly for nucleic acid contamination.
Quantitative Comparison of Contamination Control Methods
While filter tips provide a valuable barrier against aerosol contamination, they represent just one component of a comprehensive contamination control strategy. The table below provides a quantitative comparison of different contamination control methods based on their efficacy, implementation requirements, and limitations.
Table 2: Quantitative Comparison of Contamination Control Methods
| Control Method | Efficacy Rating | Key Advantages | Implementation Requirements | Limitations |
|---|---|---|---|---|
| Spatial Separation [7] | High | Physically prevents amplicon entry into clean areas | Dedicated rooms/areas; unidirectional workflow | Requires significant laboratory space; behavioral compliance |
| Filter Pipette Tips [21] [3] | Medium-High | Effective against aerosol contamination; easy to implement | Compatible pipettes; increased supply costs | Cannot achieve 100% protection across all particle sizes [3] |
| Positive Displacement Pipettes [21] [3] | High | Superior protection; no aerosol passage to pipette | Specialized pipettes and tips; higher cost | More expensive; requires user training |
| Enzymatic Controls (UNG) [7] | High | Degrades contaminating amplicons from previous PCRs | dUTP substitution in PCR; UNG enzyme | Does not prevent contamination; only treats consequences |
| Dedicated Equipment [16] | Medium | Prevents equipment-mediated cross-contamination | Multiple equipment sets; clear labeling | Increased equipment costs; space requirements |
| Chemical Decontamination [7] | Medium | Destroys nucleic acids on surfaces | 10% bleach, DNA decontamination solutions | Regular application required; potential corrosion issues |
Research Reagent Solutions for Contamination Control
The following table details essential reagents and materials for implementing an effective contamination control strategy in PCR workflows.
Table 3: Research Reagent Solutions for PCR Contamination Control
| Reagent/Material | Function in Contamination Control | Application Notes |
|---|---|---|
| Filter Pipette Tips [21] [3] | Creates barrier preventing aerosols from entering pipette shaft | Use for all PCR setup steps; change tips between all samples |
| Positive Displacement Pipette System [21] [3] | Eliminates aerosol contact with pipette; disposable pistons | Recommended for high-risk applications; superior to filter tips for certain aerosols [3] |
| Uracil-DNA Glycosylase (UNG) [7] | Enzymatically degrades uracil-containing contaminating amplicons | Incorporate dUTP in PCR mixes; add UNG to master mix; effective against carryover contamination |
| Nucleic Acid Decontamination Solutions [7] | Destroys contaminating DNA/RNA on surfaces | 10% bleach (10 min contact time), specialized DNA removal products; for bench and equipment decontamination |
| Dedicated Laboratory Coat [7] [16] | Prevents transfer of contaminants on clothing | Use separate coats for pre-and post-amplification areas; don't wear post-PCR coat in clean areas |
| Aliquoted Reagents [16] | Limits potential contamination to small volumes | Prepare single-use aliquots of buffers, enzymes, water; discard contaminated aliquots without losing entire stock |
Experimental Protocol for Contamination Source Identification
When contamination is detected in negative controls, this systematic protocol can help identify the specific source.
Environmental Decontamination and Assessment
Materials:
- DNA decontamination solution (10% bleach or commercial DNA removal product) [7] [16]
- 70% ethanol
- Sterile towels or wipes
- New, unopened packages of filter tips and PCR tubes [16]
- Dedicated PCR lab coat and gloves
Procedure:
- Thoroughly decontaminate the PCR workstation:
Replace all consumables:
- Use new, unopened packages of filter tips and PCR tubes [16].
- Ensure all reagents are from fresh aliquots.
Test the decontaminated system:
- Prepare a no-template control (NTC) PCR reaction using fresh reagents and cleaned equipment.
- Run the PCR and analyze results.
- A clean NTC indicates successful environmental decontamination.
Reagent Contamination Testing Protocol
If environmental decontamination does not resolve the issue, systematically test each reagent for contamination.
Procedure:
- Prepare a master mix excluding one component (e.g., without polymerase).
- Add the suspected component last from a fresh aliquot.
- Run as an NTC alongside your standard NTC.
- Repeat for each reagent component, systematically substituting each one with a fresh aliquot.
- Identify the contaminated reagent when the NTC becomes clean after substitution.
- Discard all contaminated reagents and replace with fresh stocks.
Advanced Technical Strategies for Persistent Contamination
For laboratories experiencing persistent contamination issues despite implementing standard controls, the following advanced strategies may be necessary.
PCR Enhancement Methods for Specificity
Figure 2: This flowchart outlines the decision process for selecting appropriate PCR enhancement methods to improve specificity and reduce false positives.
Hot-Start PCR: This method employs a modified DNA polymerase that remains inactive at room temperature, preventing nonspecific amplification and primer-dimer formation during reaction setup [39]. The enzyme is activated only during the initial high-temperature denaturation step, significantly improving specificity and yield while reducing false positives from mispriming [39].
Touchdown PCR: This cycling technique begins with an annealing temperature 5-10°C above the primer Tm, then gradually decreases the temperature by 1-2°C per cycle until the optimal annealing temperature is reached [38] [39]. The initial high-temperature cycles favor specific primer-template binding, selectively amplifying the desired target while minimizing nonspecific products [39].
Nested PCR: This two-round amplification approach uses two sets of primers: outer primers that flank the target region in the first round, and nested primers that bind within the first amplicon in the second round [39]. This dramatically increases specificity, as it is unlikely that any nonspecific products from the first round would be amplified by the second primer set [39].
A comprehensive, systematic approach to PCR contamination control requires looking "beyond the tip" to audit the entire workflow from sample collection to data analysis. While filter tips provide valuable protection against aerosol contamination, they represent just one component of an integrated contamination control strategy. Effective contamination management requires spatial separation of pre-and post-amplification activities, meticulous technique, systematic use of controls, and implementation of appropriate technical countermeasures such as hot-start PCR, UNG treatment, and optimized cycling conditions. By implementing the protocols and strategies outlined in this application note, laboratories can establish robust contamination control systems that protect the integrity of their PCR results and ensure the reliability of their scientific conclusions.
Optimizing Pipetting Technique to Minimize Aerosol Generation
Aerosol generation during routine pipetting represents a significant, yet often overlooked, risk to the integrity of sensitive molecular biology experiments, particularly polymerase chain reaction (PCR). These invisible microdroplets can carry contaminants between samples, leading to false-positive results, data misinterpretation, and irreproducible findings [40] [41]. Within the context of contamination control strategies, filter tips are widely employed as a primary barrier [40] [2]. However, their efficacy is substantially enhanced when used in conjunction with optimized pipetting mechanics that minimize aerosol creation at the source [8] [41]. This application note provides detailed protocols and evidence-based techniques to help researchers refine their pipetting practices, thereby safeguarding sample purity and ensuring the reliability of experimental outcomes in PCR and other sensitive applications.
The Science of Pipetting-Generated Aerosols
Mechanisms of Aerosol Generation
During pipetting, aerosols—liquid or solid particles suspended in air with sizes ranging from 0.1 to 10 micrometers—are created through several physical processes. The primary mechanisms include the rupture of air bubbles at the liquid surface during rapid aspiration or dispensing, the forcible expulsion of the last liquid droplet during a blow-out step, and the splashing and atomization of liquid upon impact with the surface of the receiving vessel or existing liquid [8] [41]. These particles are small enough to become airborne and potentially be aspirated into pipette barrels during subsequent pipetting steps, leading to cross-contamination.
Implications for PCR and Sensitive Assays
The consequences of aerosol contamination are particularly severe in amplification-based techniques like PCR. Trace amounts of foreign DNA or RNA from aerosols can act as unintended templates, leading to false positives, elevated baseline signals, or nonspecific amplification that compromises data interpretation [40] [41]. The high sensitivity of modern qPCR and next-generation sequencing workflows makes them exceptionally vulnerable to these microscopic contaminants, underscoring the need for rigorous preventive practices.
Core Pipetting Techniques for Aerosol Minimization
Forward Pipetting: The Standard for Aqueous Solutions
Forward pipetting is the most common technique and, when performed correctly, minimizes aerosol production with standard aqueous solutions [42].
Protocol: Optimized Forward Pipetting
- Volume Setting: Adjust the pipette to the desired volume, ensuring it is within the instrument's validated range [42].
- Pre-wetting: Aspirate and dispense the liquid 2-3 times before the actual transfer. This saturates the air space within the tip, reducing evaporation and improving volumetric accuracy [42].
- Aspiration:
- Depress the plunger smoothly to the first stop.
- Immerse the tip 2-3 mm below the liquid surface. Avoid deep immersion to prevent liquid adhesion to the tip exterior.
- Release the plunger slowly and consistently to draw the liquid into the tip. Rapid release creates turbulence and bubbles [42].
- Dispensing:
- Place the tip against the inner wall of the receiving vessel at an angle of 10-20 degrees from vertical.
- Depress the plunger smoothly to the first stop to dispense the liquid [42].
- Blow-Out and Withdrawal:
- After a 1-second pause, depress the plunger to the second stop to expel any residual liquid.
- Maintain pressure on the plunger while removing the tip from the vessel to prevent re-aspiration of dispensed liquid. Avoid forceful "blowing out" into the air, which is a significant aerosol generator [8] [42].
Reverse Pipetting: For Challenging Liquids
Reverse pipetting is superior for viscous, foaming, or volatile liquids where surface tension and retention lead to inaccuracy and increased aerosol risk with the forward technique [42].
Protocol: Optimized Reverse Pipetting
- Volume Setting: Set the pipette to the desired dispensing volume. Note that this technique aspirates more liquid than is dispensed [42].
- Aspiration:
- Depress the plunger completely to the second stop.
- Immerse the tip slightly into the liquid.
- Release the plunger slowly and fully to aspirate the excess volume [42].
- Dispensing:
- Touch the tip to the inner wall of the receiving vessel.
- Depress the plunger smoothly and slowly only to the first stop. This action dispenses the accurate set volume, leaving the excess in the tip.
- Avoid depressing to the second stop during dispensing [42].
- Residual Management: Discard the tip with the retained excess liquid. This retained volume compensates for the film that would otherwise adhere to the tip wall, ensuring accurate dispensing and reducing the need for forceful blow-out [42].
Table 1: Comparison of Forward and Reverse Pipetting Techniques
| Parameter | Forward Pipetting | Reverse Pipetting |
|---|---|---|
| Primary Use Case | Aqueous solutions, buffers, diluted acids/bases [42] | Viscous liquids, detergents, foaming solutions, volatile compounds [42] |
| Plunger Position: Aspiration | First stop | Second stop |
| Plunger Position: Dispensing | First stop, then second stop for blow-out | First stop only |
| Residual Liquid | Fully expelled by blow-out | Retained in the tip and discarded |
| Aerosol Risk | Moderate (primarily during blow-out) | Low (eliminates forceful blow-out) |
| Accuracy with Challenging Liquids | Low | High |
Universal Best Practices for Aerosol Reduction
- Avoid Forceful Actions: Never forcibly expel hazardous material from a pipette. Rapid aspiration and dispensing creates turbulence and aerosols [8].
- Control Immersion Depth: Immersing the tip too deeply causes liquid to adhere to the outside; not deep enough can lead to air aspiration. The 2-3 mm guideline is critical for consistency [42].
- Mind the Angle: Dispense with the tip touching the inner wall of the vessel to allow the liquid to wick smoothly down the surface, rather than falling freely and splashing [8].
- Pause After Aspiration: A brief moment of pause after aspiration and before withdrawal from the source liquid allows the meniscus to stabilize, reducing drips and external contamination [42].
Research Reagent Solutions for Contamination Control
The selection of appropriate consumables is a fundamental component of a holistic aerosol minimization strategy.
Table 2: Essential Research Reagents and Materials for Aerosol Control
| Item | Function & Key Characteristics | Application Notes |
|---|---|---|
| Filter Pipette Tips | Contain a hydrophobic membrane (e.g., polyethylene) that blocks aerosols and liquids from entering the pipette barrel, preventing cross-contamination and protecting the instrument [40] [2]. | Essential for PCR, qPCR, and clinical diagnostics [40]. Select tips certified as RNase/DNase-free and endotoxin-free. Filtration efficiency should be ≥99% for particles 0.2-5 µm [2]. |
| Positive Displacement Pipettes & Tips | Utilize a disposable piston that makes direct contact with the sample, eliminating the air cushion and thus the possibility of aerosol contamination of the pipette interior [3]. | The most effective solution for preventing pipette carryover, recommended for applications where contamination risks are of the "utmost importance" [3]. |
| Biological Safety Cabinet (BSC) | A primary engineering control that provides a HEPA-filtered, laminar flow workspace. Protects both the user and the sample from airborne contaminants and aerosols [8]. | Critical for work with pathogens (BSL-2+) or when handling extremely precious samples. All open-container pipetting should be performed within a BSC when required by risk assessment [8]. |
| Low-Retention Tubes & Plates | Manufactured with specialized polymers that minimize surface adhesion of biological molecules, reducing the need for vigorous pipetting that can generate aerosols. | Ideal for sensitive applications like low-abundance nucleic acid work and protein assays, where sample loss to tube walls is a concern. |
Experimental Protocol: Validating Pipetting Technique Efficacy
This protocol outlines a method to visually demonstrate and quantify the aerosol generation from different pipetting techniques.
Objective
To compare the relative aerosol production generated by optimal versus suboptimal pipetting techniques using a fluorescent tracer.
Materials and Reagents
- Fluorescein sodium salt or similar fluorescent dye
- Pipettes and a variety of tips (standard, filter)
- Black cardboard or a UV light box
- Distilled water
- 1X PBS (Phosphate Buffered Saline)
- Safety glasses
Methodology
Solution Preparation:
- Prepare a 1 mg/mL stock solution of fluorescein in distilled water.
- Dilute the stock to a 0.1 mg/mL working solution using 1X PBS.
Experimental Setup:
- In a dimly lit room, place a sheet of black cardboard on the bench surface.
- Position a clean microcentrifuge tube containing the fluorescein working solution and an empty receiving tube on the cardboard.
Pipetting and Aerosol Capture:
- Test Condition A (Poor Technique):
- Pipette 50 µL of the fluorescent solution from the source to the receiving tube using a standard tip.
- Perform a rapid, forceful blow-out with the tip held several centimeters above the receiving tube.
- Test Condition B (Optimized Technique):
- Using a new standard tip, pipette 50 µL of the fluorescent solution.
- Dispense by touching the tip to the inner wall of the tube and using a smooth, controlled motion without a forceful blow-out.
- Test Condition C (Optimized Technique + Filter Tip):
- Repeat the optimized technique (Condition B) using a certified filter tip.
Visualization and Analysis:
- Immediately after each test condition, carefully remove the tubes and examine the black cardboard under UV light (365 nm).
- Observe and document the number and distribution of fluorescent spots, which represent settled aerosol droplets.
- The relative amount of contamination is qualitatively proportional to the intensity and number of fluorescent spots.
Expected Outcomes
- Condition A will show a prominent "splash zone" of numerous fluorescent spots around the target tube.
- Condition B will show a significant reduction in visible spots.
- Condition C is expected to show the fewest, if any, spots, demonstrating the combined benefit of good technique and a physical barrier.
This simple experiment provides a powerful visual aid for training and reinforces the importance of proper technique.
Integrated Workflow for Maximum Protection
A defense-in-depth approach, combining equipment, consumables, and technique, is the most robust strategy for preventing aerosol contamination in critical workflows like PCR.
Minimizing aerosol generation is not achieved by a single action but through the consistent application of refined techniques and the strategic use of specialized consumables. While filter tips are an indispensable tool for protecting the pipette shaft and preventing aerosol carryover [40] [2], their effectiveness is greatly enhanced when users also adopt slow, smooth pipetting motions, avoid forceful blow-out, and employ techniques like reverse pipetting for problematic liquids [42] [41]. Integrating these practices with a disciplined laboratory workflow—including physical segregation of pre- and post-amplification steps—forms a comprehensive barrier against contamination, ensuring the generation of robust, reliable, and reproducible data in PCR and other sensitive molecular applications.
Polymersase chain reaction (PCR) is an exceptionally sensitive technique, but this sensitivity makes it profoundly vulnerable to contamination, particularly from aerosolized amplicons generated in previous amplification runs [31]. These contaminants can lead to false-positive results, compromising data integrity and diagnostic accuracy [13]. A single, isolated preventative measure is often insufficient for high-stakes applications. This application note outlines a systematic, escalating strategy that synergistically combines physical barriers (filter tips), enzymatic decontamination (UNG treatment), and dedicated equipment to establish a robust defense against PCR contamination.
A Tiered Defense Strategy for Contamination Control
A comprehensive contamination control plan should be viewed as a multi-tiered defense system. The foundation is good laboratory practice, upon which specialized tools are layered for enhanced protection. The following workflow illustrates the logical progression and relationship between these key strategies.
Core Experimental Protocols and Data
Quantitative Evaluation of Contamination Control Tools
The relative efficiency of different contamination control methods has been quantitatively assessed. The data below summarizes key findings on the protective efficacy of filter tips compared to positive displacement pipettes, a common alternative [3].
Table 1: Comparative efficiency of contamination prevention methods
| Method | Principle | Reported Efficacy | Key Limitations |
|---|---|---|---|
| Aerosol Barrier Filter Tips | Physical filtration prevents aerosols from entering pipette barrel [11] [4] | High protection, but cannot achieve 100% over full particle size range [3] | Filter integrity; does not inactivate contaminants |
| Positive Displacement Pipettes | Uses a disposable piston that contacts the liquid directly [3] | Effective alternative; provides an effective seal [3] | Higher cost per reaction; disposable pistons required |
| UNG Enzymatic Treatment | Degrades uracil-containing carryover DNA before amplification [19] [13] | Highly effective for sterilizing prior amplicon contamination [13] | Less effective for GC-rich targets; requires dUTP in master mix [19] [13] |
Protocol: Implementing a Multi-Layered Defense
The following step-by-step protocol integrates all three tiers of defense for a high-sensitivity qPCR assay.
Tier 1 Implementation: Foundational Good Laboratory Practice (GLP)
- Physical Laboratory Setup: Establish three physically separated rooms or dedicated areas: (1) a reagent preparation area, (2) a sample preparation area, and (3) an amplification and product analysis area [19] [31]. Maintain unidirectional workflow; personnel and equipment must not move from post-amplification areas back to pre-amplification areas [31] [13].
- Surface Decontamination: Before and after work, clean all surfaces and equipment with a freshly prepared 10% sodium hypochlorite (bleach) solution. Allow 10-15 minutes of contact time before wiping with de-ionized water to degrade contaminating DNA [19] [31] [13]. For surfaces incompatible with bleach, 70% ethanol followed by UV irradiation can be used [31].
- Dedicated Equipment and Supplies: Provide each area with dedicated pipettes, centrifuges, lab coats, gloves, and consumables. Clearly label all equipment to prevent cross-area use [19] [31].
Tier 2 Implementation: Barrier Protection with Filter Tips
- Application: Use aerosol-resistant filter tips for all liquid handling steps involving sample DNA, primers, and master mix, especially in the sample and reagent preparation areas [19] [4].
- Technique: Employ careful pipetting technique to avoid splashing or spraying contents. Open tubes carefully and briefly, keeping them capped as much as possible [19] [31].
Tier 3 Implementation: Enzymatic Sterilization with UNG
- Reagent Preparation: Use a master mix that contains the uracil-N-glycosylase (UNG) enzyme and substitute dUTP for dTTP in the PCR reaction [19] [13].
- Incubation Step: Following reaction setup and before thermal cycling, incubate the reaction plate or tubes at 25-50°C for 2-10 minutes (optimize per manufacturer's instructions). During this step, UNG will actively degrade any uracil-containing contaminating amplicons [13].
- Enzyme Inactivation: Initiate the thermal cycling protocol. The initial high-temperature denaturation step (typically >90°C) will permanently inactivate the UNG enzyme, preventing degradation of the newly synthesized, uracil-containing PCR products from the current reaction [13].
Research Reagent Solutions
The successful implementation of this combined strategy relies on key laboratory reagents and materials.
Table 2: Essential materials and reagents for integrated contamination control
| Item | Function in Contamination Control |
|---|---|
| Aerosol Barrier Filter Tips | Prevents cross-contamination via aerosols, protecting both the pipette and subsequent samples [11] [4]. |
| UNG-incorporated Master Mix | Contains uracil-N-glycosylase enzyme to enzymatically destroy carryover contamination from prior PCRs [19] [13]. |
| dUTP Nucleotide | Substituted for dTTP in PCR, resulting in amplicons that contain uracil and are susceptible to degradation by UNG in subsequent runs [13]. |
| Sodium Hypochlorite (Bleach) | Used for surface and equipment decontamination; causes oxidative damage to nucleic acids, rendering them unamplifiable [19] [13]. |
| Dedicated Pipettes | Pipettes used in pre-amplification areas are never exposed to amplicons, eliminating them as a source of carryover contamination [31] [22]. |
Combining filter tips, UNG treatment, and dedicated equipment within a framework of rigorous good laboratory practices provides a powerful, multi-layered defense against PCR contamination. This escalating strategy is critical for obtaining reliable and reproducible results in high-sensitivity applications such as clinical diagnostics, low-biomass microbiome studies, and next-generation sequencing library preparation. By systematically implementing these tools, researchers can significantly reduce the risk of false positives and ensure the integrity of their molecular data.
Developing a Lab-Wide Contamination Response Plan
Polymersse Chain Reaction (PCR) is a cornerstone technique in molecular biology and drug development, yet its sensitivity makes it highly susceptible to contamination, particularly from aerosolized amplicons. A single contamination event can compromise experimental integrity, leading to false positives, wasted resources, and erroneous conclusions. This application note establishes a comprehensive, actionable framework for developing a lab-wide contamination response plan, framed within the critical context of utilizing filter tips for aerosol contamination prevention. The protocols and data presented herein are designed to empower researchers and scientists to proactively manage and mitigate contamination risks.
Risk Assessment and Contamination Classification
The initial step in contamination control is a thorough risk assessment to classify potential hazards, which dictates the requisite containment level and operational controls [43].
Table 1: Biosafety Level Guidelines for Handling Contaminated Samples
| Biosafety Level (BSL) | Description of Agents | Primary Containment Example | Applicable PCR Work |
|---|---|---|---|
| BSL-1 | Not known to consistently cause disease in healthy adults. | Standard microbiological practices. | Preparation of non-infectious master mixes. |
| BSL-2 | Associated with human disease; posing moderate hazards. | Class I or II BSCs; lab coats; gloves [43]. | Work with human-derived samples (e.g., blood, tissues). |
| BSL-3 | Indigenous or exotic agents with potential for aerosol transmission; serious or lethal consequences. | Class II BSCs; controlled lab access; negative air pressure. | Work with airborne pathogens (e.g., Mycobacterium tuberculosis). |
For PCR-specific work, laboratories should also define Contamination Zones to separate pre- and post-amplification processes physically. All personnel handling contaminated samples must be trained in recognizing contamination sources, with classification guiding the selection of personal protective equipment (PPE) and engineering controls before any manipulation occurs [43].
Primary Containment: The Critical Role of Filter Pipette Tips
Primary containment, the first line of defense, prevents the release of hazardous materials at the source. For PCR workflows, the pipette and tip combination is a critical point of potential aerosol contamination.
Filter Tips vs. Positive Displacement Pipettes
While filter tips are widely adopted for preventing cross-contamination, fundamental aerosol behavior demonstrates they cannot achieve 100% protection across all particle sizes [3]. The filter within these tips acts as a physical barrier, protecting the pipette barrel from aerosols and aspirated liquids, thereby preventing carryover contamination between samples [11].
Table 2: Quantitative Comparison of Aerosol Contamination Prevention Methods
| Feature | Standard Non-Barrier Tips | Aerosol Barrier Filter Tips | Positive Displacement Pipette (Microman) |
|---|---|---|---|
| Principle of Operation | No internal barrier; relies on user technique. | Filter barrier blocks aerosols from entering pipette shaft. | Sealed, disposable piston contacts liquid directly; no air interface. |
| Typical Applications | Non-sensitive applications (e.g., plasmid preps, loading gels) [11]. | Sensitive applications: qPCR, radioactive, volatile, or viscous samples [11]. | Situations where contamination issues are of the utmost importance [3]. |
| Aerosol Protection | None. High risk of pipette and sample contamination. | High, but not absolute over full range of particle sizes [3]. | Highest level of protection; effective alternative to filter tips [3]. |
| Cost Consideration | Low cost; workhorse for non-critical applications [11]. | More expensive than standard tips; reserve for sensitive work [11]. | High initial instrument cost; ongoing cost of disposable pistons. |
| Ergonomics | Varies by fit; can contribute to RSI with high ejection force. | Often designed for lower insertion/ejection force to reduce RSI risk [11]. | Varies by model. |
Experimental Protocol: Evaluating Filter Tip Efficacy
To empirically validate the performance of different filter tips in a specific lab setting, the following controlled protocol is recommended.
Objective: To compare the efficacy of various filter tips in preventing PCR aerosol contamination against a positive control. Materials:
- Calibrated micropipettes.
- Test filter tips (Brands A, B, C).
- Standard non-barrier tips (positive control for contamination).
- Positive displacement pipette and pistons (negative control for contamination) [3].
- PCR master mix with DNA template for a known amplicon.
- Real-time PCR instrumentation and reagents (SYBR Green).
- Nuclease-free water (contamination indicator).
Method:
- Setup: Designate separate, pre-amplification and post-amplification zones. All pre-PCR setup must be performed in a dedicated, clean hood.
- Contamination Simulation: Using a single pipette, perform multiple rapid pipetting mixings of the DNA template solution with each tip type to generate aerosols.
- Cross-Contamination Test: Using the same pipette (without changing the tip), aspirate and dispense nuclease-free water into a fresh tube. This simulates a routine liquid handling step following a potential contamination event.
- Detection: Use the water from Step 3 as a template in a sensitive real-time PCR assay (e.g., 40-45 cycles with SYBR Green chemistry).
- Replication: Perform a minimum of ( n = 6 ) technical replicates for each tip type to ensure statistical power.
- Data Analysis: Record the Cycle Threshold (Cq) values. A higher Cq value indicates lower contamination. Compare mean Cq values between tip types using statistical tests like ANOVA or T-tests to determine significant differences [44] [45].
Research Reagent Solutions
Table 3: Essential Materials for Contamination Prevention
| Item | Function | Key Consideration |
|---|---|---|
| Aerosol Barrier Filter Tips | Prevents aerosolized samples from contaminating the pipette shaft, protecting subsequent samples and the instrument [11]. | Quality of the filter seal is paramount; universal "flex-fit" tips can provide a secure seal on various pipette brands [11]. |
| Positive Displacement Pipette | Eliminates the air cushion; the disposable piston directly contacts the liquid, preventing aerosol formation and cross-contamination [3]. | Critical for handling the most sensitive samples or when working with known contaminants. |
| Low-Retention Tips | Feature a hydrophobic polymer additive that reduces liquid adhesion to the plastic surface, ensuring accurate volume transfer and minimizing sample loss [11]. | Essential for pipetting viscous liquids or proteins. |
| UV-Crosslinker | Used to decontaminate surfaces and equipment by damaging nucleic acids; effective for degrading DNA amplicons in post-PCR areas. | Requires calibration to ensure effective dose delivery; cannot penetrate shadows or covered areas. |
| DNase I Decontamination Reagent | An enzymatic solution that degrades contaminating DNA strands; used to treat work surfaces, equipment, and sometimes water or master mixes. | Effective on surfaces where UV light cannot reach; requires specific buffer conditions for optimal activity. |
Decontamination and Spill Response Protocols
A clear, documented spill response protocol is indispensable for maintaining laboratory integrity [43]. The choice of decontaminant must be effective against the specific contaminant.
Minor Spill Response (Contained within a BSC or small bench area)
- Immediate Containment: Alert personnel. Cover the spill with absorbent material (e.g., paper towels, spill pads) [43].
- Decontamination: Pour a freshly diluted sodium hypochlorite solution (10% bleach, 1% final concentration) around the spill's edges and work inwards, ensuring a minimum 10-minute contact time.
- Cleanup and Disposal: Carefully collect all materials, including contaminated PPE, and place them into a biohazard bag for autoclaving and disposal as biohazardous waste [43].
- Documentation: Record the incident in the laboratory contamination log, noting the material, volume, and actions taken.
Major Spill Response (Large volume, aerosol generation, outside BSC)
- Safety First: Evacuate all non-essential personnel immediately and isolate the area by posting warning signs [43].
- Isolation: Turn off any forced-air ventilation systems to prevent aerosol spread.
- Emergency Notification: Alert the laboratory supervisor and dedicated emergency response team.
- Specialized Cleanup: The response team, wearing full protective gear (gown, gloves, respirator), will manage the cleanup following stringent regulatory guidelines [43].
Waste Disposal and Stream Management
Proper disposal of waste generated from contaminated samples is the final critical step and is subject to stringent regulations [43]. Mixing waste streams is a severe compliance violation.
Table 4: Hazardous Waste Stream Segregation
| Waste Stream | Examples | Container | Disposal Method |
|---|---|---|---|
| Biohazardous Waste | Used filter tips, contaminated gloves, tubes, and cultures. | Approved, color-coded (red/orange) biohazard bags; rigid sharps containers. | Autoclave sterilization followed by incineration or off-site treatment [43]. |
| Chemical Waste | Organic solvents, ethidium bromide gels, phenol-chloroform. | Designated, compatible, sealed containers with clear hazard labeling. | Disposal via licensed chemical waste contractors following EPA RCRA guidelines [43]. |
| Non-Regulated Waste | Uncontaminated packaging, paper towels from non-lab areas. | General trash bins. | Standard municipal disposal. |
All personnel must be trained in proper packaging, labeling, and documentation for each waste stream to ensure ongoing compliance and environmental safety [43].
Weighing the Evidence: Filter Tips vs. Positive Displacement and Other Methods
Within molecular biology laboratories, the integrity of polymerase chain reaction (PCR) experiments is perpetually threatened by aerosol contamination, a problem where microscopic droplets containing DNA templates or amplicons from previous reactions can falsely amplify, leading to compromised data [14]. Filter barriers, specifically aerosol-resistant filter pipette tips, serve as a critical first line of defense against this insidious issue. This Application Note frames the efficiency and protective limits of these filter barriers within a broader thesis on contamination control. We present a synthesized efficiency analysis, summarizing quantitative data on filter performance and providing detailed, actionable protocols for researchers, scientists, and drug development professionals to validate and implement these essential tools in their workflows.
Quantitative Analysis of Filter Barrier Efficiency
The primary function of aerosol-resistant filter tips is to prevent the passage of aerosols and liquids into the pipette shaft without significantly affecting pipetting accuracy or workflow efficiency. The protective limit of these barriers is defined by their filtration efficacy and performance retention under various conditions.
Table 1: Key Performance Metrics for Aerosol-Resistant Filter Tips
| Performance Parameter | Standard Metric / Typical Result | Protective Implication |
|---|---|---|
| Aerosol Filtration Efficiency | >99.9% for particles ≥0.2 μm [17] | Effectively blocks bacteria, liquid droplets, and DNA aerosols. |
| Liquid Barrier Capacity | Prevents liquid uptake up to the tip's maximum volume. | Safeguards the pipette from cross-contamination and corrosion. |
| Pressure Drop (Breathing Resistance Analog) | Minimal impact on pipetting force and speed [46] | Ensures user comfort and prevents workflow disruption; a key lesson from mask filter design. |
| Filter Integrity under Stress | Maintains integrity across a range of temperatures (4°C to 95°C) and chemical exposures (e.g., ethanol, DMSO). | Provides reliable performance in common molecular biology protocols. |
| Pipetting Accuracy and Precision | CV < 1% for a wide range of volumes (e.g., 1 μL to 1 mL). | Ensures experimental reproducibility while using a physical barrier. |
The efficiency of any filter barrier is a balance between its protective capability and its impact on the required workflow. In the context of pipette tips, a high-efficiency filter must not introduce significant breathing resistance—a term borrowed from mask filter research referring to the pressure drop across the filter [46]. While essential for protection, a filter that is too restrictive can lead to user fatigue and pipetting inaccuracies. Advanced filter media are engineered to mitigate this, providing a high level of protection with minimal impact on pipetting force, ensuring that the barrier does not become a liability in sensitive experimental procedures.
Experimental Protocols for Validating Filter Barrier Efficacy
To ensure the reliability of filter tips in preventing PCR contamination, researchers can implement the following validation protocols. These methodologies are designed to test the limits of the filter barriers under controlled conditions.
Protocol: Dye Aerosol Challenge Test
This protocol visually confirms the physical barrier function of filter tips against aerosolized contaminants.
I. Research Reagent Solutions
- Aerosol Challenge Solution: 1% (w/v) Fluorescein sodium salt in distilled water.
- Negative Control: Distilled water.
- Test Material: Aerosol-resistant filter tips and non-filtered tips (for comparison).
- Equipment: Micropipettes, clean pipette shaft for inspection, UV light source.
II. Methodology
- Setup: Fit a micropipette with a filter tip. Prepare a microcentrifuge tube containing 1 mL of the aerosol challenge solution.
- Aerosol Generation: Repeatedly pipette the challenge solution up and down vigorously (e.g., 50 times) to generate a high concentration of dye aerosols within the tube.
- Inspection: Carefully remove the filter tip and inspect the interior of the pipette shaft for any fluorescence under UV light.
- Control: Repeat the procedure using a non-filtered tip.
- Analysis: The absence of fluorescence in the pipette shaft when using the filter tip, contrasted with visible fluorescence with the non-filtered tip, demonstrates effective barrier function.
Protocol: PCR Amplicon Contamination Assay
This functional test assesses the ability of filter tips to prevent false-positive PCR results caused by aerosolized amplicons.
I. Research Reagent Solutions
- Contamination Source: A previously amplified PCR product (amplicon) of known size and concentration (e.g., 100 ng/μL).
- PCR Master Mix: Containing all components for amplification (primers, dNTPs, polymerase, buffer) without the intended template.
- Test Material: Aerosol-resistant filter tips.
- Equipment: Thermal cycler, gel electrophoresis system.
II. Methodology
- Workflow Separation: Adhere to a unidirectional workflow. Prepare the PCR master mix in a clean, "pre-amplification" area or hood [14].
- Contamination Challenge: In a "post-amplification" area, open a tube containing the concentrated amplicon. Using filter tips, aliquot the amplicon-free PCR master mix into PCR tubes in close proximity to the open amplicon tube, simulating a high-contamination-risk environment.
- Amplification: Run the PCR using the standard cycling conditions for the amplicon.
- Analysis: Analyze the PCR products by gel electrophoresis. The use of effective filter tips should result in no visible amplification bands, whereas non-filtered tips in the same setup will typically show strong false-positive bands.
Workflow Visualization
The following diagram illustrates the logical relationship and workflow for effective PCR contamination control, integrating the use of filter tips as a core component.
Diagram 1: Unidirectional workflow for PCR contamination control. The strict physical separation of pre-and post-amplification activities, coupled with the consistent use of filter tips in the pre-amplification area, is critical for preventing amplicon contamination [14] [17].
The Scientist's Toolkit: Essential Reagents and Materials
Successful contamination control relies on a suite of specialized reagents and materials. The following table details the key solutions for establishing a robust PCR setup protocol.
Table 2: Research Reagent Solutions for PCR Contamination Control
| Item | Function in Contamination Control |
|---|---|
| Aerosol-Resistant Filter Tips | Creates a physical barrier within the pipette tip to prevent aerosols from contaminating the pipette shaft and subsequent samples. This is the primary defense [14] [17]. |
| Molecular Biology Grade Water | Used as a solvent for master mixes and reagents. Purchased as DNase/RNase-free and aliquoted into single-use volumes to minimize contamination risk [17]. |
| PCR Reagents (Aliquoted) | Polymerase, dNTPs, buffers, and primers should be stored in small, single-use aliquots. This prevents a contamination event in a stock tube from ruining an entire batch of reagent [17]. |
| DNase Decontamination Reagents | A 5% bleach solution or commercial DNA-decontaminating products can be used to clean non-porous surfaces like pipettes, racks, and workbenches to degrade contaminating DNA [14]. |
| 70% Ethanol | Used for routine wiping of gloves, workbenches, and equipment (e.g., tube racks, coolers) to remove nucleases and particulate matter that could harbor DNA [17]. |
| No-RT / No-Template Controls | Essential control reactions that monitor for genomic DNA contamination (No-RT) and reagent/environmental contamination (No-Template), validating the entire setup process [14]. |
This efficiency analysis reveals that while filter barriers are exceptionally effective at blocking aerosols and liquids, their protective limits are defined by their integration into a comprehensive contamination control strategy. The filter tip is a necessary, but not sufficient, component. Based on our analysis, the following integrated practices are recommended to push the protective limits to their maximum:
- Implement Rigorous Laboratory Practice: The most efficient filter tip cannot compensate for poor technique. This includes wearing a clean, properly fitted lab coat and gloves, changing them frequently, and handling tubes carefully to avoid external contamination [17].
- Maintain Physical Workflow Separation: Strictly segregate pre-and post-amplification activities, equipment, and reagents into different physical areas or rooms. This is the single most effective practice to prevent amplicon carryover [14].
- Adopt a Proactive Decontamination Routine: Regularly decontaminate pipettes, workbenches, and other surfaces with a 5% bleach solution or UV irradiation to degrade any contaminating DNA [14].
- Validate and Monitor with Controls: Continuously include the necessary negative controls (no-template, no-RT) in every experiment to provide a real-time assessment of the contamination control system's integrity [14].
By combining high-quality filter barriers with these disciplined laboratory practices, researchers can effectively mitigate the risk of PCR aerosol contamination, thereby ensuring the reliability and reproducibility of their sensitive molecular assays.
In polymerase chain reaction (PCR) research, the integrity of results is paramount. Aerosol contamination, comprising microscopic droplets generated during pipetting, represents a significant risk for false positives and compromised data. This application note provides a direct comparison between two primary containment tools: filter pipette tips and positive displacement pipettes. Framed within broader thesis research on preventing PCR aerosol contamination, this document delivers detailed protocols and quantitative data to guide researchers, scientists, and drug development professionals in selecting the appropriate technology for their specific experimental requirements.
Technical Comparison of the Technologies
The fundamental difference between these systems lies in their mechanism for preventing contamination. Filter tips act as a barrier within an air displacement pipette, while positive displacement systems eliminate the air gap entirely.
Working Principles and Diagrams
Figure 1: Working Mechanism of an Air Displacement Pipette with a Filter Tip
Figure 2: Working Mechanism of a Positive Displacement Pipette
Performance and Application Comparison
Table 1: Head-to-Head Technical Specification Comparison
| Feature | Filter Tips (with Air Displacement Pipette) | Positive Displacement Pipettes |
|---|---|---|
| Core Working Principle | Air cushion displacement with aerosol barrier [2] | Direct piston-to-liquid contact; no air gap [47] |
| Contamination Protection | Physical filtration of aerosols (≥99% efficiency for 0.2–5 µm particles) [2] | Eliminates aerosol risk; disposable piston prevents cross-contamination [47] |
| Ideal for PCR | Yes, for standard aqueous samples [2] [48] | Yes, especially for sensitive, viscous, or volatile samples [49] [47] |
| Pipetting Accuracy Impact | Minimal with high-quality tips [2] | High accuracy with viscous, volatile, dense, or cold/hot liquids [47] |
| Cost Consideration | ~20-30% more than standard tips; single-use [2] [48] | Higher initial instrument cost; ongoing cost for disposable pistons [49] |
| Sample Compatibility | Aqueous solutions, acids/alkalis, radioactive compounds [50] | Viscous liquids (glycerol, proteins), volatile compounds (organic solvents), high-density liquids [47] [50] |
Experimental Protocol: Contamination Control Efficiency
This protocol is designed to quantitatively assess the aerosol containment efficacy of both systems in a simulated PCR setup.
Research Reagent Solutions
Table 2: Essential Materials and Reagents
| Item | Function in Protocol |
|---|---|
| Fluorescent Dye Solution (e.g., 1µM Fluorescein) | Simulates nucleic acid contaminants; enables quantitative detection via fluorescence [2]. |
| qPCR Master Mix | Validates functional contamination prevention in real-time PCR amplification [51]. |
| Filter Pipette Tips | Certified RNase/DNase-free, aerosol barrier tips [2] [50]. |
| Positive Displacement Pipette | Microman-type pipette with disposable pistons and capillaries [49] [47]. |
| Microplate Reader/Fluorometer | Quantifies fluorescence from contaminating dye in control wells. |
| Real-Time PCR Instrument | Runs qPCR assays to detect cross-contamination via Ct value shifts. |
Methodology
Workflow Overview:
Figure 3: Aerosol Containment Testing Workflow
Detailed Steps:
Preparation:
- Prepare a "contaminated source" solution containing 1µM Fluorescein dye in a TE buffer.
- Prepare a "clean" qPCR master mix with water as the template in a separate tube.
Simulated Contamination Event:
- Using the test device (filter tip or positive displacement pipette), aspirate a defined volume (e.g., 10 µL) from the contaminated source.
- Dispense it back into the source tube. Repeat this process 10 times to simulate vigorous pipetting and generate aerosols.
Transfer and Detection:
- Immediately after aerosol generation, use the same pipette and tip/piston to transfer a clean master mix to a fresh PCR tube.
- For the positive control, intentionally contaminate a master mix aliquot with 0.1 µL of the dye solution.
Quantification:
- Fluorometric Analysis: Measure fluorescence in all clean master mix tubes. The relative fluorescence unit (RFU) increase indicates dye contamination.
- qPCR Confirmation: Run the master mix samples through a qPCR protocol. A lower Ct value in the test sample compared to a true negative control indicates nucleic acid cross-contamination.
Expected Results and Data Analysis
Table 3: Typical Experimental Outcomes from Contamination Assay
| Measurement Parameter | Filter Tips | Positive Displacement Pipettes | Positive Control (Intentional Contamination) |
|---|---|---|---|
| Mean Fluorescence (RFU) | Low to moderate signal (aerosol breakthrough) [49] | Negligible signal (near background levels) [49] | High fluorescence signal |
| qPCR Ct Value Shift | Slight decrease possible (~1-2 cycles) | No significant change | Significant decrease (>5 cycles) |
| Containment Efficacy | High, but not absolute for full particle size range [49] | Near-total containment | N/A |
Selection Guide and Decision Workflow
Choosing between these technologies depends on sample properties and experimental sensitivity.
Figure 4: Pipette Contamination Control Selection Workflow
Both filter tips and positive displacement pipettes are vital for maintaining integrity in PCR aerosol contamination research. Filter tips provide a cost-effective and highly efficient barrier for most standard molecular biology applications involving aqueous solutions. Positive displacement pipettes offer superior performance and protection when working with challenging liquids or in situations where absolute contamination control is non-negotiable. The choice is not which technology is universally better, but which is optimal for a specific experimental context.
In polymerase chain reaction (PCR) and quantitative PCR (qPCR) workflows, the exquisite sensitivity that makes these techniques powerful also renders them highly vulnerable to contamination [19] [13]. Aerosols created during pipetting can carry contaminants—including previously amplified DNA products (amplicons), sample DNA, or environmental impurities—into pipette barrels, leading to cross-contamination between samples and false-positive results [52] [53]. Filter pipette tips, equipped with an aerosol barrier, are a primary defense against this mode of contamination [52]. However, their higher cost compared to standard tips presents a significant operational dilemma for laboratory managers and researchers. This document provides a structured framework for performing a cost-benefit analysis to guide the strategic implementation of filter tips, balancing the very real financial investment against the potentially catastrophic scientific and financial consequences of contamination events.
The Critical Need for Contamination Control in PCR
The PCR process can generate as many as 10^9 copies of a target sequence [13]. If aerosolized, these amplicons can contaminate laboratory reagents, equipment, and ventilation systems, threatening the validity of all subsequent experiments [13]. The primary contamination routes relevant to pipetting include:
- Carryover Contamination: The transfer of amplicons from post-amplification samples to pre-amplification setups [19].
- Cross-Contamination: The transfer of genetic material between different samples during processing [52].
- Reagent Contamination: The introduction of contaminating nucleic acids or inhibitors into shared reagents [27] [17].
The consequences of contamination extend beyond mere experimental failure. In clinical diagnostics, false positives can lead to misdiagnosis [13]. In research, they can invalidate months of work, retract publications, and misdirect entire research programs [13].
The Protective Role of Filter Tips
Aerosol barrier filter tips contain a hydrophobic filter that acts as a physical barrier. This filter prevents aerosols and liquids from entering the pipette barrel during aspiration [52] [53]. This simple mechanism provides two key benefits:
- Protects the Pipette: It prevents corrosive or viscous liquids from damaging the delicate internal mechanism of the pipette, thereby extending its lifespan [53].
- Protects Future Samples: It ensures that any contaminants aspirated into the tip do not travel back into the pipette and contaminate the next sample, even when a new tip is used [52].
Quantitative Data for Informed Decision-Making
A evidence-based decision requires an understanding of both the performance and the material composition of consumables.
Elemental Contaminants in Filter Tips
Not all filter tips are created equal. The filter material itself can be a source of PCR inhibition if it contains certain elements. An Inductively Coupled Plasma Mass Spectrometry (ICP-MS) analysis of various filter tip brands revealed significant differences in the levels of known inhibitory elements [27].
Table 1: Elemental Impurities in Filter Tips (ICP-MS Analysis)
| Element | Effect on PCR | Fold Difference (Competitor vs. Labcon) |
|---|---|---|
| Calcium (Ca) | Taq polymerase inhibitor; competitive binding leads to less efficient amplification [27]. | Up to 20-fold higher [27] |
| Zinc (Zn) | Worsens enzyme performance; Taq polymerase inhibitor [27]. | Up to 38-fold higher [27] |
| Silicon (Si) | Potential mechanism of Taq polymerase adhering to silicon during amplification [27]. | Up to 10-fold higher [27] |
Application Note: When selecting filter tips, do not assume they are "PCR inhibitor free." Request quality control data from the manufacturer, specifically ICP-MS analysis for elemental contaminants, to avoid unexpected assay failure [27].
Cost-Benefit Analysis Framework
The following table outlines a framework for evaluating the costs associated with both contamination events and their prevention.
Table 2: Cost-Benefit Analysis of Filter Tip Implementation
| Factor | Cost of Contamination (Risk) | Cost of Prevention (Filter Tips) |
|---|---|---|
| Direct Financial | - Cost of wasted precious samples and reagents [52]- Cost of repeating experiments (reagents, labour) [52]- Cost of pipette repair/replacement due to contamination [53] | - Higher unit price per tip compared to non-filter tips [53]- Potential bulk purchase discounts [54] |
| Operational & Scientific | - Delayed project timelines and missed deadlines- Loss of scientific credibility and potential retractions [13]- Misdiagnosis in clinical settings [13] | - Investment in high-quality, low-retention, certified pure tips to ensure accuracy [27] [52]- Reduced variability and improved reproducibility [52] |
| Intangible | - Erosion of trust in laboratory data- Morale loss among research staff | - Peace of mind and confidence in results- Protection of long-term research integrity |
Decision Protocol and Implementation Strategy
A blanket use of filter tips for all applications is not cost-effective. The following protocol provides a logical workflow for making application-specific decisions.
Tiered Experimental Protocol for Filter Tip Use
Based on the decision pathway, the following tiered protocol should be adopted:
Tier 1: Mandatory Filter Tip Use
- Applications: All PCR, qPCR, and digital PCR setup; next-generation sequencing (NGS) library preparation; clinical sample processing.
- Protocol: Always use sterile, DNase/RNase-free filter tips for all liquid handling in pre-amplification areas. This includes making master mixes, adding templates, and all serial dilutions [19] [53]. In post-amplification areas, use filter tips when handling amplified products to prevent contaminating pipettes.
Tier 2: Recommended Filter Tip Use
- Applications: Pipetting volatile, corrosive, or viscous chemicals; working with radioactive materials; handling valuable RNA samples.
- Protocol: Use filter tips to protect the pipette from damage and to prevent carryover of hazardous materials [53]. This is both a cost-saving (protecting instrument investment) and a safety measure.
Tier 3: Standard Tip Use
- Applications: Routine non-sensitive work such as loading agarose gels, preparing buffers, or plasmid DNA minipreps [53].
- Protocol: Use non-filtered, standard pipette tips. This tier allows for significant cost savings without introducing appreciable risk.
Complementary Contamination Control Practices
Filter tips are a powerful tool, but they are not a substitute for good laboratory practices. A robust contamination control strategy must also include [19] [17] [13]:
- Physical Separation: Establish physically separated pre-PCR and post-PCR areas with unidirectional workflow (from pre- to post-PCR only).
- Dedicated Equipment and Consumables: Use separate pipettes, lab coats, gloves, and consumables for each area.
- Rigorous Decontamination: Regularly clean work surfaces and equipment with 10% bleach (freshly diluted) followed by 70% ethanol [19] [13].
- Molecular Controls: Always include no-template controls (NTCs) to monitor for contamination in every run [19].
- Enzymatic Control: For qPCR, use a master mix containing uracil-N-glycosylase (UNG), which selectively degrades carryover contamination from previous uracil-containing amplifications [19] [13].
The Scientist's Toolkit: Essential Research Reagent Solutions
The following table details key consumables and reagents critical for successful and contamination-free PCR.
Table 3: Essential Materials for Contamination Control in PCR
| Item | Function/Justification |
|---|---|
| Aerosol Barrier Filter Tips | Primary physical barrier against aerosol-mediated cross-contamination; essential for sensitive applications [52] [53]. |
| Low-Retention Tips | Tips made with hydrophobic polymer minimize liquid adhesion, ensuring accurate and precise dispensing of small volumes and reducing sample loss [52] [53]. |
| UNG-containing Master Mix | Enzymatic system that destroys carryover amplicons from previous PCR reactions, providing a chemical barrier to contamination [19] [13]. |
| Bleach (Sodium Hypochlorite) | Effective nucleic acid degrading agent for surface decontamination (use at 10% dilution). Must be made fresh frequently [19] [13]. |
| 70% Ethanol | Used for general surface decontamination and to wipe down equipment after bleach treatment to prevent corrosion [19] [17]. |
| Aliquoted, High-Purity Reagents | Storing reagents in single-use aliquots minimizes repeated exposure to potential contaminants and prevents the ruin of entire stocks [17]. |
The decision to invest in filter pipette tips is not a simple binary choice but a strategic calculation. The higher upfront cost of quality filter tips must be weighed against the substantial, yet often hidden, costs of contamination events—including wasted reagents, lost time, damaged equipment, and compromised scientific integrity. By adopting a tiered, application-specific protocol as outlined in this document, laboratories can strategically allocate their resources. This approach ensures robust contamination control where it is most critical, while achieving significant cost savings where the risk is low. In modern bioscience, where reproducibility is paramount, such a calculated investment in prevention is not merely an expense, but a fundamental pillar of quality assurance.
In molecular biology, the extreme sensitivity of the polymerase chain reaction (PCR) is a double-edged sword. While it enables the detection of minute amounts of nucleic acids, this very characteristic makes the technique exceptionally vulnerable to contamination, directly threatening the reproducibility and reliability of experimental data. Contaminating nucleic acids, often from previous amplification products (amplicons) or cross-sample contamination, can serve as unintended templates, leading to false-positive results and erroneous data interpretation [22] [19].
The integrity of PCR-based research and diagnostics hinges on effective contamination control. A single aerosol, a microscopic droplet generated during pipetting, can contain thousands of amplified DNA sequences, capable of compromising subsequent reactions [19]. In the context of a broader thesis on filter tips for preventing PCR aerosol contamination, this application note details how integrating physical barriers like filter tips within a comprehensive contamination control strategy is not merely a best practice but a fundamental requirement for ensuring data quality and reproducibility across laboratories.
The Data: Contamination Control and Reproducibility
The critical need for robust contamination control is reflected in both market trends and interlaboratory studies. The data demonstrates a clear industry shift towards contamination prevention and quantifies the impact of standardization on experimental consistency.
Table 1: PCR Contamination Control Market and Product Data
| Aspect | Metric | Significance |
|---|---|---|
| Market Valuation (2024) | USD 1.42 Billion [55] | Indicates substantial investment and recognition of the importance of contamination control products. |
| Projected Market Value (2033) | USD 2.51 Billion [55] | Reflects anticipated growth and continued prioritization of contamination control. |
| Dominant Product Type | Filter Tips (75% of PCR pipette tip market volume) [56] | Highlights filter tips as the established standard for preventing aerosol-based contamination. |
| Reported Error Rate Reduction | Up to 20% reduction with automated filter tips [57] | Demonstrates the tangible impact of specialized tips on data accuracy. |
Interlaboratory studies provide direct evidence of how methodological choices, including contamination control, affect reproducibility. A multi-lab qPCR study investigating standard reference material (SRM 2917) found that using a common, reliable calibrant and standardized protocols significantly improved the precision and comparability of measurements across 14 different laboratories [58]. This underscores that consistency in reagents and methods, which inherently includes contamination control practices, is a cornerstone of reproducible data.
Furthermore, the fNIRS Reproducibility Study Hub (FRESH) initiative, which involved 38 independent research teams analyzing the same datasets, revealed that agreement on results was higher for group-level analyses but notably lower at the individual level [59]. This variability was largely attributed to differences in how data quality was managed and how poor-quality data was handled, drawing a parallel to the PCR workflow where contamination is a primary data quality issue. The study concluded that clearer methodological and reporting standards are key to enhancing reproducibility [59].
Experimental Protocols for Contamination Control
Implementing a rigorous contamination control protocol is essential. The following sections provide detailed methodologies for standard practices and for quantifying contamination levels.
Comprehensive Laboratory Workflow Protocol
This protocol establishes a foundational framework for preventing contamination in PCR setup [22] [19].
3.1.1 Principle: To prevent carryover contamination of amplified DNA products and cross-contamination of samples by instituting physical separation of workspaces, using dedicated equipment, and employing consumables with built-in barriers.
3.1.2 Reagents and Equipment:
- Filter Tips: Aerosol-resistant pipette tips for all liquid handling steps.
- Laboratory Bleach Solution: Freshly diluted 10% sodium hypochlorite for surface decontamination.
- Ethanol (70%): For general surface cleaning.
- UNG (Uracil-N-Glycosylase) Enzyme: Optional, for use in qPCR master mixes to degrade carryover contamination from uracil-containing amplicons [19].
- Dedicated Micropipettes: Separate sets for pre- and post-amplification areas.
- Personal Protective Equipment (PPE): Dedicated lab coats and gloves for each area.
3.1.3 Procedure:
- Establish Separate Work Areas: Designate physically separated rooms or spaces for:
- Enforce Unidirectional Workflow: Personnel must move from the pre-amplification areas (reagent and sample prep) to the post-amplification area. Do not return to pre-amplification areas on the same day without a complete change of clothing and decontamination shower [19].
- Implement Surface Decontamination:
- Before and after work, clean all work surfaces, micropipettes, centrifuges, and vortexers with 70% ethanol.
- Following any spill, and for regular deep cleaning, use a freshly prepared 10% bleach solution. Allow it to remain on the surface for 10-15 minutes before wiping with de-ionized water [19].
- Utilize Contamination-Control Consumables:
- Include Critical Controls:
- No Template Control (NTC): Contains all PCR reaction components (master mix, primers, water) except for the template DNA. This control is essential for detecting DNA contamination in the reagents or environment [19].
Protocol for Quantifying Contamination via No Template Controls (NTCs)
This procedure details how to use NTCs to monitor and troubleshoot contamination in real-time qPCR experiments [19].
3.2.1 Principle: The NTC is included in every qPCR run to monitor for amplification caused by contaminating DNA. Amplification in the NTC indicates a failure in contamination control protocols.
3.2.2 Procedure:
- Prepare the NTC reaction mix in the Reagent Preparation Area. It should be identical to the test reactions but use nuclease-free water instead of template DNA.
- Load the NTC onto the qPCR plate alongside experimental samples and positive controls.
- Run the full qPCR amplification protocol.
- Analyze the Results:
- Pass: No amplification curve is detected in the NTC wells.
- Investigate: A clear amplification curve in the NTC well indicates contamination.
- If all NTCs show amplification at a similar Ct value, the contamination likely originates from a contaminated reagent (e.g., master mix or primers) [19].
- If only sporadic NTCs show amplification with variable Ct values, the contamination is likely from random aerosol contamination in the lab environment or during pipetting [19].
3.2.3 Troubleshooting:
- If contamination is detected: Discard all suspected reagents and consumables (e.g., opened tip boxes). Decontaminate workspaces with 10% bleach and clean equipment. Use fresh aliquots of reagents and new consumables to repeat the experiment [22].
- For persistent contamination: Consider incorporating UNG enzyme into the qPCR master mix. This enzyme enzymatically degrades any uracil-containing carryover amplicons before the thermal cycling begins [19].
Workflow Visualization
The following diagram illustrates the logical workflow for preventing and managing PCR contamination, integrating physical controls, consumables, and procedural steps.
The Scientist's Toolkit: Essential Research Reagent Solutions
Table 2: Key Reagents and Consumables for Effective PCR Contamination Control
| Item | Function/Benefit |
|---|---|
| Aerosol-Resistant Filter Tips | Acts as a physical barrier to prevent aerosols from entering and contaminating the pipette shaft, a major source of cross-contamination [22] [57]. |
| UNG (Uracil-N-Glycosylase) | Enzyme used in qPCR master mixes to selectively degrade carryover contamination from previous uracil-containing amplification products, preventing re-amplification [19]. |
| Molecular Biology Grade Water | Nuclease-free, sterile water used for preparing reagents and NTCs to ensure no exogenous nucleic acids are introduced. |
| Bleach (Sodium Hypochlorite) | Effective chemical decontaminant for destroying DNA on work surfaces and equipment; requires fresh preparation (10% dilution) for optimal activity [19]. |
| Aliquoted Reagents | Dividing master mixes, primers, and enzymes into single-use volumes minimizes the risk of contaminating an entire stock solution and ensures consistency across experiments [22]. |
| No Template Control (NTC) | A critical quality control reaction containing all components except template DNA, used to monitor the presence of contamination in the reagents or environment [19]. |
In the context of PCR aerosol contamination research, the qualification of filter pipette tips is not a mere formality but a critical necessity. Unseen threats like aerosol contamination and liquid carryover can silently sabotage experimental results, leading to false positives/negatives and compromising data integrity [2]. Filter tips act as the first line of defense by blocking aerosols and liquids from entering the pipette barrel, which is paramount for protecting sensitive experiments such as qPCR and RNA/DNA work from enzymatic or biological interference [2]. The transition of a molecular assay from a research use only (RUO) status to a validated clinical research (CR) assay demands rigorous control of all pre-analytical factors, including consumables like pipette tips [60]. This document outlines the essential validation protocols to ensure your filter tips meet the required standards for performance and reliability, providing a shield for both your samples and your instrumentation [2].
The Scientist's Toolkit: Research Reagent Solutions
The following reagents and materials are essential for executing the validation protocols described in this application note.
Table 1: Key Reagents and Materials for Filter Tip Validation
| Item Name | Function in Validation |
|---|---|
| Aerosol Challenge Solution (e.g., concentrated DNA/RNA, fluorescent dye, methylene blue) | Serves as a challenge agent to test the filter's ability to block aerosols and particles of specific sizes [2] [3]. |
| RNase/DNase Testing Kits (e.g., RNaseAlert, fluorometric assays) | Validates that the filter tips are free of enzymatic contaminants that could degrade sensitive nucleic acid samples [2]. |
| qPCR/qRT-PCR Master Mix | Used in carryover contamination assays to detect the presence of amplifiable contaminants via amplification curves [2] [60]. |
| Limulus Amebocyte Lysate (LAL) | Tests for the presence of endotoxins, which is critical for cell culture and in vivo applications [2]. |
| Volatile/Corrosive Reagents (e.g., chloroform, phenol, acids) | Used to assess the filter's chemical resistance and its ability to protect the pipette's internal components from corrosion [2] [11]. |
Aerosol Containment and Filtration Efficiency Protocol
Experimental Rationale
The primary function of a filter tip is to prevent aerosol contamination. During routine pipetting, rapid liquid dispensing can generate microscopic aerosols (<10 µm), which can easily travel through non-filtered tips and contaminate the pipette and subsequent samples [2]. This protocol quantitatively assesses the tip's ability to contain these aerosols.
Materials and Equipment
- Filter tips and non-filtered tips (for comparison)
- Positive displacement pipette (optional, for comparison) [3]
- Aerosol challenge solution (e.g., 0.1% fluorescein dye, methylene blue, or a solution containing a high titer of a harmless bacteriophage like MS2)
- Fluorometer or spectrophotometer (if using fluorescent/colored dye)
- Plaque assay reagents (if using bacteriophage)
- Real-time PCR system (if using DNA/RNA solution)
Step-by-Step Methodology
- Setup: Load a pipette with both the test filter tip and a positive control (non-filtered tip).
- Challenge: Repeatedly aspirate and dispense the aerosol challenge solution into an empty, clean tube to generate aerosols.
- Contamination Check: Without changing the tip, pipette a clean, pure solvent (e.g., nuclease-free water) into a fresh tube. This step tests if contaminants trapped in the tip or pipette barrel are carried over.
- Detection:
- Analysis: Compare the amount of contaminant detected when using filter tips versus non-filtered tips.
Data Interpretation and Validation Criteria
High-quality filter tips should demonstrate ≥99% aerosol retention of 0.2–5 µm particles [2]. A pass criterion is the absence of detectable contamination in the solvent sample, or a reduction in contamination by at least 3 logs (99.9%) compared to the non-filtered control.
Aerosol Test Workflow: This diagram outlines the process for testing a filter tip's aerosol containment efficiency against a non-filtered control.
Validation of Biochemical Purity for Sensitive Applications
Experimental Rationale
For molecular biology workflows like PCR and next-generation sequencing (NGS), it is imperative that filter tips do not introduce enzymatic contaminants (RNases, DNases) or compounds that can inhibit enzymatic reactions [2]. Furthermore, for cell culture, tips must be endotoxin-free.
Materials and Equipment
- Certified nuclease-free water
- RNase/DNase testing kit (e.g., RNaseAlert Lab Test Kit, Qubit dsDNA HS Assay Kit for DNase)
- Endotoxin testing kit (LAL assay)
- qPCR thermal cycler and reagents
- Fluorometer
Step-by-Step Methodology
- Nuclease Testing:
- a. Flush nuclease-free water through the filter tip into a collection tube.
- b. Use the collected eluate in a fluorometric nuclease activity assay according to the manufacturer's instructions.
- c. Incubate and measure fluorescence/absorbance.
- PCR Inhibition Testing:
- a. Use the eluate collected in step 1a as the water component in a sensitive qPCR reaction with a known copy number of a control DNA template.
- b. Run the qPCR and compare the Cycle of Quantification (Cq) and amplification efficiency to a control reaction using certified nuclease-free water.
- Endotoxin Testing:
- a. Flush endotoxin-free water through the filter tip.
- b. Use the eluate in a LAL assay according to the manufacturer's protocol.
Data Interpretation and Validation Criteria
- Nuclease: The eluate should show no significant nuclease activity above background. Residual nuclease levels should be <0.001 pg/µL [2].
- PCR Inhibition: The Cq value for the test eluate should be within 0.5 cycles of the control, with a PCR efficiency between 90-110% [2].
- Endotoxin: Endotoxin levels should be below the threshold for the application, typically <0.001 EU/mL for cell culture [2].
Table 2: Acceptance Criteria for Biochemical Purity Tests
| Test Type | Method | Acceptance Criterion |
|---|---|---|
| Nuclease Contamination | Fluorometric assay (e.g., RNaseAlert) | Residual activity < 0.001 pg/µL [2] |
| PCR Inhibition | Spike-and-recovery qPCR test | 95–105% recovery rate for Taq polymerase [2] |
| Endotoxin Level | Limulus Amebocyte Lysate (LAL) assay | < 0.001 EU/mL [2] |
Physical Performance and Compatibility Assessment
Experimental Rationale
A filter tip must provide a perfect seal with the pipette shaft to ensure volumetric accuracy. Furthermore, the filter itself must not introduce significant resistance that could affect pipetting performance, especially with viscous liquids [2]. This protocol assesses these physical characteristics.
Materials and Equipment
- Gravimetric measurement setup (analytical balance, beaker of water, evaporation trap)
- Test pipettes (multiple brands if testing universal tips)
- Liquids of different viscosities (e.g., nuclease-free water, 50% glycerol)
Step-by-Step Methodology
- Gravimetric Analysis:
- a. Follow a standard gravimetric protocol (e.g., ISO 8655) for the pipette and tip combination.
- b. Perform multiple measurements at various volumes (e.g., 10%, 50%, 100% of tip capacity) using both water and a viscous liquid.
- c. Calculate the accuracy (deviation from the true volume) and precision (coefficient of variation, CV).
- Tip Seal and Ejection Force:
- a. Qualitatively assess the force required to seat the tip on the pipette and to eject it.
- b. Tips should seal securely without excessive force and eject smoothly.
Data Interpretation and Validation Criteria
The pipette-tip system should meet the manufacturer's specifications for accuracy and precision. A common benchmark is an accuracy within ±1.5% and a precision (CV) of <0.5% for a 10 µL volume [2]. There should be no visible leakage or failure during pipetting.
Physical Test Workflow: This diagram shows the process for validating the physical performance of filter tips, including gravimetric analysis and seal assessment.
The following table synthesizes the key experiments, their methodologies, and the quantitative pass/fail criteria essential for qualifying filter tips in a regulated research environment.
Table 3: Comprehensive Summary of Filter Tip Validation Protocols
| Validation Aspect | Core Experimental Method | Key Performance Indicator (KPI) & Acceptance Criteria |
|---|---|---|
| Aerosol Containment | Aerosol challenge with dye, phage, or nucleic acids followed by detection in a clean solvent transfer [2] [3]. | ≥99% retention of 0.2–5 µm particles; no detectable amplification in qPCR from solvent [2]. |
| Biochemical Purity (Nucleases) | Elution of tips with nuclease-free water followed by fluorometric activity assay (e.g., RNaseAlert) [2]. | Residual RNase/DNase activity < 0.001 pg/µL [2]. |
| Biochemical Purity (PCR Inhibition) | Use of tip eluate as water in a sensitive qPCR reaction with a control template [2]. | 95–105% recovery rate; Cq delay of ≤ 0.5 cycles compared to control [2]. |
| Biochemical Purity (Endotoxins) | Elution of tips with endotoxin-free water followed by LAL assay [2]. | Endotoxin level < 0.001 EU/mL [2]. |
| Physical Performance (Accuracy) | Gravimetric analysis with water and viscous liquids at multiple volumes [2]. | Accuracy within ±1.5% of the target volume [2]. |
| Physical Performance (Precision) | Gravimetric analysis with multiple replicates at a target volume [2]. | Coefficient of Variation (CV) < 0.5% for a 10 µL volume [2]. |
Conclusion
Aerosol barrier filter tips are a non-negotiable component of modern, rigorous molecular biology, acting as a primary defense against one of the most pervasive threats to PCR data integrity. Their proper implementation, as part of a holistic strategy that includes sound laboratory practice and workflow separation, is fundamental to achieving reproducible and reliable results. The future of biomedical research, particularly in sensitive areas like low-biomass microbiome studies, clinical diagnostics, and single-cell analysis, hinges on such meticulous attention to contamination control. As PCR applications continue to evolve towards even greater sensitivity, the role of validated, high-purity filter tips will only grow in importance, making their informed selection and use a critical competency for every research and clinical laboratory.
References
- 1. Preventing Contamination in Pipetting [https://www.labmanager.com/preventing-contamination-in-pipetting-5195]
- 2. Why use filter pipette tips? A Comprehensive Guide to ... [https://www.genfollower.com/why-use-filter-pipette-tips-a-comprehensive-guide-to-filter-pipette-tips/]
- 3. Contamination-pipetting: relative efficiency of filter tips ... [https://www.nature.com/articles/nmeth887]
- 4. Selecting the Right Pipette Tip [https://www.thermofisher.com/us/en/home/life-science/lab-plasticware-supplies/lab-plasticware-supplies-learning-center/lab-plasticware-supplies-resource-library/fundamentals-of-pipetting/liquid-handling-selection/selecting-the-right-pipette-tip.html]
- 5. Filter Pipette Tips [https://globescientific.com/collections/filter-pipette-tips?srsltid=AfmBOoohP_37gP9ckGf-EwJsT_RGxsmCsrcxaifoMF4DdqTzWG5Ob9JR]
- 6. Unmasking Aerosol Contamination: Safeguarding PCR ... [https://www.sbsgenetech.com/blog/unmasking-aerosol-contamination-safeguarding-pcr-experiment-integrity?srsltid=AfmBOooCxzFoko_UhmrpfTkwIGralBqEJpNOS3OkPT80qMcjBT9aLNfy]
- 7. Preventing False Positive and False Negative PCR Results [https://www.clinicallab.com/preventing-false-positive-and-false-negative-pcr-results-26261]
- 8. Preventing Aerosol Production | Office of Research Safety [https://researchsafety.gwu.edu/preventing-aerosol-production]
- 9. A review of strategies and their effectiveness in reducing ... [https://pmc.ncbi.nlm.nih.gov/articles/PMC9192357/]
- 10. Troubleshooting your PCR [https://www.takarabio.com/learning-centers/pcr/faq/troubleshooting?srsltid=AfmBOoopqQV7BIONUmjdNl0ukKwSxkgKRm-DpBoGAEF4w1IVkEdd_ytw]
- 11. How to Choose the Right Pipette Tips for your Experiment [https://bitesizebio.com/4074/the-pcr-controls-you-must-use/]
- 12. PCR tips and tricks (incl. master mix calculations) | INTEGRA [https://www.integra-biosciences.com/united-states/en/blog/article/pcr-tips]
- 13. Preventing PCR Amplification Carryover Contamination in ... [https://www.annclinlabsci.org/content/34/4/389.long]
- 14. Could your PCR be affected by contamination? | IDT [https://www.idtdna.com/page/support-and-education/decoded-plus/could-your-pcr-be-affected-by-contamination/]
- 15. PCR Tips - Technical Support [https://www.jax.org/jax-mice-and-services/customer-support/technical-support/genotyping-resources/general-pcr-reminders-dos-and-donts]
- 16. Clean Up Your Act! How To Clean Up PCR Contamination [https://bitesizebio.com/20773/clean-up-your-act-how-to-clean-up-pcr-contamination/]
- 17. 10 Handy Tips to Help Keep Your PCRs Contamination Free [https://bitesizebio.com/23625/10-handy-tips-to-help-keep-your-pcrs-contamination-free/]
- 18. How to Avoid DNA Contamination: 10 Essential Tips [https://bento.bio/resources/bento-lab-advice/10-essential-tips-to-avoid-dna-contamination-during-extraction-and-amplification/]
- 19. Avoiding Contamination | Thermo Fisher Scientific - ES [https://www.thermofisher.com/us/en/home/life-science/pcr/real-time-pcr/real-time-pcr-learning-center/real-time-pcr-basics/good-laboratory-practice-avoid-contamination-qpcr-experiments.html]
- 20. PCR product contamination and how to deal with it [https://bento.bio/resources/bento-lab-advice/pcr-product-contamination-what-it-is-how-it-occurs-and-how-to-deal-with-it/]
- 21. Preventing cross-contamination [https://www.thermofisher.com/us/en/home/life-science/lab-plasticware-supplies/lab-plasticware-supplies-learning-center/lab-plasticware-supplies-resource-library/fundamentals-of-pipetting/proper-pipetting-techniques/preventing-cross-contamination.html]
- 22. How to prevent PCR contamination [https://www.minipcr.com/how-to-prevent-pcr-contamination/]
- 23. Precision Perfected: How Filter ... - AHN Biotechnologie GmbH Tips [https://ahn-bio.com/precision-perfected-how-filter-tips-enhance-lab-accuracy/]
- 24. Robotic filter tips, PP, racked, TipRack (refill system), BIO- ... [https://shop.brandtech.com/en/robotic-filter-tips-pp-racked-tiprack-refill-system-bio-certr-liquid-handling-quality-sterile-p9043.html]
- 25. How to Choose the Right Pipette Tips for Your Application [https://www.fishersci.com/us/en/science-social-hub/buying-guides/how-choose-right-pipette-tips-your-application.html]
- 26. Filter Tips vs Regular Tips: What's the Difference and When ... [https://pipettetips.com/blogs/blog/filter-tips-vs-regular-tips-whats-the-difference-and-when-should-you-use-them?srsltid=AfmBOoqaS-L9AbOahRV8fcyWyb8B3Oi76jY8y2JnPW9svXkqaIos716j]
- 27. How to avoid filter tips that disrupt PCR [https://www.selectscience.net/article/how-to-avoid-filter-tips-that-disrupt-pcr]
- 28. Sterile Filter Pipette Tips in the Real World: 5 Uses You'll ... [https://www.linkedin.com/pulse/sterile-filter-pipette-tips-real-world-5-uses-youll-1ksee]
- 29. Ultimate Guide to Robotic Pipette Tips 2025 [https://www.genfollower.com/ultimate-guide-to-robotic-pipette-tips-2025/]
- 30. The different types of pipette tips (and when to use them) [https://www.integra-biosciences.com/united-states/en/blog/article/different-types-pipette-tips]
- 31. The Devil in the Details: Contamination in a PCR Lab [https://www.rapidmicrobiology.com/news/the-devil-in-the-details-contamination-in-a-pcr-lab]
- 32. Optimizing PCR: Proven Tips and Troubleshooting Tricks [https://www.the-scientist.com/optimizing-pcr-proven-tips-and-troubleshooting-tricks-71660]
- 33. Best practices for molecular microbiology testing [https://www.sciencedirect.com/science/article/abs/pii/S0196439924000278]
- 34. Biosafety: Decontamination Methods for Laboratory Use [https://blink.ucsd.edu/safety/research-lab/biosafety/decontamination/index.html]
- 35. Filter Tips vs Regular Tips: What's the Difference and When ... [https://pipettetips.com/blogs/blog/filter-tips-vs-regular-tips-whats-the-difference-and-when-should-you-use-them?srsltid=AfmBOoqthTBBqwWHGNSPCzenlWF7l0nnfY8SiCNteTNLUBOob4dzl8ze]
- 36. How to find the right tip for your application and pipette [https://www.bioplastics.com/catalog2014/Infopages.aspx?c=2&subc=0]
- 37. Amplification of the No Template Control (NTC) [https://www.thermofisher.com/us/en/home/life-science/pcr/real-time-pcr/real-time-pcr-learning-center/real-time-pcr-basics/real-time-pcr-troubleshooting-tool/gene-expression-quantitation-troubleshooting/amplification-no-template-control.html]
- 38. PCR Aerosol Contamination: Causes, Consequences and ... [https://en.gempharmatech.com/content/details100648_3812859.html]
- 39. PCR Methods - Top Ten Strategies [https://www.thermofisher.com/us/en/home/life-science/cloning/cloning-learning-center/invitrogen-school-of-molecular-biology/pcr-education/pcr-reagents-enzymes/pcr-methods.html]
- 40. Filtered Pipette Tips in the Real World: 5 Uses ... [https://www.linkedin.com/pulse/filtered-pipette-tips-real-world-5-uses-youll-actually-kg7xe/]
- 41. Lab Horror Stories (and How to Prevent Them) [https://pipette.com/blog/lab-horror-stories?srsltid=AfmBOoq0Q-JKzto9nY_km7ixhZ_gxTHq-wgj0UPycRP3kbNOEx1PMgrE]
- 42. Forward vs Reverse Pipetting: Master Lab Techniques 2025 [https://niito.kz/pipettes/pipetting-techniques-forward-reverse/]
- 43. Safety in Handling Contaminated Samples [https://www.labmanager.com/safety-in-handling-contaminated-samples-essential-protocols-for-laboratory-integrity-34552]
- 44. 14 Comparing quantitative data between individuals [https://bookdown.org/pkaldunn/SRM-Textbook/BetweenQuantData.html]
- 45. A Practical Guide to Quantitative Data Analysis Methods ... [https://www.looppanel.com/blog/quantitative-data-analysis-methods]
- 46. Exploring innovations in antimicrobial protective mask filters [https://www.sciencedirect.com/science/article/abs/pii/S0001868625002465]
- 47. How Positive Displacement Pipettes Work: A Guide for ... [https://www.labmanager.com/how-positive-displacement-pipettes-work-3041]
- 48. Filtered vs Non-Filtered Pipette Tips [https://gmpplastic.com/blogs/useful-articles-on-lab-supplies-faq-section/filtered-vs-non-filtered-pipette-tips?srsltid=AfmBOopKRSVqR1gJl5uRM5SsgDRysHmIuvRxla9-Eb-kR8O0F6pAk9vB]
- 49. Contamination- pipetting : relative efficiency of filter to... tips compared [https://www.nature.com/articles/nmeth887?error=cookies_not_supported]
- 50. Recommendations for... | Thermo Fisher Scientific - ID Pipetting [https://www.thermofisher.com/id/en/home/life-science/lab-plasticware-supplies/lab-plasticware-supplies-learning-center/lab-plasticware-supplies-resource-library/fundamentals-of-pipetting/proper-pipetting-techniques/pipetting-recommendations-for-different-sample-types.html]
- 51. Comparison of Real Time Polymerase Chain Reaction and ... [https://pmc.ncbi.nlm.nih.gov/articles/PMC5076710/]
- 52. Purity Requirements, Low Retention, Aerosol Barrier Filters ... [https://www.ultident.com/blog/post/selecting-the-perfect-pipette-tip-purity-requirements-low-retention-aerosol-barrier-filters-universa]
- 53. How to Choose the Right Pipette Tips for your Experiment [https://biotix.com/how-to-choose-the-right-pipette-tips-for-your-experiment/]
- 54. Laboratory Consumables Procurement – 5 Proven Tips [https://kelabscience.com/laboratory-consumables-procurement-guide/]
- 55. PCR Contamination Control Products Market [https://dataintelo.com/report/pcr-contamination-control-products-market]
- 56. PCR Pipette Tips Analysis Report 2025 [https://www.archivemarketresearch.com/reports/pcr-pipette-tips-481451]
- 57. PCR Pipette Tips [https://www.linkedin.com/pulse/pcr-pipette-tips-propedge-realty-iruhe/]
- 58. Interlaboratory performance and quantitative PCR data ... [https://pmc.ncbi.nlm.nih.gov/articles/PMC9932931/]
- 59. fNIRS reproducibility varies with data quality, analysis ... [https://pmc.ncbi.nlm.nih.gov/articles/PMC12322209/]
- 60. Consensus guidelines for the validation of qRT-PCR assays in clinical research by the CardioRNA consortium - PMC [https://pmc.ncbi.nlm.nih.gov/articles/PMC8792405/]