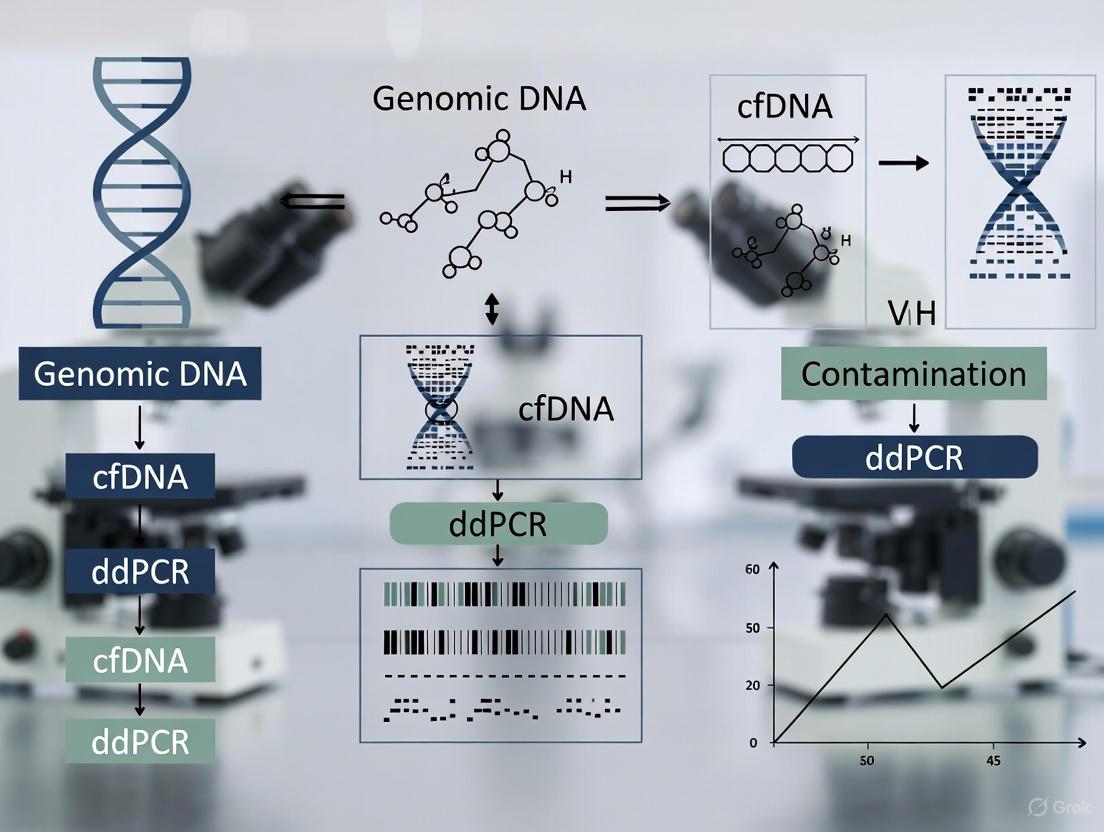
Eliminating Genomic DNA Contamination: A Comprehensive Guide to Purity in cfDNA ddPCR Analysis
Accurate quantification of circulating cell-free DNA (cfDNA) by droplet digital PCR (ddPCR) is critically dependent on the effective removal of contaminating genomic DNA (gDNA).
Eliminating Genomic DNA Contamination: A Comprehensive Guide to Purity in cfDNA ddPCR Analysis
Abstract
Accurate quantification of circulating cell-free DNA (cfDNA) by droplet digital PCR (ddPCR) is critically dependent on the effective removal of contaminating genomic DNA (gDNA). This contamination poses a significant challenge in liquid biopsy applications, particularly for cancer detection and non-invasive prenatal testing, where it can lead to false positives and compromised sensitivity. This article provides a complete framework for researchers and drug development professionals to understand, prevent, identify, and resolve gDNA contamination throughout the cfDNA workflow. We synthesize foundational knowledge on cfDNA characteristics with robust methodological protocols for extraction, advanced strategies for ddPCR assay optimization and troubleshooting, and rigorous validation techniques. By establishing best practices from sample collection to data analysis, this guide empowers scientists to achieve the high-purity cfDNA necessary for reliable and impactful ddPCR results in clinical and translational research.
The gDNA Contamination Challenge: Understanding the Threat to cfDNA Purity
The Core Problem: How gDNA Contamination Compromises cfDNA Analysis
Genomic DNA (gDNA) contamination is a critical preanalytical challenge in cell-free DNA (cfDNA) research. This contamination originates from the lysis of white blood cells and other nucleated cells during sample collection, processing, or storage. The issue is particularly acute for ddPCR applications because cfDNA is naturally short and fragmented (typically ~160-170 bp), whereas gDNA consists of long, high molecular weight (HMW) strands [1] [2].
When present, this contaminating gDNA introduces non-informational background DNA that masks the true biological signal in two primary ways:
- Absolute Quantification Bias: ddPCR performs absolute quantification by counting DNA molecules. Contaminating gDNA molecules are co-partitioned with true cfDNA molecules, leading to an overestimation of the total DNA concentration and a dilution effect on rare mutant alleles [1].
- Fragment Size Analysis Distortion: The biological information within cfDNA is often carried by its fragmentation pattern, which is influenced by the cell of origin's chromatin structure. gDNA contamination, with its random and longer fragment sizes, obliterates these subtle, informative patterns [1].
Detecting gDNA Contamination: Methods and Protocols
qPCR-Based Contamination Score
A convenient method for screening cfDNA samples uses a multiplexed qPCR assay targeting multi-copy genomic regions to calculate a contamination score [1].
Principle: The assay uses two primer pairs that generate amplicons of significantly different lengths (e.g., 106 bp and 612 bp) from the same multi-copy gene. The short amplicon (106 bp) will efficiently amplify both cfDNA and contaminating gDNA. The long amplicon (612 bp) will primarily amplify only the longer, intact gDNA fragments. The ratio of the quantification cycle (Cq) values between the long and short amplicons provides a sensitive indicator of HMW DNA contamination [1].
Experimental Protocol [1]:
- Primer/Probe Design: Design two non-overlapping primer pairs for a long non-coding RNA gene present on multiple chromosomes.
- Short amplicon: 106 bp (FAM-labeled probe)
- Long amplicon: 612 bp (HEX-labeled probe)
- qPCR Reaction Setup:
- Run reactions in monoplex format to avoid amplification efficiency imbalances.
- Each 25 µL reaction contains:
- 1X HS Taq DNA mix
- 5 pmol of each primer
- Probe (FAM for short, HEX for long)
- 1 ng of sample DNA
- Amplification Program:
- 95°C for 3 minutes
- 40 cycles of: 95°C for 30 s, 56°C for 30 s, 72°C for 30 s
- Data Analysis:
- Perform ∆∆Cq analysis using software (e.g., BioRad CFX Manager).
- Select the 106 bp amplicon as the reference gene.
- Calculate the contamination percentage as: Relative Normalized Expression × 50% (where 50% comes from a control sample).
Electrophoretic Quality Control
Automated electrophoresis systems (e.g., Agilent TapeStation) provide a direct visualization of the cfDNA fragment size distribution. A pure cfDNA sample shows a dominant peak around 160-170 bp. The presence of a significant fraction of DNA above 500 bp is a clear indicator of HMW gDNA contamination [1] [2].
Table 1: Comparison of gDNA Contamination Detection Methods
| Method | Principle | Key Output | Advantages | Disadvantages |
|---|---|---|---|---|
| qPCR Contamination Score [1] | Ratio of long to short amplicon amplification in multi-copy genes | Contamination percentage | High sensitivity; quantitative; cost-effective for routine screening | Requires specific assay design and validation |
| Automated Electrophoresis [1] [2] | Physical separation and sizing of DNA fragments | Electropherogram with peak sizes | Direct visualization of fragment profile; no special assays needed | Less sensitive to low-level contamination; semi-quantitative |
Experimental Workflow for Contamination Assessment
The following diagram illustrates the logical workflow for identifying and addressing gDNA contamination in a cfDNA sample prior to ddPCR analysis.
Frequently Asked Questions (FAQs)
Q1: What are the main sources of gDNA contamination in my cfDNA samples? The primary source is the lysis of blood cells (especially leukocytes) due to improper sample handling. This can occur if blood samples are not processed in a timely manner (within a few hours of draw), if they are subjected to excessive force during transport, or if they are frozen as whole blood instead of plasma. Using the wrong blood collection tubes can also contribute to cellular degradation [1] [2].
Q2: My qPCR contamination score indicates 20% HMW DNA. Should I proceed with ddPCR? A contamination level of 20% is significant and will likely skew your ddPCR results, particularly for applications requiring high sensitivity like rare mutation detection or precise fragment size analysis. It is strongly recommended to re-extract the sample from a new plasma aliquot, if available, after reviewing and correcting the pre-analytical workflow. Proceeding may lead to inaccurate absolute quantification [1].
Q3: Which cfDNA extraction method is best for minimizing gDNA contamination? Studies have shown that kits specifically designed for circulating nucleic acids, such as the QIAamp Circulating Nucleic Acid Kit, demonstrate high recovery rates and effective isolation of the true cfDNA fraction without significant HMW DNA contamination. The key is to use a method that selectively captures the small, fragmented DNA typical of cfDNA [2].
Q4: Can I use a crude cell lysate directly in ddPCR to avoid DNA extraction losses? While crude lysis methods have been developed for limited cell samples to bypass extraction and prevent target loss, they require a dedicated viscosity breakdown step. Without this, the intact cellular components increase viscosity, impair droplet generation, and can lead to inaccurate amplification and quantification. This approach is not generally recommended for standard plasma cfDNA analysis where the target is already in a cell-free state [3].
The Scientist's Toolkit: Key Research Reagent Solutions
Table 2: Essential Reagents and Kits for Managing gDNA Contamination
| Item | Function | Example Use Case |
|---|---|---|
| QIAamp Circulating Nucleic Acid Kit [2] | Efficient extraction of short-fragment cfDNA with high recovery and minimal HMW DNA co-purification. | Standardized plasma cfDNA preparation for sensitive ddPCR assays in liquid biopsy. |
| Agilent TapeStation with High Sensitivity D1000 Kit [1] [2] | Quality control system for objective assessment of cfDNA fragment size distribution and detection of HMW gDNA contamination. | Mandatory pre-ddPCR check to ensure sample integrity and avoid biased results. |
| Multi-copy Gene qPCR Assay [1] | A specially designed qPCR system to calculate a contamination score by comparing amplification of short vs. long amplicons. | Quantitative screening of cfDNA sample quality when electrophoresis is inconclusive. |
| Cell-Free DNA Blood Collection Tubes [1] | Specialized tubes containing preservatives that stabilize blood cells, preventing lysis and gDNA release during sample transport and storage. | Preserving sample quality in multi-center trials or when immediate plasma processing is not feasible. |
Frequently Asked Questions (FAQs)
1. What are the fundamental size differences between cfDNA and gDNA contamination? Cell-free DNA (cfDNA) consists of short, fragmented molecules typically circulating in fragments between 120–220 base pairs (bp), with a dominant peak at approximately 167 bp. This pattern corresponds to DNA wrapped around a single nucleosome plus a short linker region. In contrast, high-molecular-weight genomic DNA (gDNA) contamination consists of much longer fragments, often tens of thousands of base pairs long, resulting from the lysis of intact cells in a sample [4] [5].
2. Why is gDNA contamination problematic in cfDNA ddPCR analysis? gDNA contamination can confound downstream analyses in several ways:
- Inaccurate Quantification: It can lead to an overestimation of the total DNA concentration, as standard fluorometric methods cannot distinguish between cfDNA and gDNA [4].
- Distorted Fragment Profiles: The presence of long gDNA fragments can significantly alter the true fragment size distribution of a cfDNA sample, masking important biological signals. For instance, a key characteristic of circulating tumor DNA (ctDNA) is its higher fragmentation compared to non-neoplastic tissue-derived cfDNA [4] [5].
- Enzymatic Inhibition: gDNA contamination may also indicate the presence of enzymatic inhibitors that can undermine the efficiency of the ddPCR reaction [4].
3. How can I assess the fragment size distribution and quality of my cfDNA sample? A multiplex droplet digital PCR (ddPCR) assay can be designed to simultaneously quantify absolute cfDNA concentration and deduce its fragment size distribution in a single well. This method involves targeting multiple genomic loci with amplicons spanning different fragment size ranges (e.g., 73–165 bp, 166–253 bp, and >253 bp). The ratio of short to medium-sized fragments provides a quantitative measure of fragmentation, which correlates well with capillary electrophoresis and high-throughput sequencing data [4].
4. What are the best practices to prevent gDNA contamination during cfDNA sample preparation? Preventing contamination requires stringent laboratory practices:
- Physical Separation: Establish dedicated pre- and post-amplification areas with separate equipment, lab coats, and consumables [6] [7].
- Meticulous Technique: Use aerosol-resistant filter tips, change gloves frequently, and open tubes carefully to minimize aerosol formation [7].
- Reagent Management: Aliquot all reagents to avoid repeated freeze-thaw cycles and prevent cross-contamination of stock solutions [6].
- Rigorous Controls: Always include negative controls (NTCs) to monitor for contamination [7].
Troubleshooting Guide: Identifying and Managing gDNA Contamination
Problem: Suspected gDNA contamination in cfDNA sample, leading to aberrant quantification or fragment analysis.
| Symptom | Possible Cause | Recommended Action | Underlying Principle |
|---|---|---|---|
| High DNA yield from fluorometry but low signal in ddPCR. | gDNA contamination and/or presence of PCR inhibitors. | Implement a ddPCR QC assay to quantify amplifiable DNA and assess size distribution [4]. | Fluorometry detects all double-stranded DNA but cannot distinguish between amplifiable cfDNA and non-amplifiable/long gDNA. |
| Abnormal fragment size profile with a significant shift towards longer fragments. | Significant gDNA contamination from lysed cells during sample processing. | Optimize blood processing and plasma separation protocols; use gentle extraction methods designed for cfDNA [4]. | The natural cfDNA size profile has a peak at ~167 bp; large DNA fragments indicate intact cells were lysed. |
| Amplification in negative template control (NTC) wells. | Contamination of reagents or labware with amplicons or DNA. | Decontaminate surfaces with 10% bleach; use UNG enzyme in the reaction mix; replace reagents with new aliquots [6] [7]. | Aerosolized PCR products are a major contamination source. UNG enzymatically degrades uracil-containing carryover amplicons. |
Experimental Protocols & Data Presentation
Protocol 1: Multiplex ddPCR for cfDNA Quality Control and Size Profiling
This protocol is adapted from a study designed to evaluate the quantity, quality, and size distribution of cfDNA [4].
1. Principle: A single multiplex ddPCR reaction is configured with multiple probe-based assays. One assay targets a stable diploid single-copy locus (e.g., STAT6) for absolute quantification of haploid genome equivalents. Concurrently, a set of assays promiscuously target a gene family (e.g., Olfactory Receptor (OR) genes) with the same primer set but different probes, generating amplicons of distinct lengths (e.g., 73–165 bp, 166–253 bp, and >253 bp) to determine fragment size distribution.
2. Reagents:
- ddPCR Supermix for Probes (No dUTP)
- Primers and FAM/HEX-labeled probes for the diploid reference locus
- Primers and FAM/HEX-labeled probes for the multi-size OR targets
- Nuclease-free water
- cfDNA sample
3. Workflow:
4. Data Analysis:
- Absolute Quantification: The concentration of cfDNA (in copies/μL) is calculated from the count of positive droplets for the diploid reference locus (STAT6) using Poisson statistics.
- Size Distribution: The ratios between the counts of positive droplets for the different OR fragment sizes (short/medium, long/total) are calculated. A low short/medium ratio or a high proportion of long fragments may indicate gDNA contamination.
Quantitative Data on cfDNA Fragment Sizes
The following table summarizes key quantitative differences in fragment characteristics, which are crucial for identifying the presence of gDNA or ctDNA [4] [5].
| DNA Type | Typical Dominant Peak (bp) | Common Size Range | Characteristic Fragmentomics Features |
|---|---|---|---|
| gDNA Contamination | >10,000 (if intact) | >1,000 bp to >50,000 bp [8] | High molecular weight; appears as a high molecular weight smear or band on gel electrophoresis. |
| Normal cfDNA | ~167 bp | 120–220 bp, multiples of nucleosomal DNA [4] [5] | Represents DNA protected by nucleosomes; cleaved in linker regions. |
| Circulating Tumor DNA (ctDNA) | ~143 bp [5] | Often shorter than normal cfDNA | Higher fragmentation; can be enriched by selecting for shorter fragments (e.g., 90–150 bp) [5]. |
| Fetal-derived cfDNA | ~146 bp [5] | Often shorter than maternal cfDNA | Higher fragmentation; can be enriched by selecting for shorter fragments [5]. |
The Scientist's Toolkit: Key Research Reagent Solutions
| Item | Function in cfDNA/ddPCR Workflow |
|---|---|
| Droplet Digital PCR (ddPCR) System | Provides absolute quantification of DNA molecules without a standard curve and is highly sensitive for detecting rare variants in a background of wild-type DNA [4] [9]. |
| Multiplex ddPCR Assay for QC | A custom assay targeting a diploid locus for concentration and multiple fragment sizes for distribution. Used to identify suboptimal samples and aberrant cfDNA size distributions [4]. |
| cfDNA-Specific Extraction Kits | Silica-membrane or magnetic bead-based kits designed to purify small DNA fragments from plasma while excluding high-molecular-weight gDNA. |
| Aerosol-Resistant Filter Pipette Tips | Critical for preventing cross-contamination between samples by trapping aerosols within the tip [7]. |
| UNG (Uracil-N-Glycosylase) | An enzyme included in some master mixes to degrade carryover contamination from previous PCR reactions containing uracil, preventing re-amplification [7]. |
| Bleach Solution (10%) | A potent decontaminant for destroying DNA on laboratory surfaces and equipment. Fresh dilutions should be made weekly [6] [7]. |
FAQs on Genomic DNA Contamination in cfDNA Workflows
gDNA contamination primarily originates from the lysis of white blood cells (WBCs) during blood sample collection and handling. Key sources include:
- Blood Collection: Using inappropriate needle size, prolonged tourniquet application, or excessive agitation of blood tubes, all of which can damage WBCs and release genomic DNA [10].
- Serum vs. Plasma: Serum is not recommended for cfDNA analysis, as the clotting process can cause WBC lysis, leading to significantly higher gDNA contamination compared to plasma [10].
- Delayed Processing: Failure to isolate plasma from whole blood in a timely manner. For blood collected in standard EDTA tubes, plasma should be separated within 6 hours to prevent cell lysis [10].
How can I quickly assess if my cfDNA sample is contaminated with gDNA?
While specialized ddPCR assays exist for detailed fragment analysis [11], a simple initial quality control can be performed using a fragment analyzer. Pure, high-quality cfDNA should show a major peak at approximately 150-170 base pairs, corresponding to mononucleosomal DNA. A significant smear or a peak at higher molecular weights (e.g., >1,000 bp) indicates substantial gDNA contamination [10].
My ddPCR shows positive signals in my non-template controls (NTCs). Is this gDNA contamination?
Not necessarily. Positive signals in NTCs are more likely due to amplification of non-specific products (primer-dimers) or cross-contamination from PCR amplicons or contaminated reagents. True gDNA contamination would originate from the patient sample itself. To troubleshoot NTC positives, check probe and primer specificity, ensure proper preparation of reaction mixes in a clean environment, and use ultrapure, certified reagents [12] [13].
Troubleshooting Guide: Preventing and Managing gDNA Contamination
Table: Common Issues and Corrective Actions for gDNA Contamination
| Problem Juncture | Problem Identification | Corrective Action |
|---|---|---|
| Blood Collection & Processing | High gDNA background in all samples from a specific batch. | Use plasma over serum. Employ specialized cell-free DNA blood collection tubes with preservatives. Isolate plasma via double centrifugation, carefully avoiding the buffy coat layer [10]. |
| cfDNA Extraction | Low cfDNA yield or inconsistent fragment profile. | Add an exogenous DNA control (spike-in) to monitor extraction efficiency. Automate extraction using bead-based chemistries (e.g., magnetic beads) to improve consistency and reduce hands-on error [10]. |
| Pre-ddPCR QC | Fluorometric quantification shows high DNA yield, but PCR-based methods show low human DNA concentration. | Do not rely on fluorometry alone for quantification, as it measures all DNA, including gDNA. Use qPCR or ddPCR assays targeting short genomic fragments (e.g., ~115 bp) for accurate quantification of amplifiable cfDNA [10]. |
| ddPCR Analysis | Clusters in 2D amplitude plot are unclear, threshold is difficult to set. | Ensure the sample is sufficiently diluted to be in the "digital range." Manually review and adjust the fluorescence threshold in the analysis software if necessary [13]. |
Essential Experimental Protocols
Protocol 1: Optimized Plasma Isolation for cfDNA Analysis
This protocol is designed to minimize WBC lysis and gDNA release during the pre-analytical phase [10].
- Blood Draw: Collect blood using a large-bore needle (e.g., 21-gauge) and minimize tourniquet time.
- Tube Handling: Gently invert tubes according to manufacturer's instructions. Avoid harsh temperature changes and excessive agitation.
- Initial Centrifugation: Centrifuge whole blood at 1,600 - 2,000 x g for 10 minutes at 4°C within 6 hours of collection (for EDTA tubes).
- Plasma Transfer: Carefully transfer the upper plasma layer to a new tube, avoiding the buffy coat (white cell layer) at all costs.
- Second Centrifugation: Centrifuge the harvested plasma again at 16,000 x g for 10 minutes at 4°C.
- Final Transfer & Storage: Transfer the doubly centrifuged plasma to a new tube. Store at -80°C if not used immediately and avoid freeze-thaw cycles.
Protocol 2: ddPCR-based Quality Control for DNA Degradation
This protocol, inspired by recent research, uses a triplex ddPCR assay to evaluate the extent of DNA degradation, which can indicate the presence of fragmented cfDNA versus longer gDNA fragments [11].
- Assay Design: Design primer/probe sets to target three conserved autosomal regions with different amplicon lengths (e.g., 75 bp, 145 bp, and 235 bp). Use different fluorescent dyes for each target (e.g., FAM, HEX, VIC).
- ddPCR Reaction Setup: Prepare the ddPCR reaction mix according to the manufacturer's instructions, incorporating the triplex assay and the extracted cfDNA sample.
- Droplet Generation & PCR: Generate droplets and run the PCR amplification with optimized annealing temperature.
- Data Analysis: Quantify the copy numbers (copies/μL) for each of the three fragment sizes.
- Calculate Degradation Rate (DR): Use the formula to compute a Degradation Rate for a more direct assessment of DNA quality.
DR = (CN_medium - CN_long) / (CN_medium + CN_long)WhereCN_mediumis the concentration of the medium target (e.g., 145 bp) andCN_longis the concentration of the long target (e.g., 235 bp). A higher DR indicates more severe degradation, consistent with a purer cfDNA profile.
Workflow Visualization: cfDNA Analysis from Blood Draw to ddPCR
The Scientist's Toolkit: Essential Research Reagents & Materials
Table: Key Materials for a Robust cfDNA/ddPCR Workflow
| Item | Function/Application | Key Consideration |
|---|---|---|
| Cell-Free DNA Blood Collection Tubes | Stabilizes blood cells to prevent lysis and gDNA release during transport and storage. | Essential for multi-center studies or when processing delays exceeding 6 hours are anticipated [10]. |
| Bead-Based cfDNA Extraction Kits | Selective isolation and concentration of cfDNA from large plasma volumes. | More consistent yields and better adaptability to automation compared to some manual column methods [10]. |
| Triplex ddPCR Degradation Assay | Simultaneously quantifies DNA fragments of different lengths (e.g., 75, 145, 235 bp). | Allows calculation of a Degradation Rate (DR) to objectively assess sample quality and gDNA contamination [11]. |
| Exogenous DNA Control (Spike-in) | A non-human DNA added to the plasma sample before extraction. | Monitors extraction efficiency and helps distinguish between true low cfDNA yield and technical failure [10]. |
| qPCR Assay for Short ALU repeats (e.g., ALU115) | Accurate quantification of amplifiable, short-fragment cfDNA. | Preferable to fluorometry, which cannot differentiate between cfDNA and contaminating gDNA [10]. |
Troubleshooting Guides
FAQ: gDNA Contamination in cfDNA Samples
1. How does gDNA contamination occur, and why is it a problem for ddPCR analysis? gDNA contamination primarily occurs during the pre-analytical phase, specifically through the disruption of nucleated blood cells during sample storage and shipping. This is a significant problem because gDNA can:
- Cause false positives: By providing a large background of wild-type DNA, gDNA can mask the detection of low-frequency mutant alleles (e.g., circulating tumour DNA).
- Skew quantitative results: Fluorometric quantification methods cannot distinguish between cfDNA and gDNA, leading to overestimation of total DNA and inaccurate normalization for ddPCR inputs [4].
- Alter perceived fragment size profiles: gDNA is high molecular weight and can distort the true fragment size distribution of cfDNA, a key biomarker in itself [4].
2. What is the most effective way to prevent gDNA contamination during blood collection? Using specialized blood collection tubes containing a preservative that stabilizes nucleated cells is the most effective method. Compared to traditional K₃EDTA tubes, Cell-Free DNA BCTs have been shown to prevent gDNA release dramatically [14].
The table below summarizes the quantitative difference in gDNA levels between tube types over a 14-day storage period at room temperature:
| Blood Collection Tube | Fold Increase in gDNA after 14 days (RT) |
|---|---|
| K₃EDTA Tubes | 456-fold |
| Cell-Free DNA BCTs | < 2-fold |
Source: Data adapted from [14].
3. My cfDNA sample is suspected to be contaminated with gDNA. How can I confirm this? A ddPCR-based integrity assay can confirm contamination. This method involves simultaneously targeting short and long amplicons from a stable, diploid genomic locus.
- Methodology: Design two assays for the same genetic locus: one short (e.g., 136 bp, compatible with cfDNA fragment length) and one long (e.g., 420 bp, which would be poorly amplified from fragmented cfDNA but efficiently amplified from intact gDNA) [14].
- Interpretation: A high concentration of the long amplicon relative to the short amplicon is a strong indicator of gDNA contamination. A specialized multiplex ddPCR assay that assesses cfDNA fragment size distribution can also identify samples with aberrant profiles suggestive of contamination [4].
4. My ddPCR shows non-specific amplification. Could this be related to sample quality? Yes, non-specific amplification can be caused by several factors related to sample quality and reaction setup [15] [16].
- Causes:
- Low sample purity: Contaminants like salts, EDTA, or alcohols can interfere with enzyme activity and fluorescence detection [17].
- Degraded primers/probes: Old or improperly stored reagents can lead to smears or multiple bands [16].
- Suboptimal annealing temperature: A temperature too low can allow primers to bind to non-target sequences [16].
- Solutions:
- Repurify the cfDNA sample to remove inhibitors.
- Ensure primers and probes are stored correctly in TE buffer, not water, to prevent degradation [17].
- Use a gradient thermal cycler to optimize the annealing temperature for your assay.
5. How can I decontaminate my PCR master mix to prevent false positives? Use a double-strand specific DNase (dsDNase) to treat your master mix before adding the sample DNA.
- Experimental Protocol:
- Prepare your PCR master mix (polymerase, dNTPs, buffer, primers/probes).
- Add the dsDNase enzyme and incubate at ambient temperature for a brief period (e.g., 5-20 minutes) to digest any contaminating DNA.
- Inactivate the dsDNase by heating to a specific temperature (e.g., 60°C) in the presence of DTT. This step is crucial to prevent degradation of your sample DNA when it is added later.
- Add your template cfDNA to the decontaminated master mix and proceed with the ddPCR run [18].
Experimental Protocol: Assessing cfDNA Sample Quality via Multiplex ddPCR
This protocol is adapted from a study that designed a novel ddPCR assay to evaluate the quantity, quality, and size distribution of cfDNA [4].
1. Principle A single-well, multiplex ddPCR assay simultaneously targets a stable diploid reference locus (e.g., STAT6) for absolute quantification and multiple size ranges of a promiscuous gene family (e.g., Olfactory Receptor genes) to determine the fragment size distribution.
2. Reagents and Equipment
- Droplet Digital PCR System (e.g., Bio-Rad QX200)
- ddPCR Supermix for Probes (no dUTP)
- Primers and TaqMan Probes for the diploid locus (e.g., STAT6)
- Primers and TaqMan Probes for multi-size targets (e.g., OR genes, with amplicons designed for 73-165 bp, 166-253 bp, and >253 bp)
- DG8 Cartridges and Droplet Generator
- Thermal Sealer
- 96-Well PCR Plate
3. Procedure
- Reaction Setup: Prepare a 22 µL ddPCR reaction mixture containing:
- 1X ddPCR Supermix
- Optimized concentrations of primers and probes for both the diploid locus and the multi-size targets.
- 1-3 ng of input cfDNA (based on prior fluorometric quantification).
- Droplet Generation: Transfer the reaction mix to a DG8 cartridge, generate droplets using the Droplet Generator, and then transfer the emulsified samples to a 96-well PCR plate.
- PCR Amplification: Seal the plate and run on a thermal cycler with the following optimized cycling conditions:
- Enzyme activation: 95°C for 10 minutes.
- 40 cycles of:
- Denaturation: 94°C for 30 seconds.
- Annealing/Extension: 60°C for 60 seconds.
- Enzyme deactivation: 98°C for 10 minutes.
- Hold: 4°C.
- Droplet Reading: Read the plate on a droplet reader.
- Data Analysis:
- Absolute Quantification: Calculate the cfDNA concentration (in ng/µL) based on the copies/µL of the diploid STAT6 locus, using the formula: Concentration = (copies/µL × 22 µL) / 303. (Where 303 is the approximate number of haploid genome equivalents in 1 ng) [4].
- Size Distribution: Calculate the ratios between the different OR gene amplicon sizes (e.g., Short/Medium ratio). A high Short/Medium ratio is indicative of a highly fragmented sample, often associated with a high tumour DNA fraction.
- gDNA Contamination: A high fractional abundance of the long (>253 bp) OR amplicon suggests gDNA contamination.
Essential Visualizations
Diagram 1: gDNA Contamination Pathway in Blood Samples
This diagram illustrates the primary pathway through which genomic DNA contaminates cell-free DNA samples during blood sample handling.
Diagram 2: Workflow for cfDNA Quality Control using ddPCR
This chart outlines the step-by-step experimental workflow for assessing cfDNA quality and quantifying contamination using a multiplex ddPCR assay.
The Scientist's Toolkit: Research Reagent Solutions
The following table details essential materials and kits used for effective contamination control in cfDNA/ddPCR workflows.
| Research Reagent / Tool | Primary Function in Contamination Control |
|---|---|
| Cell-Free DNA BCTs (Stabilizing Blood Collection Tubes) | Prevents the release of genomic DNA from white blood cells during sample storage and transport, preserving the integrity of the plasma cfDNA [14]. |
| Droplet Digital PCR (ddPCR) | Provides absolute quantification of nucleic acids without a standard curve and enables precise assessment of cfDNA fragment size distribution to identify gDNA contamination [4]. |
| gDNA Removal Kit (e.g., based on HL-dsDNase) | Enzymatically cleaves and removes contaminating gDNA from RNA or DNA samples. The enzyme is heat-labile, allowing for easy inactivation before downstream PCR [18]. |
| PCR Decontamination Kit (e.g., based on dsDNase) | Used to treat PCR master mixes (without template) to digest contaminating DNA (e.g., bacterial DNA from reagents), preventing false-positive results [18]. |
| Hot-Start DNA Polymerase | Reduces non-specific amplification and primer-dimer formation by remaining inactive until a high-temperature activation step, improving the specificity and sensitivity of ddPCR [16]. |
| TE Buffer (pH 8.0) | The recommended storage buffer for primers and probes. Using water can lead to degradation, while TE buffer ensures stability and prevents loss of assay performance [17]. |
Building a Defensive Workflow: Proactive Strategies for Contamination-Free cfDNA Processing
FAQs and Troubleshooting Guides
This section addresses common challenges researchers face during the collection and initial processing of blood samples for circulating cell-free DNA (cfDNA) analysis.
FAQ 1: What is the single most critical step to minimize genomic DNA contamination during plasma preparation?
Answer: The timely and proper centrifugation of blood samples is paramount. Delays in processing or inadequate centrifugation force can lead to leukocyte lysis, which is a primary source of gDNA contamination. This contaminating gDNA can obscure the true signal from low-abundance cfDNA, leading to inaccurate quantification in downstream ddPCR assays [19].
- Detailed Protocol:
- Collect blood into K2EDTA tubes [20]. Do not use heparin tubes, as heparin is a potent PCR inhibitor.
- Invert the tube 8-10 times immediately after collection to ensure proper mixing with the anticoagulant.
- Process the sample within 2 hours of draw to prevent leukocyte degradation.
- Perform an initial centrifugation at 800-1600 x g for 10 minutes at room temperature to separate plasma from cells.
- Carefully transfer the supernatant (plasma) to a new tube without disturbing the buffy coat (which contains leukocytes).
- Perform a second, high-speed centrifugation of the plasma at 16,000 x g for 10 minutes to remove any remaining cellular debris.
- Aliquot the final purified plasma into sterile tubes and store at -80°C until cfDNA extraction.
FAQ 2: How do blood collection tube components interfere with downstream ddPCR analysis?
Answer: Components of blood collection tubes, such as stoppers, lubricants, separator gels, and surfactants, can leach into the specimen [20]. These substances can:
- Inhibit PCR enzymes, reducing amplification efficiency.
- Adsorb analytes, leading to falsely low concentrations of cfDNA.
- Interfere with fluorescence detection, crucial for partition analysis in ddPCR [17].
- Troubleshooting Guide:
- Problem: Unexpectedly low PCR efficiency or poor separation of positive and negative droplets.
- Solution: Ensure you are using tubes specifically validated for molecular diagnostics. If interference is suspected, a post-extraction purification step (e.g., using silica-membrane columns) can help remove contaminants.
FAQ 3: Our plasma samples are often lipemic. How does this affect ddPCR results?
Answer: Lipemia, or turbidity caused by high lipoprotein content, can interfere with ddPCR in two ways [19]:
- Spectrophotometric Quantification: It can lead to inaccurate measurement of DNA concentration and purity (A260/A280 ratios) prior to ddPCR setup.
- Fluorescence Detection: It can cause spectral interference and light scattering, which may impede the clear discrimination of fluorescent signals in the droplets.
- Mitigation Strategy:
- Ensure patients fast for 8-12 hours before blood collection to reduce the risk of lipemic samples [19].
- If a lipemic sample is unavoidable, consider using ultracentrifugation to clarify the plasma before cfDNA extraction.
Quantitative Data on Pre-analytical Errors
The table below summarizes the primary sources and frequencies of pre-analytical errors that compromise sample quality, based on data from clinical laboratory testing [19].
Table 1: Distribution of Common Pre-analytical Errors Affecting Blood Sample Quality
| Source of Error | Frequency of Occurrence | Primary Impact on cfDNA Analysis |
|---|---|---|
| Hemolyzed Sample | 40% - 70% of poor-quality samples | Indicator of cellular lysis; high risk of gDNA contamination. |
| Insufficient Sample Volume | 10% - 20% of poor-quality samples | Inadequate yield of cfDNA for analysis. |
| Clotted Sample | 5% - 10% of poor-quality samples | Improper anticoagulation; sample unusable. |
| Use of Wrong Container/Additive | 5% - 15% of poor-quality samples | e.g., Use of heparin, a known PCR inhibitor [20]. |
Experimental Protocol: A Standardized Workflow for High-Quality Plasma
This protocol is designed to minimize gDNA contamination and ensure the integrity of cfDNA.
Objective: To isolate cell-free plasma from whole blood suitable for sensitive downstream cfDNA ddPCR applications.
Materials:
- Blood Collection Tubes: K2EDTA tubes (plastic, validated for molecular work) [20].
- Centrifuge: A swinging-bucket rotor centrifuge capable of maintaining 16,000 x g.
- Pipettes and Sterile Tips.
- Sterile Polypropylene Tubes for plasma aliquoting.
Methodology:
- Phlebotomy: Perform venipuncture and collect blood into K2EDTA tubes. Invert tubes gently but thoroughly 8-10 times.
- Initial Transport: Transport tubes at room temperature and process within 2 hours of collection.
- First Centrifugation: Centrifuge tubes at 1,200 x g for 10 minutes at room temperature.
- Plasma Transfer: Using a sterile pipette, carefully transfer the upper plasma layer to a fresh microcentrifuge tube. Critical Step: Avoid the buffy coat layer at all costs. Leave a small amount of plasma behind to ensure no leukocytes are transferred.
- Second Centrifugation: Centrifuge the transferred plasma at 16,000 x g for 10 minutes at room temperature. This pellets any remaining platelets and cellular debris.
- Final Aliquot: Transfer the supernatant into fresh, pre-labeled tubes. Store at -80°C until cfDNA extraction.
The Scientist's Toolkit: Research Reagent Solutions
Table 2: Essential Materials for cfDNA Plasma Processing
| Item | Function & Importance |
|---|---|
| K2EDTA Blood Collection Tubes | Preferred anticoagulant for molecular studies; prevents coagulation and is non-inhibitory to PCR [20]. |
| Double-Spacer Centrifuge Tubes | Maintains tube integrity during high-speed spins; prevents tube collapse and sample loss. |
| Sterile, Nuclease-Free Pipette Tips | Prevents contamination from foreign nucleases that can degrade cfDNA. |
| Polypropylene Storage Tubes (Screw-cap) | Ideal for long-term storage at -80°C; prevents sample evaporation and maintains sample integrity. |
| Plasma/Serum Preparation Tubes (PPT) | Some contain a gel barrier that simplifies plasma separation during the first centrifugation, reducing handling error. |
Workflow Diagram for Plasma Processing
The following diagram visualizes the optimal workflow for processing blood samples to obtain high-quality, cell-free plasma, highlighting critical control points.
The analysis of cell-free DNA (cfDNA) from liquid biopsies represents a transformative approach in molecular diagnostics, particularly for cancer detection and monitoring. However, the reliability of downstream analyses, especially sensitive techniques like droplet digital PCR (ddPCR), is critically dependent on sample purity. The presence of genomic DNA (gDNA) contamination from lysed white blood cells can severely compromise assay accuracy, leading to false positives and inaccurate quantification. The double-centrifugation protocol has emerged as a gold standard preanalytical step to effectively remove cellular debris and prevent gDNA contamination, thereby ensuring the integrity of cfDNA samples for ddPCR research.
Technical FAQs: Resolving Centrifugation Challenges in cfDNA Workflows
What is the fundamental rationale for employing double-centrifugation in cfDNA preparation?
Double-centrifugation utilizes two sequential centrifugation steps with different forces to systematically separate blood components. The initial "soft spin" at lower g-force separates plasma from cellular components, while the subsequent "hard spin" at higher g-force pellets any remaining platelets and cellular debris. This process is crucial because single centrifugation protocols often fail to remove all platelets and potential cellular contaminants, which can later lyse and release gDNA into the plasma fraction during sample storage or processing. Research demonstrates that double-centrifugation significantly reduces white blood cell contamination compared to single-step protocols, thereby preserving cfDNA sample purity [21].
How do specific centrifugation parameters influence gDNA contamination and cfDNA yield?
Centrifugation parameters must be carefully optimized as they directly impact both contamination levels and final cfDNA yield:
- Initial centrifugation force: Lower g-forces (e.g., 800-1600×g) are typically used initially to separate plasma while minimizing cell lysis [22]. One study found no significant differences in cfDNA concentrations when comparing centrifugation at 380g versus 800g for the first spin [22].
- Second centrifugation force: Higher g-forces (e.g., 10,000-20,000×g) are employed in the second step to pellet microparticles and remaining cellular debris [22].
- Temperature control: Room temperature centrifugation is standard, though some evidence suggests lower temperatures (12°C-16°C) may improve platelet recovery and viability in similar applications [23].
- Timing considerations: Studies indicate that cfDNA concentrations remain stable in blood samples stored at room temperature for up to 24 hours before processing, providing flexibility in workflow planning [22].
Table 1: Comparison of Single vs. Double Centrifugation Outcomes
| Parameter | Single Centrifugation | Double Centrifugation | Significance |
|---|---|---|---|
| Platelet Count in PRP | 594.6 ± 157.4 ×10³/μL [21] | 923.06 ± 127.58 ×10³/μL [21] | p < 0.01 |
| Platelet Yield | 175.75 ± 55.08% [21] | 276.78 ± 112.7% [21] | p < 0.01 |
| WBC Contamination | Higher [21] | Significantly lower [21] | p < 0.01 |
| RBC Contamination | Comparable [21] | Comparable [21] | Not Significant |
What are the most effective troubleshooting strategies for common centrifugation issues?
- Excessive Vibration or Noise: This typically indicates an unbalanced load. Ensure samples are distributed with tubes of equal weight directly opposite each other in the rotor. Inspect the rotor for proper alignment and signs of damage [24] [25].
- Inconsistent Sample Clarity After Centrifugation: If plasma remains turbid after processing, consider increasing the g-force or duration of the second centrifugation step. Also verify that the centrifuge is maintaining correct speed during operation [25].
- Unexpectedly Low cfDNA Yield: This may result from incomplete plasma recovery after the first centrifugation. Avoid disturbing the buffy coat layer when transferring plasma to a fresh tube for the second spin [22] [26].
- Poor ddPCR Results Despite Clear Plasma: Centrifugation force that is too high during the initial spin may cause white blood cell lysis, introducing gDNA contamination that isn't visible to the eye [22]. Optimize forces based on validated protocols.
Experimental Protocol: Standardized Double-Centrifugation for cfDNA Isolation
Materials and Equipment
Table 2: Essential Research Reagent Solutions for Double-Centrifugation Protocol
| Item | Specification | Function |
|---|---|---|
| Blood Collection Tubes | K₂/K₃ EDTA tubes [22] | Prevents coagulation while preserving cell integrity |
| Centrifuge | Swing-out rotor type [23] | Ensures optimal separation of plasma components |
| Secondary Tubes | Nuclease-free [22] | Prevents sample contamination during transfer |
| Plasma Storage Tubes | Low DNA binding [26] | Preserves cfDNA integrity during storage |
Step-by-Step Protocol
Sample Collection: Collect venous blood into EDTA-containing vacuum tubes. Gently invert 8-10 times immediately after collection to ensure proper mixing with anticoagulant [22] [27].
First Centrifugation (Soft Spin):
- Transfer blood to sealable centrifuge tubes if not already in appropriate vessels.
- Centrifuge at 800-1600×g for 10 minutes at room temperature [22].
- Following centrifugation, three distinct layers will be visible: plasma (top), buffy coat (thin middle layer containing white blood cells and platelets), and red blood cells (bottom) [27].
Plasma Transfer:
- Carefully aspirate the upper plasma layer without disturbing the buffy coat.
- Transfer the plasma to a fresh nuclease-free tube.
- Leave approximately 0.5 mL of plasma above the buffy coat to avoid cellular contamination [22].
Second Centrifugation (Hard Spin):
- Centrifuge the transferred plasma at 10,000-20,000×g for 10 minutes at room temperature [22].
- This high-speed step pellets any remaining platelets, cellular debris, and potential contaminants.
Final Plasma Collection and Storage:
The following workflow diagram illustrates the complete double-centrifugation process:
Impact on Downstream ddPCR Analysis
The implementation of a robust double-centrifugation protocol directly enhances the quality and reliability of ddPCR results. ddPCR is particularly sensitive to the presence of gDNA contamination due to its precision in absolute quantification of rare targets [22] [28]. When gDNA contaminates cfDNA samples, it can:
- Compromise accurate quantification of low-abundance mutations in circulating tumor DNA
- Generate false positive signals in mutation detection assays
- Reduce assay sensitivity by increasing background noise
- Cause inaccurate partition classification during droplet analysis
Proper preanalytical processing through double-centrifugation ensures that ddPCR measurements reflect true cfDNA concentrations rather than artificial inflation from gDNA contamination. Studies have confirmed that preanalytical variables significantly impact ddPCR results, with centrifugation protocols being among the most critical factors [22] [26].
The double-centrifugation protocol represents an essential preanalytical standard for reliable cfDNA analysis in ddPCR research. By systematically removing cellular debris through optimized sequential centrifugation steps, researchers can significantly reduce gDNA contamination while preserving cfDNA integrity. The implementation of this standardized approach, coupled with appropriate troubleshooting methodologies, ensures sample quality that meets the exacting requirements of modern molecular diagnostics and precision medicine applications.
Technical Comparison: Magnetic Bead vs. Silica Membrane Kits
The following table summarizes the core characteristics of magnetic bead and silica membrane technologies for genomic DNA (gDNA) exclusion in cell-free DNA (cfDNA) workflows.
| Feature | Magnetic Bead Kits | Silica Membrane Kits (Spin Columns) |
|---|---|---|
| Basic Principle | DNA binds to silica-coated magnetic beads in presence of chaotropic salts; beads are separated with a magnet [29]. | DNA binds to a silica membrane in a column under high-salt conditions; impurities are washed away by centrifugation [29]. |
| Best for gDNA Exclusion / cfDNA Yield | Superior for maximizing recovery from low-DNA samples; higher binding capacity can be optimized for small fragments [29]. | May not be as effective for samples with very low DNA concentrations; binding capacity of the membrane can limit recovery [29]. |
| Throughput & Automation | Highly suited for automation and high-throughput settings [29] [30]. | Ideal for manual processing of a large number of samples efficiently, but less amenable to full automation [29]. |
| Typical Purity | High, but can be susceptible to bead carryover if washing is incomplete [31]. | High-quality DNA suitable for most common applications [29]. |
| Hands-on Time | Can be more time-consuming for manual processing; hands-off when automated [29]. | Relatively short and straightforward for manual protocols [29]. |
| Scalability | Highly scalable and flexible for processing large volumes [29]. | Scalability is limited by centrifuge capacity and column size [29]. |
| Cost Considerations | Often higher cost per test; requires investment in a magnetic separator or automated system [29] [32]. | Generally cost-effective; requires a centrifuge [29]. |
FAQs and Troubleshooting Guides
FAQ: General Selection and Principles
Q1: Which kit is better for purifying cfDNA where excluding gDNA contamination is critical? Magnetic bead-based kits are often the preferred choice for cfDNA work. Their binding chemistry can be more easily optimized for the smaller-sized cfDNA fragments, and they typically offer better recovery from low-yield samples like plasma, which is crucial for detecting rare variants [29] [33]. Furthermore, they are more amenable to automation, reducing hands-on time and variability in high-throughput clinical environments [30].
Q2: What is the fundamental principle that allows both methods to bind DNA? Both methods rely on the affinity of DNA molecules for a silica surface in the presence of high concentrations of chaotropic salts (e.g., guanidine thiocyanate). These salts disrupt the hydrogen-bonding network of water, allowing the negatively charged DNA backbone to bind directly to the silica matrix. The DNA is later released in a low-salt elution buffer [32] [34].
Q3: Our lab is setting up a new cfDNA research pipeline. Should we choose magnetic beads? For a new cfDNA pipeline focused on sensitivity and reproducibility, magnetic bead-based extraction is a highly recommended starting point. Its suitability for automation and superior performance with low-concentration samples align well with the requirements of robust cfDNA analysis [33] [32]. The initial higher equipment cost can be offset by gains in throughput, consistency, and reduced manual error.
Troubleshooting Guide: Magnetic Bead Kits
| Problem | Possible Cause | Solution |
|---|---|---|
| Low DNA Yield | Incomplete resuspension or mixing during binding [31]. | Ensure beads are fully suspended and mix continuously or frequently during the binding incubation. |
| Beads pelleting inefficiently due to viscous solution or aggregation [35]. | Increase magnetic separation time to 2-5 minutes. Add DNase I to the lysate or increase Tween 20 concentration to ~0.05% [35]. | |
| Suboptimal binding buffer conditions (salt concentration, pH) [31]. | Verify buffer preparation and storage. Ensure final binding conditions (e.g., 1 M NaCl for some systems) are met [35]. | |
| PCR Inhibition | Residual ethanol or wash buffer carryover [35] [31]. | Ensure complete removal of the final wash supernatant and air-dry the bead pellet for 5-10 minutes with the tube open to evaporate ethanol. |
| Beads or stabilizers co-eluting with DNA [36]. | Ensure a proper elution step is performed. Use a higher ionic strength buffer or heat the sample (50-65°C) during elution to ensure complete DNA release from the beads [31] [36]. | |
| High Background or Contamination | Non-specific binding to the bead surface [35]. | For streptavidin-based beads, use beads with a hydrophilic, negatively charged surface (e.g., M-270). Add Tween 20 to wash buffers and use siliconized tubes [35]. |
| Cross-contamination between samples [31]. | Change pipette tips between all samples. For automated systems, ensure tip changeover and use systems with UV decontamination between runs [32] [36]. | |
| Inefficient Bead Separation | Beads appear "sticky" or float [35]. | The beads' negative surface charge can cause electrostatic interactions. Wash beads in a nonionic detergent like Tween 20 (up to 0.1%) before use [35]. |
Troubleshooting Guide: Silica Membrane Kits (Spin Columns)
| Problem | Possible Cause | Solution |
|---|---|---|
| Low DNA Yield | Column membrane is clogged with tissue fibers or proteins [37]. | For fibrous tissues, centrifuge the lysate at maximum speed for 3 minutes before loading it onto the column. Do not exceed recommended input material [37]. |
| Overloaded column membrane [37]. | Reduce the amount of input material, especially for DNA-rich tissues like spleen, liver, or kidney [37]. | |
| Incomplete elution [37]. | Ensure the elution buffer is applied directly to the center of the membrane. Pre-heat the elution buffer to 65°C and incubate the column for >5 minutes before centrifugation [35] [37]. | |
| gDNA Contamination | Cellular genomic contamination from white blood cells in plasma [33]. | Follow standardized plasma processing protocols: double-centrifugation steps to ensure all cells are removed before DNA extraction [33]. |
| Incomplete lysis of sample [37]. | Cut tissue into the smallest possible pieces and ensure sufficient lysis time with Proteinase K. Vortex immediately after adding lysis buffers [37]. | |
| Salt Contamination (Low A260/A230) | Carryover of binding buffer containing guanidine salts [37]. | Avoid pipetting lysate onto the upper column area or transferring foam. Close caps gently to avoid splashing. Invert columns with wash buffer as per protocol [37]. |
| DNA Degradation | Sample was not stored properly or is too old [37]. | Flash-freeze tissue samples in liquid nitrogen and store at -80°C. For blood, use fresh (unfrozen) samples less than a week old [37]. |
| High nuclease content in tissues (e.g., pancreas, liver) [37]. | Keep samples frozen and on ice during preparation. Do not use more than the recommended input material [37]. |
Essential Workflow Diagrams
Magnetic Bead DNA Extraction Process
Silica Membrane DNA Extraction Process
Research Reagent Solutions
The following table details key reagents and materials essential for successful nucleic acid extraction, particularly in the context of preventing gDNA contamination.
| Reagent / Material | Function in gDNA Exclusion / cfDNA Purification |
|---|---|
| Chaotropic Salts (e.g., Guanidine Thiocyanate) | A key component of lysis and binding buffers. They disrupt hydrogen bonding, enabling DNA to bind to the silica matrix in both magnetic bead and spin column methods [32] [34]. |
| Proteinase K | A broad-spectrum protease that digests nucleases and other proteins, preventing DNA degradation and facilitating the release of nucleic acids from cellular material [37]. |
| RNase A | Degrades RNA to prevent it from co-purifying with DNA, which can otherwise reduce yield and purity measurements and compete for binding sites on silica [37]. |
| Silica-coated Magnetic Beads | The solid phase for DNA binding in bead-based methods. Their surface chemistry and size can be optimized for selective binding of smaller DNA fragments like cfDNA [29] [32]. |
| Silica Membrane Columns | The solid phase for spin-column methods. They act as a filter, binding DNA while allowing contaminants to pass through during centrifugation [29] [37]. |
| Wash Buffers (with Ethanol) | Remove salts, proteins, and other impurities from the bound DNA. Correct ethanol concentration is critical to remove contaminants without accidentally eluting the DNA [37] [31]. |
| Elution Buffer (Low Salt, pH 8-8.5) | Disrupts the DNA-silica interaction by providing a low-ionic-strength environment, releasing purified DNA. Slightly alkaline pH helps maintain DNA stability [35] [37]. |
| Nonionic Detergent (e.g., Tween 20) | Reduces nonspecific binding to tube walls and bead surfaces. It can be added to wash buffers to minimize electrostatic interactions and improve bead handling [35]. |
Accurate detection and quantification of cell-free DNA (cfDNA) using droplet digital PCR (ddPCR) is paramount in areas like liquid biopsy and infectious disease diagnosis. However, this sensitive technique is highly susceptible to errors caused by genomic DNA (gDNA) contamination and other experimental artifacts. Implementing a robust multi-control strategy is not merely a best practice but a fundamental requirement for generating reliable, interpretable, and publication-quality data. This guide details the essential controls—No-Template, Positive, and Environmental—and provides a structured troubleshooting framework to overcome the specific challenge of gDNA contamination in cfDNA workflows.
Understanding the Essential Controls
A comprehensive control strategy monitors every stage of your ddPCR experiment, from reagent purity to the success of the amplification itself. The table below summarizes the core controls, their purpose, and expected results.
Table 1: Essential Controls for a Robust ddPCR Experiment
| Control Type | Purpose | Expected Result | What a Deviation Indicates |
|---|---|---|---|
| No-Template Control (NTC) [38] [39] | Detects contamination in PCR reagents (e.g., primers, probes, water). | Zero (0) positive droplets [38]. | Presence of contaminating nucleic acids in your master mix. |
| Positive Control [38] [39] | Verifies that the primer/probe set and reaction conditions work correctly. | Successful amplification of the known target. | Assay failure due to reagent degradation, incorrect preparation, or instrument error. |
| Environmental Control | Monitors contaminating DNA in the laboratory workspace and equipment. | Zero (0) positive droplets. | Contamination of benches, pipettes, or other equipment with amplicons or DNA. |
| No RT Control (for RNA viruses) [39] | Detects contaminating DNA in RNA samples during reverse transcription. | No amplification signal. | Presence of gDNA in an RNA sample, which could lead to false positives. |
| Internal Positive Control (IPC) [39] | Tests for the presence of PCR inhibitors in the sample. | The control sequence is successfully amplified. | PCR inhibitors are present in the sample, which can cause false negatives. |
Special Considerations for cfDNA Workflows
The analysis of cfDNA presents unique challenges due to its low concentration and high fragmentation. gDNA released from white blood cells during sample handling is a major source of contamination that can obscure the true cfDNA signal [10]. To ensure meaningful results:
- Sample Collection: Use plasma over serum, as serum preparation leads to higher gDNA contamination from white blood cell lysis during clotting [10].
- Plasma Processing: Perform a double centrifugation step to minimize carryover of white blood cells and isolate plasma within 6 hours of blood collection when using EDTA tubes [10].
- Inhibition Control: Given the low abundance of cfDNA, spiking an exogenous, heterologous Internal Positive Control (IPC) into the sample is highly recommended. This controls for both extraction efficiency and the presence of PCR inhibitors without competing with your low-copy-number target [39].
Implementing Your Multi-Control Strategy: A Workflow
The following diagram illustrates how these controls are integrated into a complete ddPCR workflow for cfDNA analysis, highlighting key decision points.
Diagram 1: ddPCR Quality Control Workflow
Troubleshooting Guides and FAQs
Frequently Asked Questions
Q1: My No-Template Control (NTC) shows false-positive droplets. What is the source of this contamination and how do I eliminate it? A: A positive NTC indicates that your reagents or workspace are contaminated with target DNA or amplicons [39].
- Action Plan:
- Decontaminate your workspace and equipment: Wipe down benches, pipettes, centrifuges, and vortexers with a 10% bleach solution or a commercial DNA decontaminant [40] [6].
- Establish physical separation: Use distinct pre-PCR and post-PCR areas for reaction setup and product analysis, respectively. Restrict equipment and lab coats to their designated zones [40].
- Test your reagents: Systematically substitute each master mix component (water, buffer, enzymes, primers/probes) with a new, unopened aliquot to identify the contaminated reagent [6].
- Use aerosol-filter pipette tips to prevent cross-contamination via pipettes [40].
Q2: I suspect my cfDNA sample is contaminated with genomic DNA. How can I confirm this and prevent it in future samples? A: gDNA contamination severely impacts the accuracy of cfDNA quantification.
- Confirmation: Use fragment analysis (e.g., Bioanalyzer) to visualize the DNA size profile. Pure cfDNA shows a dominant peak at ~160-170 bp. A significant smear or a peak at high molecular weight indicates gDNA contamination [10].
- Prevention:
- During blood draw: Use appropriate needle size and avoid prolonged tourniquet application to minimize cell lysis [10].
- During processing: Isolate plasma carefully, avoiding the buffy coat layer, and process samples within 6 hours of collection (for EDTA tubes) or use specialized cell-free DNA blood collection tubes [10].
- Include a No RT Control: If starting from RNA, this control will reveal gDNA contamination [39].
Q3: My Positive Control worked, but my target cfDNA sample shows no amplification. What does this mean? A: This result suggests a problem specific to the sample, not the assay itself.
- Investigate Inhibition: This is the most common cause. Include an Internal Positive Control (IPC) spiked into your sample. If the IPC fails to amplify, it confirms the presence of PCR inhibitors in the sample [39].
- Low Target Concentration: The target cfDNA may be below the limit of detection (LoD) of your assay. Concentrate your cfDNA extract or increase the plasma input volume for extraction [10].
Q4: What are the minimum quality metrics I should check after every ddPCR run? A: Always verify these three criteria before analyzing your data [38]:
- Droplet Count: A minimum of 10,000 accepted droplets per well is required for statistically robust quantification.
- NTC: Must have zero positive droplets.
- Positive Control: Must show the expected concentration and clear cluster separation.
Troubleshooting Table: Common Problems and Solutions
Table 2: Troubleshooting Common Issues in ddPCR for cfDNA Analysis
| Problem | Potential Causes | Solutions |
|---|---|---|
| High Background in NTC | Contaminated reagents or labware; amplicon carryover [6]. | Use new reagent aliquots; decontaminate workspace with bleach; enforce pre-/post-PCR separation [40]. |
| Low Droplet Count | Issues with droplet generator; viscous sample; pipetting error. | Check droplet generator; ensure sample is not viscous (digest gDNA if needed) [17]; practice accurate pipetting. |
| Poor Cluster Separation ("Rain") | Suboptimal primer/probe concentrations; low PCR efficiency; imperfect thermal cycling [17]. | Optimize primer (0.5-0.9 µM) and probe (0.25 µM) concentrations [17]; validate assay efficiency. |
| Positive Control Failure | Degraded control template; incorrect reaction setup; instrument error. | Prepare fresh control aliquots; double-check reaction mix calculations; ensure thermocycler is calibrated. |
| Inconsistent Replicates | Pipetting inaccuracy; uneven partitioning; low droplet count. | Use calibrated pipettes and master mixes; ensure homogeneous reaction mix; aim for high droplet count [38]. |
The Scientist's Toolkit: Key Reagents and Materials
Table 3: Essential Research Reagent Solutions for cfDNA ddPCR
| Item | Function | Considerations for cfDNA Work |
|---|---|---|
| Cell-Free DNA Blood Collection Tubes | Stabilizes blood cells to prevent lysis and gDNA release during storage/transport. | Critical for multi-center studies or when plasma cannot be processed immediately [10]. |
| cfDNA Extraction Kits (Silica column/magnetic beads) | Isulates and concentrates cfDNA from large plasma volumes. | Look for kits validated for high recovery of short, fragmented DNA. Automated systems increase throughput and consistency [10]. |
| Digital PCR Supermixes | Provides optimized buffer, enzymes, and dNTPs for partition-based amplification. | Choose a supermix compatible with your detection chemistry (probe-based vs. EvaGreen) and instrument. |
| Internal Positive Control (IPC) | Exogenous, non-competitive synthetic sequence spiked into the sample. | Must be heterologous (uses different primers/probe) to avoid competition with the low-abundance cfDNA target [39]. |
| Assay-Specific Primers & Hydrolysis Probes | Enables specific amplification and detection of the target of interest. | Keep amplicons short (<100 bp) to match the fragmented nature of cfDNA and improve amplification efficiency [17]. |
Personal Protective Equipment (PPE) and Clean Lab Practices to Minimize External Contamination
The analysis of cell-free DNA (cfDNA) using droplet digital PCR (ddPCR) is a powerful tool in modern research and diagnostics, particularly in areas like non-invasive prenatal testing (NIPT) and oncology. cfDNA fragments are typically short (often around 143 base pairs for fetal DNA) and exist in low concentrations in plasma, making them highly susceptible to being overwhelmed by external genomic DNA contamination. Such contamination can lead to inaccurate quantification, false positives, or failed experiments. Implementing rigorous Personal Protective Equipment (PPE) protocols and clean lab practices is therefore not merely a procedural formality but a fundamental requirement for generating reliable and reproducible data. This guide provides targeted troubleshooting advice to help researchers overcome the specific challenges of protecting cfDNA samples in ddPCR workflows.
Core Principles: Understanding and Controlling Contamination
The primary sources of contamination are amplification carryover and cross-contamination from samples and reagents.
- Amplification Carryover: The ddPCR process creates millions of copies of the target DNA sequence. When reaction tubes or plates are opened, these amplified products can aerosolize and settle on lab surfaces, equipment, or even into open reagents. If these contaminants enter a subsequent pre-amplification setup, they will be efficiently amplified, leading to false positives [7].
- Cross-Contamination: This can occur between samples during pipetting or from external genomic DNA introduced via contaminated reagents, consumables, or lab personnel [7]. For cfDNA analysis, the risk is heightened because the target is itself a low-abundance, fragmented DNA, which can be easily masked by higher molecular weight contaminating DNA.
How can laboratory design and workflow mitigate contamination?
The most effective strategy is physical separation of the workflow into distinct, dedicated areas.
- Pre- and Post-Amplification Separation: Establish physically separated rooms for pre-amplification activities (sample preparation, reaction setup) and post-amplification activities (analyzing ddPCR plates). These areas should have dedicated equipment (pipettes, centrifuges, vortexers) and supplies [7].
- Unidirectional Workflow: Personnel should move from pre-amplification to post-amplification areas, but not in reverse on the same day. If moving from a post-PCR to a pre-PCR area is necessary, a complete change of lab coat and gloves is mandatory [7].
- Controlled Environments: For highly sensitive applications, performing pre-amplification steps in a ISO-classified cleanroom or a PCR workstation with HEPA-filtered air provides a controlled, low-particulate environment [41] [42].
Diagram: Idealized Laboratory Workflow to Minimize Contamination
Troubleshooting FAQs
Q1: My No Template Controls (NTCs) are showing amplification. What should I do?
This is a clear indicator of contamination. Your systematic response should be:
Identify the Pattern:
- If all NTCs show amplification at similar Ct/Cq values: The contamination is likely in a common reagent (e.g., master mix, primers, or water). Replace all suspect reagents with fresh, uncontaminated aliquots [7].
- If only some NTCs show amplification with variable signals: The contamination is likely sporadic, caused by aerosolized amplicons or cross-contamination during pipetting. This warrants a review of your technique and a deep clean of your workspace [7].
Decontaminate: Thoroughly clean all work surfaces and equipment in the pre-PCR area with a validated DNA decontamination reagent (see Table 2) [43].
Review Practices: Ensure you are using aerosol-resistant filter pipette tips and that your pipetting technique is careful to avoid splashing. Confirm that your lab maintains strict unidirectional workflow protocols [7].
Q2: What is the single most common PPE mistake that leads to contamination?
Skipping or rushing the gowning procedure is a critical error. Putting on gloves before securing a hood or gown, for example, can transfer skin cells and contaminants to the outside of the cleanroom garment, which are then shed into the clean environment. Always follow a step-by-step, validated gowning sequence, using visual aids as a reminder [44].
Q3: I work in a shared lab space. How can I implement these practices without a dedicated room?
While not ideal, you can create virtual zones within a single lab:
- Temporal Separation: Perform all pre-PCR work first in a dedicated biosafety cabinet or PCR workstation before any post-PCR work begins for the day.
- Dedicated Equipment: Use a dedicated set of pipettes (color-coded) and consumables for pre-PCR work only. Store them separately.
- Meticulous Cleaning: Decontaminate the entire workstation (inside the cabinet and on the benchtop) with a 1-3% bleach or Virkon solution before and after your pre-PCR work [43].
- Personal Workflow: Be disciplined about your own unidirectional movement. Once you have handled amplified products, do not return to pre-PCR activities on the same day without changing your lab coat and gloves.
Research Reagent and Material Solutions
Table 1: Essential Research Reagent Solutions for Contamination Control
| Item | Function & Rationale | Key Considerations |
|---|---|---|
| Aerosol-Resistant Filter Tips | Prevents aerosols from contaminating the pipette shaft, a major source of cross-contamination between samples. | Essential for all liquid handling in pre-PCR setup. |
| Aliquoted Reagents | Prevents repeated freeze-thaw cycles and avoids contaminating the entire stock solution. | Create single-use aliquots of master mixes, primers, probes, and water [7]. |
| Uracil-DNA Glycosylase (UNG) | Enzymatically degrades carryover contamination from previous PCR reactions. | Requires using dUTP instead of dTTP in amplification reactions. Inactivated at high temperatures, so does not affect new amplification [7]. |
| Restriction Enzymes | Used to linearize plasmids or fragment high-molecular-weight genomic DNA. | Ensures even distribution of template in partitions and prevents over-quantification. Critical: Do not use an enzyme that cuts within your amplicon [17]. |
| Validated DNA Decontamination Reagents | Used for cleaning surfaces and equipment to remove amplifiable DNA. | Bleach (1-3%) and Virkon are highly effective. Ethanol and isopropanol are poor DNA decontaminants [43]. |
Table 2: Efficacy of Common Laboratory Decontamination Reagents
| Reagent | Active Ingredient | DNA Removal Efficacy | Notes & Precautions |
|---|---|---|---|
| Bleach (1-3%) | Hypochlorite (NaClO) | Excellent (Removes all amplifiable DNA) | Corrosive to metals; can be followed by ethanol wipe and rinse with water to prevent damage [43]. |
| Virkon (1%) | Peroxymonosulfate (KHSO₅) | Excellent (Removes all amplifiable DNA) | Less corrosive than bleach; environmentally friendlier [43]. |
| DNA AWAY | Sodium Hydroxide (NaOH) | Good (Removes >99.9% of DNA) | Leaves minimal traces of DNA [43]. |
| Ethanol (70%) | Ethanol | Poor (Removes ~95% of DNA) | Effective as a disinfectant but should not be relied upon for DNA decontamination [43]. |
| Isopropanol | Isopropanol | Poor (Removes ~90% of DNA or less) | Ineffective for reliable DNA decontamination [43]. |
Step-by-Step Experimental Protocols
Protocol 1: Standard Pre-PCR Workspace Decontamination
This protocol should be performed before and after every pre-PCR session.
- Clear the surface: Remove all equipment and consumables from the benchtop or biosafety cabinet.
- Apply reagent: Liberally apply a freshly prepared 1-3% bleach solution or a 1% Virkon solution to a lint-free wipe [43].
- Wipe down: Thoroughly wipe the entire work surface, including the back and sides. Pay special attention to frequently touched areas.
- Dwell time: Allow the reagent to air dry completely (approximately 10-15 minutes) to ensure sufficient contact time for complete DNA degradation [7] [43].
- Rinse (Optional for bleach): If concerned about bleach corrosion, wipe the surface with a wipe soaked in nuclease-free water or 70% ethanol to neutralize the bleach. Note that ethanol does not remove DNA [43].
- Final wipe: Use a dry, lint-free wipe to dry the surface.
Protocol 2: Proper PPE Gowning Sequence for a Cleanroom or Designated Pre-PCR Area
Proper gowning is a sequential process to protect the cleanest garments from contamination.
The sequence illustrated above must be followed precisely to ensure that inner, cleaner layers are not exposed to outer, potentially contaminated layers [44] [42].
Resolving Ambiguity in ddPCR: Tackling Rain, Thresholds, and Inhibitors
FAQ: Understanding and Addressing gDNA Contamination in ddPCR
What is "rain" in ddPCR and how is it different from gDNA contamination?
In ddPCR, "rain" refers to a cluster of partitions that show intermediate fluorescence amplitude, falling between the clearly positive and negative clusters. This can be caused by various factors including non-specific amplification, probe degradation, or suboptimal PCR efficiency.
gDNA contamination, specifically in cfDNA samples, presents a different challenge. It involves the unintended amplification of non-target, high-molecular-weight genomic DNA. This can lead to false positive signals and inaccurate quantification, as the ddPCR system cannot distinguish between the target cfDNA and contaminating gDNA molecules. Unlike rain, which affects cluster separation, gDNA contamination can artificially inflate the apparent target concentration [17].
Why is gDNA contamination a particular problem for cfDNA analysis?
cfDNA is naturally fragmented, typically into sizes of 150-200 base pairs. gDNA contamination, in contrast, consists of much longer, intact DNA strands. This fundamental difference is key to distinguishing them:
- Template Integrity: Strongly degraded or fragmented templates like cfDNA may show a discrepancy between the DNA amount quantified by optical density and the number of copies detected by ddPCR. A larger-than-expected DNA input might be needed to achieve desired sensitivity for mutation detection in cfDNA [17].
- Partitioning Behavior: High-molecular-weight gDNA with complex structures can partition unevenly across droplets. This uneven distribution can lead to over-quantification because linked gene copies in a single partition are counted as one copy, unlike separated target molecules in cfDNA [17].
gDNA contamination typically originates during the sample collection and processing phases:
- Incomplete Cell Lysis Prevention: During blood collection or plasma separation, lysis of white blood cells can release high-molecular-weight gDNA into the sample.
- Sample Carryover: Cross-contamination from other high-concentration gDNA samples processed in the same workspace.
- Laboratory Environment: Aerosols generated from opening tubes containing purified gDNA can contaminate reagents and samples [45].
Troubleshooting Guide: Identifying and Resolving gDNA Contamination
How can I experimentally confirm gDNA contamination?
A multi-amplicon size assay is a reliable method to detect the presence of long DNA fragments indicative of gDNA contamination. This approach is based on the principle that amplification efficiency drops significantly for longer amplicons in a degraded cfDNA sample, but not in a sample contaminated with intact gDNA.
Experimental Protocol: Triplex ddPCR Assay for DNA Degradation Assessment
This protocol is adapted from a published method for assessing degraded DNA and can be repurposed to detect gDNA contamination by looking for a signature of long, amplifiable fragments [11].
- Assay Design: Design three primer-probe sets targeting the same genetic locus (e.g., a single-copy gene) but generating amplicons of different lengths (e.g., 75 bp, 145 bp, and 235 bp). Use different fluorescent dyes for each probe (e.g., FAM, HEX, Cy5) [11].
- Sample Preparation: Run your cfDNA sample and a known pure cfDNA control in the optimized triplex ddPCR reaction.
- ddPCR Run: Perform the ddPCR according to your standard protocol and instrument manufacturer's instructions.
- Data Analysis: Calculate the absolute copy numbers for each of the three amplicon sizes.
Interpretation of Results:
- A pure cfDNA sample will show high copy numbers for the short (75 bp) amplicon, with a progressive decrease in copy number for the medium (145 bp) and long (235 bp) amplicons due to natural fragmentation.
- A sample with gDNA contamination will show high and relatively similar copy numbers for all three amplicon sizes, indicating the presence of long, intact DNA molecules that can serve as a template for even the longest amplicon.
Table 1: Expected Results from Triplex Amplicon Size Assay
| Sample Type | Short Amplicon (e.g., 75 bp) | Medium Amplicon (e.g., 145 bp) | Long Amplicon (e.g., 235 bp) |
|---|---|---|---|
| Pure cfDNA | High copy number | Moderate copy number | Low or zero copy number |
| gDNA-contaminated cfDNA | High copy number | High copy number | High copy number |
My results indicate gDNA contamination. What should I do next?
Follow this troubleshooting workflow to prevent and eliminate gDNA contamination.
1. Review and Optimize Laboratory Practices
- Physical Separation: Strictly separate the laboratory areas for sample processing, PCR reaction setup, amplification, and post-PCR analysis. Traffic must be unidirectional to prevent amplicon carryover into clean areas [46].
- Decontamination: Regularly clean work surfaces and equipment with a 10% sodium hypochlorite (bleach) solution, which causes oxidative damage to naked nucleic acids, followed by ethanol to remove the bleach. UV irradiation (254/300 nm) can also be used to sterilize surfaces and reagents by inducing thymidine dimers in contaminating DNA [46].
- Pre-mix and Aliquot: Prepare a master mix of all PCR reagents without the template DNA and aliquot it. This minimizes pipetting steps and reduces the risk of cross-contamination [45].
- Use Aerosol Barrier Tips: Always use filter tips to prevent cross-contamination via pipettors [45].
2. Employ Pre-Amplification Sterilization: Uracil-N-Glycosylase (UNG) This is one of the most effective methods to prevent carryover contamination from previous PCR reactions.
- Principle: Incorporate dUTP instead of dTTP in your PCR master mix. Any amplicons generated in previous runs will contain uracil. Adding the UNG enzyme to the new reaction mix will hydrolyze any uracil-containing contaminants before PCR cycling begins. The UNG is then inactivated during the initial denaturation step, allowing the new amplification to proceed with the natural dTTP in your sample [46].
- Protocol: Use a commercial master mix that contains UNG, or add it to your custom mix. Incubate the reaction at room temperature for 10 minutes before starting the thermal cycling program.
3. Optimize Sample Input and Treatment
- Restriction Digestion: For complex or high-molecular-weight DNA, perform restriction digestion before the ddPCR assay. This linearizes DNA, reduces viscosity for more accurate partitioning, and physically separates linked gene copies so they are counted independently [17].
- Note: When selecting restriction enzymes, ensure they do not cut within your target amplicon sequence.
- Input Amount: Ensure your DNA input is within the ideal range for your ddPCR system. Overloading can lead to partitioning issues. The average number of target copies per partition should ideally be between 0.5 and 3 for precise quantification [17].
How can I prevent contamination in the long term?
- Rigorous Controls: Always include a non-template control (NTC) containing nuclease-free water instead of sample to monitor for reagent contamination. Use a positive control with a known, low concentration of the target [45] [17].
- Dedicated Reagents and Equipment: Use dedicated sets of pipettes, lab coats, and consumables for pre- and post-PCR work. Never bring equipment from the post-PCR area back into a clean reagent preparation area [46].
- Assay Design: Keep amplicons as short as possible (especially for cfDNA analysis) to improve amplification efficiency and reduce the likelihood of co-amplifying gDNA fragments. Ensure high primer/probe specificity to minimize non-specific amplification that can contribute to "rain" [17].
The Scientist's Toolkit: Essential Reagents for Contamination Control
Table 2: Key Research Reagent Solutions for gDNA Contamination Control
| Reagent / Material | Function / Purpose | Key Considerations |
|---|---|---|
| Uracil-N-Glycosylase (UNG) | Enzymatically degrades carryover contamination from previous PCRs by hydrolyzing uracil-containing DNA. | Most effective when dUTP is fully incorporated into PCR products. Inactivated at high temperatures (>50°C) [46]. |
| Restriction Endonucleases | Linearizes plasmid DNA and fragments high-molecular-weight gDNA for more uniform partitioning and accurate quantification. | Critical for analyzing complex DNA or linked gene copies. Must not cut within the target amplicon [17]. |
| Specific Hydrolysis Probes (TaqMan) | Provides sequence-specific detection, reducing false positives from non-specific amplification like primer-dimers. | Higher specificity compared to DNA-binding dyes. Fluorophore and quencher combinations must be chosen carefully to avoid background noise [17]. |
| Sodium Hypochlorite (Bleach) | Chemically inactivates nucleic acids in the laboratory environment through oxidation. | A 10% solution is effective for surface decontamination. Must be thoroughly removed (e.g., with ethanol) as it can damage metal surfaces and inhibit PCR [46]. |
| Aerosol Barrier Pipette Tips | Prevents cross-contamination by blocking aerosols and liquids from entering the pipette shaft. | Essential for all liquid handling steps, particularly when pipetting high-concentration DNA samples or PCR products [45]. |
FAQs: Addressing Core Challenges in cfDNA ddPCR
Q1: Why is thermocycler optimization critical for detecting mutations in circulating tumor DNA (ctDNA)?
The detection of tumor-derived mutations in ctDNA is challenging because it often exists at a very low concentration and is diluted by a background of non-mutant DNA. The performance of every ddPCR assay varies based on factors including target locus sequence context and cycling conditions. Proper thermocycler optimization is essential to maximize the separation between positive and negative droplet populations, thereby ensuring the assay can detect low-frequency mutations with high specificity and minimize false positives. [47]
Q2: How does genomic DNA (gDNA) contamination affect my ddPCR results for cfDNA, and how can I detect it?
cfDNA has a distinctive fragment size of 160–180 bp. Contamination with high molecular weight (HMW) genomic DNA, often released from blood cells during sample collection, can mask the native cfDNA signal and lead to decreased assay sensitivity or inconsistent results. This gDNA contamination can be detected using a quantitative PCR (qPCR) method that targets amplicons of different lengths (e.g., 106 bp and 612 bp). A higher-than-expected ratio of long to short amplicons indicates the presence of gDNA contamination. [48] [1]
Q3: What are the key parameters to optimize in the thermocycler for a ddPCR assay?
The most important parameters to fine-tune are annealing temperature and cycle number. The correct annealing temperature is based on the calculated Tm of your primers and must be determined empirically. Magnesium concentration and the selection of a high-quality PCR enzyme also significantly impact the yield and specificity of PCR products. [49]
Q4: My ddPCR results show high background noise. Could this be related to thermocycling conditions?
Yes, suboptimal thermocycling can contribute to high background. This can be due to an annealing temperature that is too low, leading to non-specific primer binding, or an insufficient number of cycles failing to amplify true low-abundance targets above the background noise. A systematic optimization of the annealing temperature using a gradient and validating with appropriate positive and negative controls is recommended to resolve this. [49]
Troubleshooting Guides
Problem: Inconsistent or Failed Detection of Low-Abundance Mutations
Potential Cause 1: Suboptimal annealing temperature leading to poor primer specificity. Solution:
- Perform a gradient PCR: Run your ddPCR reaction using a thermocycler with a gradient function across a range of annealing temperatures (e.g., ± 5°C from the primer's calculated Tm).
- Analyze the results: The optimal temperature provides the clearest separation between positive and negative droplet clusters and the highest amplitude of the positive cluster, as determined by your droplet reader's software. [49]
Potential Cause 2: gDNA contamination diluting the mutant allele frequency or introducing artifacts. Solution:
- Implement a QC qPCR assay: Use a method that quantifies the level of HMW DNA contamination.
- Protocol: Design two TaqMan assays for the same genomic locus that generate different amplicon lengths (e.g., a 106 bp "short" amplicon and a 612 bp "long" amplicon). The short amplicon will efficiently amplify both cfDNA and gDNA, while the long amplicon will preferentially amplify the contaminating gDNA. A contamination score is calculated as the ratio of the results from the two assays. [1]
- Action: If significant contamination is detected, review plasma preparation steps to ensure a double centrifugation protocol is used and improve sample handling to prevent white blood cell lysis. [50]
Problem: Low Amplitude or Signal in Positive Droplets
Potential Cause: Inefficient amplification due to poorly optimized cycle number or conditions. Solution:
- Systematically test different cycle numbers. While increasing cycles can boost signal, excessive cycling can lead to increased background.
- Consider a "hot-start" polymerase that is activated only at high temperatures to reduce non-specific amplification during reaction setup. One study used an aptamer-inhibited hot-start Taq (Aptamer HS Taq) to allow for the elimination of a separate heat activation step while maintaining signal integrity. [51]
Data Presentation
Table 1: qPCR-Based Assessment of gDNA Contamination
This table outlines the quantitative method for detecting high molecular weight genomic DNA contamination in cfDNA samples, a critical pre-analytical quality control step. [1]
| Parameter | Short Amplicon Assay | Long Amplicon Assay |
|---|---|---|
| Target Length | 106 bp | 612 bp |
| Amplification Efficiency | Efficiently amplifies cfDNA and gDNA | Preferentially amplifies gDNA |
| Primary Target | Total DNA (cfDNA + gDNA) | gDNA contamination |
| Fluorophore | FAM | HEX |
| Purpose in QC | Quantifies total amplifiable DNA | Quantifies contaminating gDNA |
| Calculation | \multicolumn{2}{c | }{Contamination Score = Ratio (Long/Short Amplicon Results)} |
Table 2: Key Thermocycler Parameters for ddPCR Optimization
This table summarizes the core parameters to optimize for enhancing specificity and sensitivity in ddPCR assays, particularly for challenging targets like ctDNA. [47] [49] [51]
| Parameter | Standard/Initial Value | Optimization Goal | Impact on Specificity |
|---|---|---|---|
| Annealing Temperature | Calculated Tm of primers | Test a gradient (e.g., ± 5°C) | Critical. Higher temperature increases stringency, reducing non-specific binding. |
| Cycle Number | 40 cycles | Test range (e.g., 35-45 cycles) | Balances sensitivity (more cycles) with background signal (fewer cycles). |
| Denaturation Time | 30 seconds | Can be reduced to 1 second in rapid protocols | Shorter times can be sufficient and reduce total process time. [51] |
| Annealing/Extension Time | 60 seconds | Can be reduced to 15 seconds in rapid protocols | Shorter times can be sufficient and reduce total process time. [51] |
| Heat Activation / Enzyme | Standard hot-start polymerase | Aptamer-based immediate-activation polymerase | Allows removal of long heat activation step, reducing run time without sacrificing specificity. [51] |
Experimental Protocols
Protocol 1: QC Workflow for Detecting gDNA Contamination in cfDNA
Purpose: To screen cfDNA samples for artificial high molecular weight (HMW) DNA contamination using quantitative PCR. [1]
Principle: This method uses two real-time PCR systems targeting multi-copy genomic regions to generate amplicons of different lengths (106 bp and 612 bp). The ratio of the results from the long amplicon to the short amplicon provides a contamination score.
Materials:
- Purified cfDNA sample
- qPCR instrument (e.g., BioRad CFX96)
- Primers and TaqMan probes for 106 bp and 612 bp amplicons (see "Research Reagent Solutions")
- HS Taq DNA mix
Procedure:
- Prepare Two Separate Reactions: For each cfDNA sample, set up two monoplex qPCR reactions, one for the 106 bp target and one for the 612 bp target.
- Reaction Mix: Each 20 µL PCR contains:
- 1X HS Taq DNA mix
- 5 pmol of forward primer
- 5 pmol of reverse primer
- 5 pmol of the respective TaqMan probe (FAM for 106 bp, HEX for 612 bp)
- 1 ng of sample DNA
- Nuclease-free water to volume.
- Thermocycling Program:
- Initial Denaturation: 95°C for 3 minutes
- 40 Cycles of:
- Denaturation: 95°C for 30 seconds
- Annealing: 56°C for 30 seconds
- Extension: 72°C for 30 seconds
- Data Analysis:
- Perform ΔΔCt analysis in the qPCR instrument's software, selecting the 106 bp amplicon as the reference gene.
- The percentage of contamination can be calculated as: Relative Normalized Expression * 50% (where the control sample is a predefined standard). [1]
Protocol 2: Fine-Tuning Annealing Temperature Using ddPCR
Purpose: To empirically determine the optimal annealing temperature for a new ddPCR assay to maximize specificity and signal-to-noise ratio.
Materials:
- Bio-Rad QX200 or similar ddPCR system
- ddPCR Supermix for probes (no dUTP)
- FAM- and HEX-labelled probes and primers
- Template DNA (including wild-type and known mutant controls)
Procedure:
- Reaction Setup: Prepare the ddPCR reaction mix according to the manufacturer's protocol and your assay design. Divide the master mix into aliquots for each temperature to be tested.
- Gradient Setup: Use a thermocycler with a gradient function to run the same ddPCR plate across a range of annealing temperatures (e.g., from 55°C to 65°C in 1-2°C increments).
- Droplet Generation and Reading: Generate droplets and perform PCR using the standard or optimized cycling protocol. Read the plate on the droplet reader.
- Analysis:
- For each annealing temperature, analyze the 2D amplitude plot.
- The optimal annealing temperature is the one that provides:
- The clearest separation between positive and negative droplet populations.
- The highest fluorescence amplitude for the positive clusters.
- The lowest number of "rain" droplets (those falling between clear clusters).
- A mutant allele frequency in the positive control that matches the expected value. [47] [49]
Workflow Visualization
Diagram: cfDNA ddPCR Analysis with QC
The Scientist's Toolkit: Research Reagent Solutions
| Item | Function | Example & Notes |
|---|---|---|
| ccfDNA Plasma Kit | Extraction of cell-free DNA from plasma samples. | Kits from Promega (Maxwell RSC), Omega BioTek (MagBind), or Qiagen (QIAamp Circulating Nucleic Acid Kit) are commonly used. [47] |
| gBlock Gene Fragments | Synthetic DNA spike-in control. | Used to spike plasma prior to extraction to later calculate and correct for cfDNA extraction efficiency (e.g., a Xenopus tropicalis sequence). [47] |
| ddPCR Supermix for Probes | The core reaction mix for probe-based ddPCR. | Bio-Rad's ddPCR Supermix for probes (no dUTP) is a standard choice. Hot-start versions can improve specificity. [47] [1] |
| Locked Nucleic Acid (LNA) Probes | Dual-labelled hydrolysis probes for mutation detection. | LNA bases are incorporated into PrimeTime probes to increase allele discrimination and assay sensitivity. [47] |
| qPCR Reagents for QC | Detecting gDNA contamination. | HS Taq DNA mix with primers/probes for 106 bp and 612 bp amplicons from multi-copy regions. [1] |
| Reference Control Assay | Quantification of total human cfDNA. | An assay for a stable, single-copy gene like RPP30 is used to control for total human DNA input. [47] |
The analysis of cell-free DNA (cfDNA) using droplet digital PCR (ddPCR) is a powerful tool in oncology and liquid biopsy applications. However, the reliability of this data is fundamentally threatened by contamination with high molecular weight (HMW) genomic DNA (gDNA), which can originate from damaged blood cells during sample collection or processing [1] [48]. This contamination masks the native cfDNA fragmentation profile, leading to decreased assay sensitivity and inconsistent results [48] [4]. A critical, often subjective, step in data analysis—threshold determination—can compound these issues, undermining reproducibility. This guide provides targeted troubleshooting and protocols to objectively identify gDNA contamination and establish robust, reproducible analysis thresholds.
Frequently Asked Questions (FAQs) & Troubleshooting
1. How can I distinguish genuine gDNA contamination from a sample with naturally elevated high molecular weight cfDNA?
True gDNA contamination is characterized by a significant overrepresentation of long DNA fragments. While capillary electrophoresis can visualize this, a PCR-based integrity assay provides objective, quantitative data. By simultaneously quantifying short and long fragments from the same genomic locus, a low integrity score (high ratio of short to long fragments) confirms the presence of predominantly short, native cfDNA. A high integrity score suggests gDNA contamination, as the long fragment count will be disproportionately elevated [48] [4].
2. Why does my ddPCR amplitude plot show a compressed cluster spread, making manual threshold setting difficult?
Compressed cluster spread can result from several factors:
- PCR Inhibitors: Despite ddPCR's higher tolerance to inhibitors, their presence can reduce amplification efficiency and fluorescence intensity [4].
- gDNA Contamination: HMW gDNA can cause inefficient amplification in droplets containing long templates, leading to a broader, less distinct spread of positive droplets [1].
- Suboptimal Probe/Primer Efficiency: Reagents not optimized for the specific sample type can lead to weak signal generation.
Action: First, implement a QC assay to check for gDNA contamination. If contamination is ruled out, re-optimize your PCR conditions and ensure reagent quality.
3. My positive and negative droplet clusters are well-separated. Is manual threshold setting sufficient?
While manual setting is acceptable for ideal data, it introduces subjectivity and is not reproducible across multiple users, experiments, or over time. For robust, auditable research, an objective method is required. Using a threshold based on the fluorescence of the negative droplet population, calculated statistically (e.g., mean + 5 or 10 standard deviations), ensures consistency and eliminates operator bias [52].
Experimental Protocols for Contamination Assessment & Objective Analysis
Protocol 1: qPCR-Based gDNA Contamination Screening
This quantitative PCR method provides a rapid and accessible screen for HMW gDNA contamination [48].
Principle: Two amplicons—one short (e.g., 106 bp, within the typical cfDNA size range) and one long (e.g., 612 bp, representative of HMW DNA)—are amplified from multi-copy genomic regions. The ratio of the amplification efficiency (∆∆Cq method) of the long to the short amplicon indicates the degree of contamination.
- Research Reagent Solutions
| Item | Function in the Experiment |
|---|---|
| Primers & TaqMan Probes (for 106 bp & 612 bp amplicons) | Sequence-specific detection of target DNA fragments. The long amplicon is critical for identifying HMW gDNA. |
| HS Taq DNA Mix | A high-sensitivity polymerase master mix for robust amplification of low-abundance cfDNA targets. |
| Fragmented & Unfragmented DNA from Cell Line (e.g., Raji) | Used to create a standard curve for calibrating the contamination score and validating the assay's performance. |
Methodology:
- Assay Design: Design two non-overlapping primer pairs that generate amplicons of ~100 bp and >600 bp from a stable, multi-copy genomic region (e.g., long non-coding RNA genes) [48].
- Standard Curve Preparation: Prepare a calibration curve by mixing sheared DNA (~170 bp) with unsheared HMW gDNA from a cell line (e.g., Raji) in known proportions (e.g., 1%, 5%, 25%, 50% HMW DNA) [1].
- qPCR Run: Run the two qPCR assays (short and long) separately (monoplex) on your test cfDNA samples and the standard curve samples to avoid competition during amplification.
- Data Analysis: Use the ∆∆Cq method to calculate the ratio of long to short amplicons. The percentage of contamination can be extrapolated from the standard curve [1].
Protocol 2: Multiplex ddPCR for Integrated QC and Absolute Quantification
This advanced protocol uses a single ddPCR well to quantify absolute cfDNA concentration, assess fragment size distribution, and flag gDNA contamination [4].
Principle: A multiplex ddPCR assay targets several genomic loci with different fragment sizes. The example below uses a diploid single-copy locus (e.g., STAT6) for absolute concentration and a multi-copy gene family (e.g., Olfactory Receptor (OR) genes) targeted by probes for short, medium, and long fragments to build a size profile.
- Research Reagent Solutions
| Item | Function in the Experiment |
|---|---|
| ddPCR Supermix for Probes (no dUTP) | A reagent mix optimized for generating stable droplets and efficient probe-based amplification in ddPCR. |
| FAM/HEX-labeled TaqMan Probes | Enable multiplexed detection of different targets (e.g., STAT6 vs. OR genes) and different size amplicons within the OR family. |
| Olfactory Receptor (OR) Gene Family Primers/Probes | Designed to promiscuously cross-amplify multiple OR genes, providing a strong signal for fragment size distribution analysis. |
| Diploid Locus Probes (e.g., STAT6) | Used as an internal reference for absolute quantification of genome equivalents, independent of fragment size. |
Methodology:
- Assay Design: Design a primer/probe set to absolutely quantify a diploid reference gene (STAT6). Separately, design a set of primers that cross-amplify a multi-copy gene family (OR), with three different probes that are specific for short (73-165 bp), medium (166-253 bp), and long (>253 bp) fragments [4].
- ddPCR Setup: Combine the cfDNA sample with the mastermix and all primers/probes in a single well.
- Droplet Generation & PCR: Generate droplets and run endpoint PCR according to manufacturer protocols.
- Data Acquisition & Analysis:
- The absolute concentration (copies/μL) is derived from the count of STAT6-positive droplets [53] [4].
- The fragment size profile is determined by the ratio of positive droplets for the short vs. medium OR probes. A low ratio suggests potential gDNA contamination, while a high ratio is indicative of highly fragmented, pure cfDNA often seen in cancer samples [4].
The workflow below summarizes this integrated approach.
Integrated ddPCR Workflow for QC
Objective Threshold Determination: A Step-by-Step Guide
Moving beyond manual clicking ensures your data is analyzable and reproducible.
- Identify the Negative Cluster: The foundation of thresholding is a correct identification of the negative droplet population. This cluster should form a tight, well-defined cloud.
- Calculate Statistical Properties: Using your ddPCR analysis software's capabilities, calculate the mean (μ) and standard deviation (σ) of the fluorescence amplitude for the negative cluster.
- Set the Threshold Algorithmically: Establish the threshold line at a defined number of standard deviations above the negative mean. A common and robust starting point is:
- Threshold = μ + (5 × σ)
- This can be adjusted to μ + (10 × σ) for assays with higher background or more variability.
- Document and Apply Consistently: The formula used (e.g., "NEG_mean + 5SD") must be documented in your methods section and applied consistently to all samples in a dataset. This eliminates inter-experiment and inter-operator variability.
| Method | Principle | Key Metric | Advantages |
|---|---|---|---|
| qPCR Integrity Assay [48] | Ratio of long (612 bp) to short (106 bp) amplicon quantification. | Contamination Score (from ∆∆Cq). | Rapid, cost-effective; uses standard lab equipment. |
| Multiplex ddPCR QC [4] | Multiplexed absolute quantification and size profiling in a single well. | Short/Medium OR Ratio; HMW/STAT6 Ratio. | Provides absolute concentration, size distribution, and purity check simultaneously. |
| Capillary Electrophoresis [4] | Direct sizing and quantification of DNA fragments. | Percentage of fragments >500 bp. | Visual size distribution; good for quantifying high levels of contamination. |
Achieving reproducible data in cfDNA ddPCR research requires a systematic assault on two fronts: sample integrity and data analysis. By implementing the objective QC assays described here to detect and quantify gDNA contamination, and by replacing manual, subjective thresholding with a statistical, algorithmic approach, researchers can significantly enhance the reliability, credibility, and translational potential of their findings.
Assessing Inhibitor Carryover and Its Synergistic Effects with gDNA Contamination
FAQ: Understanding the Core Problem
What is the synergistic effect between inhibitor carryover and gDNA contamination in cfDNA ddPCR analysis?
This synergy describes a compounded negative impact where both contaminants are present. Residual impurities (inhibitors) from sample preparation reduce PCR efficiency, while concurrent genomic DNA (gDNA) contamination provides non-specific background targets. This combination can severely compromise data integrity by reducing the apparent concentration of the true cfDNA target, increasing variability, and raising the limit of detection. Inhibitors exacerbate the problem posed by gDNA by making it more difficult to distinguish specific amplification from non-specific background signals [17] [54].
Why is ddPCR, despite its robustness, still susceptible to these contaminants?
Droplet Digital PCR (ddPCR) partitions the reaction into thousands of nanoliter-sized droplets. While this partitioning can dilute inhibitors, making the technique less prone to their effects than qPCR, it does not eliminate them. High concentrations of inhibitors can still impair the enzymatic reaction within individual droplets. Furthermore, gDNA contamination is physically distributed across the droplets according to Poisson statistics. If present in high amounts, gDNA can occupy a significant fraction of the droplets, leading to false-positive signals and inaccurate quantification of the low-abundance cfDNA target [17] [55] [54].
What are the most common sources of inhibitor carryover in cfDNA samples?
Inhibitors are often co-purified with nucleic acids from the original biological sample. Common culprits include:
- Heparin from blood collection tubes.
- Hemoglobin and its breakdown products from hemolyzed blood.
- Urea and phenolic compounds from certain tissue types.
- Immunoglobulin G (IgG) from plasma/serum.
- Incomplete purification can leave behind alcohols, salts, or EDTA from the extraction process itself, which can impair polymerase activity and primer annealing [17].
Troubleshooting Guide: Identification and Resolution
The table below outlines common symptoms, their underlying causes, and recommended corrective actions.
Table 1: Troubleshooting Guide for Inhibitor and gDNA Contamination in cfDNA ddPCR
| Observed Symptom | Potential Cause | Corrective Actions & Experimental Optimizations |
|---|---|---|
| Reduced Amplitude & Poor Cluster Separation | Inhibitor Carryover: Contaminants reduce PCR efficiency, leading to lower fluorescence in positive droplets [17]. | 1. Re-purify Sample: Use a silica-membrane column cleanup or implement a double-purification protocol [56].2. Dilute the Sample: Dilution can reduce inhibitor concentration; however, this also dilutes the target cfDNA.3. Add Enhancers: Supplement the reaction with PCR enhancers like bovine serum albumin (BSA) or betaine. |
| High Background & False Positives | gDNA Contamination: Non-specific amplification of genomic sequences creates positive droplets not derived from the cfDNA target [17] [54]. | 1. Design Junction-spanning Assays: Place primers on different exons so that only spliced RNA (after reverse transcription) or cfDNA fragments (if intronic) yield a product.2. Use Restriction Digestion: Digest high-molecular-weight gDNA prior to ddPCR. Critical: Ensure the enzyme does not cut within your amplicon sequence [17].3. Apply Nuclease Treatments: Use a DNase I treatment post-extraction to degrade linear DNA, protecting your cfDNA target with specific buffers. |
| Low Calculated Copy Number & Inaccurate Quantification | Synergistic Effect: Inhibitors suppress true positive signals while gDNA inflation creates noise, leading to a gross miscalculation of the target's concentration. | 1. Implement Rigorous Controls: Include a No Template Control (NTC) to detect gDNA/amplicon contamination and a Positive Control to monitor inhibitor-induced efficiency loss [7] [17] [57].2. Optimize Sample Input: Titrate the sample input amount to find the optimal balance where inhibitors are diluted but the target is still detectable.3. Use Probe-Based Chemistry: Hydrolysis probes (e.g., TaqMan) offer greater specificity than DNA-binding dyes, helping to distinguish specific cfDNA targets from gDNA amplicons [17]. |
Experimental Protocols for Mitigation
Protocol 1: On-Chip Integrated Purification and Digital Detection
This protocol, adapted from a microfluidic approach for SARS-CoV-2 detection, demonstrates a closed-system method to minimize contamination and inhibitor carryover [56].
Workflow Diagram: Integrated Purification and Detection
Key Steps:
- Sample Preparation: Load the cfDNA sample (e.g., from plasma) into the lysis well (Well 1) of a PDMS-glass microfluidic chip. Pre-load wash buffers and PCR reagents into subsequent wells.
- Nucleic Acid Binding: Incubate to allow cfDNA to bind to magnetic beads in the lysis mixture.
- Wash: Using a magnet, pull the beads through two distinct wash wells (Wells 2 & 3) in an oil-enclosed environment. This physically separates inhibitors from the bead-bound nucleic acids. Stir beads in each wash well for efficient contaminant removal.
- Elution: Move the cleaned magnetic beads into the final mix well (Well 4) containing the PCR master mix.
- Partitioning & Amplification: Generate monodisperse droplets (50–200 µm) using a concentric-ring, oil-water-mixing, flow-focusing structure. Perform endpoint PCR amplification.
- Analysis: Read the droplets and apply Poisson statistics for absolute quantification. This method has demonstrated a nucleic acid recovery rate of 75 ± 8.8% and a detection limit of 10 copies/µL [56].
Protocol 2: Restriction Digestion for gDNA Removal
This pre-treatment is critical for accurate quantification, especially when targeting single-copy genes or working with samples prone to gDNA contamination [17].
Key Steps:
- Enzyme Selection: Choose a restriction enzyme that:
- Cuts frequently in the human genome but does not have a recognition site within your target amplicon sequence.
- Is active in a buffer compatible with your downstream ddPCR reaction.
- Digestion Reaction: Combine up to 1 µg of your extracted nucleic acid sample (containing cfDNA and potential gDNA) with the restriction enzyme and its appropriate buffer. Incubate according to the manufacturer's specifications (typically 1 hour at 37°C).
- Enzyme Inactivation: Heat-inactivate the enzyme if required (e.g., 20 minutes at 65°C). Alternatively, the digestion mix can be purified using a column-based clean-up protocol or used directly in the ddPCR reaction if the volume is acceptable.
- Proceed to ddPCR: Use the digested sample as the template for your ddPCR assay.
Rationale: This step fragments high-molecular-weight gDNA into smaller pieces, preventing it from being efficiently amplified in partitions and reducing its potential to cause false-positive signals, thereby ensuring that the quantified signal originates from the shorter cfDNA fragments [17].
The Scientist's Toolkit: Essential Reagents and Materials
Table 2: Research Reagent Solutions for Contamination Control
| Reagent/Material | Function in Contamination Control |
|---|---|
| Magnetic Silica Beads | Selective binding of nucleic acids (cfDNA) enabling physical separation from inhibitors through washing steps in automated or manual protocols [56]. |
| Restriction Enzymes | Enzymatic fragmentation of long, contaminating genomic DNA to prevent its co-amplification and ensure accurate quantification of short cfDNA targets [17]. |
| Hot-Start DNA Polymerase | A polymerase engineered to be inactive at room temperature, preventing non-specific amplification and primer-dimer formation during reaction setup, which is crucial for maintaining specificity in a contaminated sample [58]. |
| Hydrolysis Probes (TaqMan) | Sequence-specific fluorescent probes that provide a higher level of specificity compared to intercalating dyes, helping to distinguish true cfDNA targets from non-specific amplicons derived from gDNA [17]. |
| UNG/UDG Enzyme | An enzyme included in the master mix that degrades carryover contamination from previous PCR amplifications (containing dUTP) before the thermal cycling begins, preventing false positives [7] [57]. |
| Microfluidic Chip (Integrated) | Provides a closed, automated system for sample purification, washing, and droplet generation, dramatically reducing the risk of environmental contamination and cross-contamination between samples [56]. |
Workflow Visualization: A Strategic Defense-in-Depth
A successful contamination control strategy requires a multi-layered approach, integrating preventive and detective measures at every stage of the workflow.
Diagram: Comprehensive Contamination Control Workflow
Utilizing Fragment Analysis to Confirm cfDNA Purity and Size Profile
FAQ: Core Concepts and Best Practices
Q1: What are the characteristic size profiles of pure cfDNA, and what does gDNA contamination look like?
Pure cell-free DNA (cfDNA) exhibits a characteristic nucleosomal ladder pattern when analyzed. The primary peak corresponds to mononucleosomal DNA (~165 bp), followed by smaller peaks for dinucleosomes (~350 bp) and trinucleosomes (~565 bp) [59] [60]. Genomic DNA (gDNA) contamination is indicated by a significant, continuous smear of high molecular weight (hmwDNA) material, typically above 1,000 bp, or a prominent peak in that region. The presence of this high molecular weight DNA can interfere with downstream applications like ddPCR by increasing the background of wild-type DNA [59].
Q2: What are the critical pre-analytical factors that most impact cfDNA purity?
The choice of blood collection tube and the time delay between blood draw and plasma processing are two of the most critical factors [61]. The table below summarizes findings from a recent study evaluating these parameters:
Table 1: Impact of Blood Collection Tubes and Processing Delay on cfDNA Yield and Purity
| Blood Collection Tube | cfDNA Yield at 0h (ng/mL plasma) | cfDNA Yield at 168h (ng/mL plasma) | Recommended Use |
|---|---|---|---|
| K2EDTA | 2.41 | 68.19 | Plasma must be isolated within hours to avoid gDNA contamination from cell lysis. |
| Streck | 2.74 | 2.41 | Suitable for delayed processing (up to one week); maintains stable yield. |
| PAXgene | 1.66 | 2.48 | Suitable for delayed processing; moderate yield increase over time. |
| Norgen | 0.76 | 0.76 | Suitable for delayed processing; provides the most stable but lowest yield. |
Data adapted from [61]. The dramatic increase in yield for K2EDTA tubes after 168 hours is a strong indicator of gDNA contamination from lysed blood cells.
Q3: How can I objectively quantify the level of gDNA contamination in my sample?
Automated electrophoresis systems provide a quantitative metric for this purpose. For example, the %cfDNA is a quality metric that calculates the proportion of DNA fragments within the expected cfDNA size range (e.g., 50-700 bp) relative to the total DNA detected, which includes high molecular weight contamination. A higher %cfDNA indicates a purer sample [59]. Another method is using qPCR assays that target long DNA fragments (>400 bp), which are indicative of gDNA, and comparing their signal to assays for short fragments (~60-80 bp) representative of cfDNA [61].
Troubleshooting Guide: Common Issues and Solutions
Q4: My fragment analysis shows a low or uninterpretable signal. What should I check?
- Verify Instrument and Reagents: Ensure all reagents are within their expiration dates and have been stored properly. Run the internal size standard alone to confirm the instrument hardware and software are functioning correctly [62].
- Check Sample Concentration: The input concentration of cfDNA may be below the detection limit of your assay. Use a highly sensitive system or kit designed for low-abundance samples. For example, the Agilent Femto Pulse system can detect cfDNA concentrations as low as 5 pg/µL [59].
- Inspect Fluorescent Labels: If the size standard is present but your sample is not, the issue may be with the fluorescently labeled primer or probe. Re-synthesizing the primer is recommended [62].
Q5: My electropherogram shows broad or flat-topped peaks. What does this mean?
- Overloaded Sample (Off-scale Data): Flat-topped peaks are typically caused by signal saturation due to injecting too much DNA. Solution: Reduce the sample concentration by diluting the PCR product further or decreasing the injection time during the run [62].
- Sample or System Degradation: Broadening of peaks can occur if the separation polymer, buffer, or capillary array is degraded or expired. Solution: Replace the consumables and run the standards again. High salt concentration in the sample can also cause broad peaks [62].
Q6: I suspect carrier RNA from my extraction kit is interfering with the analysis. How can I confirm and resolve this?
Carrier RNA, used in some extraction kits to improve cfDNA recovery, can occasionally be detected as a smear or peak that overlaps with the dinucleosome fragment (~350 bp), interfering with accurate sizing and quantification [59].
- Solution: The most straightforward approach is to treat the extracted cfDNA sample with RNase prior to analysis. Alternatively, select an extraction protocol or kit that does not use carrier RNA [59].
Experimental Protocols
Protocol 1: Standardized Workflow for cfDNA QC using Automated Electrophoresis
This protocol is adapted for systems like the Agilent TapeStation or Bioanalyzer to assess cfDNA purity and size [59] [60].
- Sample Preparation: Use extracted cfDNA. The input concentration should be within the linear range of the assay (e.g., 20 pg/µL to 2 ng/µL for sensitive systems).
- Assay Selection: Load the appropriate reagent kit, such as the Cell-free DNA ScreenTape assay.
- Loading: Pipette the recommended volume of sample and/or ladder into the designated wells.
- Run Analysis: Start the pre-programmed run method. The system automatically performs electrophoresis, data collection, and analysis.
- Data Interpretation:
- Check the electropherogram for the characteristic mono-, di-, and tri-nucleosome peaks.
- Review the software-generated quality metrics, such as the %cfDNA, which quantifies the proportion of DNA in the cfDNA size range.
- Look for a "smear" of high molecular weight DNA (>700 bp) indicating gDNA contamination.
Protocol 2: Complementary qPCR Assay for gDNA Contamination
This method uses qPCR to detect long DNA fragments that are unlikely to exist in pure cfDNA [61].
- Assay Design: Design two sets of qPCR assays for the same genomic locus:
- A short amplicon assay (60-80 bp) to quantify total DNA (cfDNA + gDNA).
- A long amplicon assay (>200 bp, ideally >400 bp) that will only amplify if high-integrity gDNA is present.
- qPCR Run: Run both assays on your cfDNA samples and a control gDNA sample in parallel.
- Data Analysis: Calculate the ratio of the concentration obtained from the long amplicon assay to that from the short amplicon assay. A high ratio indicates significant gDNA contamination.
Workflow Visualization
The following diagram illustrates the logical workflow for confirming cfDNA purity and troubleshooting common issues.
The Scientist's Toolkit: Essential Research Reagent Solutions
Table 2: Key Instruments and Kits for cfDNA Fragment Analysis
| Instrument System | Recommended Kits | Key Application and Function | Sensitivity |
|---|---|---|---|
| TapeStation Systems | Cell-free DNA ScreenTape | Fast, automated digital assessment; provides %cfDNA metric for objective purity qualification. | From 20 pg/µL [59] |
| Bioanalyzer System | High Sensitivity DNA | Separation of major cfDNA peaks from HMW DNA; ideal for low-throughput analysis. | High Sensitivity [59] |
| Fragment Analyzer | HS Small Fragment Kit | High-resolution sizing and quantification of mono-, di-, tri-nucleosome fragments. | High Resolution [59] |
| Femto Pulse System | Ultra Sensitivity NGS Kit | Complete separation of fragments for the most sensitive sizing and quantification. | 5 - 250 pg/µL [59] |
Demonstrating Assay Fidelity: Validation Techniques and Comparative Analysis with qPCR
Accurate analysis of circulating cell-free DNA (cfDNA) using droplet digital PCR (ddPCR) is a cornerstone of liquid biopsy applications in cancer research and drug development. However, this process is critically compromised by genomic DNA (gDNA) contamination, which can lead to false positives, reduced assay sensitivity, and inaccurate quantification. Establishing a robust validation framework for assessing cfDNA purity and yield is therefore essential for generating reliable, reproducible data. This technical support guide outlines key experimental parameters, troubleshooting advice, and frequently asked questions to help researchers overcome the pervasive challenge of gDNA contamination in their cfDNA workflows, ensuring the integrity of downstream ddPCR analyses.
Core Validation Parameters: Quantifying Purity and Yield
A systematic validation of cfDNA extracts requires monitoring specific quantitative and qualitative parameters. The following table summarizes the key metrics that form the foundation of a reliable purity and yield assessment framework.
Table 1: Key Analytical Parameters for cfDNA Purity and Yield Validation
| Parameter | Description | Recommended Method(s) | Acceptance Criteria / Ideal Outcome |
|---|---|---|---|
| Fragment Size Profile | Analysis of cfDNA fragment length distribution. | Agarose Gel Electrophoresis, Agilent TapeStation, LabChip GX Touch HT Nucleic Acid Analyzer [60] [10]. | Dominant peak at ~150-170 bp (mononucleosomal); smaller peak at ~300 bp (dinucleosomal) possible [60] [10]. |
| gDNA Contamination | Assessment of high molecular weight genomic DNA contamination. | Fragment Size Analysis (as above), PCR Amplification of Long Targets [63]. | Minimal to no signal above 500-1000 bp. Absence of a high molecular weight smear on a gel [60]. |
| Extraction Yield | Quantity of cfDNA recovered from a given plasma volume. | qPCR or ddPCR (e.g., ALU115 assay) [10]. Fluorometry with caution and use of Poly(A) RNA carrier [10]. | Varies by sample; should be consistent with expected human plasma range (e.g., 1-50 ng/mL) [63]. Scalable with input plasma volume [10]. |
| Extraction Efficiency & Reproducibility | Consistency of recovery and lack of inter-extraction variability. | Use of exogenous DNA controls spiked into plasma pre-extraction [10]. Replicate extractions. | High recovery rates and low coefficient of variation (CV) across replicates [60]. |
| Variant Detection Accuracy (for ctDNA) | Concordance between detected and expected mutant alleles. | ddPCR or NGS on commercially available ctDNA reference materials with known Variant Allele Frequency (VAF) [60]. | Strong concordance with expected variants; high sensitivity for low VAF (e.g., 0.1%) [60]. |
Experimental Protocols for Validation
Protocol: Assessing cfDNA Purity via Fragment Size Analysis
This protocol utilizes fragment analyzers like the Agilent TapeStation or LabChip GX Touch to evaluate sample purity by confirming the classic cfDNA fragment pattern and identifying gDNA contamination.
Principle: Apoptotically derived cfDNA has a characteristic nucleosomal ladder pattern, with a strong peak at approximately 167 base pairs (mononucleosome). Significant deviation from this profile or a smear of high molecular weight fragments indicates gDNA contamination or sample degradation [60] [63].
Materials:
- Extracted cfDNA samples
- Appropriate fragment analysis kit (e.g., High Sensitivity D1000 for TapeStation)
- Fragment Analyzer instrument (e.g., Agilent TapeStation, LabChip GX Touch HT)
- Nuclease-free water
Method:
- Sample Preparation: Dilute the extracted cfDNA to a concentration within the linear range of the detection kit, following the manufacturer's instructions.
- Instrument Setup: Prepare the gel matrix, dyes, and ladder reagents as specified in the kit protocol.
- Loading: Pipette the prepared samples, ladder, and markers into the designated wells of the cartridge or chip.
- Run Analysis: Start the predefined workflow on the instrument software. The system will automatically separate the DNA fragments by size, detect them, and generate an electrophoretogram and virtual gel image.
- Data Interpretation:
- Pure cfDNA: A major, sharp peak at ~150-170 bp. A smaller secondary peak at ~300-400 bp (dinucleosomal) may be present [60].
- gDNA Contamination: Evidenced by a continuous smear of fragments above 500 bp or a distinct peak at a very high molecular weight. This indicates lysis of white blood cells during sample processing [63].
Protocol: Quantifying Yield and Extraction Efficiency with qPCR/ddPCR
Spectrophotometry (NanoDrop) and general fluorometry (Qubit) are unreliable for low-concentration cfDNA as they do not distinguish between cfDNA and contaminating gDNA, and can be influenced by kit reagents [10]. PCR-based methods are recommended.
Principle: Amplification of a short target (e.g., 115 bp from an ALU repeat) specifically quantifies the amplifiable, short-fragment cfDNA fraction. Spiking a known quantity of an exogenous control into the plasma before extraction allows for precise calculation of extraction efficiency [10].
Materials:
- Extracted cfDNA samples
- qPCR or ddPCR instrument
- Master mix, primers, and probes for a short amplicon target (e.g., ALU115)
- Exogenous DNA control (e.g., from other species)
Method:
- Spike-in Control: Add a known copy number of an exogenous DNA control (not present in the human genome) to the plasma sample immediately before cfDNA extraction.
- Extraction: Perform cfDNA extraction as per your standard protocol.
- PCR Setup:
- For the sample cfDNA, set up qPCR/ddPCR reactions with the ALU115 primer/probe set.
- For the extraction control, set up a separate qPCR/ddPCR reaction with primers/probes specific to the exogenous spike-in control.
- Quantification:
- Calculate the concentration of human cfDNA (from ALU115 assay) using a standard curve (qPCR) or absolute quantification (ddPCR).
- Calculate the recovery percentage of the exogenous control by comparing the measured concentration post-extraction to the known input concentration.
- Interpretation: A high and consistent recovery rate of the spike-in control (e.g., >70%) indicates an efficient and robust extraction process. The quantified human cfDNA concentration from the ALU115 assay provides a more accurate measure of usable yield than fluorometry [10].
Workflow Visualization: From Blood Draw to Validated cfDNA
The following diagram illustrates the complete workflow for obtaining high-purity cfDNA, highlighting the critical pre-analytical and analytical steps that prevent gDNA contamination.
Diagram 1: High-Purity cfDNA Workflow from Collection to Validation.
The Scientist's Toolkit: Essential Reagents and Materials
Table 2: Key Research Reagent Solutions for cfDNA Workflows
| Item | Function / Rationale | Example Kits / Products |
|---|---|---|
| Blood Collection Tubes with Stabilizers | Prevent white blood cell lysis during storage/transport, minimizing gDNA contamination [63]. | Cell-free DNA Blood Collection Tubes (e.g., from Streck, Roche). |
| Magnetic Bead-based cfDNA Kits | High-throughput, automatable extraction with high recovery efficiency of short fragments [60] [10]. | chemagic cfDNA Kits [10], other magnetic bead-based platforms [60]. |
| Reference Standards | Validate extraction efficiency and variant detection accuracy using material with known fragment profile and mutation status [60]. | Seraseq ctDNA, nRichDx cfDNA, AcroMetrix ctDNA controls [60]. |
| Fragment Analysis Kits | Visualize fragment size distribution to assess cfDNA purity and detect gDNA contamination [60] [10]. | Agilent High Sensitivity D1000, LabChip Cell-Free DNA Kits. |
| qPCR/ddPCR Kits for Short Amplicons | Accurate quantification of amplifiable cfDNA yield and extraction efficiency via spike-in controls [10]. | KAPA Human Genomic DNA QC Kit, custom ALU115 assays [10]. |
Troubleshooting Guides and FAQs
FAQ 1: My fragment analysis shows a significant high molecular weight smear. What went wrong and how can I fix it?
This indicates substantial genomic DNA contamination.
- Root Cause: The most likely source is lysis of white blood cells during sample handling. This can be caused by:
- Solutions:
- Prevention: Use cell-free DNA blood collection tubes with stabilizers for longer storage. If using EDTA, process plasma within 6 hours. Always perform a double centrifugation step to ensure complete removal of cells [10].
- Mitigation: If re-extraction is not possible, consider using enzymes or methods to selectively digest long DNA fragments, though this is not ideal and may not fully rescue the sample.
FAQ 2: My cfDNA yield seems sufficient by fluorometry, but my ddPCR fails or shows very low copy numbers. Why?
This discrepancy highlights the limitation of fluorometric methods for cfDNA.
- Root Cause: Fluorometers (e.g., Qubit) measure all double-stranded DNA, including contaminating gDNA, truncated fragments, and potential interference from extraction kit reagents. They do not indicate whether the DNA is amplifiable. The "yield" may be inflated, while the actual concentration of intact, targetable cfDNA fragments is low [10].
- Solutions:
- Switch to PCR-based quantification: Use a qPCR or ddPCR assay targeting a short amplicon (e.g., 100-150 bp) to quantify only the amplifiable fraction of your cfDNA [10].
- Use a carrier: If fluorometry must be used, ensure the addition of Poly(A) RNA to the assay to improve reliability, but be aware it still measures total DNA [10].
FAQ 3: How can I be sure my cfDNA extraction process itself is efficient and not introducing variability?
Monitoring extraction efficiency is key to a robust workflow.
- Solution: Implement an exogenous spike-in control. Add a known amount of a synthetic DNA sequence (e.g., from a non-human species) to your plasma sample before you begin the extraction. After extraction, use a specific ddPCR assay to quantify how much of the spike-in you recovered. A consistent, high recovery rate (e.g., >70%) across samples gives confidence in the reproducibility and efficiency of your extraction method [10].
FAQ 4: My negative controls (no-template water) are showing positive signals in ddPCR. What should I do?
This indicates PCR contamination, a serious issue that must be addressed before proceeding.
- Root Cause: Carry-over of amplicons from previous PCRs or cross-contamination of samples/reagents [64].
- Solutions:
- Physical Separation: Strictly separate your pre-PCR (reaction setup, DNA handling) and post-PCR (amplification, product analysis) areas. Use dedicated equipment, lab coats, and consumables (especially filtered tips) for each area [64].
- Decontaminate: Use surface decontaminants (e.g., diluted bleach or commercial nucleic acid degrading solutions) to clean workspaces and equipment [64].
- Reagent Aliquoting: Always work with small, single-use aliquots of reagents to prevent widespread contamination.
- Review Workflow: Ensure no materials (including lab notebooks) are moved from the post-PCR to the pre-PCR area [64].
Core Principle: How ddPCR Achieves Absolute Quantification
Digital PCR (dPCR), including Droplet Digital PCR (ddPCR), represents the third generation of PCR technology. Its core principle involves partitioning a PCR mixture into thousands to millions of individual reactions so that each partition contains either 0, 1, or a few nucleic acid targets. Following PCR amplification, the fraction of positive partitions is counted via an end-point fluorescence measurement. This fraction, when applied to Poisson statistics, allows for the direct computation of the absolute target concentration in the original sample, eliminating the need for a standard curve [65]. This calibration-free nature is the foundational advantage of ddPCR, enabling absolute quantification with high sensitivity, accuracy, and reproducibility [65] [66].
Comparative Workflows: qPCR vs. ddPCR
The diagram below illustrates the fundamental difference in how qPCR and ddPCR handle quantification.
Quantitative Performance Comparison
The following table summarizes key performance metrics where ddPCR holds a distinct advantage, particularly for complex samples.
| Performance Characteristic | qPCR | ddPCR | Experimental Context |
|---|---|---|---|
| Quantification Method | Relative (requires standard curve) [65] | Absolute (calibration-free) [65] | Fundamental measurement principle |
| Precision with Inhibitors | Highly variable Cq values; artifactual data [66] | More precise and reproducible results [66] | Samples with residual reverse transcription (RT) mix contaminants |
| Sensitivity (Limit of Detection) | Calculated LOD of 12.0 copies/μL [67] | Lower LOD of 0.066 copies/μL [67] | SARS-CoV-2 detection in wastewater matrices |
| Accuracy in Viral Load Quantification | Variable, less consistent for medium viral loads [68] | Superior accuracy and consistency, especially for medium loads [68] | Detection of influenza, RSV, and SARS-CoV-2 in clinical samples |
| Performance with Low Abundant Targets | Highly variable, non-reproducible data (Cq ≥ 29) [66] | More precise, reproducible, and statistically significant data [66] | Gene expression analysis with low amounts of synthetic DNA |
Troubleshooting Guide & FAQs: Overcoming Genomic DNA Contamination in cfDNA ddPCR
A primary challenge in cfDNA analysis is ensuring that the signal originates from circulating tumor DNA and not from contaminating genomic DNA (gDNA) released from lysed white blood cells. The following section addresses specific issues and solutions.
Frequently Asked Questions (FAQs)
Q1: Why is gDNA contamination a particular problem for ddPCR analysis of cfDNA? gDNA contamination artificially inflates the wild-type background. This is critical in applications like mutation detection or methylation analysis, where you are searching for rare tumor-derived signals. A high gDNA background can mask low-abundance targets, dramatically reducing the assay's sensitivity and leading to false negatives [69].
Q2: My ddPCR data shows over-quantification. Could gDNA be the cause? Yes. Large DNA molecules, including gDNA, can partition unevenly into droplets. If a single droplet contains multiple linked copies of your target (e.g., from a gDNA fragment), it will be counted as a single positive event, leading to over-quantification of the target concentration. This is a common issue with high-molecular-weight templates [17].
Q3: How can I assess the level of gDNA contamination in my cfDNA sample? It is recommended to use a dedicated ddPCR assay that targets an unaffected genomic region to quantify the gDNA load directly. Furthermore, you can evaluate sample quality by using ddPCR assays that amplify regions of different lengths (e.g., 65 bp vs. 250 bp). A high concentration of the longer amplicon suggests contamination with high-molecular-weight DNA, which is indicative of gDNA [69].
Troubleshooting Guide: gDNA Contamination
| Problem | Root Cause | Solution |
|---|---|---|
| High gDNA background overwhelming cfDNA signal. | Inefficient blood plasma processing; lysis of nucleated blood cells during sample handling. | Centrifuge blood samples at 2,000 g within 4 hours of venepuncture to remove cells before plasma isolation [69]. Use a second, high-speed centrifugation of plasma (e.g., 10,000 g) to remove residual cellular debris [69]. |
| Uneven partitioning and over-quantification. | Presence of large, high-molecular-weight gDNA fragments. | Perform restriction digestion prior to the ddPCR assay to fragment large gDNA molecules. This ensures even distribution and more accurate quantification [17]. |
| Inconsistent results and false positives in negative controls. | General contamination of reagents or workspace with foreign DNA. | Decontaminate workspace and labware. Use a closed, tipless liquid handling system to minimize cross-contamination. Always include Non-Template Controls (NTCs) [17] [70]. |
| Poor PCR efficiency in ddPCR, impeding cluster separation. | Co-purified inhibitors from the sample matrix (e.g., salts, heparin, acidic polysaccharides). | Ensure high nucleic acid purity using dedicated cfDNA extraction kits. Test sample dilution to dilute out inhibitors, though this must be balanced with the need to detect rare targets [17]. |
Experimental Protocol: A Robust Workflow for cfDNA Analysis via ddPCR
This protocol is designed to minimize gDNA contamination and optimize detection of rare targets in plasma cfDNA.
Sample Collection and Plasma Preparation
- Blood Collection: Draw whole blood into Streck or EDTA tubes.
- Plasma Separation: Centrifuge at 2,000 g for 10 minutes at 4°C within 4 hours of collection to pellet cells.
- Plasma Clarification: Transfer the supernatant (plasma) to a new tube and perform a second centrifugation at 10,000 g for 10 minutes to remove any remaining cellular debris [69].
- Storage: Aliquot and store clarified plasma at -80°C until cfDNA extraction.
cfDNA Extraction and Quality Control
- Extraction: Use a commercially available kit specifically validated for cfDNA isolation (e.g., DSP Circulating DNA Kit on QIAsymphony SP) [69].
- Spike-in Control: Add an exogenous DNA fragment (e.g., ~9000 copies/mL of CPP1) to the plasma before extraction to monitor extraction efficiency [69].
- Quality Control (QC): Perform a multi-parameter QC using ddPCR:
- Extraction Efficiency: Use a ddPCR assay targeting the spike-in (CPP1).
- gDNA Contamination: Use an assay for an immunoglobulin gene (PBC) and an assay for a long genomic fragment (e.g., 250 bp EMC7). A high signal in these indicates gDNA contamination [69].
- Total cfDNA: Use an assay for a short fragment (e.g., 65 bp EMC7) to quantify total cfDNA.
Restriction Digestion (If gDNA is detected)
- Incubate the extracted cfDNA with a restriction enzyme that does not cut within your target amplicon sequence.
- Heat-inactivate the enzyme according to the manufacturer's instructions [17].
ddPCR Reaction Setup and Analysis
- Prepare Master Mix: Combine ddPCR supermix, optimized primers (0.5–0.9 µM final concentration), and hydrolysis probes (0.25 µM final concentration) [17].
- Partitioning: Combine the master mix with your cfDNA sample and load into a droplet generator or nanoplate system to create thousands of partitions.
- PCR Amplification: Run endpoint PCR on a thermal cycler using optimized cycling conditions.
- Reading and Analysis: Run the plate or droplets on a droplet reader. Use the manufacturer's software to analyze the data and apply Poisson statistics for absolute quantification.
Essential Research Reagent Solutions
The following table lists key reagents and their critical functions in a ddPCR assay for cfDNA, with a focus on mitigating gDNA issues.
| Reagent / Material | Function | Considerations for gDNA/cfDNA Workflows |
|---|---|---|
| cfDNA-Specific Extraction Kits | Isolate short-fragment cfDNA while excluding high-molecular-weight gDNA. | Kits often include specific buffers and silica membranes designed to bind nucleic acids of a specific size range, improving cfDNA purity [69]. |
| Restriction Enzymes | Fragment large gDNA molecules to prevent uneven partitioning and over-quantification. | Critical: Verify the enzyme does not have a recognition site within your target amplicon [17]. |
| Hydrolysis Probes (TaqMan) | Provide sequence-specific detection, minimizing false positives from non-specific amplification or primer dimers. | Higher primer/probe concentrations than qPCR are often used (e.g., 0.5-0.9 µM primer, 0.25 µM probe) to increase fluorescence amplitude for better cluster separation [17]. |
| DNA Methylation-Specific Kits | Chemically convert unmethylated cytosines to uracils, allowing differentiation of tumor-derived methylated cfDNA from normal DNA. | Essential for assays detecting cancer-specific methylation markers in cfDNA, as in lung cancer detection [69]. |
| Nuclease-Free TE Buffer | Resuspend and store primers and probes. | Maintains primer and probe integrity. Avoid using water, as its acidic pH can degrade oligonucleotides over time [17]. |
| Automated Liquid Handler | Precisely dispense small volumes, reducing pipetting errors and cross-contamination risk. | A closed, tipless system is ideal for maximizing reproducibility and minimizing contamination in high-throughput settings [70]. |
A technical guide for optimizing digital PCR in the presence of genomic DNA contamination.
This technical support center provides targeted guidance for researchers using droplet digital PCR (ddPCR) in applications where sensitivity and resistance to inhibitors are critical, with a specific focus on overcoming the challenge of genomic DNA (gDNA) contamination in cell-free DNA (cfDNA) samples.
Core Concepts: dPCR vs. qPCR
What are the fundamental differences between dPCR and qPCR that affect their sensitivity and tolerance to inhibitors?
The key difference lies in their quantification methods. Quantitative real-time PCR (qPCR) relies on measuring fluorescence during the exponential phase of amplification and depends on a standard curve for quantification. In contrast, digital PCR (dPCR) uses an end-point measurement, partitioning a sample into thousands of miniature reactions and counting the positive and negative partitions to provide an absolute count of target molecules without a standard curve [71].
This partitioning confers two major advantages for challenging samples:
- Enhanced Sensitivity for Rare Targets: Partitioning effectively concentrates low-abundance targets into a small number of partitions, making them easier to detect against a background of non-target sequences [72] [71].
- Superior Tolerance to Inhibitors: PCR inhibitors present in a sample are also diluted across the many partitions. Therefore, a inhibitor molecule is less likely to be present in any given partition at a high enough concentration to prevent amplification, making the overall reaction more robust [71].
Table 1: Fundamental Comparison of qPCR and dPCR
| Feature | Quantitative PCR (qPCR) | Digital PCR (dPCR) |
|---|---|---|
| Quantification Method | Relative to a standard curve | Absolute, by Poisson statistics |
| Signal Measurement | Real-time (Ct value) | End-point |
| Sample Processing | Bulk reaction | Partitioned into 100s to 1000s of reactions |
| Sensitivity in Inhibitory Samples | Lower susceptibility | Higher susceptibility |
| Accuracy for Low Abundance Targets | Lower | Higher |
The following diagram illustrates the core dPCR workflow and its conceptual advantage for detecting rare targets in a complex background.
Troubleshooting & FAQs
How does ddPCR performance compare to qPCR in side-by-side studies?
Multiple direct comparison studies, particularly in virology and wastewater surveillance, demonstrate ddPCR's advantages in sensitivity for low viral loads.
- Clinical SARS-CoV-2 Detection: One study found that ddPCR significantly improved detection sensitivity in symptomatic individuals, from 28% by RT-qPCR to 87% by RT-ddPCR. It also reduced false positives among close contacts from 21% to 1% [72].
- Low Viral Load SARS-CoV-2 Samples: Another study reported that RT-ddPCR was 500 times more sensitive than RT-qPCR when testing throat swab samples from patients who later developed COVID-19 but initially tested negative by qPCR [72].
- Wastewater Surveillance: A study comparing both methods for quantifying SARS-CoV-2 in wastewater found their limits of detection (LOD) and quantification (LOQ) were within the same order of magnitude. The authors concluded that for this application, the choice of method is a matter of resources and throughput requirements, though ddPCR can offer benefits in accuracy [73].
Table 2: Selected Side-by-Side Performance Comparisons from Literature
| Application/Sample Type | Reported qPCR Performance | Reported ddPCR Performance | Key Study Finding |
|---|---|---|---|
| Clinical SARS-CoV-2 Detection [72] | 28% sensitivity in symptomatic individuals | 87% sensitivity in symptomatic individuals | ddPCR drastically reduced false negatives |
| Throat Swabs (Low Viral Load) [72] | High false-negative rate | 500x more sensitive than qPCR | Enabled detection in qPCR-negative, later symptomatic patients |
| Wastewater Surveillance [73] | LOD and LOQ comparable to ddPCR | LOD and LOQ comparable to qPCR | Both methods highly sensitive; choice depends on resources |
Genomic DNA contamination in cfDNA samples primarily originates from the lysis of nucleated blood cells during sample collection, handling, or storage. This "background" wild-type DNA drastically reduces the variant allele frequency (VAF) of a tumor-derived mutation, challenging detection limits.
Best Practices for Minimizing gDNA Contamination:
- Use Specialized Blood Collection Tubes: Instead of conventional EDTA tubes, which require processing within 2-6 hours, use cell-stabilizing blood collection tubes (BCT) like cfDNA (Streck), PAXgene Blood ccfDNA (Qiagen), or similar. These tubes preserve nucleated blood cells, preventing lysis and gDNA release, and allow for room temperature storage and transportation for up to 7 days [74].
- Optimize Plasma Processing Protocol: Implement a double centrifugation strategy:
- First step: 380–3,000 x g for 10 minutes at room temperature to separate plasma from blood cells.
- Second step: 12,000–20,000 x g for 10 minutes at 4°C to remove any remaining cellular debris [74].
- Choose an Efficient cfDNA Extraction Method: Magnetic bead-based and silica-membrane-based methods are commonly used. One study noted that silica membrane-based kits may yield more cfDNA than magnetic bead methods, but bead-based systems are advantageous for automation and high-throughput processing [74] [75].
- Analyze Fragment Size: Use an analytical tool like the Agilent TapeStation to confirm that the extracted DNA has a peak at ~167 bp, characteristic of mononucleosomal cfDNA. A significant fraction of longer fragments suggests gDNA contamination [75].
Our ddPCR assays for cfDNA show poor efficiency and low positive droplet counts. What could be the cause?
This is a common symptom of several pre-analytical and analytical issues.
- Cause 1: Sample Purity. Contaminants co-purified with nucleic acids can inhibit the PCR reaction or quench fluorescence. Common inhibitors include:
- Salts and EDTA: Impair primer/probe annealing.
- Humic Acids: Quench the fluorescence of dsDNA-binding dyes like EvaGreen.
- Phenol: Denatures the Taq polymerase [17].
- Cause 2: Sample Integrity and Input. cfDNA is highly fragmented. Using an amplicon that is too long can lead to amplification failure. Keep amplicons as short as possible to maximize the chance of amplifying degraded cfDNA templates [17].
- Cause 3: Improper Partitioning. The sample input amount must be in the "digital range." The average number of target copies per partition should ideally be between 0.5 to 3 to ensure some partitions contain the target and others do not, which is essential for accurate Poisson calculation. Excess DNA can lead to high background and poor cluster separation [17] [13].
How can I validate that my ddPCR assay is effectively detecting a rare mutant allele in a background of wild-type gDNA?
A rigorous validation requires a model system that mimics your clinical sample.
Experimental Protocol: Assay Validation using Synthetic Controls
This protocol uses commercially available reference materials to spike a known amount of mutant DNA into a background of wild-type DNA.
- Obtain Reference Standards: Acquire synthetic cfDNA or ctDNA reference materials with a known mutation (e.g., KRAS p.G12V) at a defined variant allele frequency (VAF). Multi-analyte controls with VAFs like 0%, 0.1%, 0.5%, and 1% are ideal [75].
- Spike-in Recovery Experiment: Spike the reference material into DNA-free plasma or wild-type gDNA to simulate a patient sample with a known truth.
- Extract cfDNA: Process the spiked sample using your standardized magnetic bead or silica-membrane protocol [75].
- Run ddPCR Analysis: Perform the ddPCR assay in duplicate or triplicate.
- Calculate Key Metrics:
- Recovery Rate: (Measured concentration / Expected concentration) x 100.
- Limit of Detection (LOD): The lowest VAF at which the mutation is reliably detected. A well-optimized assay can achieve an LOD of 0.1% or lower [74] [76].
- Precision: Calculate the coefficient of variation (CV) between replicates. A total error (bias + CV) of less than 35% may be acceptable for a validated bioanalytical assay [76].
The following workflow diagram outlines the key steps for establishing a robust ddPCR assay for detecting rare mutations in cfDNA.
The Scientist's Toolkit: Key Research Reagent Solutions
Table 3: Essential Materials for cfDNA ddPCR Research
| Item | Function/Application | Example Products/Brands |
|---|---|---|
| Cell-Stabilizing Blood Collection Tubes (BCT) | Prevents white blood cell lysis and gDNA release during transport/storage. | cfDNA BCT (Streck), PAXgene Blood ccfDNA (Qiagen) [74] |
| Magnetic Bead-Based cfDNA Kits | High-throughput, automated extraction of high-quality, short-fragment cfDNA. | QIAamp MinElute ccfDNA Midi Kit (Qiagen), Maxwell RSC ccfDNA LV Kit (Promega) [74] [75] |
| Silica-Membrane cfDNA Kits | Solid-phase extraction for high cfDNA yield. | QIAamp Circulating Nucleic Acid Kit (Qiagen), Cobas ccfDNA Sample Preparation Kit [74] |
| Reference Standard Materials | Assay validation, spike-in recovery experiments, and determining LOD/LOL. | Seraseq ctDNA (SeraCare), AcroMetrix ctDNA (Thermo Fisher), nRichDx cfDNA [75] |
| Fragment Analyzer | Quality control to assess cfDNA fragment size and detect gDNA contamination. | Agilent TapeStation, Bioanalyzer [75] |
- Superior Sensitivity: ddPCR consistently demonstrates higher sensitivity than qPCR in detecting low-abundance targets, as validated in multiple side-by-side clinical and environmental studies [72] [73].
- Pre-analytical is Paramount: The biggest gains in assay performance come from meticulous sample collection and processing to minimize gDNA contamination. The choice of blood collection tube and centrifugation protocol is critical [74].
- Assay Optimization is Non-negotiable: For reliable results with cfDNA, use short amplicons, ensure high nucleic acid purity, and input a template amount that keeps the reaction in the ideal "digital range" (0.5-3 copies/partition) [17].
- Validate with Controls: Always use synthetic reference standards in a background of wild-type DNA to empirically determine the recovery rate, limit of detection, and precision of your specific ddPCR assay [75] [76].
Utilizing Certified Reference Materials (CRMs) for Spike-and-Recovery Experiments
Core Concepts: CRMs and Their Role in cfDNA Analysis
What are Certified Reference Materials (CRMs) and why are they essential for spike-and-recovery experiments in cfDNA research?
Certified Reference Materials (CRMs) are controls or standards characterized by a metrologically valid procedure for one or more specified properties. They are accompanied by a certificate that provides the value of the specified property, its associated uncertainty, and a statement of metrological traceability [77]. In the context of cfDNA analysis for ddPCR, CRMs provide the ground truth needed to validate that your extraction and quantification processes are working as expected by providing a material with known characteristics that you can "spike" into your samples to measure recovery efficiency.
How does spike-and-recovery with CRMs help overcome genomic DNA contamination in cfDNA samples?
Genomic DNA (gDNA) contamination poses a significant challenge in cfDNA analysis because it can lead to false positives and inaccurate quantification. gDNA fragments are typically much longer than the 80-200 bp fragments that characterize cfDNA [78]. By using CRMs with known fragment sizes in spike-and-recovery experiments, you can:
- Validate extraction efficiency specific to the cfDNA size range
- Detect gDNA contamination through size distribution analysis
- Troubleshoot protocol issues that may be co-extracting gDNA
- Establish measurement certainty for your ddPCR assays
Table: Key Properties of cfDNA vs. Genomic DNA Contamination
| Property | True cfDNA | gDNA Contamination |
|---|---|---|
| Typical Fragment Size | 80-200 bp [78] | >10,000 bp [78] [79] |
| Origin Mechanism | Apoptosis, necrosis, active secretion [78] | Cell lysis during sample processing |
| Digital PCR Signal | Specific target amplification | Non-specific amplification or elevated background |
| Impact on Quantification | Accurate molecular counting | Overestimation of target concentration |
Implementation: Designing Spike-and-Recovery Experiments
What are the critical steps in designing a spike-and-recovery experiment for cfDNA analysis using CRMs?
A properly designed spike-and-recovery experiment requires careful planning at each stage:
CRM Selection: Choose a CRM that closely matches your target cfDNA in size and sequence characteristics. Linearized plasmid DNA CRMs in the 100-200 bp range are ideal [80].
Spiking Protocol: Introduce the CRM at the earliest possible stage of your workflow - preferably into the plasma/serum matrix before cfDNA extraction.
Extraction and Processing: Process the spiked sample alongside unspiked controls through your entire cfDNA workflow.
ddPCR Analysis: Quantify the recovered CRM using the same ddPCR conditions you use for your experimental samples.
Recovery Calculation: Calculate percentage recovery as: (Measured CRM concentration / Expected CRM concentration) × 100
The following workflow diagram illustrates a robust spike-and-recovery experimental design:
What recovery rate thresholds should I target, and what do deviations indicate?
Recovery rates provide crucial diagnostic information about your workflow efficiency. The table below outlines interpretation guidelines and troubleshooting actions:
Table: Interpretation of Spike-and-Recovery Results and Troubleshooting Guidance
| Recovery Rate | Interpretation | Common Causes | Troubleshooting Actions |
|---|---|---|---|
| 85-115% [79] | Optimal performance | Well-optimized protocol | Continue current methods; document performance |
| <85% | Under-recovery; potential loss of cfDNA | Inefficient extraction, improper storage, enzymatic degradation | Validate extraction kits; check sample handling; verify buffer compositions |
| >115% | Over-recovery; potential gDNA contamination | Cellular contamination, insufficient centrifugation, large DNA fragments | Increase centrifugation speed; implement additional purification steps; check blood processing timing |
| Highly Variable | Inconsistent methodology | Operator error, reagent lot changes, equipment calibration issues | Standardize training; validate new reagent lots; calibrate instruments |
Troubleshooting Common Experimental Issues
I'm observing inconsistent recovery rates across replicates. What could be causing this and how can I resolve it?
Inconsistent recovery typically indicates issues with sample homogeneity or procedural variability:
- Cause: Improper mixing of the CRM spike into the sample matrix
Solution: Ensure complete mixing after spiking by vortexing sufficiently, then brief centrifugation
Cause: Pipetting errors with small volumes of CRM
Solution: Use calibrated pipettes with appropriate volume ranges; consider pre-diluting CRM stocks to enable larger volume transfers
Cause: CRM instability or improper storage
Solution: Adhere strictly to CRM storage conditions; avoid repeated freeze-thaw cycles by creating single-use aliquots
Cause: Inconsistent droplet generation in ddPCR
- Solution: Regularly maintain and calibrate droplet generators; ensure consistent droplet volume across runs
My recovery rates are consistently low. How can I improve extraction efficiency for cfDNA?
Low recovery rates indicate suboptimal extraction or handling:
- Implement size-selection purification to remove contaminants while retaining cfDNA-sized fragments
- Verify plasma preparation protocols - ensure complete removal of cellular components through sufficient centrifugation (2,000 × g for 10 minutes is commonly used) [81]
- Evaluate alternative extraction chemistries - compare performance across different commercial kits specifically validated for cfDNA
- Add carrier DNA if compatible with your downstream applications, though this may interfere with absolute quantification
The recovery of my CRM doesn't match the recovery of endogenous cfDNA. What does this indicate?
Differential recovery between your CRM and endogenous cfDNA suggests a matrix effect or compatibility issue:
- Cause: CRM fragment size distribution doesn't match endogenous cfDNA
Solution: Source CRMs with size profiles more closely matching the 80-200 bp range of natural cfDNA [78]
Cause: CRM is not experiencing the same matrix effects as endogenous cfDNA
Solution: Use a CRM that is pre-formulated in a compatible matrix such as plasma or serum
Cause: Differential behavior during bisulfite conversion (for methylation studies)
- Solution: Use CRMs that have been validated for bisulfite conversion efficiency [69]
Advanced Applications and Method Validation
How can I use CRMs to validate the performance of my ddPCR system for cfDNA quantification?
CRMs enable comprehensive validation of your ddPCR system through several approaches:
- Linearity assessment: Create a dilution series of the CRM across the expected concentration range of your samples
- Limit of detection (LOD) and quantification (LOQ): Determine the lowest concentration at which you can reliably detect and quantify the CRM
- Precision validation: Perform replicate measurements of the CRM at multiple concentrations to establish inter- and intra-assay variability
- Cross-platform validation: Compare results obtained on different ddPCR systems using the same CRM to establish consistency
What quality control parameters should I monitor alongside spike-and-recovery experiments?
Implement a comprehensive quality control program that includes multiple orthogonal assessments:
- Extraction efficiency: Monitor using spiked CRMs as described
- gDNA contamination: Assess using assays that target longer genomic fragments [69]
- Inhibitor detection: Include internal amplification controls to detect PCR inhibitors
- Sample integrity: Evaluate cfDNA size distribution using bioanalyzer or similar methods
The relationship between these quality control metrics can be visualized as an integrated monitoring system:
Research Reagent Solutions
Table: Essential Materials for CRM-Based cfDNA Spike-and-Recovery Experiments
| Reagent/Material | Function | Selection Criteria |
|---|---|---|
| Linearized Plasmid DNA CRMs [80] | Primary spike-in material for recovery experiments | SI-traceable value assignment; size matching cfDNA (100-200 bp); multiple target sites for multiplex verification |
| Size-Fractionated cfDNA Mimics | Matrix-matched controls simulating natural cfDNA | Pre-quantified fragment distribution (80-200 bp); compatibility with extraction chemistry |
| Inhibition Control DNA | Detection of PCR inhibitors in extracted cfDNA | Non-human sequence; minimal cross-reactivity; different amplicon size than targets |
| gDNA Contamination Assay [69] | Detection of high molecular weight DNA contamination | Targets long genomic regions (>250 bp); human-specific sequences |
| Droplet Digital PCR Reagents | Absolute quantification of targets and spikes | Compatible with your ddPCR platform; validated probe chemistry; low background fluorescence |
Frequently Asked Questions
How should I handle and store CRMs to maintain their stability and accuracy?
CRM stability is maintained through strict adherence to storage conditions specified in the certificate of analysis. Avoid repeated freeze-thaw cycles by aliquoting CRMs into single-use portions. Document any deviations from recommended storage conditions, as these may affect the assigned values and uncertainties. Monitor CRM performance over time to detect any degradation that could impact your recovery calculations.
Can I create my own laboratory reference materials if certified materials are unavailable?
While laboratory-prepared reference materials can be useful for internal method monitoring, they lack the metrological traceability and rigorous characterization of CRMs [77]. If using laboratory-made materials, establish their concentration through orthogonal methods and compare them to CRMs whenever possible to ensure accuracy. For critical applications requiring regulatory submission, invested in properly certified materials is essential.
What uncertainty should I expect in my recovery measurements, and how do I account for it?
All quantitative measurements include uncertainty components from multiple sources: the CRM's certified uncertainty, pipetting variability, extraction efficiency variation, and ddPCR counting uncertainty. Combine these components using appropriate error propagation methods. Typically, well-optimized spike-and-recovery experiments should achieve coefficients of variation under 15% for replicate measurements.
How often should I perform spike-and-recovery experiments in my workflow?
Incorporate spike-and-recovery assessment:
- Initially: During method development and validation
- Routinely: With each new reagent lot or significant protocol change
- Periodically: As part of ongoing quality control, with frequency determined by your sample volume and regulatory requirements
- As needed: When troubleshooting suspected extraction or quantification issues
Implementing In-process QC Metrics for Ongoing Workflow Monitoring
Frequently Asked Questions (FAQs)
1. Why is genomic DNA (gDNA) contamination a critical issue for cfDNA analysis using ddPCR?
Genomic DNA contamination can lead to significant overestimation of the true cell-free DNA (cfDNA) concentration and mask low-abundance mutations, such as those in circulating tumor DNA (ctDNA) [14]. Unlike the short, fragmented nature of cfDNA (with a major peak around 150-170 bp), gDNA consists of long, high-molecular-weight strands. In ddPCR, the presence of gDNA can cause false-positive partitions, thereby skewing the absolute quantification that ddPCR is designed to provide [10].
2. What are the primary sources of gDNA contamination in plasma samples?
The main source of gDNA contamination is the lysis of white blood cells (WBCs) during or after blood collection [10]. This can be caused by:
- Improper phlebotomy techniques, such as using an incorrect needle size or prolonged tourniquet application.
- Rough handling of blood tubes, including excessive agitation or exposure to harsh temperature changes during storage or transport.
- Delayed processing of blood collected in standard K₃EDTA tubes, which should ideally be processed within 6 hours [10].
3. How can I check my extracted cfDNA for gDNA contamination?
A standard method is to use a ddPCR assay that targets different fragment lengths. One approach is to use two assays for the same gene: one amplifying a short fragment (e.g., 136 bp) to quantify total DNA, and another amplifying a long fragment (e.g., 420 bp) that is predominantly amplified if high-molecular-weight gDNA is present. A high concentration of the long fragment indicates gDNA contamination [14]. Additionally, fragment analysis systems can visualize the size profile; a clean cfDNA sample will show a dominant peak at ~170 bp, while a "smear" of larger fragments suggests gDNA contamination [10].
4. What are the key advantages of using ddPCR for cfDNA QC in a regulated environment?
ddPCR offers several key advantages for Quality Control (QC) [82] [83]:
- Absolute Quantification without a Standard Curve: ddPCR provides direct counting of target molecules, eliminating potential inaccuracies associated with creating and using a calibration curve in qPCR.
- Superior Tolerance to Inhibitors: The partitioning step in ddPCR dilutes PCR inhibitors present in the sample, making the assay more robust and potentially allowing for direct testing without DNA extraction.
- High Precision and Sensitivity: This makes ddPCR ideal for detecting rare events, such as low-frequency mutations in ctDNA.
Troubleshooting Guide: gDNA Contamination
Problem: Suspected genomic DNA contamination in plasma-derived cfDNA.
| QC Metric | Target / Acceptable Range | Out-of-Specification Indication |
|---|---|---|
| Post-Extraction gDNA DD-PCR Assay [14] | Low/undetectable long-fragment (e.g., 420 bp) signal. | Significant amplification of the long-fragment target. |
| Fragment Analysis Profile [10] | Sharp peak at ~170 bp. | A large amount of DNA fragments above 500 bp. |
| Fluorometric Quantification (with caveats) [10] | Yields should align with PCR-based methods. | Yields are consistently and significantly higher than ddPCR-based quantification. |
Step 1: Review Blood Collection and Handling Procedures
- Action: Verify that the blood draw was performed with an appropriate needle size and minimal tourniquet time. Ensure that after collection, tubes were not shaken and were stored at room temperature, protected from large temperature swings [10].
- Preventive Metric: Establish and monitor a standard operating procedure (SOP) for phlebotomy and sample handling.
Step 2: Evaluate Plasma Processing Timelines and Methods
- Action: If using standard K₃EDTA tubes, confirm that plasma was separated from cellular components within 6 hours of collection. The plasma should be subjected to a double centrifugation step to minimize carryover of WBCs [10].
- QC Metric: Record and track the time from blood draw to plasma freezing. This should consistently be under 6 hours for K₃EDTA tubes.
Step 3: Implement the Use of cfDNA-Stabilizing Blood Collection Tubes
- Action: Switch from K₃EDTA tubes to specialized cell-free DNA Blood Collection Tubes (BCTs). These tubes contain a preservative that stabilizes nucleated blood cells, preventing lysis and gDNA release.
- Data Support: Table: Impact of Blood Collection Tube on gDNA Stability during Storage summarizes experimental data comparing tube types.
| Storage Duration at Room Temperature | Standard K₃EDTA Tube | Stabilizing BCT |
|---|---|---|
| Day 1 | Slight increase in gDNA | Stable gDNA levels |
| Day 7 | Significant gDNA increase | Stable gDNA levels |
| Day 14 | >456-fold gDNA increase [14] | <2-fold gDNA increase [14] |
Step 4: Include an Exogenous Control to Monitor Extraction Efficiency
- Action: Spike a known quantity of an exogenous, non-human DNA sequence (e.g., from a plant or virus) into the plasma sample before the extraction begins. After extraction, use a dedicated ddPCR assay to quantify the recovery of this control.
- QC Metric: Calculate the percentage recovery of the exogenous control. A low and variable recovery rate indicates issues with the extraction process itself, which could contribute to overall data variability [10].
Workflow Diagrams
Diagram 1: Optimal cfDNA Workflow to Minimize gDNA Contamination
Diagram 2: Mechanism and Impact of gDNA Contamination
The Scientist's Toolkit: Key Reagent Solutions
| Reagent / Kit | Primary Function | Rationale for cfDNA Workflow |
|---|---|---|
| cfDNA Stabilizing Blood Collection Tubes (BCTs) | Prevents white blood cell lysis during blood storage and shipping. | Critically minimizes the release of genomic DNA, preserving the integrity of the cfDNA sample for up to 14 days at room temperature [14]. |
| Silica-Magnetic Bead Based cfDNA Kits | Extracts and purifies cfDNA from plasma. | Automated kits enable high-throughput, consistent recovery of cfDNA with minimal manual intervention, reducing pre-analytical variability [10]. |
| ALU115 qPCR/ddPCR Quantification Kit | Amplifies a short (115 bp) fragment of abundant ALU repeats. | Provides a sensitive and PCR-based method for accurate quantification of cfDNA, which is often too low for reliable spectrophotometric measurement [10]. |
| Exogenous DNA Control (e.g., Synthetic Non-Human DNA) | Spiked into plasma before extraction to monitor process efficiency. | Serves as an internal control for the extraction process, allowing researchers to track and normalize for sample-to-sample variations in cfDNA recovery [10]. |
Conclusion
Overcoming genomic DNA contamination in cfDNA samples is not a single step but an integrated, vigilant workflow imperative for generating trustworthy ddPCR data. The convergence of meticulous pre-analytical practices, optimized DNA extraction methods, and intelligent ddPCR assay design forms a powerful defense, ensuring that the true signal of circulating biomarkers is not masked by contaminating noise. As the field of liquid biopsy advances toward earlier cancer detection and minimal residual disease monitoring, the demand for ultra-pure cfDNA will only intensify. By adopting the comprehensive strategies outlined—from foundational understanding to rigorous validation—researchers can significantly enhance the precision and reproducibility of their work. This commitment to quality control paves the way for more reliable non-invasive diagnostics, accelerates drug development, and ultimately contributes to improved patient outcomes in precision medicine.
References
- 1. Application of PCR-based approaches for evaluation of cell ... [https://pmc.ncbi.nlm.nih.gov/articles/PMC10083340/]
- 2. Extraction of Cell-Free DNA: Evaluation of Efficiency, ... [https://www.sciencedirect.com/science/article/pii/S152515782400014X]
- 3. Absolute quantification of rare gene targets in limited ... [https://pmc.ncbi.nlm.nih.gov/articles/PMC11928631/]
- 4. Evaluating the quantity, quality and size distribution of cell ... [https://www.nature.com/articles/s41598-020-69432-x]
- 5. Cell-Free DNA Fragmentomics: The Novel Promising ... [https://pmc.ncbi.nlm.nih.gov/articles/PMC9866579/]
- 6. Clean Up Your Act! How To Clean Up PCR Contamination [https://bitesizebio.com/20773/clean-up-your-act-how-to-clean-up-pcr-contamination/]
- 7. Avoiding Contamination | Thermo Fisher Scientific - ES [https://www.thermofisher.com/us/en/home/life-science/pcr/real-time-pcr/real-time-pcr-learning-center/real-time-pcr-basics/good-laboratory-practice-avoid-contamination-qpcr-experiments.html]
- 8. Evaluating Digital PCR for the quantification of human ... [https://pmc.ncbi.nlm.nih.gov/articles/PMC5108050/]
- 9. Digital droplet PCR is an accurate and precise method to ... [https://www.nature.com/articles/s41598-025-20944-4]
- 10. Tips on establishing a reliable cell free DNA (cfDNA) ... [https://www.revvity.com/blog/tips-establishing-reliable-cell-free-dna-cfdna-workflow-plasma-samples]
- 11. A novel Droplet Digital PCR method for assessing ... [https://www.sciencedirect.com/science/article/abs/pii/S0379073825003627]
- 12. A ddPCR method for simultaneous detection and ... [https://www.nature.com/articles/s41598-025-17272-y]
- 13. Digital PCR Support—Troubleshooting [https://www.thermofisher.com/us/en/home/technical-resources/technical-reference-library/real-time-digital-PCR-applications-support-center/digital-pcr-support/digital-pcr-support-troubleshooting.html]
- 14. A stabilizing reagent prevents cell-free DNA contamination ... [https://pubmed.ncbi.nlm.nih.gov/23769817/]
- 15. Troubleshooting Non-Specific Amplification [https://bento.bio/resources/bento-lab-advice/troubleshooting-non-specific-amplification-with-bento-lab/]
- 16. PCR Troubleshooting Guide | Thermo Fisher Scientific - US [https://www.thermofisher.com/us/en/home/life-science/cloning/cloning-learning-center/invitrogen-school-of-molecular-biology/pcr-education/pcr-reagents-enzymes/pcr-troubleshooting.html]
- 17. dPCR assay development | Digital PCR troubleshooting [https://www.qiagen.com/us/applications/digital-pcr/beginners/dpcr-guide/setup-and-troubleshooting]
- 18. Contamination Control of Genomic DNA [https://www.enzo.com/basic-research/technology-platforms/genomic-analysis/pcr/dna-purification-and-contamination-control/]
- 19. Preanalytical Errors in Clinical Laboratory Testing at a ... [https://pmc.ncbi.nlm.nih.gov/articles/PMC10981510/]
- 20. Interferences from blood collection tube components on ... [https://pmc.ncbi.nlm.nih.gov/articles/PMC3936985/]
- 21. Comparison of single and double centrifugation methods ... [https://pmc.ncbi.nlm.nih.gov/articles/PMC10214802/]
- 22. Preanalytical blood sample workup for cell‐free DNA ... [https://pmc.ncbi.nlm.nih.gov/articles/PMC5633557/]
- 23. What is the optimal centrifugation protocol for preparing ... [https://labsup.net/blogs/blog/what-is-the-optimal-centrifugation-protocol-for-preparing-prp?srsltid=AfmBOopPr4AXAiaDgYhs9OFeOZykXutBh683zOV4rnfX3tgypVfL-e40]
- 24. A (Mini) Guide to Centrifuge Troubleshooting [https://www.marathonls.com/a-mini-guide-to-centrifuge-troubleshooting/?srsltid=AfmBOopEW804jM-RUkhnKH3U50oajDKqTIOkdhFqP22K2V7IzPHjFD79]
- 25. Common Centrifuge Issues and How to Fix Them [https://newlifescientific.com/blogs/new-life-scientific-blog/centrifuge-troubleshooting?srsltid=AfmBOoo0cKCb_tubfkn4JiGx2j9uUQOLtJ2Ib4IY7oSyJMVAjk53xXOm]
- 26. The impact of preanalytical variables on the analysis of cell ... [https://www.frontiersin.org/journals/cell-and-developmental-biology/articles/10.3389/fcell.2024.1385041/full]
- 27. The Significance of Double Centrifugation in Diagnostic ... [https://www.needle.tube/resources-25/The-Significance-of-Double-Centrifugation-in-Diagnostic-Testing-in-the-Healthcare-Industry]
- 28. Droplet digital PCR of viral DNA/RNA, current progress ... [https://pmc.ncbi.nlm.nih.gov/articles/PMC8013307/]
- 29. DNA Extraction Kits Compared: Spin Columns vs. Magnetic ... [https://synapse.patsnap.com/article/dna-extraction-kits-compared-spin-columns-vs-magnetic-beads]
- 30. Optimization and validation of a fully automated silica ... [https://www.sciencedirect.com/science/article/abs/pii/S0379073805001349]
- 31. Common Mistakes and Avoidance Methods in Magnetic ... [https://www.dnaextractionkit.com/products/magnetic-beads-dna-extraction-kit/common-mistakes-magnetic-beads-dna-extraction-avoidance]
- 32. A Novel Automated Nucleic Acid Extraction System Based ... [https://pmc.ncbi.nlm.nih.gov/articles/PMC12191882/]
- 33. Harmonizing cell-free DNA Collection and Processing ... [https://pmc.ncbi.nlm.nih.gov/articles/PMC7334102/]
- 34. Comparison of two silica-based extraction methods for ... [https://www.sciencedirect.com/science/article/abs/pii/S1344622316300608]
- 35. Dynabeads Nucleic Acid Purification Support ... [https://www.thermofisher.com/us/en/home/technical-resources/technical-reference-library/nucleic-acid-purification-analysis-support-center/dynabeads-nucleic-acid-purification-support/dynabeads-nucleic-acid-purification-support-troubleshooting.html]
- 36. Common Problems with Nucleic Acid Extraction [https://www.sterilab.co.uk/news/common-problems-with-nucleic-acid-extraction]
- 37. Troubleshooting Guide for Genomic DNA Extraction & ... [https://www.neb.com/en-us/tools-and-resources/troubleshooting-guides/troubleshooting-guide-for-t3010?srsltid=AfmBOor0HcfR7Ma0r0TEvivarO4YLyNfqeNMttKdH684_F3TOTwaISTO]
- 38. Chapter 8: Quality Control and Best Practices in ddPCR [https://gccllab.github.io/ddPCR/chapter-8-quality-control-and-best-practices-in-ddpcr.html]
- 39. PCR controls [https://www.qiagen.com/us/knowledge-and-support/knowledge-hub/bench-guide/pcr/reference-genes-and-controls/pcr-controls]
- 40. Seven tips for avoiding DNA contamination in your PCR [https://www.takarabio.com/about/bioview-blog/tips-and-troubleshooting/avoid-dna-contamination-in-pcr?srsltid=AfmBOopbGyEbDbW45_6OxZExPO25SNGPWMTbcQls8vO5l7mDgEj8ARXt]
- 41. How Do You Maintain ISO Cleanroom Standards in 2025? [https://lindstromgroup.com/in/articles/how-do-you-maintain-iso-cleanroom-standards-in-2025/]
- 42. A Guide to Cleanroom Personal Protective Equipment (PPE) [https://harmonycr.com/resources/a-guide-to-cleanroom-personal-protective-equipment-ppe/]
- 43. Cleaning protocols in forensic genetic laboratories - PMC [https://pmc.ncbi.nlm.nih.gov/articles/PMC11306349/]
- 44. PPE Protocol Mistakes That Could Compromise Your ... [https://douyeebiomed.com/ppe-protocol-mistakes-that-could-compromise-your-cleanroom/]
- 45. PCR技术系列四:PCR污染与对策 [https://www.biomart.cn/lab-web/news/article/31m72tago40ec.html]
- 46. Preventing PCR Amplification Carryover Contamination in ... [https://www.annclinlabsci.org/content/34/4/389.long]
- 47. Optimisation of robust singleplex and multiplex droplet ... [https://pmc.ncbi.nlm.nih.gov/articles/PMC6718424/]
- 48. Quantitative PCR–Based Method to Assess Cell-Free DNA ... [https://www.sciencedirect.com/science/article/pii/S1525157822000745]
- 49. PCR Thermal Cyclers Support - Troubleshooting [https://www.thermofisher.com/us/en/home/technical-resources/technical-reference-library/pcr-cdna-synthesis-support-center/pcr-thermal-cyclers-support/pcr-thermal-cyclers-support-troubleshooting.html]
- 50. Considerations and quality controls when analyzing cell-free ... [https://pmc.ncbi.nlm.nih.gov/articles/PMC6416156/]
- 51. Ultra-Rapid Droplet Digital PCR Enables Intraoperative Tumor ... [https://pmc.ncbi.nlm.nih.gov/articles/PMC11160868/]
- 52. Validation of a digital PCR method for quantification ... [https://pmc.ncbi.nlm.nih.gov/articles/PMC5007884/]
- 53. Fundamentals of digital PCR [https://www.qiagen.com/us/knowledge-and-support/knowledge-hub/bench-guide/pcr/digital-pcr/what-is-digital-pcr]
- 54. Droplet Digital Polymerase Chain Reaction - an overview [https://www.sciencedirect.com/topics/immunology-and-microbiology/droplet-digital-polymerase-chain-reaction]
- 55. Maximize Insights by Combining Molecular Profiling [https://www.bioradiations.com/maximize-insights-by-combining-molecular-profiling-624/]
- 56. On-Chip Nucleic Acid Purification Followed by ddPCR ... - PMC [https://pmc.ncbi.nlm.nih.gov/articles/PMC10216157/]
- 57. Controlling for contamination in qPCR testing - LGC [https://blog.biosearchtech.com/how-to-control-for-contamination-in-qpcr-testing]
- 58. Troubleshooting primer dimer in PCR [https://www.minipcr.com/primer-dimer-pcr/]
- 59. cfDNA Analysis – Quality Control Advantages with Agilent [https://www.agilent.com/en/product/automated-electrophoresis/cfdna-analysis?srsltid=AfmBOooE79ZHyqDwtRL1awhV32fgQ4zZPeXI-YBppyF_MDN1mx25hXN9]
- 60. Standardized Workflow and Analytical Validation of Cell ... [https://pmc.ncbi.nlm.nih.gov/articles/PMC12293894/]
- 61. Evaluation of automatic cell free DNA extraction metrics ... [https://www.nature.com/articles/s41598-025-03508-4]
- 62. Fragment Analysis Support—Troubleshooting [https://www.thermofisher.com/us/en/home/technical-resources/technical-reference-library/capillary-electrophoresis-applications-support-center/fragment-analysis-support/fragment-analysis-support-troubleshooting.html]
- 63. Challenges in cfDNA Analysis [https://www.qiagen.com/us/knowledge-and-support/knowledge-hub/bench-guide/cell-free-dna-guide/introduction/challenges-in-cfdna-analysis]
- 64. Seven tips for avoiding DNA contamination in your PCR [https://www.takarabio.com/about/bioview-blog/tips-and-troubleshooting/avoid-dna-contamination-in-pcr?srsltid=AfmBOopsWFC8lTWco58SPh2AqxZzPGAsSHphscA87lkieSnZnuWdHub0]
- 65. Digital PCR: from early developments to its future application ... [https://pubs.rsc.org/en/content/articlehtml/2025/lc/d5lc00055f]
- 66. Droplet Digital PCR versus qPCR for gene expression ... [https://www.nature.com/articles/s41598-017-02217-x]
- 67. Assessing sensitivity and reproducibility of RT-ddPCR and RT ... [https://pmc.ncbi.nlm.nih.gov/articles/PMC8267102/]
- 68. Comparative Performance of Digital PCR and Real-Time RT ... [https://pmc.ncbi.nlm.nih.gov/articles/PMC12474457/]
- 69. Development and validation of a methylation-specific ... [https://www.nature.com/articles/s41598-025-15228-w]
- 70. qPCR Troubleshooting: How to Ensure Successful ... [https://dispendix.com/blog/qpcr-troubleshooting]
- 71. dPCR: A Technology Review - PMC - PubMed Central [https://pmc.ncbi.nlm.nih.gov/articles/PMC5948698/]
- 72. In pursuit of sensitivity: Lessons learned from viral nucleic acid ... [https://pmc.ncbi.nlm.nih.gov/articles/PMC8501152/]
- 73. Evaluating the sensitivity of droplet digital PCR for the ... [https://www.frontiersin.org/journals/public-health/articles/10.3389/fpubh.2023.1271594/full]
- 74. Improvement of the sensitivity of circulating tumor DNA-based ... [https://pmc.ncbi.nlm.nih.gov/articles/PMC12332530/]
- 75. Standardized Workflow and Analytical Validation of Cell ... [https://www.mdpi.com/2073-4409/14/14/1062]
- 76. Development and validation of a model gene therapy ... [https://www.sciencedirect.com/science/article/pii/S2329050123000694]
- 77. Certified reference materials - Wikipedia [https://en.wikipedia.org/wiki/Certified_reference_materials]
- 78. The Potential of cfDNA as Biomarker - PubMed Central [https://pmc.ncbi.nlm.nih.gov/articles/PMC11906534/]
- 79. Quantitation of Residual Host Cell DNA in Recombinant ... [https://pmc.ncbi.nlm.nih.gov/articles/PMC10285681/]
- 80. Development and interlaboratory validation of a linearized ... [https://www.sciencedirect.com/science/article/abs/pii/S0039914025012536]
- 81. Plasma cell-free DNA Droplet Digital PCR provides rapid ... [https://www.frontiersin.org/journals/cellular-and-infection-microbiology/articles/10.3389/fcimb.2025.1522426/full]
- 82. A quality control revolution for droplet digital PCR [https://www.nature.com/articles/d42473-020-00123-x]
- 83. ddPCR in GMP product testing quantifies without ... [https://www.eurofins.com/biopharma-services/product-testing/news-events/newsletters/spring-2021/ddpcr-in-gmp-product-testing/]