Essential Guide to Nested PCR Contamination Prevention: Workflows, Optimization, and Best Practices for 2025
This article provides a comprehensive guide for researchers and laboratory professionals on establishing a robust workflow to prevent contamination in nested PCR.
Essential Guide to Nested PCR Contamination Prevention: Workflows, Optimization, and Best Practices for 2025
Abstract
This article provides a comprehensive guide for researchers and laboratory professionals on establishing a robust workflow to prevent contamination in nested PCR. Nested PCR, while offering superior sensitivity and specificity for challenging applications in pathogen detection and oncology, is highly susceptible to contamination due to its two-step amplification process, which can lead to false-positive results. We detail foundational principles of contamination risks, methodological strategies including physical laboratory design and unidirectional workflows, troubleshooting protocols for common issues, and a comparative analysis with alternative molecular techniques. By synthesizing current best practices and validation data, this guide aims to empower laboratories to achieve reliable and reproducible nested PCR results, thereby enhancing the integrity of molecular diagnostics and drug development research.
Understanding the Critical Contamination Risks in Nested PCR
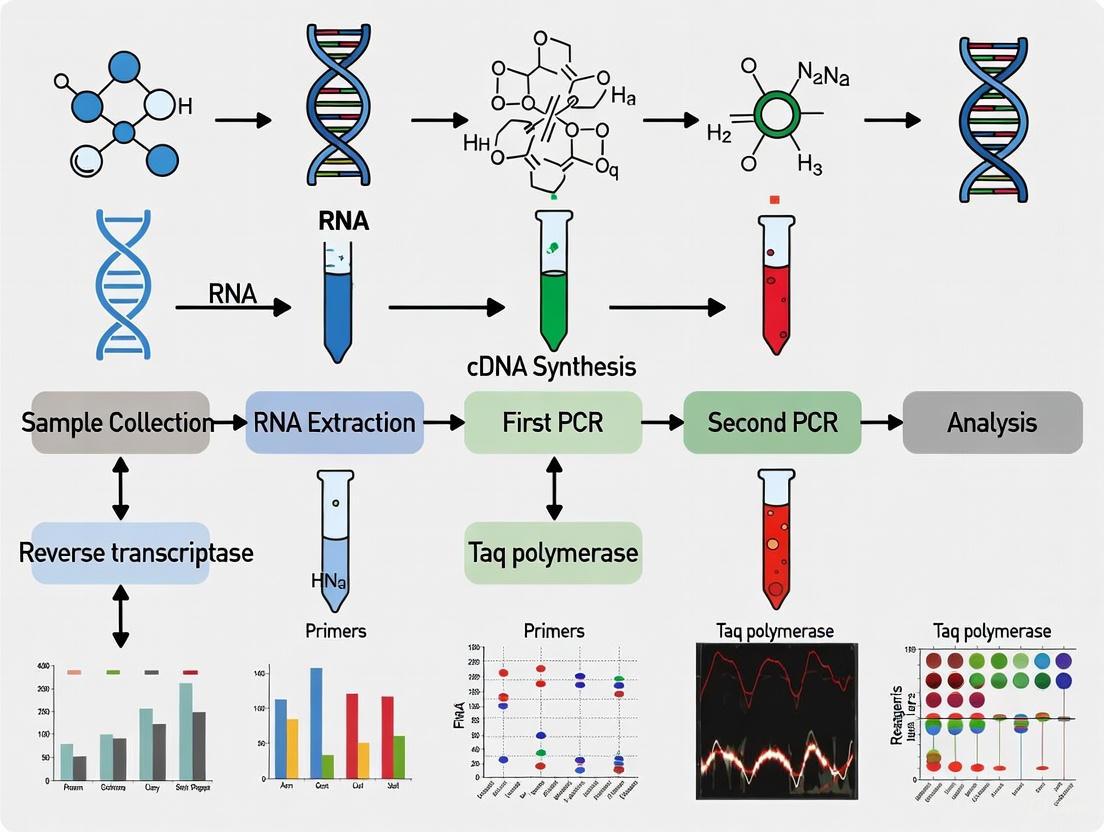
Nested polymerase chain reaction (nested PCR) is a powerful molecular technique developed to significantly enhance the sensitivity and specificity of DNA amplification through two successive rounds of PCR amplification [1]. This method utilizes two pairs of primers: an outer primer set that flanks the target region in the first amplification round, and an inner (nested) primer set that binds within the first amplicon product during the second amplification round [2] [3]. The statistical improbability of non-specific products being amplified by both primer sets confers exceptional specificity, while the high total cycle number dramatically increases detection sensitivity—theoretically enabling detection of even a single template molecule [1].
Despite these advantages, nested PCR presents a critical vulnerability: inherent susceptibility to amplicon contamination. The requirement to transfer the first-round amplification product to a second reaction tube creates numerous opportunities for aerosol contamination of laboratory environments, equipment, and reagents with the highly concentrated PCR products from the first amplification round [1] [4] [2]. These amplicons can then serve as templates in subsequent reactions, generating false-positive results that compromise diagnostic accuracy and research validity. This application note examines the contamination mechanisms in nested PCR workflows and provides evidence-based strategies for contamination prevention.
Mechanisms of Amplicon Contamination in Nested PCR
Physical Transfer Between Amplification Rounds
The fundamental vulnerability of conventional nested PCR stems from the physical transfer requirement between the primary and secondary amplification reactions. After 15-30 cycles of initial amplification, the reaction tube contains a high concentration of the target amplicon, typically in the nanogram to microgram range [1]. The process of opening this tube to aliquot the first-round product for the second amplification creates microscopic aerosols that can contaminate pipettors, workstation surfaces, reagent stocks, and the laboratory environment [4]. Since these amplicons are identical to the target sequence for the second round of amplification, even minute quantities can serve as efficient templates, leading to false-positive results in subsequent reactions.
Statistical Evidence of Contamination Risk
Recent studies quantify the contamination challenges associated with nested PCR workflows. The table below summarizes comparative data from diagnostic applications:
Table 1: Comparative Performance of Nested PCR Methods in Diagnostic Applications
| Study Focus | Conventional Nested PCR Results | Alternative Method Results | Contamination Control Challenges |
|---|---|---|---|
| H. pylori detection in stool samples [5] | Higher positivity rates (51% vs 6.25% with long amplicon) but potential false positives | Stool antigen test: 27.9% positivity; Specificity confirmed by sequencing | Short amplicon (148 bp) NPCR showed unexpectedly high positivity, suggesting potential contamination or detection of degraded DNA |
| JC polyomavirus detection in prostate tissue [6] | 58% detection in cancer cases vs 38% in controls with nested PCR | N/A | Strict aerosol barrier tips and separate hoods required to prevent false positives |
| Single-tube nested PCR optimization [4] | Conventional method: high contamination risk during transfer between tubes | Single-tube format: maintained sensitivity while eliminating transfer step | Eliminates amplicon release by containing both reactions in one tube |
Amplification Workflow and Contamination Points
The following diagram illustrates the standard nested PCR workflow with critical contamination risk points:
Contamination Control Protocols and Methodologies
Physical Separation Strategies
Traditional nested PCR protocols implement physical barriers to minimize amplicon transfer between reactions. One documented approach uses wax or oil barriers to physically separate first-round and second-round amplification mixtures within the same tube [1]. This method partitions the reaction components during setup, with the barrier melting during thermal cycling to allow the second round of amplification to proceed without opening the tube. While reducing aerosol generation, this method requires precise optimization of primer concentrations and cycling conditions to ensure both amplification rounds proceed efficiently.
Single-Tube Nested PCR (ST-nPCR) Protocol
The development of single-tube nested PCR (ST-nPCR) represents a significant advancement in contamination control [4]. This methodology contains both amplification rounds within a single sealed tube, eliminating the physical transfer step that generates aerosols. The protocol relies on primer engineering and thermal cycling optimization:
Table 2: Single-Tube Nested PCR Protocol Components
| Component | Concentration | Function | Considerations |
|---|---|---|---|
| Outer Primers | 0.1-0.2 µM | First-round amplification | Higher Tm (65-68°C) to prevent early inner primer binding |
| Inner Primers | 0.4-0.5 µM | Second-round amplification | Lower Tm (45-50°C) with delayed activation |
| DNA Template | 1-10 ng | Target sequence | Volume not to exceed 10% of reaction |
| dNTPs | 200 µM each | Nucleotide substrates | Balanced concentration prevents errors |
| MgCl₂ | 1.5-2.0 mM | Polymerase cofactor | Concentration affects specificity |
| Taq Polymerase | 1.25 U | DNA amplification | Hot-start formulation recommended |
| PCR Buffer | 1X | Reaction environment | Optimized for primer combination |
Experimental Protocol [4] [2]:
- Reaction Setup: Prepare a master mix containing all components: 1X PCR buffer, 1.5 mM MgCl₂, 200 µM dNTPs, outer primers (0.1-0.2 µM), inner primers (0.4-0.5 µM), 1.25 U hot-start Taq polymerase, and template DNA in a total volume of 25 µL.
- Thermal Cycling:
- Initial denaturation: 94°C for 2 minutes
- First round (20-25 cycles):
- Denaturation: 94°C for 30 seconds
- Annealing: 65-68°C for 30 seconds (outer primers only)
- Extension: 72°C for 1 minute
- Second round (20-30 cycles):
- Denaturation: 94°C for 30 seconds
- Annealing: 45-50°C for 30 seconds (both primer sets)
- Extension: 72°C for 1 minute
- Final extension: 72°C for 5 minutes
- Product Analysis: Analyze 5-10 µL of PCR product by agarose gel electrophoresis with appropriate molecular weight markers.
Laboratory Workflow Engineering
Effective contamination control requires spatial and temporal separation of PCR setup, template addition, and product analysis areas:
Essential Research Reagent Solutions
Implementation of robust contamination control measures requires specific reagents and equipment designed to minimize amplicon contamination:
Table 3: Contamination Control Research Reagents and Equipment
| Category | Specific Products/Methods | Function in Contamination Control |
|---|---|---|
| Polymerase Systems | Hot-start Taq polymerase [3] [7] | Reduces non-specific amplification and primer-dimer formation by requiring high temperatures for activation |
| Laboratory Equipment | PCR workstations with UV sterilization [6] | Creates contained environment for reaction setup; UV degrades contaminating DNA |
| Consumables | Aerosol barrier pipette tips [6] | Prevents aerosol contamination of pipettors and subsequent reactions |
| Spatial Separation | Dedicated pre-PCR, template addition, and post-PCR areas [5] | Prevents amplicon transfer between different stages of the workflow |
| Reaction Design | Single-tube nested PCR [4] | Eliminates physical transfer of first-round products between tubes |
| Physical Barriers | Wax/oil barrier systems [1] | Separates reaction components physically within same tube |
Nested PCR remains a valuable technique for detecting low-abundance targets despite its inherent vulnerability to amplicon contamination. The requirement to transfer first-round amplification products creates critical contamination points through aerosol generation. Implementing robust contamination control strategies—including single-tube protocols, physical barriers, unidirectional workflow separation, and specialized reagents—is essential for maintaining diagnostic accuracy and research reliability. These measures effectively address the fundamental amplicon problem while preserving the exceptional sensitivity and specificity that make nested PCR indispensable for challenging molecular applications.
Contamination control is a foundational aspect of molecular diagnostics and research, particularly in nested polymerase chain reaction (PCR) workflows where amplification of minute quantities of nucleic acids creates vulnerability to false positives and compromised results. The exponential amplification power of PCR, while central to its utility, also represents its greatest Achilles' heel—the potential for contaminating nucleic acids to be co-amplified, generating erroneous data that can misdirect clinical decisions and research trajectories [8]. Within the context of a broader thesis on laboratory workflow for nested PCR contamination prevention, this application note delineates the major sources of contamination, provides quantitative assessments of contamination risks, and outlines robust, implementable protocols for contamination mitigation. The focus on nested PCR is particularly critical as the two-stage amplification process inherently increases the risk of amplicon carryover contamination, requiring stringent controls throughout the experimental workflow [5] [3].
The consequences of contamination extend beyond mere inconvenience, potentially leading to misdiagnosis in clinical settings, erroneous research conclusions, and compromised drug development pipelines. Contamination can manifest from various sources, including cross-contamination between samples, carryover of amplification products from previous reactions, and contaminated reagents or equipment [9] [8]. This document provides a comprehensive framework for identifying, quantifying, and controlling these contamination sources through structured experimental approaches and validated protocols, with particular emphasis on applications in clinical diagnostics and pharmaceutical development.
Understanding the specific pathways through which contamination enters PCR workflows is essential for developing effective prevention strategies. Systematic investigation has identified three primary categories of contamination, each with distinct characteristics and control requirements.
Sample-to-Sample Contamination
Sample-to-sample contamination, also referred to as cross-contamination, occurs when nucleic acids from one sample are inadvertently transferred to another during handling or processing. This form of contamination is frequently mediated by aerosol generation during pipetting, tube opening, or sample centrifugation [8]. The risk is particularly pronounced in high-throughput environments where large sample volumes are processed simultaneously. Experimental data indicates that improper pipetting techniques can generate aerosols containing up to 10^6 nucleic acid copies per microliter of solution, creating an invisible cloud of potential contaminants [8].
Additional vectors for sample-to-sample contamination include contaminated gloves, laboratory surfaces, and shared equipment. In one systematic evaluation, samples processed in laboratories without physical separation between pre- and post-amplification areas showed significantly higher contamination rates (mean T value of 1.28%) compared to those processed in standardized facilities with segregated workspaces (mean T value of 0.43%) [9]. The T value, representing the ratio of reads mapped to target loci versus total qualifying reads, serves as a quantitative measure of contamination levels.
Amplicon Carryover Contamination
Amplicon carryover represents perhaps the most insidious form of PCR contamination, where amplification products from previous PCR reactions contaminate new reactions. These amplicons are ideally suited for re-amplification as they contain the exact target sequences, making them potent sources of false positives. The risk is especially elevated in nested PCR protocols where tubes must be opened between the first and second amplification rounds to add nested primers, creating opportunities for amplicon release [5] [3].
Experimental data demonstrates that carryover contamination can persist in laboratory environments for extended periods. One study found that NFS water exposed to laboratory air for just one day showed detectable contamination levels (T values of 0.36% and 0.32% in preparation and analysis rooms, respectively) [9]. The problem is compounded by the stability of DNA amplicons, which can persist on laboratory surfaces for weeks without proper decontamination protocols.
Reagent and Equipment Contamination
Reagent contamination occurs when PCR master mixes, water, enzymes, or other reaction components become tainted with exogenous nucleic acids or amplicons. This form of contamination is particularly problematic as it can affect entire experimental batches. Investigations have traced reagent contamination to several sources, including contaminated nucleic acid extraction kits, improperly handled enzyme stocks, and even molecular grade water [9].
In controlled experiments, significant differences in contamination levels were observed when comparing original versus newly purchased PCR master mix reagents. Samples tested with new master mix showed dramatically lower contamination levels (mean T value of 0.01%) compared to those tested with original mix (mean T value of 9.18%) [9]. Equipment such as pipettes can also serve as contamination reservoirs, particularly when aerosol barrier tips are not employed. Studies demonstrate that using filter tips reduces contamination levels by approximately 62% compared to standard tips [9].
Table 1: Quantitative Assessment of Major Contamination Sources
| Contamination Source | Experimental Evidence | Contamination Level | Key Contributing Factors |
|---|---|---|---|
| Sample-to-Sample | Higher T values (1.28%) in non-physically separated labs [9] | Moderate to High | Aerosol generation, shared equipment, surface contamination |
| Amplicon Carryover | Detectable SARS-CoV-2 reads in NTC samples [9] | High | Opening post-amplification tubes, contaminated surfaces |
| Reagent/Equipment | 9.18% mean T value with contaminated master mix [9] | Variable | Contaminated enzyme batches, water, pipettes without filter tips |
Contamination Control Strategies and Experimental Validation
Effective contamination management requires a multi-faceted approach addressing each potential source through physical, biochemical, and procedural controls. The carryover contamination-controlled amplicon sequencing (ccAMP-Seq) workflow provides a validated framework for systematic contamination control [9].
Physical Segregation and Workflow Design
The cornerstone of contamination prevention is physical separation of PCR workflow stages. The recommended laboratory configuration divides the process into three distinct areas with unidirectional workflow [8]:
- Reagent Preparation Area: A dedicated clean space for master mix preparation and reagent aliquoting, ideally with positive air pressure to prevent contaminant ingress.
- Sample Preparation Area: A separate space for nucleic acid extraction and template addition, with negative air pressure to contain template nucleic acids.
- Amplification and Product Analysis Area: An isolated space for PCR amplification and post-amplification analysis, with negative pressure to contain amplicons.
Experimental validation demonstrates that this physical segregation reduces contamination levels by approximately 66% compared to unseparated workflows [9] [8]. Critically, movement between areas should be unidirectional, with personnel and equipment never moving from post-amplification to pre-amplification areas without thorough decontamination.
Biochemical Contamination Controls
Several biochemical methods provide additional layers of protection against contamination, particularly amplicon carryover:
dUTP/UDG System: The incorporation of dUTP in place of dTTP during amplification, followed by treatment with uracil DNA glycosylase (UDG) prior to subsequent PCR cycles, effectively degrades contaminating amplicons from previous reactions. This system achieved a 22-fold reduction in carryover contamination in controlled studies [9].
Synthetic DNA Spike-Ins: Adding defined synthetic DNA sequences that compete with potential contaminants for primer binding sites reduces amplification of contaminating nucleic acids. Research shows that supplementation with 10,000 copies of specific spike-ins reduces contamination levels in no-template controls from 1.14% to 0.05% T value while maintaining amplification efficiency for genuine targets [9].
Hot-Start PCR: Employing DNA polymerases that remain inactive until exposed to high temperatures prevents non-specific amplification and primer-dimer formation during reaction setup, reducing potential substrates for future contamination [3].
Table 2: Research Reagent Solutions for Contamination Control
| Reagent Solution | Mechanism of Action | Experimental Validation | Application Context |
|---|---|---|---|
| dUTP/UDG System | Enzymatic degradation of uracil-containing contaminants | 22-fold reduction in carryover contamination [9] | All amplification workflows, particularly nested PCR |
| Synthetic DNA Spike-Ins | Competitive inhibition of contaminant amplification | Reduction from 1.14% to 0.05% T value in NTCs [9] | Low template amplification, quantitative applications |
| Hot-Start DNA Polymerases | Prevention of non-specific amplification at room temperature | Reduced primer-dimer formation and mispriming [3] | All PCR applications, especially multiplex assays |
| Aerosol Barrier Pipette Tips | Physical barrier against aerosol contamination | 62% reduction in sample-to-sample contamination [9] | All liquid handling steps, particularly post-amplification |
Procedural and Environmental Controls
Rigorous laboratory practices form the final essential component of contamination control:
Surface Decontamination: Regular cleaning with sodium hypochlorite (10-15%) or validated DNA-decontaminating solutions, supplemented with UV irradiation, effectively removes nucleic acid contaminants from work surfaces and equipment [8].
Equipment Dedication: Assigning specific pipettes, centrifuges, and other equipment to each work area prevents cross-contamination. Studies show that using filter tips in standardized laboratories reduces contamination levels from 1.12% to 0.43% T value [9].
Control Reactions: Including no-template controls (NTCs) and positive controls in every run provides essential monitoring of contamination levels and amplification efficiency [8].
Experimental Protocols for Contamination Assessment and Control
Protocol: Quantitative Contamination Source Identification
This protocol enables systematic evaluation of potential contamination sources within a laboratory workflow, adapted from methodologies described in [9].
Materials:
- Nuclease-free sterile (NFS) water
- Newly purchased PCR master mix
- Freshly synthesized primer pools
- Filter tips and non-filter tips
- Access to physically separated and non-separated laboratory spaces
Procedure:
- Aerosol Contamination Assessment:
- Place open tubes of NFS water in PCR preparation room, analysis room, and outdoor location away from laboratory.
- After 1 day and 1 week exposure, use these samples as templates in amplification reactions.
- Calculate T value (percentage of reads mapping to target versus total reads) for each sample.
Reagent Contamination Testing:
- Prepare amplification reactions using original and newly purchased master mix reagents.
- Use two technical replicates for each condition with freshly synthesized primers.
- Compare T values between conditions to identify reagent contamination.
Equipment and Workflow Assessment:
- Test NFS water samples in physically isolated and non-isolated laboratories.
- Include conditions with and without filter tips (5 technical replicates per condition).
- Quantify contamination levels across conditions using T value calculations.
Data Analysis: Calculate significance of contamination differences using Wilcoxon rank-sum test. Contamination sources are considered significant when p < 0.05 with at least 2-fold difference in T values.
Protocol: Carryover Contamination-Controlled Amplicon Sequencing (ccAMP-Seq)
The ccAMP-Seq protocol represents a comprehensive approach to contamination control, validated in SARS-CoV-2 detection but applicable to various amplification contexts [9].
Materials:
- Filter tips
- Synthetic DNA spike-ins
- dUTP/UDG system
- Physically isolated laboratory spaces
- Standard PCR reagents
Procedure:
- Library Preparation with Physical Controls:
- Perform all pre-amplification steps in physically separated reagent and sample preparation areas.
- Use filter tips for all liquid handling steps.
- Include 10,000 copies of synthetic DNA spike-ins per reaction during master mix preparation.
Amplification with Biochemical Controls:
- Incorporate dUTP in place of dTTP in amplification reactions.
- Include UDG treatment step (37°C for 10 minutes) prior to amplification to degrade contaminating uracil-containing DNA.
- Implement hot-start activation of DNA polymerase (95°C for 2 minutes).
Data Analysis with Bioinformatics Controls:
- Sequence amplification products using standard platforms.
- Apply bioinformatic filters to remove reads matching synthetic spike-in sequences.
- Quantify contamination levels using T value calculations comparing experimental samples and controls.
Validation: The ccAMP-Seq workflow demonstrates detection sensitivity as low as one copy per reaction with 100% sensitivity and specificity in validated models [9]. The method reduces contamination levels by at least 22-fold compared to standard amplicon sequencing protocols.
Workflow Integration and Visualization
The following workflow diagram illustrates the integrated approach to contamination control in nested PCR applications, incorporating physical, biochemical, and procedural strategies:
Integrated Contamination Control Workflow for Nested PCR
This integrated workflow emphasizes three critical aspects of contamination control: (1) physical segregation of processes with unidirectional workflow, (2) implementation of targeted controls at each stage, and (3) specific attention to the high-risk step of tube opening between nested PCR rounds.
Effective contamination control in nested PCR workflows requires a systematic, multi-layered approach addressing sample-to-sample, amplicon carryover, and reagent contamination sources. The strategies outlined in this application note—including physical laboratory segregation, biochemical methods such as dUTP/UDG and synthetic spike-ins, and rigorous procedural controls—provide a validated framework for maintaining assay integrity. Implementation of the ccAMP-Seq protocol and associated contamination assessment methods enables researchers to achieve the sensitivity and specificity required for demanding applications in clinical diagnostics and pharmaceutical development. As molecular methods continue to evolve toward greater sensitivity and throughput, these contamination control principles will remain essential for generating reliable, reproducible results.
Contamination in molecular biology, particularly in highly sensitive techniques like nested PCR, represents a critical vulnerability that can compromise diagnostic accuracy, undermine research validity, and lead to significant clinical consequences. This application note examines the specific impacts of contamination through quantitative data from recent studies and provides detailed protocols for contamination prevention within laboratory workflows. By implementing rigorous procedural controls and validation methods, laboratories can significantly reduce false results, enhance reproducibility, and support more reliable clinical decision-making. The protocols outlined here are designed specifically for researchers, scientists, and drug development professionals working with nested PCR applications across diagnostic and research settings.
Nested polymerase chain reaction (nested PCR) is a powerful molecular technique that significantly enhances detection sensitivity through two successive rounds of amplification. This increased sensitivity, however, comes with heightened vulnerability to contamination issues, as amplified products from previous reactions can serve as templates in subsequent assays [10]. The consequences of contamination extend across the entire research and diagnostic spectrum, potentially leading to false-positive results, misdiagnosis, erroneous research conclusions, and inappropriate clinical interventions [10] [11].
The diagnostic accuracy of nested PCR makes it invaluable for detecting low-abundance pathogens in clinical samples and identifying specific genetic variants in research settings. Its application spans diverse fields from human medicine to plant pathology, including detection of Helicobacter pylori in human stool [10], identification of Plasmodium species in malaria diagnostics [12] [13], and detection of phytoplasmas in agricultural settings [11]. In all these applications, maintaining amplicon purity is paramount for generating reliable, reproducible results that can confidently inform clinical and research decisions.
The Impact of Contamination: Quantitative Evidence
Recent studies across multiple disciplines provide compelling quantitative evidence of how contamination and methodological limitations affect diagnostic and research outcomes. The data below illustrate specific consequences observed in real-world applications.
Table 1: Comparative Diagnostic Performance Highlighting Contamination and Methodological Challenges
| Study Context | Method Compared | Key Finding | Implied Contamination Risk |
|---|---|---|---|
| H. pylori Detection [10] | Long amplicon NPCR (454 bp) vs. Short amplicon NPCR (148 bp) | Short amplicon NPCR detected 51.0% positives in patients vs. 6.25% for long amplicon NPCR | High potential for false negatives with degraded samples when using long amplicons |
| H. pylori Detection [10] | NPCR vs. Stool Antigen Test (SAT) | NPCR required 100x fewer cells than SAT for detection, yet showed lower sensitivity in stool | Paradox suggests DNA degradation or contamination affects efficiency |
| Phytoplasma Detection [11] | Universal Nested PCR vs. Specific Nested PCR | 32% of samples (16/50) showed false positives with universal primers (matched chloroplast/bacterial DNA) | Primer non-specificity leads to false positives and misinterpretation |
| Malaria Detection [12] [13] | Nested PCR vs. HRM vs. Sequencing | HRM and nested PCR showed variations in detecting Plasmodium falciparum and P. vivax | Methodological variations and potential cross-contamination affect species identification |
The data from these diverse applications demonstrate that the consequences of contamination and methodological errors are not merely theoretical but have tangible impacts on result interpretation. In clinical diagnostics, these inaccuracies can directly affect patient management decisions, while in research settings they can compromise experimental validity and reproducibility.
Consequences for Diagnostic Accuracy
False-Positive and False-Negative Results
Contamination primarily manifests as false-positive results when amplicons from previous reactions contaminate new reaction mixtures. This is particularly problematic in clinical diagnostics where results directly inform treatment decisions. For example, in H. pylori detection, false-positive results could lead to unnecessary antibiotic regimens, while false-negative results could prevent patients from receiving needed treatment [10]. The study on H. pylori demonstrated that using a shorter amplicon (148 bp) in nested PCR dramatically increased detection rates from 6.25% to 51.0% in patient samples, suggesting that both contamination control and amplicon size optimization are critical for accurate diagnosis [10].
Species Misidentification
In malaria diagnostics, where differentiating between Plasmodium species directly affects treatment protocols, contamination between samples can lead to species misidentification. The high-resolution melting (HRM) analysis study showed variations in detecting Plasmodium falciparum and Plasmodium vivax when compared to nested PCR and sequencing results [12] [13]. Such misidentification could lead to inappropriate antimalarial prescriptions, potentially contributing to drug resistance or treatment failure.
Impact on Research Reproducibility
False Results in Experimental Data
Research reproducibility depends heavily on uncontaminated experimental procedures. The development of a specific nested PCR system for detecting phytoplasmas in areca palms revealed that universal primers frequently produced false-positive results, with 32% of initially positive samples actually containing chloroplast or bacterial DNA rather than the target phytoplasma [11]. Such inaccuracies undermine research validity and can lead entire research endeavors in wrong directions, wasting resources and impeding scientific progress.
Compromised Methodological Comparisons
When comparing molecular detection methods for Fusarium tricinctum, researchers noted that each method (LAMP, nested PCR, and qPCR) had distinct sensitivity profiles [14]. Without proper contamination controls, such comparative studies would yield unreliable results, making it impossible to determine the true optimal method for specific applications. qPCR showed the highest sensitivity (detecting 3.1 fg/μL), while nested PCR offered exceptional stability and reliability when properly controlled [14].
Implications for Clinical Decision-Making
Direct Patient Care Impacts
In clinical microbiology, rapid diagnostic systems like the BioFire FilmArray BCID2 panel for bloodstream infections significantly reduce time-to-result (1 day vs. 2 days for conventional methods) [15]. However, contamination in such systems could lead to misidentification of pathogens or false detection of resistance genes, resulting in inappropriate antimicrobial therapy. The study reported 73.46% concordance between BCID2 and conventional methods for detecting antimicrobial resistance genes, highlighting that even advanced systems require careful validation to prevent clinical errors [15].
Public Health Consequences
Inaccurate results due to contamination can extend beyond individual patients to affect public health surveillance and response. For malaria control programs, reliable species identification is essential for monitoring transmission patterns and implementing targeted interventions [12]. Contamination compromising this data could lead to misallocation of resources and ineffective disease control measures.
Detailed Experimental Protocols for Contamination Prevention
Protocol 1: Spatial Separation of PCR Workflows
Principle: Physical separation of pre-amplification and post-amplification activities prevents amplicon contamination of reagents and samples [10].
Table 2: Spatial Separation Protocol Requirements
| Component | Specification | Purpose |
|---|---|---|
| Dedicated Rooms/Areas | Physically separated spaces with unidirectional workflow | Prevent amplicon transfer between stages |
| Equipment Dedication | Separate pipettes, tips, and lab coats for each area | Eliminate cross-contamination via equipment |
| Airflow Control | Positive pressure in pre-PCR areas, negative in post-PCR | Control directional movement of aerosols |
| Surface Decontamination | Regular cleaning with 10% bleach or DNA-degrading solutions | Destroy contaminating DNA on surfaces |
Procedure:
- Establish three physically distinct laboratory areas: (1) Reagent preparation room, (2) Sample preparation room, and (3) Amplification and product analysis room
- Implement strict unidirectional workflow: personnel must move from pre-amplification to post-amplification areas only, never in reverse
- Use dedicated equipment in each area, clearly marked and never transported between areas
- Perform daily decontamination of all work surfaces with DNAaway or fresh 10% bleach solution
- Use UV irradiation in biosafety cabinets when preparing reaction mixtures to destroy potential DNA contaminants
Protocol 2: Reagent Preparation and Quality Control
Principle: Contamination-free reagents are fundamental to reliable nested PCR results [16] [10].
Procedure:
- Prepare master mixes in a dedicated pre-PCR area equipped with UV light
- Aliquot all reagents into single-use portions to minimize freeze-thaw cycles and contamination risk
- Include multiple negative controls in each run: (a) template-free control, (b) extraction control, and (c) environmental control
- Use uracil-DNA glycosylase (UNG) treatment in reaction mixtures to carryover contamination by incorporating dUTP in place of dTTP in amplification reactions
- Validate all primer sets for specificity using sequencing confirmation before implementation in diagnostic workflows [11]
Protocol 3: Optimized Nested PCR Amplification
Principle: Careful optimization of nested PCR parameters enhances specificity and reduces spurious amplification [11].
Table 3: Nested PCR Optimization Protocol Based on Phytoplasma Detection Study
| Parameter | Optimization Method | Outcome |
|---|---|---|
| Primer Design | Target conserved regions with species-specific variable sequences | Designed HNP primers specifically detecting 16SrI and 16SrII groups |
| Annealing Temperature | Gradient PCR from 40°C to 60°C | Optimal outer primers: 53.6°C; Optimal inner primers: 57.2°C |
| Template Dilution | 1:1000 dilution of first-round product for second round | Prevented carryover inhibition and non-specific amplification |
| Cycle Number | 35 cycles for both first and second rounds | Balanced sensitivity with minimal non-specific products |
Procedure:
- First Round Amplification:
- Prepare reaction mixture in pre-PCR area
- Cycling conditions: Initial denaturation 95°C for 5 min; 35 cycles of denaturation 94°C for 45 s, annealing (primer-specific temperature) for 45 s, extension 72°C for 70 s; final extension 72°C for 10 min [12]
- Include positive and negative controls in each run
Template Dilution:
- Dilute first-round product 1:1000 in nuclease-free water [12]
- Perform dilution in a separate area from initial PCR setup
Second Round Amplification:
- Use 3 μL of diluted first-round product as template
- Prepare fresh master mix with inner primers
- Cycling conditions: Initial denaturation 95°C for 4 min; 35 cycles of 94°C for 20 s, annealing (primer-specific temperature) for 20 s, 72°C for 45 s; final extension 72°C for 10 min [12]
Product Analysis:
- Analyze second-round products by gel electrophoresis or other detection methods
- Always sequence a subset of positive results to confirm specificity [11]
Visualization of Nested PCR Contamination Pathways
The following diagram illustrates potential contamination pathways in nested PCR workflows and critical control points for prevention.
The Scientist's Toolkit: Essential Research Reagents and Materials
Table 4: Essential Reagents and Equipment for Contamination-Free Nested PCR
| Item | Specification | Function in Contamination Control |
|---|---|---|
| DNA Extraction Kit | Column-based (e.g., Qiagen DNA Mini Kit) [12] | High-quality DNA extraction minimizes PCR inhibitors |
| PCR Enzymes | High-fidelity DNA polymerase with proofreading | Reduces amplification errors and spurious products |
| dNTPs with dUTP | dATP, dCTP, dGTP, dUTP mixture | Enables UNG carryover prevention system |
| UNG Enzyme | Uracil-N-Glycosylase | Degrades contaminating amplicons from previous runs |
| Primer Sets | Specifically validated outer and inner pairs [11] | Ensures species-specific amplification |
| Aerosol Barriers | Filtered pipette tips | Prevents aerosol contamination during pipetting |
| Surface Decontaminant | DNAaway, 10% fresh bleach | Destroys DNA on work surfaces and equipment |
| Negative Controls | Nuclease-free water, extraction controls | Monitors for contamination in reagents and processes |
| Equipment | Dedicated pipettes for pre- and post-PCR | Prevents amplicon transfer via equipment |
Contamination in nested PCR workflows presents significant challenges to diagnostic accuracy, research reproducibility, and clinical decision-making. The consequences range from false research conclusions to inappropriate patient treatments, highlighting the critical need for robust contamination prevention protocols. By implementing the spatial separation strategies, reagent quality controls, and optimized amplification procedures detailed in this application note, laboratories can significantly reduce contamination risks. The Scientist's Toolkit provides essential resources for establishing and maintaining contamination-free workflows, supporting reliable results across diverse nested PCR applications. Through diligent application of these protocols, researchers and clinicians can harness the full sensitivity of nested PCR while minimizing the risks associated with contamination.
Core Principles of a Contamination-Avoidance Laboratory Culture
The exquisite sensitivity of nested polymerase chain reaction (nested PCR) makes it a powerful tool for detecting low-abundance targets in research and diagnostics [17]. However, this very sensitivity also renders the technique exceptionally vulnerable to contamination, potentially compromising experimental integrity and leading to false-positive results [18]. A robust, contamination-aware laboratory culture is not merely a set of rules but a fundamental mindset adopted by every researcher to protect sample integrity from preparation to analysis. This application note delineates the core principles and detailed protocols essential for establishing and maintaining a laboratory workflow dedicated to preventing contamination in nested PCR procedures, framed within the context of advanced research on workflow optimization.
The Nested PCR Contamination Challenge
Nested PCR involves two consecutive rounds of amplification using two sets of primers. The product of the first PCR reaction serves as the template for the second round, which uses a set of internal primers that bind within the first amplicon [17] [19]. This process significantly enhances the sensitivity and specificity of detecting a target sequence [1].
The primary contamination risk in nested PCR is amplicon carryover. The high volume of amplification products generated in the first round can contaminate reagents, equipment, and the laboratory environment. If these amplicons are introduced into a subsequent second-round PCR, they will be efficiently amplified, yielding a false positive even if the original target template was absent [17] [18]. A single contaminated experiment can generate enough amplicons to contaminate an entire laboratory space [18]. The consequences are particularly severe in clinical and diagnostic settings, where false positives can directly impact patient care and treatment decisions [18].
Table 1: Common Sources of PCR Contamination and Their Impact
| Contamination Source | Description | Potential Consequence |
|---|---|---|
| Amplicon Carryover | Aerosols or droplets of PCR products from previous amplification reactions [18]. | False positive results due to amplification of contaminating DNA. |
| Cross-Contamination between Samples | Transfer of template between samples during handling [18]. | Inaccurate genotyping or quantification. |
| Contaminated Reagents or Consumables | Introduction of exogenous DNA or amplicons via enzymes, water, or plasticware [18]. | Systemic false positives across multiple experiments. |
| Environmental Nucleic Acids | Airborne particles or dust containing microbial or human DNA [18]. | Background noise and non-specific amplification. |
Core Principles of a Contamination-Avoidance Workflow
Physical Separation of Work Areas
The most critical principle is the physical segregation of pre- and post-amplification activities [18]. Ideally, a nested PCR workflow should be distributed across four distinct laboratory areas:
- Reagent Preparation Room (Clean Area): A dedicated, amplicon-free space for preparing master mixes and aliquoting reagents. This area should contain dedicated equipment, such as a laminar flow hood, and should never be used for handling DNA templates or amplified products [18].
- Sample Preparation Room: A separate area for extracting and quantifying nucleic acids. This is where the template DNA is added to the prepared master mix.
- Amplification Room: The room housing the thermal cyclers where the PCR reactions are run.
- Post-PCR Analysis Room (Contained Area): A segregated area for analyzing PCR products, such as during gel electrophoresis. Equipment and consumables from this area must never be brought back into the pre-PCR rooms [18].
For laboratories where multiple dedicated rooms are not feasible, the minimum requirement is to use separate workbenches or designated laminar flow hoods for pre- and post-PCR activities, ensuring they are on opposite sides of the room or separated by physical barriers [18].
Unidirectional Workflow
Personnel movement must follow a strict unidirectional pattern: from clean areas (reagent prep) to dirty areas (post-PCR analysis) [18]. Moving backward from a post-PCR area to a pre-PCR area is strictly prohibited unless the researcher performs a complete decontamination procedure, including changing lab coats, washing hands, and potentially showering [18].
Dedicated Equipment and Consumables
Each physically separated area must have its own set of dedicated equipment and supplies, including:
- Pipettes and tip boxes [18]
- Lab coats and gloves [18]
- Tube racks, centrifuges, and vortexers [18]
- Reagents and consumables [18]
Procedural and Engineering Controls
Laminar Flow Hoods
Using a laminar flow hood or a portable clean room is highly recommended for sensitive steps such as reagent mixing, adding DNA to reactions, and, crucially, for the nested PCR step when the first-round product is transferred to the second-round reaction mix [18]. These devices provide a continuous flow of HEPA-filtered air (removing 99.97% of particles ≥0.3 µm), creating an ISO Class 5 cleanroom environment that protects samples from external contamination [18]. Some models are equipped with UV lights to decontaminate the work surface between uses [18].
Aerosol-Reducing Techniques
Utilize aerosol-resistant filter pipette tips for all liquid handling to prevent cross-contamination via pipette shafts.
Chemical and Enzymatic Decontamination
- DNA-Decontaminating Reagents: Treat pre-PCR work surfaces and equipment with solutions like 10% sodium hypochlorite (bleach) or commercial DNA-decontaminating products to degrade stray DNA fragments [18].
- dUTP/UDG System: Incorporate dUTP in place of dTTP during PCR. The resulting amplicons contain uracil. Before the next PCR run, the reaction mix is treated with Uracil-DNA Glycosylase (UDG), which cleaves uracil-containing DNA, thereby destroying any contaminating carryover amplicons without harming natural thymidine-containing template DNA.
The following workflow diagram synthesizes these principles into a practical, unidirectional pathway for conducting nested PCR.
Figure 1: Unidirectional Nested PCR Workflow. This workflow mandates physical separation and a one-way movement of samples from clean (green) to potentially contaminated (red) areas, with amplification (yellow) as an intermediate step.
Detailed Experimental Protocol for a Two-Step Nested PCR
This protocol outlines the specific steps for performing a nested PCR assay for the detection of Porphyromonas gingivalis from calcified atherothrombotic samples, a method that demonstrated a 22.2% increased detection rate compared to direct real-time PCR [20]. The protocol integrates the contamination controls described above.
Research Reagent Solutions
Table 2: Essential Materials and Reagents
| Item | Function/Description |
|---|---|
| Template DNA | Extracted from clinical samples (e.g., atherothrombotic plaques) [20]. |
| External & Internal Primers | Two primer sets designed to target the same gene; internal primers bind within the first amplicon [17] [20]. |
| Taq DNA Polymerase | Thermostable enzyme for DNA synthesis [17]. |
| dNTP Mixture | Deoxynucleotide triphosphates (dATP, dCTP, dGTP, dTTP) for DNA strand elongation [17]. |
| PCR Buffer (10X) & MgCl₂ | Provides optimal ionic environment and cofactor for polymerase activity [17]. |
| Nuclease-Free Water | Sterile, DNA/RNAse-free water to make up reaction volume [17]. |
| Laminar Flow Hood | Provides a particulate-free workspace for reagent and reaction setup [18]. |
| Thermal Cycler | Instrument programmed to perform precise temperature cycles for DNA amplification. |
Step-by-Step Procedure
- Work Area: Perform all steps in a laminar flow hood located in the Reagent Preparation or Sample Preparation area.
Master Mix Preparation: In a sterile 1.5 mL microcentrifuge tube, prepare a master mix for the desired number of reactions (include ~10% extra to account for pipetting error) as detailed below. Gently vortex and centrifuge the mix briefly.
Table 3: First-Round PCR Reaction Mix (25 µL final volume)
Component Final Concentration Volume per 25 µL Reaction Nuclease-Free Water - To 25 µL 10X PCR Buffer 1X 2.5 µL MgCl₂ (25 mM) 1.5-2.0 mM 1.5 µL dNTP Mixture (2 mM) 200 µM 0.5 µL External Forward Primer (10 µM) 0.2 µM 0.5 µL External Reverse Primer (10 µM) 0.2 µM 0.5 µL Template DNA Variable (e.g., 100 ng) 1-2 µL Taq DNA Polymerase (5 U/µL) 1.25 U 0.25 µL Aliquot and Run: Aliquot 23-24 µL of the master mix into individual PCR tubes. Add 1-2 µL of template DNA to each tube, sealing the tubes securely. Transfer the sealed tubes to the Amplification Room. Place them in the thermal cycler and run the following program:
- Initial Denaturation: 94°C for 2 minutes.
- 30-35 Cycles:
- Denaturation: 94°C for 30 seconds.
- Annealing: 45-60°C (based on primer Tm) for 30 seconds.
- Extension: 72°C for 1 minute (adjust for amplicon size).
- Final Extension: 72°C for 5 minutes.
- Hold: 4°C [17].
- Work Area: Move to the designated Post-PCR Processing area or hood. Do not return to the pre-PCR areas.
- Template Dilution: Dilute the first-round PCR product 1:10 to 1:1000 in nuclease-free water [17].
Master Mix Preparation: In a new, sterile tube, prepare a master mix for the second round as below, using the internal primers.
Table 4: Second-Round PCR Reaction Mix (25 µL final volume)
Component Final Concentration Volume per 25 µL Reaction Nuclease-Free Water - To 25 µL 10X PCR Buffer 1X 2.5 µL MgCl₂ (25 mM) 1.5-2.0 mM 1.5 µL dNTP Mixture (2 mM) 200 µM 0.5 µL Internal Forward Primer (10 µM) 0.2 µM 0.5 µL Internal Reverse Primer (10 µM) 0.2 µM 0.5 µL Diluted First-Round Product Template 1-2 µL Taq DNA Polymerase (5 U/µL) 1.25 U 0.25 µL Aliquot and Run: Aliquot the second-round master mix into new PCR tubes. Add the diluted first-round product. Transfer the tubes to a thermal cycler in the Amplification Room (or a dedicated post-PCR cycler) and run using the same cycling conditions as the first round.
- Product Analysis: Take the final amplification products to the separate Post-PCR Analysis Room for analysis via agarose gel electrophoresis or other downstream applications [17].
The implementation of a contamination-aware culture is a non-negotiable prerequisite for reliable nested PCR. The principles outlined—physical separation, unidirectional workflow, dedicated equipment, and rigorous procedural controls—form an interlocking system of checks and balances. While the initial setup requires discipline and planning, it becomes ingrained in the laboratory's standard operating procedures.
The consequences of neglecting these principles are severe, ranging from wasted resources and time to erroneous scientific conclusions and misdiagnosis in clinical settings [18]. The protocol detailed herein, which has been shown to significantly improve detection sensitivity for challenging targets [20], is only reliable when executed within the framework of a meticulous contamination-avoidance culture. Ultimately, the success of any nested PCR assay is as dependent on the integrity of the laboratory workflow as it is on the quality of the reagents and the skill of the researcher.
Building a Bulletproof Lab: Practical Workflow and Setup for Contamination Prevention
Nested Polymerase Chain Reaction (PCR) is a highly sensitive molecular technique that employs two successive rounds of amplification with two sets of primers to enhance the specificity and sensitivity of target nucleic acid detection [21]. This method is particularly valuable for detecting low-abundance targets in complex samples, such as in host-associated microbiota studies and clinical diagnostics for pathogens like Mycobacterium tuberculosis and Leishmania [22] [21]. However, the requirement to transfer the first-round amplification product to a second reaction tube significantly increases the risk of amplicon contamination, which can lead to false-positive results [1]. This application note details the optimal laboratory design and protocols to prevent contamination, framed within a thesis investigating workflow efficiency for nested PCR.
The fundamental principle of contamination control is the strict physical separation of pre- and post-amplification activities [23] [24]. Amplification products, or amplicons, are present in extremely high concentrations after PCR. Aerosolized amplicons are the primary source of contamination, and their inadvertent introduction into pre-PCR master mixes or samples can compromise all subsequent experiments [24]. Implementing a unidirectional workflow where personnel and materials move from "clean" areas (pre-PCR) to "dirty" areas (post-PCR)—and never in reverse—is the most critical defense [23].
Laboratory Zoning and Workflow Design
Physical Layout Specifications
A robust nested PCR laboratory should be divided into at least four distinct physical areas to compartmentalize the workflow stages. The following design is recommended to minimize cross-contamination risk [23]:
Room 1: Pre-PCR Area 1 - Reagent Aliquoting and Master Mix Preparation This must be the cleanest area, ideally a designated laminar flow cabinet equipped with UV light. No samples, extracted nucleic acids, or amplified products should ever be introduced. Amplification reagents should be stored in a dedicated freezer or refrigerator within or adjacent to this space [23].
Room 2: Pre-PCR Area 2 - Nucleic Acid Extraction and Template Addition Nucleic acid extraction and the addition of DNA template to the mastermix should occur in this second designated area. It requires a separate set of pipettes, filter tips, and lab coats. To avoid sample cross-contamination, it is recommended to change gloves before handling positive controls and to use a separate set of pipettes for them [23].
Room 3: Post-PCR Area 1 - Amplification and Primary Product Handling This room houses thermocyclers and real-time PCR platforms for the first and second rounds of amplification. It must be physically separate from all pre-PCR areas. For nested PCR, the addition of the first-round product to the second-round reaction mix should be performed within a dedicated laminar flow cabinet within this post-PCR room [23].
Room 4: Post-PCR Area 2 - Product Analysis This area is dedicated to analyzing amplified DNA, using equipment such as gel electrophoresis tanks, power packs, and gel documentation systems. No other reagents should be brought into this area [23].
For laboratories where four separate rooms are not feasible, a minimum of two rooms should be established: one for all pre-PCR activities (with master mix preparation ideally performed in a laminar flow cabinet) and one for all post-PCR activities [23].
Workflow Visualization
The following diagram illustrates the mandatory unidirectional workflow and the specific activities permitted in each zone to prevent amplicon contamination.
Personnel and Equipment Flow
Strict protocols must govern the movement of personnel and equipment [23] [24]:
- Unidirectional Workflow: Personnel must not move from post-PCR areas back to pre-PCR areas on the same day. If unavoidable, they must thoroughly wash hands, change gloves, use a designated lab coat for the pre-PCR area, and not bring any equipment (including lab books) from the post-PCR area [23].
- Dedicated Equipment: Each room/area must have a separate set of clearly labelled equipment, including pipettes, filter tips, tube racks, vortexes, centrifuges, lab coats, and gloves. Equipment must never be moved from a post-PCR area to a pre-PCR area [23].
- Decontamination Protocol: In extreme cases where equipment must be moved backwards, it must be decontaminated with a freshly prepared 10% sodium hypochlorite solution (with a minimum contact time of 10 minutes), followed by a wipe-down with sterile water. For equipment that cannot tolerate bleach, 70% ethanol followed by UV irradiation or a commercial DNA-destroying decontaminant can be used [23].
Decontamination and Good Laboratory Practice Protocols
Surface and Equipment Decontamination
Routine and rigorous decontamination of all work surfaces and equipment is essential. The following protocol must be implemented before and after all procedures [23] [24].
| Surface/Equipment | Decontamination Agent | Contact Time | Special Instructions |
|---|---|---|---|
| Bench Spaces | 10% sodium hypochlorite (freshly made) | 10 minutes | Wipe with sterile water afterwards to remove residual bleach [23]. |
| Bench Spaces (Alternative) | 70% ethanol | Until dry | Must be followed by UV irradiation for complete DNA destruction [23]. |
| Pipettes | Autoclave | N/A | Preferred method, if permitted by manufacturer [23]. |
| Pipettes (Non-autoclavable) | 10% sodium hypochlorite or commercial DNA-decontaminant | 10 minutes | If using bleach, wipe thoroughly with sterile water afterwards. Check manufacturer recommendations [23]. |
| Vortexes, Centrifuges | 70% ethanol | Until dry | Follow with UV exposure. Avoid sodium hypochlorite as it may damage metals/plastics [23]. |
| Laminar Flow Cabinets | 70% ethanol or commercial decontaminant | Until dry | Wipe all contents, then expose closed hood to UV light for 30 minutes [23]. |
UV Decontamination Note: UV lamps are highly effective for decontaminating closed spaces like safety cabinets but should be installed in a way that limits staff exposure. Do not expose reagents to UV light [23].
Reagent and Sample Handling Protocols
Good pipetting practice is paramount to reduce the generation of aerosols [23].
- Filter Tips: Pipette all reagents and samples using aerosol-resistant filter tips [23] [24].
- Centrifugation: Briefly centrifuge all reagent and sample tubes before opening to avoid aerosol generation [23].
- Aliquoting: Aliquot all reagents to avoid multiple freeze-thaw cycles and prevent contamination of master stocks [23] [24].
- Labelling: Clearly label and date all reagent and reaction tubes. Maintain detailed logs of reagent lot and batch numbers [23].
- Master Mix Preparation: When performing multiple reactions, prepare a single mastermix containing common reagents to minimize the number of reagent transfers and pipetting errors [23].
- Hot-Start Enzymes: Use a Hot-Start DNA polymerase to reduce non-specific amplification and primer-dimer formation during reaction setup at room temperature [3].
Experimental Protocol: Nested rpoB PCR for Metabarcoding
The following detailed protocol, adapted from current research, demonstrates the application of physical separation principles in a nested PCR procedure designed for metabarcoding of bacterial communities in samples with low bacterial DNA concentration [22].
Research Reagent Solutions
The following table lists the key materials required for the nested PCR experiment.
| Item | Function/Description |
|---|---|
| Template DNA | Sample containing the target bacterial DNA (e.g., from insect oral secretions or larvae) [22]. |
| Outer Primers (rpoB_F/R) | First set of primers that bind to conserved regions, generating a 906 bp amplicon that encompasses the ultimate target region [22]. |
| Inner Primers (UnirpoBdeg_F/R) | Second set of primers with Illumina adapters; bind internally to the first amplicon to generate the final 435 bp metabarcoding product [22]. |
| Hot-Start DNA Polymerase | Enzyme modified to be inactive at room temperature, preventing non-specific amplification during reaction setup [3]. |
| dNTP Mixture | Deoxynucleotide triphosphates (dATP, dCTP, dGTP, dTTP), the building blocks for DNA synthesis [21]. |
| 10x PCR Buffer | Provides optimal ionic conditions and pH for the DNA polymerase [21]. |
| MgCl₂ Solution | Cofactor essential for DNA polymerase activity; concentration requires optimization [21]. |
| Nuclease-free Water | Sterile, ultra-pure water to make up the reaction volume [21]. |
Step-by-Step Nested PCR Protocol
Workflow Overview:
Detailed Methodology:
First-Round PCR Amplification (Perform in Pre-PCR Area 2) [22] [21]
Prepare Reaction Mix: In a PCR tube, assemble the following components for a final volume of 25 µL:
- Template DNA: 1-2 µL
- Outer Primer (rpoB_F/R), each: 0.5 µL (Final concentration 0.2 µM)
- dNTP Mixture: 0.5 µL (Final concentration 200 µM of each dNTP)
- 10× PCR Buffer: 2.5 µL
- MgCl₂: 1.5 µL (Final concentration 1.5-2.0 mM)
- Hot-Start DNA Polymerase: 0.25 µL (1.25 U)
- Nuclease-free Water: to 25 µL
Thermal Cycling:
- Initial Denaturation: 94°C for 2 minutes
- 25 Cycles of:
- Denaturation: 94°C for 30 seconds
- Annealing: 45-60°C (optimize based on primer Tm) for 30 seconds
- Extension: 72°C for 1 minute
- Final Extension: 72°C for 5 minutes
- Hold: 4°C
Second-Round PCR Amplification (Perform in Post-PCR Area 1) [22] [21]
- Dilute Product: Dilute the first-round PCR product (e.g., 1:10 to 1:1000) in nuclease-free water.
- Prepare Reaction Mix: In a new PCR tube, assemble the following for a final volume of 25 µL:
- Diluted First-Round Product: 1-2 µL
- Inner Primer (UnirpoBdeg_F/R), each: 0.5 µL (Final concentration 0.2 µM)
- dNTP Mixture: 0.5 µL
- 10× PCR Buffer: 2.5 µL
- MgCl₂: 1.5 µL
- Hot-Start DNA Polymerase: 0.25 µL (1.25 U)
- Nuclease-free Water: to 25 µL
- Thermal Cycling: Use the same thermal cycling procedure as the first round, but for 15 cycles.
Product Analysis (Perform in Post-PCR Area 2) [21]
Analyze 5-10 µL of the second-round PCR product using agarose gel electrophoresis. A single, sharp band of the expected size (435 bp) should be visible.
Experimental Data and Performance Metrics
The following table summarizes quantitative data from a study comparing single-step and nested rpoB PCR strategies, demonstrating the enhanced sensitivity of the nested approach [22].
| PCR Strategy | Total Cycles | Successful Amplification (Mock_8sp) | Successful Amplification (Mock8splog) | Key Finding |
|---|---|---|---|---|
| Single-Step PCR | 35 | Up to 1:10 dilution | Undiluted sample only | Standard sensitivity for high-concentration targets [22]. |
| Single-Step PCR | 40 | Up to 1:10 dilution | Not tested | Increased cycles did not recover very dilute samples [22]. |
| Nested PCR | 25 (1st) + 15 (2nd) | Up to 1:100 dilution | Up to 1:100 dilution | Significantly higher sensitivity for low-concentration targets without biasing community composition [22]. |
Key Experimental Insight: The nested PCR protocol, with optimized cycle numbers (25 in the first round and 15 in the second), provided a markedly higher amplification efficiency for dilute samples and samples where bacterial DNA was embedded in a predominant eukaryotic DNA matrix (e.g., insect larvae), without altering the perceived bacterial community structure [22].
Implementing a laboratory design with strict physical separation of pre- and post-PCR areas is non-negotiable for reliable nested PCR, a technique inherently vulnerable to amplicon contamination. The protocols and experimental data outlined herein provide a validated framework for establishing a robust workflow. Adherence to these guidelines for laboratory zoning, unidirectional workflow, rigorous decontamination, and optimized reagent handling is fundamental to generating accurate, reproducible, and contamination-free results in molecular diagnostics and research.
In molecular biology, particularly in laboratories utilizing polymerase chain reaction (PCR) and especially nested PCR, the prevention of contamination is not merely a matter of protocol but a fundamental requirement for diagnostic and research accuracy. Nested PCR, which involves a second round of amplification using primers internal to the first set, dramatically increases the risk of amplicon carryover, making it exceptionally vulnerable to false-positive results [25]. The implementation of a strict unidirectional workflow from 'clean' to 'dirty' zones serves as the primary strategy to mitigate this risk. This physical and procedural segregation ensures the integrity of reagents and samples by preventing the movement of amplification products (amplicons) back into areas dedicated to pre-amplification activities [26]. This document outlines the detailed application notes and protocols for establishing such a workflow, framed within the broader context of contamination prevention for nested PCR.
Laboratory Zoning and Workflow Design
The cornerstone of contamination control is the physical separation of the various stages of the PCR process. This separation minimizes the risk of amplicons contaminating master mixes, reagents, and samples that have not yet been amplified.
Definition of Zones
A molecular laboratory should be divided into distinct, physically separated areas dedicated to specific tasks. The following zoning is recommended for an optimal setup [23] [26]:
Pre-PCR ('Clean') Zones:
- Reagent Preparation Room/Area: This should be the cleanest area in the laboratory, dedicated solely to the preparation, aliquoting, and storage of PCR master mixes and reagents. No biological samples, extracted nucleic acids, or amplicons should be introduced here [26].
- Sample/Nucleic Acid Extraction Room/Area: This area is dedicated to the processing of specimens and the extraction of DNA/RNA. It is considered a "low copy" area since the nucleic acids have not yet been amplified. The addition of template DNA to the master mix is also performed here [26].
Post-PCR ('Dirty') Zones:
- Amplification Room/Area: This room houses the thermal cyclers where the PCR amplification occurs. Once the PCR process begins, the samples become a potential source of contamination.
- Post-Amplification Analysis Room/Area: This is the "dirtiest" area, where amplified products (amplicons) are handled. Activities include gel electrophoresis, sequencing, and—critically—the opening of tubes after the first round of nested PCR to transfer product to the second reaction [26].
Implementing the Unidirectional Workflow
The movement of personnel, equipment, and consumables must follow a strict one-way path from clean to dirty areas. Moving backwards from a dirty to a clean area on the same day is strongly discouraged [23]. If such movement is unavoidable, personnel must undertake rigorous decontamination procedures, including washing hands, changing lab coats and gloves, and ensuring no equipment or paperwork is carried from the dirty to the clean area [23] [26].
Table 1: Laboratory Zoning Specifications and Requirements
| Zone | Primary Function | Physical Requirements | Permitted Materials | Prohibited Materials |
|---|---|---|---|---|
| Reagent Prep (Clean) | Master mix preparation/aliquoting | Laminar flow hood with UV light; Slight positive air pressure [26] | PCR reagents, nuclease-free water, sterile consumables | Biological samples, extracted nucleic acids, PCR amplicons |
| Nucleic Acid Extraction (Clean) | Sample processing, DNA/RNA extraction, template addition | Separate bench or cabinet; dedicated set of pipettes and supplies | Biological samples, extraction kits, master mix from reagent prep area | Amplified PCR products |
| Amplification (Dirty) | Thermal cycling | Housed thermal cyclers; preferably separate room | Loaded PCR plates/tubes | Master mix stocks, extracted nucleic acid stocks |
| Post-Amplification Analysis (Dirty) | Gel electrophoresis, nested PCR tube opening, sequencing | Slight negative air pressure [26]; dedicated equipment | Amplified PCR products, gels, loading dyes | Reagents and consumables from clean areas |
Diagram 1: Unidirectional laboratory workflow.
Detailed Protocol for Nested PCR in a Unidirectional Workflow
Nested PCR is a two-stage process where the product of the first PCR is used as a template for a second PCR with primers internal to the first set. This significantly increases sensitivity and specificity but also the risk of carryover contamination [25]. The following protocol is designed to be executed within the defined unidirectional workflow.
Stage 1: First-Round PCR Amplification in the Clean Area
Location: Reagent Preparation Area and Nucleic Acid Extraction Area. Objective: To set up the initial PCR reaction without contamination from amplicons.
Materials:
- Template DNA
- First-round (external) primers
- dNTP mixture
- PCR buffer, MgCl₂ solution
- Taq DNA polymerase
- Nuclease-free water
- Sterile PCR tubes and filter tips [23]
Procedure:
- In the Reagent Preparation Area:
- Prepare a master mix for the first-round PCR on ice. For a single 25 µL reaction, combine [25]:
- 2.5 µL 10x PCR Buffer
- 1.5 µL MgCl₂ (1.5-2.0 mM final concentration)
- 0.5 µL dNTP mixture (200 µM each)
- 0.5 µL Forward Primer (external, 0.2 µM)
- 0.5 µL Reverse Primer (external, 0.2 µM)
- 0.25 µL Taq DNA Polymerase (1.25 U)
- Nuclease-free water to 22.5 µL
- Aliquot the master mix into individual PCR tubes.
- Prepare a master mix for the first-round PCR on ice. For a single 25 µL reaction, combine [25]:
In the Nucleic Acid Extraction Area:
- Add 1-2 µL of template DNA to each tube containing the master mix, bringing the total volume to 25 µL.
- Centrifuge the tubes briefly to collect the contents at the bottom [23].
- Transfer the sealed tubes to the Amplification (Dirty) Area. Do not open the tubes in the clean area after this point.
Amplification Profile (run in the Amplification Area):
- Initial Denaturation: 94°C for 2 minutes
- 30-35 Cycles of:
- Denaturation: 94°C for 30 seconds
- Annealing: 45-60°C (primer-specific) for 30 seconds
- Extension: 72°C for 1 minute
- Final Extension: 72°C for 5 minutes
- Hold at 4°C [25]
Stage 2: Second-Round PCR Amplification in the Dirty Area
Location: Post-Amplification Analysis Area. Objective: To use the product of the first PCR as a template for the nested reaction without contaminating the clean areas.
Materials:
- First-round PCR product
- Second-round (internal/nested) primers
- dNTP mixture, PCR buffer, MgCl₂, Taq DNA polymerase
- Nuclease-free water
- Sterile PCR tubes and filter tips (from a set dedicated to the post-PCR area)
Procedure:
- In the Post-Amplification Analysis Area:
- Prepare a master mix for the second-round PCR on a separate bench or, ideally, within a laminar flow hood located within the dirty area [23]. For a single 25 µL reaction, combine:
- 2.5 µL 10x PCR Buffer
- 1.5 µL MgCl₂
- 0.5 µL dNTP mixture
- 0.5 µL Forward Primer (internal, 0.2 µM)
- 0.5 µL Reverse Primer (internal, 0.2 µM)
- 0.25 µL Taq DNA Polymerase
- Nuclease-free water to 22.5 µL
- Aliquot the master mix into new, sterile PCR tubes.
- Prepare a master mix for the second-round PCR on a separate bench or, ideally, within a laminar flow hood located within the dirty area [23]. For a single 25 µL reaction, combine:
Template Addition (Critical Step):
Analysis:
- Analyze the second-round PCR products using gel electrophoresis in the same Post-Amplification Analysis Area.
Contamination Control and Decontamination Procedures
Vigilant cleaning and the use of dedicated equipment are essential to support the unidirectional workflow.
Decontamination Agents and Methods
All laboratory surfaces and equipment must be routinely decontaminated. The following agents are recommended:
- 10% Sodium Hypochlorite (Freshly Made): Effective for destroying DNA. Requires a minimum contact time of 10 minutes before wiping with sterile water to remove residue. Not suitable for metal parts as it is corrosive [23].
- 70% Ethanol: Can be used for routine cleaning but must be followed by UV irradiation to fully decontaminate surfaces from DNA [23].
- UV Irradiation: Effective for sterilizing surfaces, equipment, and laminar flow cabinets by causing thymidine dimer formation in DNA. Requires a 30-minute exposure in a closed area. Note that dry-state DNA is more resistant to UV light [26].
- Commercial DNA-Destroying Reagents: A validated alternative to sodium hypochlorite, especially for sensitive equipment [23].
Table 2: Contamination Control Methods and Applications
| Method | Mechanism of Action | Primary Use | Advantages | Limitations |
|---|---|---|---|---|
| Sodium Hypochlorite (10%) | Chemical oxidation and degradation of DNA | Surface decontamination (benches, plastics) | Highly effective, low cost | Corrosive to metals; must be made fresh daily [23] |
| UV Light | Induction of thymidine dimers in DNA | Decontamination of closed spaces (hoods, rooms), equipment | Non-contact, broad coverage | Less effective on dry DNA; requires regular bulb cleaning [26] |
| Enzymatic Decontamination | DNAse enzyme degradation of DNA | Decontamination of reagents or sensitive equipment | Specific, non-corrosive | Can be more expensive |
| 70% Ethanol | Protein denaturation, general disinfection | Routine wiping of surfaces, equipment (vortex, centrifuge) [23] | Evaporates quickly, non-corrosive | Does not reliably destroy DNA alone; must be paired with UV [23] |
Management of Laboratory Equipment and Consumables
- Dedicated Equipment: Each zone must have its own set of pipettes, tube racks, centrifuges, vortexers, lab coats, gloves, and waste containers. These items must be clearly labeled and must never be moved between zones [23] [26].
- Pipettes and Filter Tips: Always use aerosol-resistant filter tips to prevent particulate contamination of pipette shafts. Pipettes should be autoclaved regularly if the manufacturer permits. If not, they should be decontaminated with 70% ethanol or a commercial DNA-decontaminating solution, followed by UV exposure [23].
- Personal Protective Equipment (PPE): Gloves must be worn and changed when moving between different zones, and especially after handling amplified products. Lab coats dedicated to each area should be worn [23].
The Scientist's Toolkit: Essential Reagents and Materials
The following table details key reagents and materials critical for implementing a contamination-controlled nested PCR workflow.
Table 3: Essential Research Reagent Solutions for Nested PCR Contamination Control
| Item | Function/Application | Contamination Control Feature |
|---|---|---|
| Aerosol-Resistant Filter Tips | Pipetting of all reagents and samples | Prevents aerosols from entering and contaminating the pipette shaft [23] |
| dNTP Mix | Building blocks for new DNA strands during PCR | N/A |
| Hot-Start Taq Polymerase | DNA synthesis enzyme activated only at high temperatures | Reduces non-specific amplification and primer-dimer formation at low temperatures, improving specificity and yield [23] |
| PCR Grade Water (Nuclease-Free) | Solvent for master mix preparation | Guaranteed free of nucleases that could degrade DNA/RNA or contaminants that could inhibit amplification |
| 10x PCR Buffer | Provides optimal ionic conditions and pH for PCR | N/A |
| Primers (External & Internal) | Sequence-specific oligonucleotides that define the target region | Two sets of primers (external for 1st round, internal for 2nd round) confer high specificity to nested PCR [25] |
| UV Decontamination Chamber | Decontaminating surfaces, empty laminar flow hoods, and equipment | Cross-links and destroys contaminating DNA on exposed surfaces [18] [26] |
| DNA Decontamination Solution | Chemical surface decontamination (e.g., benches, equipment) | Actively destroys DNA molecules on contact; an alternative to sodium hypochlorite [23] |
The rigorous implementation of a unidirectional workflow from 'clean' to 'dirty' zones is a non-negotiable component of a modern molecular laboratory, especially one engaged in nested PCR. This systematic approach, combining physical separation, strict procedural protocols, and routine decontamination, forms the most effective defense against contamination. By adhering to the application notes and detailed protocols outlined in this document, researchers and drug development professionals can ensure the generation of reliable, reproducible, and accurate molecular data, thereby upholding the highest standards of scientific integrity and diagnostic validity.
Nested Polymerase Chain Reaction (nested PCR) is a powerful molecular technique that significantly enhances the sensitivity and specificity of detecting target DNA sequences by employing two successive rounds of amplification with two sets of primers [27]. This very power, however, renders the technique exceptionally vulnerable to contamination, primarily from previously amplified PCR products (amplicons), which can lead to false-positive results and compromise research integrity [23]. Within a laboratory workflow dedicated to nested PCR contamination prevention, the strategic management of equipment and reagents through dedicated supplies and meticulous aliquoting forms the first and most crucial line of defense. This protocol outlines evidence-based procedures to establish a robust system for managing these resources, thereby safeguarding the validity of experimental data.
Background: Understanding Nested PCR and Contamination Risks
The Nested PCR Workflow
Nested PCR involves an initial amplification round using an outer set of primers, followed by a second round using a nested (inner) set of primers that bind within the first PCR product [3]. This two-step process dramatically increases sensitivity, as the second round amplifies a shorter, internal fragment from the product of the first reaction [28]. The enhanced sensitivity is particularly valuable for applications with minimal target DNA, such as detecting low-pathogen loads [29] or analyzing nucleic acids from suboptimal samples like formalin-fixed, paraffin-embedded tissues [30].
Primary Contamination Vectors
The most significant contamination risk in nested PCR is carryover contamination from amplicons generated during the first or subsequent PCR rounds [23]. These amplicons are present in extremely high concentrations and can aerosolize during tube opening or pipetting, easily contaminating reagents, equipment, and laboratory surfaces. Once introduced into a new reaction, they are efficiently amplified, leading to false positives. Cross-contamination between samples is another considerable risk, underscoring the need for stringent laboratory practices [23].
Protocols for Dedicated Supplies and Aliquoting
Implementing a system of dedicated supplies and aliquoting is a foundational practice for contamination prevention. The following protocols provide a detailed framework for its execution.
Protocol 1: Establishing a Unidirectional Workflow and Dedicated Equipment
Principle: Physically separate pre- and post-amplification activities to prevent amplicons from contacting reagents, equipment, and areas used for reaction setup [23].
Materials:
- Four separate rooms or physically distinct areas (e.g., separate benches, designated laminar flow cabinets)
- Multiple sets of pipettes, filter tips, tube racks, vortexers, centrifuges, lab coats, and gloves
- Ethanol-resistant markers
- 10% fresh sodium hypochlorite solution, 70% ethanol, or commercial DNA-decontaminating solutions [23]
Procedure:
- Designate Laboratory Zones: Establish and clearly label the following separate areas [23]:
- Zone 1: Reagent Aliquoting and Master Mix Preparation. This must be the cleanest area, entirely free of DNA templates and amplicons.
- Zone 2: Nucleic Acid Extraction and Template Addition.
- Zone 3: Amplification. Housing thermal cyclers.
- Zone 4: Product Analysis. Housing gel electrophoresis equipment and UV transilluminators.
Assign Dedicated Equipment: Provide a separate, uniquely colored set of pipettes, tip boxes, tube racks, vortexers, centrifuges, lab coats, and gloves for each zone. These items must not be moved between zones [23].
Implement Unidirectional Workflow: Personnel and samples must move in a single direction: from Zone 1 (cleanest) to Zone 4 (dirtiest). Movement from a post-PCR zone back to a pre-PCR zone on the same day should be prohibited. If unavoidable, personnel must thoroughly wash hands, change gloves and lab coats, and ensure no equipment or paperwork is carried back [23].
Execute Routine Decontamination:
- Pre-PCR Areas (Zones 1 & 2): Before and after use, wipe all surfaces, equipment, and tube racks with 70% ethanol or a commercial DNA-decontaminant. For enclosed spaces like laminar flow cabinets, follow with UV irradiation for 30 minutes [23].
- Post-PCR Areas (Zones 3 & 4): Clean surfaces with 10% fresh sodium hypochlorite (allow 10 minutes contact time), followed by wiping with sterile water to remove residual bleach. Alternatively, use a validated commercial DNA-decontaminant. Note: Sodium hypochlorite can damage metal parts of equipment; for these, use 70% ethanol followed by UV exposure [23].
Protocol 2: Reagent Aliquoting and Management
Principle: To prevent the contamination of master stock reagents, all critical reagents should be divided into single-use or small-workload aliquots [23].
Materials:
- Sterile, nuclease-free microcentrifuge tubes
- Powder-free gloves
- Filter-barrier pipette tips
- Reagents: Water, dNTPs, PCR buffer, MgCl₂, primers, and Hot-Start DNA polymerase
Procedure:
- Preparation: Centrifuge all reagent tubes briefly before opening to avoid aerosol generation. Wear a clean lab coat and powder-free gloves, and work within the designated Zone 1 [23].
- Aliquot Creation: Using sterile tubes and filter tips, dispense small volumes (e.g., volumes sufficient for a single experiment or a week's work) of each reagent.
- dNTP Mixture: Aliquot to avoid repeated freeze-thaw cycles.
- Primer Stocks: Prepare concentrated stocks and dilute to working concentrations for aliquoting.
- PCR-Grade Water and Buffers: Aliquot into volumes suitable for preparing a master mix.
- Hot-Start DNA Polymerase: Aliquot as recommended by the manufacturer.
- Labeling and Storage: Clearly label each aliquot with the reagent name, concentration, date of preparation, aliquot number, and preparer's initials. Store all aliquots at their recommended temperatures in dedicated freezers/refrigerators within Zone 1 [23].
- Usage: Once an aliquot is opened, it should not be returned to the master stock. Discard any unused portion after the experimental run to prevent future contamination.
Table 1: Reagent Aliquoting Strategy for Nested PCR Contamination Prevention
| Reagent | Recommended Aliquot Size | Storage Temperature | Rationale |
|---|---|---|---|
| dNTP Mixture | Single-experiment volume (e.g., for 50 reactions) | -20°C | Prevents degradation from freeze-thaw cycles and contamination. |
| Primer Stocks (Working) | Single-experiment volume | -20°C | Minimizes introduction of contaminants and nuclease degradation. |
| PCR-Grade Water | Multi-use volume for a defined period (e.g., one week) | -20°C or 4°C | Ensures a clean water source; small volumes limit exposure time. |
| 10x PCR Buffer | Multi-use volume for a defined period | -20°C | Prevents contamination of the master stock. |
| MgCl₂ Solution | Multi-use volume for a defined period | -20°C | Prevents contamination of the master stock. |
| Hot-Start DNA Polymerase | As per manufacturer's suggestion | -20°C | Maintains enzyme stability and prevents activity loss. |
Protocol 3: Master Mix Preparation in a Nested PCR Workflow
Principle: Preparing a single master mixture for multiple reactions minimizes pipetting steps, reduces handling errors, and limits the potential for cross-contamination [23]. The use of a Hot-Start DNA polymerase is critical, as it prevents non-specific amplification and primer-dimer formation at room temperature, thereby enhancing specificity [3].
Materials:
- All reagent aliquots
- Sterile, nuclease-free PCR tubes or plates
- Filter-barrier pipette tips
- Ice bucket or cold block
Procedure for First-Round PCR Master Mix:
- Setup: Work in Zone 1. Thaw all reagent aliquots on ice or a cold block and briefly centrifuge them before opening.
- Calculate Volumes: Determine the total volume of master mix required for the number of reactions needed (including at least 10% extra to account for pipetting error), plus positive control, negative control, and a no-template control (NTC).
- Combine Reagents: In a single sterile tube on ice, add the components in the following order: sterile water, 10x PCR buffer, dNTP mixture, MgCl₂ (if not in buffer), outer primers, and finally, Hot-Start DNA polymerase. Gently mix by pipetting up and down at least 20 times [31].
- Dispense: Aliquot the appropriate volume of master mix into each PCR tube/well.
- Add Template: Move to Zone 2. Add the extracted DNA template to each respective tube, followed by the positive control (a well-characterized, low-concentration template) to the control tube. Add the same volume of sterile water to the NTC tube. Cap the tubes securely.
- Amplify: Transfer the tubes to Zone 3 for amplification in the thermal cycler.
Procedure for Second-Round (Nested) PCR:
- The preparation of the second-round master mix, using the inner primers, must be performed in Zone 1 [23].
- The addition of the first-round PCR product (diluted as required, e.g., 1:100 to 1:1000) to the second-round master mix must be performed in Zone 3, ideally within a dedicated laminar flow cabinet, to prevent aerosol contamination of the pre-PCR areas with high-concentration amplicons [23].
The Scientist's Toolkit: Essential Research Reagent Solutions
The following table details key reagents and materials critical for implementing an effective contamination control strategy in nested PCR.
Table 2: Essential Research Reagent Solutions for Nested PCR Contamination Control
| Item | Function/Application | Key Considerations |
|---|---|---|
| Filter-Barrier Pipette Tips | Prevent aerosol and liquid from entering the pipette shaft, thereby protecting instruments from contamination and cross-contaminating samples. | Confirm compatibility with the brand of pipette used. Essential for all liquid handling steps [23]. |
| Hot-Start DNA Polymerase | Reduces non-specific amplification and primer-dimer formation by remaining inactive until a high-temperature activation step. | A key reagent for improving specificity and yield. Can be antibody-, affibody-, or chemically modified [3]. |
| Sterile, Nuclease-Free Tubes | Contain reactions and store aliquoted reagents. | Ensure they are certified free of nucleases and DNA/RNA to prevent false results. |
| DNA Decontamination Solution | For surface and equipment decontamination. Inactivates contaminating DNA. | 10% fresh sodium hypochlorite or validated commercial products. For sensitive equipment, 70% ethanol followed by UV light is an alternative [23]. |
| dNTP Mixture | Provides the nucleotide building blocks (dATP, dCTP, dGTP, dTTP) for DNA synthesis. | Aliquot to maintain stability and prevent contamination from repeated use. Typical final concentration is 200 μM of each dNTP [31]. |
| PCR Buffer with MgCl₂ | Provides optimal chemical conditions (pH, ionic strength) for polymerase activity. Mg²⁺ is a essential cofactor for the enzyme. | Check if MgCl₂ is included; if not, it must be added separately. The concentration often requires optimization [31]. |
| No-Template Control (NTC) | Critical negative control to detect reagent or master mix contamination. | Contains all reaction components except the DNA template, which is replaced by sterile water [23]. |
Workflow Visualization
The following diagram illustrates the unidirectional workflow and the strict physical separation of pre- and post-PCR activities, which is the cornerstone of an effective contamination prevention strategy.
Rigorous management of equipment and reagents through dedicated supplies and systematic aliquoting is not merely a best practice but a non-negotiable component of any nested PCR workflow aimed at contamination prevention. By physically separating pre- and post-amplification processes, utilizing dedicated equipment for each zone, and managing reagents through single-use or small-volume aliquots, laboratories can significantly mitigate the risk of false-positive results. When integrated with other good laboratory practices—such as the consistent use of appropriate controls and meticulous pipetting technique—these protocols form a comprehensive defense system that ensures the reliability and reproducibility of sensitive nested PCR assays.
Nested Polymerase Chain Reaction (nested PCR) is a highly sensitive molecular technique that significantly improves upon conventional PCR by using two sets of primers to amplify a specific target DNA sequence. This method involves an initial amplification round with outer primers, followed by a second round using inner primers that bind within the first PCR product. While this approach enhances specificity and sensitivity for detecting low-abundance targets, it also introduces substantial contamination risks during the procedural workflow. The necessity of transferring first-round amplification products to a second reaction tube creates critical vulnerability points where amplicon contamination can compromise experimental results. This application note details a comprehensive framework of procedural safeguards, integrating both established and novel methodologies to maintain sample integrity from initial sample preparation through final amplification, specifically within the context of advanced laboratory workflow optimization for contamination prevention research.
Principles and Challenges of Nested PCR
Fundamental Principles
Nested PCR operates on the principle of sequential amplification using two primer sets designed for the same target nucleic acid. The first amplification round utilizes a pair of external primers that flank the target region, typically generating a larger DNA fragment. Following this initial amplification, a portion of the first-round product serves as template for a second amplification using internal primers (nested primers) that bind within the sequence of the first PCR product. This two-stage process results in a shorter final amplicon with significantly enhanced specificity [32].
The key advantage of this approach lies in its verification mechanism. If the first primers bind non-specifically and amplify incorrect fragments, it is statistically unlikely that the same non-specific region will be recognized by the second set of internal primers. This dual verification system dramatically reduces false positive results compared to conventional single-round PCR protocols. Furthermore, nested PCR overcomes limitations of the single amplification plateau effect, increases overall amplification yield, and enhances detection sensitivity for challenging samples with minimal target DNA [32].
Contamination Challenges
The primary vulnerability of nested PCR stems from the requirement to open reaction tubes after the first amplification round to transfer products to the second reaction mixture. This manual transfer process creates aerosolized amplicons that can contaminate laboratory surfaces, equipment, and subsequent reactions [32]. These contamination events can lead to false positive results that undermine experimental integrity and diagnostic accuracy.
The extreme sensitivity of nested PCR, while analytically beneficial, compounds this contamination risk. The technique can generate millions of copies of the target sequence from a single template molecule, meaning even minute contamination levels can produce significant false positive signals [24]. Research demonstrates that carryover contamination from previously amplified templates represents one of the most persistent challenges in nested PCR workflows, particularly when analyzing low-prevalence targets or samples with minimal pathogen load [24].
Procedural Safeguards: A Stage-Based Approach
Pre-Amplification Safeguards
Laboratory Design and Workflow
Implementing strict physical separation of PCR workspace areas represents the foundational safeguard against contamination. The laboratory workflow should maintain distinct, dedicated areas for: (1) reagent preparation, (2) sample preparation and DNA extraction, (3) first-round PCR setup, (4) second-round PCR setup, and (5) post-amplification analysis [24] [33]. This physical segregation should extend to completely independent laboratory equipment, including pipettes, centrifuges, vortexers, and protective equipment for each area [24].
Maintaining a unidirectional workflow is critical, where researchers proceed from pre-amplification to post-amplification areas without reverse movement. Personnel who have entered post-amplification areas should not return to pre-amplification areas on the same day. When movement between areas is necessary, researchers must change gloves and lab coats before transitioning from post-amplification to pre-amplification spaces [24].
Reagent and Sample Preparation
Aliquoting reagents into single-use volumes prevents repeated freeze-thaw cycles and minimizes the risk of contaminating entire reagent stocks [33]. All reagents, including primers, dNTPs, buffers, and Master Mix components should be prepared in small, single-experiment aliquots using dedicated pre-amplification workspace areas.
Surface decontamination procedures must be rigorously implemented before and after all procedures. Work surfaces should be cleaned using 10-15% bleach solution (sodium hypochlorite), which effectively degrades DNA contaminants. Fresh bleach dilutions should be prepared regularly (at least weekly) due to solution instability. The bleach should remain on surfaces for 10-15 minutes before wiping with deionized water [24]. For routine cleaning, 70% ethanol provides effective surface decontamination between procedures.
The use of aerosol-resistant filter tips for all liquid handling steps creates a physical barrier preventing aerosol contamination of pipette shafts and internal mechanisms [33]. Positive-displacement pipettes offer additional protection against aerosol formation in samples and reagents. Proper pipetting technique that minimizes splashing or spraying further reduces aerosol generation [24].
Table 1: Pre-Amplification Reagent Preparation
| Reagent/Solution | Preparation Method | Contamination Control Rationale |
|---|---|---|
| Primers (outer and inner) | Aliquot into single-experiment volumes | Prevents contamination of entire stock |
| dNTP mixtures | Prepare small aliquots (e.g., 10-20 µL) | Minimizes freeze-thaw cycles and cross-contamination |
| PCR buffer/MgCl₂ | Aliquot without vortexing | Prevents aerosol formation |
| Template DNA | Prepare in dedicated sample area | Separates sample processing from amplification areas |
| Master Mix | Prepare in reagent-only area | Excludes template DNA from bulk reagent preparation |
Sample Preparation and DNA Extraction
Sample preparation represents a critical vulnerability point where external contaminants can be introduced. Using disposable equipment (punches, tweezers, or blades) for sample collection prevents cross-contamination between specimens [33]. When processing multiple samples, changing gloves between specimens provides additional protection against sample-to-sample contamination.
For nucleic acid extraction, incorporating inhibitor removal protocols specific to the sample type improves amplification efficiency while reducing co-purification of contaminants. For plant material, which often contains PCR inhibitors, specific DNA extraction protocols effectively eliminate inhibitory compounds that could compromise amplification efficiency [34]. Similarly, for cell culture applications, simplified protocols using culture supernatant directly as PCR template can reduce manipulation steps and associated contamination risks [35].
Including negative control samples throughout the extraction process verifies the integrity of extraction reagents and procedures. These controls should undergo identical processing as experimental samples to detect any contamination introduced during nucleic acid isolation [33].
First-Round Amplification Setup
The first amplification round establishes the foundation for the entire nested PCR process, requiring meticulous attention to contamination prevention. Reaction setup should occur in a dedicated pre-amplification area, physically separated from areas where amplified products are handled.
When preparing the first-round reaction mixture, all components except template DNA should be combined as a Master Mix to minimize pipetting steps and tube-to-tube variation. The template DNA should be added last in a separate workspace to prevent accidental contamination of reagents [32]. The first-round amplification typically follows standard PCR parameters with 15-30 cycles using the external primer set.
Table 2: First-Round PCR Reaction Components
| Component | Final Concentration/Amount | Function | Contamination Considerations |
|---|---|---|---|
| Template DNA | 1-2 µL (104-107 molecules) | Target amplification | Add last in separate workspace |
| External primers (each) | 0.2 µM (0.5 µL) | Outer fragment amplification | Aliquot to prevent primer contamination |
| dNTP mixture | 200 µM each (0.5 µL) | Nucleotide substrate | Aliquot to prevent contamination |
| 10× PCR buffer | 1× (2.5 µL) | Reaction conditions | Check for MgCl₂ content |
| MgCl₂ | 1.5-2.0 mM (1.5 µL) | Enzyme cofactor | Adjust based on buffer composition |
| Taq DNA polymerase | 1.25 U (0.25 µL) | DNA amplification | Use high-quality, contaminant-free enzyme |
| Sterile ultrapure water | To 25 µL final volume | Reaction volume | Use PCR-grade, nuclease-free water |
Thermal cycling conditions for the first-round amplification generally follow: initial denaturation at 94°C for 2 minutes; 30-35 cycles of denaturation at 94°C for 30 seconds, annealing at 45-60°C for 30 seconds (based on primer Tm), and extension at 72°C for 1 minute per 1000bp; final extension at 72°C for 5 minutes; and hold at 4°C [32].
Product Transfer and Second-Round Setup
The transition between first and second amplification rounds represents the highest risk procedure in nested PCR. Traditional two-tube approaches require opening the first amplification tube to transfer product to the second reaction, creating significant aerosolization risk [32]. Several strategic approaches minimize this risk:
Product Dilution and Transfer Controls: When using conventional two-tube methods, first-round amplification products should be diluted (typically 1:10 to 1:1000) before second-round amplification [32]. This dilution step should be performed carefully with minimal vortexing to reduce aerosol formation. Tube opening should occur in a dedicated area separate from pre-amplification spaces, preferably in a PCR workstation with vertical laminar flow.
Single-Tube Nested PCR: The most effective safeguard against transfer-related contamination involves implementing one-tube nested PCR protocols. This approach utilizes two primer pairs with distinct annealing temperatures in a single reaction tube. The first amplification round employs outer primers with higher annealing temperatures (approximately 68°C), while the second round uses inner primers with lower annealing temperatures (approximately 46°C) [32] [34]. This methodology eliminates the need for tube opening between amplification rounds, significantly reducing contamination risk while maintaining sensitivity equivalent to conventional two-step approaches [34].
Enzymatic Contamination Control: Incorporating uracil-N-glycosylase (UNG) into the reaction mixture provides biochemical protection against carryover contamination. This method requires using dUTP instead of dTTP in PCR amplification, causing all amplification products to contain uracil. UNG enzymatically degrades uracil-containing DNA from previous amplifications before thermocycling initiates, while high temperatures during PCR inactivate UNG, protecting newly synthesized products [24]. This approach is particularly effective for thymine-rich amplification products.
The second-round amplification mixture parallels the first round in composition, substituting inner primers for external primers and using a diluted sample of the first-round product as template. Thermal cycling parameters generally mirror those of the first amplification round [32].
Diagram 1: Nested PCR workflow with physical area segregation for contamination control. Critical transfer step highlighted in red indicates maximum contamination risk.
Post-Amplification Analysis
Following second-round amplification, proper handling of PCR products prevents future contamination events. All amplified products should remain in designated post-amplification areas and never be introduced into pre-amplification spaces. Analysis techniques such as agarose gel electrophoresis should be conducted in separate facilities with dedicated equipment.
Routine implementation of negative controls at multiple stages validates procedural integrity. These controls should include: (1) extraction negatives to monitor contamination during nucleic acid isolation, (2) first-round PCR negatives containing all components except template DNA, and (3) second-round PCR negatives using water instead of first-round product [24] [33]. Amplification in any negative control indicates contamination, necessitating investigation and procedural adjustment.
Disposal of amplified products requires careful attention. Sealed containers for used tips, tubes, and electrophoresis gels prevent environmental contamination. Regular decontamination of post-amplification areas with bleach solutions maintains a clean workspace for product analysis [24].
Advanced Technical Applications
Modified Nested PCR Protocols
Several specialized nested PCR formats address specific application needs while incorporating contamination control features:
Semi-Nested PCR: This variation uses three primers instead of four—one primer from the first amplification is reused in the second round along with one new internal primer. This approach is particularly valuable when primer design constraints prevent developing two complete primer pairs for a specific target [32]. While maintaining enhanced sensitivity, semi-nested PCR reduces primer-related costs and complexity.
Reverse Transcriptase Nested PCR (RT-nested PCR): Combining reverse transcription with nested PCR enables highly sensitive detection of low-copy RNA targets. This method first generates complementary DNA (cDNA) from RNA templates, followed by standard nested PCR amplification [32]. Applications include detection of RNA viruses like hepatitis C virus (HCV) and analysis of low-abundance transcript expression.
Consensus Nested PCR: This approach employs degenerate primers designed against conserved sequences within a genus or family of organisms. Particularly valuable for detecting novel or uncharacterized pathogens, consensus nested PCR allows amplification of diverse variants, with subsequent sequencing of products enabling identification [32].
Synthetic Positive Controls
Incorporating specially designed positive controls that generate distinct-sized amplification products enables visual detection of plasmid contamination in diagnostic nested PCR. These controls produce larger fragments than the diagnostic target, allowing clear discrimination on agarose gels and immediate identification of control plasmid contamination [36]. This approach is especially valuable when target prevalence is low and conventional positive controls might be unavailable.
Research Reagent Solutions
Table 3: Essential Research Reagents for Contamination-Free Nested PCR
| Reagent Category | Specific Examples | Function | Contamination Control Features |
|---|---|---|---|
| Polymerase Enzymes | Taq DNA polymerase | DNA amplification | High-purity, contaminant-free formulations |
| Nucleotide Mixes | dNTP mixtures (dATP, dCTP, dGTP, dTTP) | PCR substrate | Aliquot for single-use; dUTP for UNG systems |
| Reaction Buffers | 10× PCR buffer with MgCl₂ | Optimal reaction conditions | Pre-tested for contamination |
| Primer Sets | Outer and inner primer pairs | Target-specific amplification | HPLC-purified; aliquot in small volumes |
| Contamination Control Reagents | Uracil-N-glycosylase (UNG) | Degrades carryover contamination | Effective against uracil-containing amplicons |
| Decontamination Solutions | 10-15% bleach, 70% ethanol | Surface decontamination | Freshly prepared for optimal DNA degradation |
| Nucleic Acid Extraction Kits | Sample-specific kits | Template purification | Include inhibitor removal components |
Implementing comprehensive procedural safeguards throughout the nested PCR workflow, from sample preparation through second-round amplification, is essential for maintaining experimental integrity. The most critical elements include physical separation of pre-and post-amplification areas, meticulous reagent handling practices, utilization of single-tube methodologies where possible, and rigorous negative controls. These measures collectively address the primary vulnerability of nested PCR—carryover contamination during product transfer—while preserving the technique's exceptional sensitivity and specificity.
Future methodological developments will likely focus on further minimizing manual transfer steps through fully integrated amplification systems and enhancing enzymatic contamination control mechanisms. The principles outlined in this application note provide a foundational framework for researchers implementing nested PCR in diagnostic, research, and drug development contexts where result reliability is paramount.
Conventional nested polymerase chain reaction (nPCR) is a powerful technique for amplifying target DNA sequences with high sensitivity and specificity. However, its requirement for two separate amplification steps and physical transfer of initial PCR products to a second reaction tube presents a significant limitation: a high risk of cross-contamination from amplified DNA, leading to false-positive results [4] [37]. This contamination vulnerability poses substantial challenges in diagnostic, research, and clinical settings where result accuracy is critical.
The one-tube nested PCR (STnPCR) protocol has been developed as a robust alternative to address these contamination issues. This method performs both amplification rounds within a single, sealed tube by strategically utilizing primer design and thermal cycling parameters [4] [38]. This Application Note details the principles, protocols, and applications of STnPCR, providing researchers and drug development professionals with a reliable framework for implementing this technique within laboratory workflows focused on contamination prevention.
Principle and Advantages of One-Tube Nested PCR
Fundamental Principle
Single-tube nested PCR consolidates the two amplification rounds of traditional nested PCR into a single reaction vessel. This is achieved by incorporating both outer and inner primer sets into the initial reaction mixture but controlling their activity through differential annealing temperatures [37] [39].
The process involves two consecutive phases:
- First Phase: Higher annealing temperatures (typically >65°C) selectively permit only the outer primers to bind and amplify the larger target sequence.
- Second Phase: Lower annealing temperatures (typically <60°C) allow both inner and any remaining outer primers to bind, with the inner primers preferentially amplifying the shorter internal sequence from the initial amplification products [39].
This temperature-mediated control ensures sequential amplification without requiring physical transfer of materials, thereby maintaining a closed-tube system throughout the process [38].
Key Advantages Over Conventional Nested PCR
| Advantage | Description | Impact |
|---|---|---|
| Reduced Contamination | Closed-tube system prevents amplicon exposure to laboratory environment [4] [38]. | Eliminates primary source of false-positive results, enhancing diagnostic reliability. |
| Enhanced Sensitivity | Two successive amplifications increase detection capability for low-copy targets [4] [40]. | Enables detection from minimal samples (e.g., single cells, low pathogen loads) [4] [10]. |
| Operational Efficiency | Single-tube approach reduces hands-on time and consumable usage [4]. | Streamlines workflow, decreases processing time by approximately 1.5 hours compared to conventional methods [40]. |
| Resource Conservation | Combined reactions require less reagents and plasticware [4]. | Lowers per-test costs and reduces laboratory waste generation. |
Detailed Experimental Protocol
Primer Design Considerations
Effective STnPCR requires careful primer design with distinct thermodynamic properties:
- Outer Primers: Typically 25-30 nucleotides with higher melting temperatures (Tm > 65°C) [39] [38]. Locked Nucleic Acid (LNA) modifications can further increase Tm and specificity [38].
- Inner Primers: Shorter fragments (17-20 nucleotides) with lower Tm values (50-55°C) [39]. These should bind specifically to regions internal to the outer primer binding sites.
- Concentration Optimization: Outer primers are used at lower concentrations (0.005-0.01 μM) to ensure depletion after the first amplification phase, while inner primers require higher concentrations (0.15-0.5 μM) for efficient second-round amplification [4] [39].
Reagent Setup and Reaction Conditions
The following protocol is adapted from optimized systems for bacterial pathogen detection [39] and bovine genotyping [4]:
Reaction Mixture (20 μL total volume):
- 10 μL of 2× Taq Master Mix (containing 1 U Taq DNA polymerase, 3 mM MgCl₂, and 400 μM dNTPs)
- Outer primers: 0.01 μM each
- Inner primers: 0.15 μM each
- Template DNA: 1-2 μL (1-10 ng depending on source)
- Nuclease-free water to volume
Thermal Cycling Conditions:
- Initial Denaturation: 95°C for 5 minutes
- First Amplification (15 cycles):
- Denaturation: 94°C for 30 seconds
- Annealing: 65°C for 30 seconds
- Extension: 72°C for 30 seconds
- Second Amplification (25 cycles):
- Denaturation: 94°C for 30 seconds
- Annealing: 55°C for 30 seconds
- Extension: 72°C for 30 seconds
- Final Extension: 72°C for 5 minutes
Critical Optimization Parameters
Successful implementation requires optimization of several key parameters:
- Primer Concentration Ratio: Systematic testing of outer:inner primer ratios (e.g., 1:10 to 1:50) is essential to prevent interference between amplification rounds [4].
- Cycle Number Distribution: The 15:25 cycle distribution between phases has demonstrated optimal efficiency, but may require adjustment based on template abundance [39].
- Annealing Temperature Transition: A precise 10°C difference between phase-specific annealing temperatures ensures proper primer selectivity [39].
- Template Quality Assessment: DNA integrity is particularly crucial for STnPCR, especially when analyzing degraded samples where shorter amplicons (100-150 bp) are preferred [10].
Research Reagent Solutions
The following table outlines essential reagents and their functions for implementing STnPCR:
| Reagent | Function | Specification |
|---|---|---|
| Thermostable DNA Polymerase | Catalyzes DNA synthesis | Must lack 3'→5' exonuclease activity; supplied with optimized buffer [37] [39] |
| dNTP Mixture | Building blocks for DNA synthesis | High-purity, PCR-grade; 200 μM each dNTP recommended [37] |
| Primer Sets | Target sequence recognition | HPLC-purified; designed with distinct Tm values; LNA modifications optional [39] [38] |
| MgCl₂ Solution | Cofactor for polymerase activity | Typically 1.5-2.0 mM final concentration; requires optimization [37] |
| Template DNA | Source of target sequence | Quality/quantity assessment critical; 0.2-10 ng for most applications [4] |
| Nuclease-Free Water | Reaction medium | Must be sterile, molecular grade to prevent enzymatic degradation [37] |
Performance Comparison and Applications
Sensitivity and Specificity Assessment
STnPCR demonstrates superior sensitivity compared to conventional molecular detection methods:
| Method | Detection Limit (Plasmid DNA) | Clinical Sensitivity | Reference |
|---|---|---|---|
| Conventional PCR | 5 × 10⁴ copies/μL | 7.3% | [41] |
| Real-Time PCR | 50 copies/μL | 82.9% | [41] [38] |
| Traditional Nested PCR | 5 copies/μL | 85.4% | [41] |
| One-Tube Nested PCR | 1-5 copies/μL | 85.4-100% | [41] [40] |
STnPCR has demonstrated particular value in detecting porcine cytomegalovirus (PCMV), showing a 38.6% positivity rate compared to 23.6% for traditional nPCR and 12.6% for conventional PCR in clinical samples [40]. Similar enhanced sensitivity has been documented for respiratory syncytial virus (RSV), where one-tube nested real-time RT-PCR detected 25-fold lower viral concentrations compared to standard qRT-PCR [38].
Diverse Research and Diagnostic Applications
This methodology has supported advancements across multiple fields:
- Veterinary Diagnostics: Efficient detection of PCMV in xenotransplantation donor screening programs [40].
- Clinical Microbiology: Highly sensitive identification of bacterial pathogens (Staphylococcus aureus, Pseudomonas aeruginosa, Klebsiella pneumoniae) in research animal facilities [39].
- Animal Genetics: Reliable genotyping of single cells and bovine embryos for traits like milk production and disease resistance [4].
- Human Medicine: Improved detection of Helicobacter pylori in stool samples, particularly when targeting shorter DNA fragments (148 bp) in degraded specimens [10].
Technological Workflow
The following diagram illustrates the streamlined workflow of the single-tube nested PCR process, highlighting how contamination risks are minimized at each stage:
The one-tube nested PCR protocol represents a significant advancement in molecular diagnostic technology, effectively addressing the critical limitation of contamination associated with conventional nested PCR. Through strategic primer design and thermal cycling optimization, this method maintains the high sensitivity and specificity of traditional approaches while offering enhanced operational efficiency and reliability.
Implementation of STnPCR is particularly valuable in laboratory workflows prioritizing contamination prevention, including diagnostic laboratories processing high sample volumes, research studies utilizing limited template materials, and any setting requiring robust, reproducible amplification of low-abundance targets. As molecular diagnostics continue to evolve, single-tube nested PCR formats provide a practical foundation for developing increasingly automated and reliable detection systems.
The detection of respiratory pathogens via nested polymerase chain reaction (nested PCR) presents a significant challenge in molecular diagnostics due to the technique's exquisite sensitivity, which makes it exceptionally vulnerable to amplicon carryover contamination [42]. This case study examines the application of robust contamination control protocols within the context of a laboratory workflow dedicated to the detection of respiratory pathogens. The implementation of pre- and post-amplification sterilization techniques, coupled with stringent physical barriers, is critical for generating reliable and reproducible results, thereby ensuring the integrity of diagnostic data in both research and clinical settings [24] [42].
Quantitative Data on Nested PCR Performance
The enhanced sensitivity of nested PCR, when effectively controlled for contamination, makes it a powerful tool for detecting low-abundance pathogens. The following tables summarize key performance metrics from relevant studies.
Table 1: Comparative Sensitivity of Nested PCR vs. Other Diagnostic Methods
| Pathogen / Application | Nested PCR Sensitivity | Comparison Method | Performance of Comparison Method | Reference |
|---|---|---|---|---|
| Broad-Range Sepsis Detection | 101 CFU/mL for all target groups (Gram-positive, Gram-negative bacteria, yeast, filamentous fungi) | Microbiological Culture | 19% positive detection rate (vs. 70% for nested PCR) | [43] |
| Human Cytomegalovirus (HCMV) | 180 copies/mL | Quantitative Real-Time PCR (qRT-PCR) | 500 copies/mL detection limit; 12.3% positive rate (vs. 34.9% for nested PCR) | [44] |
| Cryptosporidium parvum | 8 oocysts | Reverse-Transcription PCR (RT-PCR) | 5 oocysts; but only 33% reproducibility vs. 97% for nested PCR | [45] |
Table 2: Impact of Sample Type on Detection Sensitivity in Nested PCR
| Pathogen | Sample Type | Positive Detection Rate | Key Finding | Reference |
|---|---|---|---|---|
| Human Cytomegalovirus (HCMV) | Peripheral Blood Leukocytes (PBL) | 34.9% | PBL is a superior material for DNA detection compared to plasma. | [44] |
| Human Cytomegalovirus (HCMV) | Plasma | 18.9% | Lower detection rate likely due to reduced viral DNA load. | [44] |
Experimental Protocols for Contamination Control
Core Nested PCR Protocol
The following protocol is adapted for the detection of a generic respiratory pathogen, incorporating critical contamination control measures.
Materials and Reagents
- Template DNA: Extracted from clinical respiratory samples (e.g., nasopharyngeal swabs).
- Primers: Two pairs of pathogen-specific primers (external and internal).
- PCR Master Mix: Contains dNTPs, reaction buffer, and a thermostable DNA polymerase.
- Uracil-DNA Glycosylase (UNG): Critical for carryover contamination control.
- dUTP: Used in place of dTTP in the reaction mix to facilitate UNG activity.
- Sterile, DNA-free water and aerosol-resistant pipette tips.
Procedure
- First Round Amplification:
- Prepare the reaction mixture in a pre-amplification, dedicated clean area. The final volume is 25 µL.
- Reagent Mix: 1-2 µL template DNA, 0.5 µL each external primer (final conc. 0.2 µM), 0.5 µL dNTP/dUTP mixture, 2.5 µL 10X PCR buffer, 1.5 µL MgCl₂, 0.25 µL Taq DNA polymerase, and sterile water to 25 µL [46].
- Thermal Cycling: Initial denaturation at 94°C for 2 min; 30-35 cycles of denaturation (94°C, 30 s), annealing (45-60°C, 30 s), and extension (72°C, 1 min); final extension at 72°C for 5 min [46].
Second Round Amplification:
- Dilute the first-round PCR product (e.g., 1:10) in a clean tube.
- Prepare the second reaction mixture with the same components as the first round, but replacing the external primers and template with 1-2 µL of the diluted first-round product and the internal primers.
- Use the same thermal cycling conditions as the first round.
Product Analysis:
- Analyze the final PCR product using agarose gel electrophoresis.
Integrated Contamination Control Workflow
A successful contamination control strategy relies on a multi-barrier approach [24] [42].
1. Physical Segregation of Laboratory Areas:
- Pre-amplification Area: A dedicated room or contained space for reagent preparation, sample processing, and reaction setup. This area must be free of amplified DNA products.
- Amplification Area: A separate room housing the thermal cyclers.
- Post-amplification Area: A distinct room for analyzing PCR products (e.g., gel electrophoresis).
- Unidirectional Workflow: Personnel and materials must move from pre- to post-amplification areas without backtracking. Lab coats, gloves, and equipment (pipettes, centrifuges) must be dedicated to each area [42].
2. Procedural and Reagent-Based Controls:
- UNG/dUTP System: Incorporate UNG enzyme and dUTP into the PCR master mix. UNG enzymatically degrades any uracil-containing carryover amplicons from previous runs during an initial incubation step (e.g., 10 min at room temperature). It is then inactivated during the first high-temperature denaturation step, allowing the new amplification to proceed with dUTP incorporated into the fresh products [24] [42].
- No-Template Controls (NTCs): Include control reactions containing all reagents except the template DNA in every experiment. Amplification in the NTC indicates contamination of reagents or the environment [24].
- Surface Decontamination: Regularly clean work surfaces and equipment in the pre-amplification area with a 10% sodium hypochlorite (bleach) solution, followed by ethanol and deionized water to remove residual bleach [24] [42].
- Aerosol Management: Use aerosol-resistant pipette tips and open tubes carefully to minimize the creation of aerosols.
The following workflow diagram illustrates the integration of these physical and procedural controls.
Diagram 1: Integrated Nested PCR Workflow with Contamination Control Zones
The Scientist's Toolkit: Essential Research Reagents & Materials
Table 3: Key Reagents and Materials for Contamination-Controlled Nested PCR
| Item | Function/Application | Key Consideration for Contamination Control |
|---|---|---|
| Uracil-N-Glycosylase (UNG) | Enzyme that degrades uracil-containing DNA from previous amplifications, preventing carryover contamination [24] [42]. | Must be used in conjunction with dUTP in the PCR mix. Incubate at room temperature before thermal cycling. |
| dUTP | Deoxynucleotide triphosphate used in place of dTTP. Incorporated into amplification products, making them susceptible to UNG degradation [42]. | Must be compatible with the DNA polymerase and not inhibit amplification efficiency. |
| Aerosol-Resistant Pipette Tips | Physical barrier to prevent aerosols from contaminating pipette shafts and subsequent reactions. | Essential for all liquid handling, especially in the pre-amplification area. |
| 10% Sodium Hypochlorite (Bleach) | Chemical decontaminant for work surfaces and equipment. Causes oxidative damage to nucleic acids [42]. | Fresh dilutions should be made regularly. Surfaces should be wiped with ethanol/water after bleach to prevent corrosion. |
| Dedicated Labware & Equipment | Separate pipettes, centrifuges, vortexers, and lab coats for pre- and post-amplification areas. | Prevents mechanical transfer of amplicons. A unidirectional workflow must be enforced. |
Effective detection of respiratory pathogens using nested PCR is critically dependent on rigorous contamination control. By integrating the multi-level strategy outlined—encompassing physical segregation, the UNG/dUTP biochemical system, stringent procedural controls, and consistent decontamination practices—laboratories can harness the full, exceptional sensitivity of nested PCR while maintaining the integrity of their results. This holistic approach is fundamental to advancing research and ensuring diagnostic accuracy.
Troubleshooting Common Issues and Optimizing Your Nested PCR Protocol
The exquisite sensitivity of nested polymerase chain reaction (nested PCR) makes it a powerful tool for detecting low-abundance targets in clinical, environmental, and biological research. This method significantly enhances detection sensitivity by performing two consecutive rounds of amplification with two sets of primers [47]. However, this very sensitivity renders the technique exceptionally vulnerable to contamination, potentially leading to false positive results that compromise diagnostic accuracy and research validity [48] [49]. The primary objective of this application note is to delineate a systematic framework for identifying contamination sources within the nested PCR workflow and to provide robust, actionable protocols for their prevention and control, thereby supporting the integrity of data generated in drug development and scientific research.
Understanding False Positives in Nested PCR
The Double-Edged Sword of Enhanced Sensitivity
In nested PCR, the initial amplification round employs an outer primer pair to generate a primary amplicon. A portion of this product is then transferred to a second reaction tube, where an inner primer pair binds within the first amplicon to generate a shorter, secondary product [47]. This two-stage process dramatically increases the overall amplification factor and sensitivity, enabling the detection of targets present in minute quantities. However, the necessity to open reaction tubes after the first amplification round to transfer the product creates a significant contamination vector. Aerosolized droplets of the first-round product, which contain a high concentration of the target amplicon, can easily contaminate reagents, equipment, or subsequent second-round reactions [47]. These amplicons then become potent templates for the second-round PCR, leading to false positive detection even in the absence of the original target template in the sample.
Cross-Reactivity and Non-Specific Amplification
Beyond amplicon contamination, false positives can arise from primer cross-reactivity with non-target sequences. This is a particular challenge when detecting pathogens using primers designed from highly conserved genomic regions. For instance, universal primers targeting the small subunit ribosomal RNA (SSU rRNA) gene for microsporidian detection have been shown to cross-react with DNA from closely related non-target microorganisms, generating false positive signals [48] [50]. Similarly, a study screening areca palm for phytoplasma using universal 16S rDNA primers found that a substantial number of amplification products belonged to chloroplast DNA or other bacterial sequences upon sequencing, rather than the target phytoplasma [49]. Such findings underscore that not all amplification products of the expected size are necessarily the intended target.
A methodical approach to diagnosing contamination sources is critical. The following workflow provides a logical pathway for identifying the root cause of false positives. The diagram below outlines a step-by-step diagnostic pathway to methodically identify the source of contamination in a nested PCR process.
Interpreting the Diagnostic Workflow
The diagnostic process begins with the analysis of No-Template Controls (NTCs). Positive signals in NTCs provide definitive evidence of amplicon or reagent contamination, necessitating a thorough investigation of laboratory surfaces, equipment, and reagents [47]. If NTCs are clean, the pattern of sample positives must be scrutinized. Unexpected positive results concentrated in specific sample types (e.g., environmental samples versus clinical samples) may indicate primer cross-reactivity with non-target organisms present in those samples [48] [50]. Finally, sequencing of the amplicon is an indispensable confirmatory step. It verifies whether the amplified product is the intended target or an off-target sequence, thereby distinguishing between true infection and contamination or cross-reactivity [49].
Quantitative Data on Contamination and Specificity
Empirical data from published studies highlights the prevalence and impact of false positives in molecular diagnostics. The table below summarizes key findings that quantify contamination and specificity issues.
Table 1: Quantitative Analysis of False Positives and Assay Specificity in PCR Diagnostics
| Study Target | Method | False Positive / Specificity Issue | Outcome / Resolution | Reference |
|---|---|---|---|---|
| Areca Palm Phytoplasma | Universal 16S rDNA nested PCR | 36/50 (72%) of initially positive samples were false positives (chloroplast/bacterial DNA) upon sequencing. | Developed novel specific primers (HNP) that eliminated non-specific amplification. [49] | |
| Shrimp Microsporidian (EHP) | SSU rRNA nested PCR | Cross-reaction with closely related microsporidia, causing false positives in environmental samples. | Developed a new SWP gene-targeted nested PCR that showed no false positives from related species. [48] | |
| JC Polyomavirus in PCa | T-antigen nested PCR | 38% (19/50) detection in benign control tissues, highlighting background signal or contamination risk. | Significant association (p=0.045) still found with prostate cancer, but controls indicate potential for false positives. [6] |
The data in Table 1 demonstrates that false positives are not merely a theoretical risk but a common practical challenge. The high percentage of false positives encountered in phytoplasma detection [49] underscores the critical importance of amplicon sequencing for result validation. Furthermore, the development of novel, more specific primers targeting unique genes (e.g., the spore wall protein gene for EHP [48] or conserved regions specific to 16SrI and 16SrII groups for phytoplasma [49]) proves to be a highly effective strategy for overcoming the limitations of universal primer sets.
Essential Protocols for Contamination Prevention and Diagnosis
Protocol: Spatial Separation of Pre- and Post-Amplification Areas
Principle: The most critical step in preventing amplicon contamination is the physical separation of PCR setup areas from spaces where amplified products are handled [47].
- Procedure:
- Establish three distinct, dedicated workstations:
- Area 1 (Pre-PCR): For reagent preparation, master mix assembly, and template addition. This area should contain dedicated equipment, including pipettes, tips, and lab coats.
- Area 2 (Amplification): For housing thermal cyclers.
- Area 3 (Post-PCR): For analysis of amplified products (e.g., gel electrophoresis).
- Enforce a unidirectional workflow: personnel and materials should move from Pre-PCR to Post-PCR areas, but never in reverse.
- Utilize dedicated equipment for each area, and physically separate them within the laboratory, ideally in different rooms.
- Establish three distinct, dedicated workstations:
Protocol: Establishing Rigorous Contamination Monitoring Controls
Principle: Controls are essential for detecting contamination when it occurs and for validating the specificity of the assay.
- Procedure:
- No-Template Control (NTC): Include at least one reaction containing all PCR components except the template DNA (use nuclease-free water instead). A positive signal in the NTC indicates amplicon or reagent contamination.
- Negative Control: Use a sample known to be negative for the target (e.g., healthy tissue extract). This controls for non-specific amplification from the sample matrix.
- Positive Control: Use a sample with a known, low concentration of the target. This verifies that the assay is functioning correctly.
- Sequencing Verification: Regularly sequence a subset of amplicons, especially from critical or unexpected positive results, to confirm the identity of the amplified product [49].
Protocol: Validating Primer Specificity to Minimize Cross-Reactivity
Principle: Primers designed for nested PCR must be highly specific to the target sequence to avoid amplification of non-target genes or organisms.
- Procedure:
- In silico Analysis: Perform rigorous BLAST analysis of all primer sequences (both inner and outer) against genomic databases to check for homology with non-target sequences from the host or common environmental contaminants.
- Empirical Testing: Test the primer sets against a panel of genomic DNA from non-target organisms that are phylogenetically related or likely to be present in the sample type. For example, when developing a phytoplasma assay, test primers against DNA from host plants and common plant pathogens [49].
- Target Alternative Genes: If cross-reactivity is an issue with a commonly targeted gene (e.g., SSU rRNA), consider designing primers for a more unique genetic locus, such as a single-copy gene or a gene encoding a structural protein (e.g., the spore wall protein gene used for EHP detection) [48] [50].
The Scientist's Toolkit: Key Reagents and Materials
The following table catalogues essential materials and reagents critical for implementing an effective nested PCR contamination control strategy.
Table 2: Research Reagent Solutions for Nested PCR Contamination Prevention
| Item | Function in Contamination Control | Application Notes |
|---|---|---|
| Aerosol-Barrier Pipette Tips | Prevents aerosolized contaminants from entering pipette shafts and cross-contaminating samples and reagents. | Essential for all liquid handling steps, especially during transfer of first-round PCR product. [6] |
| dUTP and UNG Enzyme | Incorporates dUTP in place of dTTP during PCR. Subsequent treatment with Uracil-N-Glycosylase (UNG) prior to amplification degrades any contaminating carry-over dUTP-containing amplicons. | Effective biochemical method to prevent carry-over contamination from previous PCR runs. |
| Dedicated PCR Workstation & UV Hood | Provides a physically segregated, clean space for setting up pre-PCR reactions. UV light decontaminates surfaces and neutralizes contaminating DNA. | Critical for maintaining a sterile environment for reagent and master mix preparation. [47] |
| High-Fidelity Taq Polymerase | Reduces misincorporation errors during amplification, ensuring faithful replication of the target sequence. | Helps maintain sequence integrity, which is crucial for subsequent sequencing validation. |
| Plasmid Controls for Sensitivity | Provides a quantifiable standard (e.g., copy number/μL) to determine the limit of detection and ensure assay sensitivity is maintained with clean techniques. | Used for both positive controls and standard curves in qPCR-based nested assays. [48] |
| Nuclease-Free Water | Serves as the diluent for reagents and the substitute for template in NTCs. Guaranteed to be free of nucleases and contaminating DNA/RNA. | Fundamental for all reagent preparation and critical control reactions. [47] |
False positives in nested PCR present a significant challenge that can be effectively mitigated through a systematic and vigilant approach. The integration of spatial segregation, mandatory control reactions, biochemical safeguards, and, most importantly, confirmatory amplicon sequencing forms the cornerstone of a robust contamination prevention strategy. The protocols and analytical frameworks detailed in this application note provide researchers and drug development professionals with a concrete pathway to enhance the reliability and reproducibility of their nested PCR results, thereby strengthening the scientific conclusions drawn from this powerful but technically demanding technique.
False negative results in nested PCR present a significant challenge in molecular diagnostics, potentially leading to missed diagnoses, inappropriate treatments, and inaccurate research conclusions. Unlike false positives, which often stem from contamination, false negatives arise from more complex technical and biochemical failures within the amplification process. These silent errors are particularly problematic in clinical diagnostics where they can directly impact patient care, and in research settings where they compromise data integrity. This application note systematically addresses the primary causes of false negatives—inhibition, template quality degradation, and primer-related issues—within the broader context of laboratory workflow for nested PCR contamination prevention. By integrating targeted assessment protocols and preventive strategies into standard operating procedures, laboratories can significantly enhance detection reliability, ensuring the accuracy required for both diagnostic and research applications.
Experimental Data and Comparative Analysis
Recent investigations across diverse fields, from clinical diagnostics to plant pathology, highlight the critical factors influencing false negative rates in nested PCR. The following data summarizes key quantitative findings from recent studies.
Table 1: Comparative Sensitivity of Nested PCR and Other Molecular Methods
| Pathogen/Application | Nested PCR Sensitivity | Comparison Method | Performance Notes | Source |
|---|---|---|---|---|
| H. pylori Detection (Stool) | 51.0% (148 bp amplicon) | Stool Antigen Test (SAT): 27.9% | Short 148 bp amplicon significantly outperformed longer 454 bp amplicon (6.25%) due to DNA fragmentation. | [5] |
| Chinese Pepper Rust (C. zanthoxyli) | 31.2 fg/µL | qPCR: 3.1 fg/µL | Nested PCR showed high stability and reliability, though it was 10x less sensitive than qPCR. | [51] |
| Areca Palm Phytoplasma | 7.5x10⁻⁷ ng/µL (16SrI)4.0x10⁻⁷ ng/µL (16SrII) | Conventional Universal Primers | Novel specific primers eliminated false positives from chloroplast and bacterial DNA, improving effective sensitivity. | [49] |
| Acute Leukemia Fusion Genes | Lower than RT-qPCR | RT-qPCR | RT-qPCR demonstrated higher sensitivity in detecting genetic alterations at diagnosis. | [52] |
| Z. bungeanum Gummosis (F. tricinctum) | 31.2 fg/µL | qPCR: 3.1 fg/µLLAMP: 31.2 fg/µL | Nested PCR exhibited exceptional stability and reliability for early diagnosis. | [14] |
Diagnostic Protocols for False Negative Identification
Protocol 1: Assessment of PCR Inhibition
Principle: Inhibitors co-purified with nucleic acids can disrupt polymerase activity, leading to partial or complete amplification failure. This protocol uses an internal control to detect their presence.
Materials:
- Pre-validated control DNA plasmid (e.g., with a housekeeping gene insert)
- Nuclease-free water
- PCR master mix (including primers for the control amplicon)
- Test sample DNA extracts
Method:
- Prepare Reaction Mix: For each test sample DNA, prepare two reactions:
- Test Reaction: Standard nested PCR reaction mix with the sample DNA.
- Spiked Reaction: Identical to the test reaction, but spiked with a known, low-copy number (e.g., 50-100 copies) of the control DNA plasmid.
- Amplification: Run both reactions through the full nested PCR protocol.
- Analysis: Analyze the products by gel electrophoresis.
- Interpretation: If the test reaction is negative but the spiked reaction is also negative, this indicates the presence of PCR inhibitors in the sample. A positive result in the spiked reaction confirms that the sample is truly negative for the target.
Troubleshooting: If inhibition is detected, consider:
- Re-purifying the DNA using a silica-column-based kit or dilution (e.g., 1:10 dilution of the DNA extract in nuclease-free water).
- Adding Bovine Serum Albumin (BSA) to the reaction mix at 200-400 ng/µL to neutralize certain inhibitors like phenolic compounds [53].
Protocol 2: Verification of Template Quality and Integrity
Principle: Degraded DNA or low-quality RNA is a primary cause of false negatives, especially when targeting long amplicons. This protocol assesses the amplifiable nucleic acid content.
Materials:
- DNA/RNA samples
- Spectrophotometer (e.g., NanoDrop)
- PCR/Qubit equipment
- Primers for a conserved, multi-copy host gene (e.g., β-actin, GAPDH)
Method:
- Quantification and Purity Check: Measure the nucleic acid concentration and A260/A280 ratio via spectrophotometry. Acceptable ratios are ~1.8 for DNA and ~2.0 for RNA.
- Amplification of a Control Gene: Perform a single-round PCR (or RT-PCR for RNA) targeting a conserved host gene. Use primers that generate amplicons of different lengths (e.g., a short ~150 bp fragment and a longer ~400 bp fragment).
- Integrity Assessment: Analyze the PCR products by gel electrophoresis.
- Interpretation: A positive result for the short amplicon but a negative for the long amplicon is a strong indicator of nucleic acid degradation [5]. Consistent failure to amplify any control gene suggests poor template quality or the presence of inhibitors.
Protocol 3: Validation of Primer Binding Efficiency
Principle: Mismatches between primer sequences and the target template, often due to genetic variations, can prevent annealing and cause false negatives.
Materials:
- Isolated genomic DNA from a reference strain or patient sample
- Primer sets (outer and inner)
- PCR reagents for standard and touchdown protocols
- Gel electrophoresis equipment
Method:
- In Silico Validation: Regularly verify primer sequences via BLAST search against the NCBI database to ensure they are specific and unlikely to cross-react with non-target sequences [53].
- Empirical Testing with Controls: Always include a well-characterized positive control (e.g., plasmid clone or DNA from a known positive sample) in every run. Consistent failure of the positive control indicates a reagent or primer issue.
- Optimize Annealing Conditions: If specificity is suspected, implement a Touchdown PCR protocol. Start with an initial annealing temperature 5°C–10°C above the primer's estimated Tm and reduce it by 1°C–2°C per cycle until the optimal temperature is reached. This favors specific binding in the early cycles [53].
- Alternative Target Design: If problems persist, re-design primers to target a different, more conserved genomic region, and aim for a shorter amplicon length to improve efficiency [5] [49].
Figure 1: A systematic workflow for diagnosing and addressing the root causes of false negatives in nested PCR.
The Scientist's Toolkit: Essential Research Reagents
The following reagents are critical for implementing the diagnostic protocols described above and for ensuring the overall reliability of nested PCR assays.
Table 2: Key Reagent Solutions for False Negative Prevention
| Reagent/Material | Function & Rationale | Application Example |
|---|---|---|
| Bovine Serum Albumin (BSA) | Neutralizes PCR inhibitors (e.g., phenolics, humic acids) by binding them, thereby restoring polymerase activity. | Added to reaction mix at 200-400 ng/µL when inhibition is suspected [53]. |
| Internal Control Plasmid | Distinguishes true target negatives from amplification failure. Co-amplifies with the target, acting as a process control. | Spiked into test reactions; failure to amplify indicates inhibition or reaction failure [53]. |
| Host Gene Primers | Verifies the presence of amplifiable nucleic acid and assesses its integrity. | Targeting conserved genes (e.g., GAPDH) with short and long amplicons to check for degradation [5]. |
| Hot-Start DNA Polymerase | Reduces non-specific amplification and primer-dimer formation by remaining inactive until high temperatures are reached. | Improves assay specificity and sensitivity, especially in the first round of nested PCR [53]. |
| Annealing-Control Primers | Feature a polydeoxyinosine linker that forms a bubble structure, preventing non-specific binding and improving specificity. | Commercial primers (e.g., from Seegene) for highly specific target amplification in complex samples [53]. |
| Silica-Column DNA Kits | Provide high-purity nucleic acid extracts, effectively removing common PCR inhibitors from complex samples. | Essential for DNA extraction from inhibitor-rich samples like stool, soil, or plant tissues [5] [14]. |
Integrated Preventive Strategies
Contamination Control
Given that the focus is on false negatives, it remains critical to distinguish them from false positives caused by contamination. Maintain strict unidirectional workflow, use separate rooms/areas for pre- and post-PCR steps, and employ good laboratory practices (fresh gloves, dedicated lab coats, UV irradiation of benches, and using uracil-DNA-glycosylase (UNG) to combat carry-over contamination) [53].
Workflow Optimization
- Template Handling: Store samples at low temperatures in small aliquots to prevent degradation from repeated freeze-thaw cycles. Use nuclease-free tubes, tips, and water [53].
- Equipment Calibration: Regularly service and calibrate pipettes and thermal cyclers to ensure accurate liquid handling and precise temperature control, which is vital for consistent amplification [53].
- Primer Design: Design primers targeting genes with low conservation that are highly specific to the target organism. For challenging templates like degraded DNA, prioritize shorter amplicon lengths (100-150 bp) to maximize detection sensitivity [5] [49].
Method Selection
While nested PCR is highly sensitive and specific, alternative methods may offer advantages in certain scenarios. qPCR provides superior quantification and a higher sensitivity, as demonstrated in leukemia and plant pathogen diagnostics [51] [52]. For field applications, LAMP offers a rapid, cost-effective, and equipment-free alternative for qualitative detection [14].
Nested polymerase chain reaction (nested PCR) is a powerful molecular technique designed to enhance the specificity and sensitivity of DNA amplification by employing two successive sets of primers. Despite its advantages, the increased risk of amplicon contamination during the transfer of first-round products to the second reaction presents a significant challenge, potentially leading to false-positive results. A robust laboratory workflow for contamination prevention is therefore integral to the reliable application of nested PCR. The optimization of reagent concentrations, particularly primer ratios and magnesium (Mg2+) levels, is a critical factor in maximizing amplification specificity and efficiency, thereby reducing non-specific products that can perpetuate contamination. This application note provides detailed protocols and data for optimizing these key parameters within the context of a comprehensive contamination prevention strategy.
Theoretical Foundations of Nested PCR
Nested PCR significantly enhances the specificity and yield of DNA amplification through a two-stage process. The initial round of amplification uses an outer set of primers that flank the target region. A small aliquot of this first reaction is then transferred to a second reaction tube containing an inner set of primers that bind within the first amplicon. This two-step process ensures that even if non-specific products are generated in the first round, it is highly improbable that the same non-target region would be recognized and amplified by the second, nested primer set [3]. The method is particularly beneficial for amplifying targets from complex templates or from samples with a low copy number of the target sequence [3].
The following workflow diagram illustrates the key stages of a nested PCR procedure and highlights critical points for optimization to prevent contamination.
Key Reagents and Their Functions
A successful nested PCR reaction relies on the precise combination and concentration of several key reagents. The table below details these essential components and their roles in the amplification process.
Table 1: Research Reagent Solutions for Nested PCR
| Reagent | Function in Nested PCR | Typical Concentration Range |
|---|---|---|
| Primers (Outer & Nested) | Bind complementary sequences to define amplicon; nested primers enhance specificity [3]. | 20-50 pmol per reaction [31] |
| DNA Polymerase | Enzyme that synthesizes new DNA strands. Hot-start versions are recommended to reduce non-specific amplification [3]. | 0.5-2.5 units per 50 µL reaction [31] |
| MgCl₂ | Essential cofactor for DNA polymerase; concentration critically affects primer annealing and enzyme fidelity [54]. | 1.5-5.0 mM [31] |
| dNTPs | Building blocks (A, T, G, C) for new DNA synthesis. | 50-200 µM of each dNTP [31] |
| PCR Buffer | Provides optimal chemical environment (pH, ionic strength) for polymerase activity. | 1X concentration |
| Additives (e.g., DMSO, BSA) | Assist in amplifying difficult templates (e.g., GC-rich regions) and stabilize reaction components [54]. | DMSO: 1-10%; BSA: 10-100 µg/mL [31] |
Optimization of Critical Parameters
Primer Design and Concentration
The foundation of a specific nested PCR assay lies in meticulous primer design. The following characteristics should be considered for both outer and nested primer sets: primer length should be 15-30 nucleotides; GC content should ideally be between 40-60%; the 3' end should be rich in G or C bases to prevent "breathing" (fraying of ends); and the melting temperatures (Tm) for a primer pair should differ by no more than 5°C [31]. Avoiding self-complementarity and di-nucleotide repeats is also crucial to prevent hairpin structures and primer-dimer formation [31].
Regarding concentration, a final concentration of 20-50 pmol per reaction (e.g., 1 µL of a 20 µM stock in a 50 µL reaction) for each primer is a standard starting point [31]. Using a master mix for each primer pair set is highly recommended to ensure consistency across replicates and to minimize pipetting errors [31].
Magnesium Ion (Mg2+) Optimization
Magnesium ion concentration is a pivotal factor influencing PCR specificity. As a essential cofactor for thermostable DNA polymerases, Mg2+ concentration must be higher than the total concentration of dNTPs in the reaction [54]. However, excessive Mg2+ can stabilize nonspecific primer-template interactions, leading to spurious amplification and smeared gel results, while insufficient Mg2+ can result in low yield or no product [54].
Table 2: Mg2+ Optimization Guide
| Mg2+ Concentration | Observed Effect on PCR | Recommendation |
|---|---|---|
| Too Low (< 1.0 mM) | Low or no yield of specific product; polymerase activity inefficient. | Increase concentration in 0.5 mM increments. |
| Optimal (1.5 - 3.0 mM) | High yield of specific amplicon with minimal background. | Varies by template and primer set; requires empirical testing. |
| Too High (> 5.0 mM) | Increased non-specific bands and primer-dimer formation; smeared gel appearance. | Decrease concentration in 0.5 mM increments. |
A standard optimization protocol involves a titration series. A common approach is to use a MgCl2 gradient from 1.0 mM to 5.0 mM in 0.5 mM increments, keeping all other reaction components constant [31] [54]. The results are then analyzed via gel electrophoresis to identify the concentration that produces the strongest desired band with the least background.
Integrated Experimental Protocol for Optimization
This protocol outlines a systematic approach to optimizing a nested PCR assay, with an emphasis on procedures that minimize contamination risk.
Pre-Amplification: Reaction Setup and Contamination Control
Materials:
- Template DNA
- Outer and nested primer sets
- Hot-start DNA polymerase with compatible buffer
- MgCl2 (25 mM stock)
- dNTP mix (10 mM)
- Sterile, nuclease-free water
- PCR tubes and dedicated pipettors
Procedure:
- Physical Separation: Perform reagent preparation, the first round of PCR, product transfer, and post-amplification analysis in separate dedicated areas using dedicated pipettors [54].
- Master Mix Preparation: For the first-round PCR, prepare a master mix on ice to minimize non-specific amplification and nuclease activity [31]. Calculate volumes for multiple reactions to account for pipetting error.
- For a 50 µL reaction, combine:
- Sterile H2O: Q.S. to 50 µL
- 10X PCR Buffer: 5 µL
- 25 mM MgCl2: Variable (See titration protocol in Section 5.2)
- 10 mM dNTP mix: 1 µL
- 20 µM Outer Primer F: 1 µL
- 20 µM Outer Primer R: 1 µL
- Template DNA: Variable (e.g., 1-1000 ng)
- Hot-start DNA Polymerase: 0.5-1.0 µL (per mfr. recommendation)
- For a 50 µL reaction, combine:
- Mix Thoroughly: Gently mix the reaction by pipetting up and down. Briefly centrifuge to collect contents at the bottom of the tube.
- Include Controls: Always include a negative control (no template DNA) for each primer set and optimization condition to monitor for contamination [54].
Mg2+ and Primer Titration Protocol
- Mg2+ Titration: Prepare a master mix as above, but omit MgCl2. Aliquot the master mix into multiple tubes and supplement with MgCl2 to create a final concentration series (e.g., 1.0, 1.5, 2.0, 2.5, 3.0, 4.0, 5.0 mM).
- Thermal Cycling (First Round):
- Initial Denaturation: 95°C for 5 min
- 30-35 Cycles of:
- Denaturation: 95°C for 30 s
- Annealing: Temperature based on Tm of outer primers for 30 s
- Extension: 72°C for 1 min/kb
- Final Extension: 72°C for 10 min
- Hold: 4°C
- Product Transfer: After the first round, carefully open tubes in the separate "post-amplification" area. Dilute the first-round product 1:10 to 1:1000 in sterile water [12].
- Second Round PCR: Prepare a second master mix identical in composition to the first, but containing the nested primers. Use 1-3 µL of the diluted first-round product as the template.
- Thermal Cycling (Second Round): Use the same cycling conditions as the first round, but with an annealing temperature calculated for the nested primers.
- Analysis: Analyze 5-10 µL of the second-round products by agarose gel electrophoresis. Identify the Mg2+ concentration that gives the strongest specific signal with the cleanest background.
Application Examples and Data Analysis
The effectiveness of optimized nested PCR is demonstrated across various fields. In clinical microbiology, a novel single-tube nested PCR for detecting Erwinia amylovora achieved a detection rate of 78% in naturally infected plant material, outperforming standard PCR (55%) and two-tube nested PCR (71%) while reducing contamination risk [34]. In parasitology, a nested PCR for Tritrichomonas muris in laboratory mice demonstrated 100% sensitivity and specificity, detecting at least 100 trophozoites/mL, and achieved an 18.96% detection rate compared to 14.05% for smear microscopy [55]. For the detection of Acanthamoeba in aquatic environments, an "Optimally Modified Genotyping Nested PCR" method was developed to overcome the limitations of existing primers, significantly enhancing detection sensitivity for all known genotypes [56].
Troubleshooting is a critical part of the optimization process. The table below summarizes common issues and their solutions related to reagent concentration and specificity.
Table 3: Troubleshooting Guide for Nested PCR Optimization
| Problem | Potential Causes | Recommended Solutions |
|---|---|---|
| No product in either round | Insufficient Mg2+, low primer concentration, inactive enzyme, incorrect annealing temperature. | Verify enzyme activity; increase Mg2+ and/or primer concentration within optimal ranges; check primer design and Tm calculations. |
| Non-specific bands/smearing | Excessive Mg2+, primer concentration too high, low annealing temperature, genomic DNA contamination. | Titrate down Mg2+ and primer concentrations; increase annealing temperature using a touchdown protocol [3]; ensure use of hot-start polymerase. |
| Bands in negative control | Amplicon contamination from previous reactions or cross-contamination during setup. | Implement strict unidirectional workflow; use UV irradiation and chemical decontamination of workspaces; use dedicated equipment and reagents. |
| Poor yield in second round | Inefficient transfer of first-round product, over-dilution of first-round product, suboptimal nested primer design. | Adjust dilution factor of first-round product; re-check design and concentration of nested primers. |
The successful implementation of nested PCR hinges on the precise optimization of reagent concentrations, particularly primers and Mg2+, to achieve maximum specificity and sensitivity. This document has provided detailed protocols for this optimization process. By integrating these strategies with a rigorous, unidirectional laboratory workflow that physically separates pre- and post-amplification activities, researchers can effectively mitigate the primary risk of amplicon contamination. This holistic approach ensures the generation of reliable, reproducible results, making nested PCR a more robust tool for sensitive detection applications in research and diagnostics.
The high sensitivity of nested PCR, which involves two rounds of amplification, makes it exceptionally vulnerable to contamination, potentially leading to false-positive results and compromising diagnostic or research outcomes [29] [10]. Contamination can originate from multiple sources, including previous amplicons (carry-over contamination), laboratory surfaces, and even reagents themselves [57] [58]. Effective decontamination is therefore not a single action but a strategic combination of methods targeting these different threats. Within a comprehensive laboratory workflow for contamination prevention, ultraviolet (UV) irradiation and chemical cleaners serve as critical, yet distinct, tools for maintaining the integrity of the pre-PCR environment [23] [8]. This application note details their effective use, providing validated protocols and quantitative data to support their implementation in a research setting focused on nested PCR.
Understanding the Contamination Challenge in Nested PCR
Nested PCR significantly increases the risk of amplicon accumulation in the laboratory. These amplicons, present at very high copy numbers (up to 10¹³ molecules per PCR), are identical to target molecules and are efficiently amplified, creating a persistent contamination hazard [57] [8]. A particular challenge is that short DNA fragments (less than 200 bp), which are common in degraded samples and are the primary target in many nested PCR assays, are notoriously difficult to eliminate with many standard decontamination methods [57].
Contamination control requires a multi-pronged approach. While physical separation of laboratory areas is fundamental, it must be reinforced by robust decontamination protocols for both spaces and reagents [23] [8]. It is crucial to understand that no single method is sufficient for all contamination sources; a combination of treatments, adapted to different reagent categories and laboratory zones, is required for complete control [57].
Decontamination Methodologies: Mechanisms and Applications
Ultraviolet (UV) Irradiation
- Mechanism of Action: UV light, particularly in the UV-C spectrum (around 254 nm), induces the formation of pyrimidine dimers in DNA. These covalent bonds between adjacent thymine or cytosine bases cause irreversible damage, preventing the DNA from being copied by polymerase enzymes and thus rendering it non-amplifiable [57] [58].
- Primary Application: UV irradiation is predominantly used for decontaminating immovable equipment and work surfaces within biosafety cabinets, laminar flow hoods, and entire rooms after cleaning and before use [23] [8]. It is highly effective for neutralizing aerosolized amplicons that may have settled on surfaces.
- Critical Limitations:
- Effectiveness is Fragment-Size Dependent: The efficiency of UV irradiation is inversely related to the size of the DNA fragment. Short, low-concentration DNA fragments are more resistant to UV degradation [57].
- Requires Direct Exposure: Shadows, crevices, or any area not in the direct line of sight of the UV lamp will not be decontaminated. The surface must also be non-porous.
- Does Not Remove DNA: UV irradiation damages DNA to prevent amplification but does not physically remove it from surfaces.
Chemical Cleaners
Chemical cleaners work through various mechanisms to destroy or remove contaminating DNA.
Table 1: Key Chemical Decontaminants and Their Properties
| Chemical Agent | Concentration | Mechanism of Action | Primary Application | Contact Time | Key Considerations |
|---|---|---|---|---|---|
| Sodium Hypochlorite | 10% (v/v) | Oxidative degradation of nucleic acids, destroying their structure [58] [23]. | Work surfaces, non-metallic equipment [23]. | ≥10 minutes [23] | Corrosive to metals and some plastics; must be made fresh daily [23]. |
| Ethanol | 70% (v/v) | Precipitates nucleic acids but does not reliably destroy them; used for cleaning and disinfection [58] [23]. | Pipettes, centrifuges, and other metallic equipment [23]. | Wipe and air dry | Used alone, it is insufficient for DNA destruction; must be followed by UV irradiation for complete decontamination [23] [8]. |
| Accelerated Hydrogen Peroxide | 2% (commercial formulations) | Broad-spectrum oxidative agent; damages nucleic acids and proteins [59]. | Surface and equipment disinfection, including endoscopes [59]. | 8-12 minutes [59] | Less corrosive than hypochlorite; validated for use on sensitive equipment [59]. |
| DNase I | Varies by protocol | Enzyme that catalyzes the hydrolytic cleavage of phosphodiester bonds in DNA, breaking it down into oligonucleotides [57]. | Reagent decontamination (when added to PCR mixes) [57]. | Prior to PCR activation | Requires precise thermal control (heat-labile forms are preferred); can interfere with PCR if not thoroughly inactivated [57]. |
Quantitative Efficacy of Decontamination Methods
The choice of decontamination method should be informed by data on its efficacy. The following table summarizes key performance metrics for common strategies as demonstrated in controlled studies.
Table 2: Quantitative Efficacy of Selected Decontamination Methods
| Decontamination Method | Target Contaminant | Reported Efficacy | Key Experimental Findings | Source |
|---|---|---|---|---|
| UV Irradiation | DNA amplicons on surfaces | Variable; highly dependent on fragment size and exposure. | Inefficient for eliminating short DNA fragments (<200 bp) of low concentration. Optimal performance requires narrow, defined experimental conditions. | [57] |
| 10% Sodium Hypochlorite | Surface DNA contamination | Effective elimination of surface DNA contamination when used as part of a protocol. | A 4-step protocol including hypochlorite wiping effectively identified and eliminated surface DNA contamination in a clinical PCR lab. | [58] |
| Accelerated Hydrogen Peroxide | Streptococcus equi DNA on endoscopes | 33% qPCR positive after disinfection (vs. 73% for OPA). | Significantly lower probability of residual DNA detection post-disinfection compared to ortho-phthalaldehyde (OPA). All endoscopes were culture-negative. | [59] |
| Multistrategy Reagent Treatment | DNA in PCR reagents | Efficient decontamination while preserving PCR efficiency. | A combination of γ-irradiation, UV-irradiation, and a double-strand specific DNase achieved complete reagent decontamination. | [57] |
Experimental Protocols for Decontamination
Protocol: UV Irradiation of Biosafety Cabinets and Work Surfaces
This protocol is designed for the routine decontamination of contained work areas like biosafety cabinets used in pre-PCR reagent preparation [23] [8].
- Preparation: Before irradiation, clear the work surface of all reagents, samples, and amplified products. Reagents are sensitive to UV light and should never be exposed [23].
- Initial Cleaning: Wipe down all interior surfaces, including the back wall, side walls, and work surface, with 70% ethanol to remove gross contaminants and dust [8].
- UV Exposure: Close the cabinet sash and activate the UV lamp. Irradiate for a minimum of 30 minutes [23]. For whole-room decontamination, UV lamps may be activated overnight.
- Safety Note: Ensure no personnel are in the room during UV irradiation to prevent exposure to harmful UV-C radiation.
- Post-Irradiation: After UV exposure and before commencing work, wipe surfaces again with 70% ethanol to remove any damaged DNA and other residues. The cabinet is now ready for use.
Protocol: Chemical Decontamination of Work Surfaces and Equipment
This protocol outlines the use of sodium hypochlorite for high-level decontamination of laboratory benches and non-metallic equipment [58] [23].
- Solution Preparation: Freshly prepare a 10% (v/v) solution of sodium hypochlorite in deionized water on the day of use [23].
- Application: Liberally apply or spray the hypochlorite solution onto the surface to be decontaminated, ensuring complete coverage.
- Contact Time: Allow the solution to remain on the surface for at least 10 minutes. This contact time is critical for effective DNA destruction [23].
- Rinsing: After the contact time, thoroughly wipe the surface with sterile water or deionized water to remove any residual bleach, which can corrode equipment and interfere with PCR [23].
- Drying: Allow the surface to air dry completely before use.
Note: For metallic equipment like pipettes or centrifuges, where hypochlorite is corrosive, use 70% ethanol or a commercial DNA-destroying decontaminant, followed by UV irradiation for complete decontamination [23].
Workflow Integration: A Unidirectional PCR Laboratory Design
The following diagram illustrates how decontamination practices are integrated into the physical workflow of a nested PCR laboratory to enforce unidirectional movement and prevent carry-over contamination.
The Scientist's Toolkit: Research Reagent Solutions
The following table details essential materials and reagents used in the featured decontamination protocols.
Table 3: Essential Reagents for PCR Laboratory Decontamination
| Item | Function/Application | Brief Explanation |
|---|---|---|
| UV-C Lamp | Surface and air decontamination. | Generates short-wavelength UV light to damage DNA on exposed surfaces and in aerosolized droplets within contained spaces [23] [8]. |
| Sodium Hypochlorite | High-level surface decontamination. | An oxidizing agent that chemically destroys contaminating DNA on non-metallic surfaces and equipment [58] [23]. |
| 70% Ethanol | Medium-level disinfection and cleaning. | Used for routine wiping of surfaces and metallic equipment; precipitates nucleic acids but should be combined with UV for full decontamination [23] [8]. |
| Aerosol Barrier Pipette Tips | Prevention of cross-contamination during pipetting. | Contain a filter that prevents aerosols from contaminating the pipette shaft, thereby protecting reagents and samples [23] [8]. |
| Uracil-N-Glycosylase & dUTP | Prevention of carry-over contamination in qPCR. | A enzymatic system where dTTP is replaced by dUTP in PCR mixes. UNG enzymatically degrades any contaminating dUTP-containing amplicons from previous reactions before amplification begins [57] [8]. |
| Heat-Labile Double-Strand Specific DNase | Reagent decontamination. | An enzyme that degrades double-stranded DNA contaminants in PCR reagents before amplification. Its heat-lability allows for easy inactivation prior to the PCR step [57]. |
| Accelerated Hydrogen Peroxide | Equipment and surface disinfection. | A stabilized formulation effective against microbial cells and nucleic acids, with low corrosivity, suitable for sensitive instrumentation [59]. |
In molecular biology, particularly in highly sensitive techniques like nested polymerase chain reaction (PCR), the use of negative controls is a critical component of robust experimental design and contamination prevention. Nested PCR, which involves two consecutive rounds of amplification with two sets of primers, significantly increases sensitivity but also dramatically elevates the risk of false-positive results due to contamination from amplicon carryover, cross-sample contamination, or reagent contamination [60] [61]. Within the context of a comprehensive laboratory workflow for contamination prevention, negative controls serve as essential sentinels that monitor for the presence of contamination throughout the experimental process, thereby safeguarding the integrity of results and ensuring data reliability [62].
The fundamental principle underlying negative controls is their ability to detect unintended amplification events that could compromise experimental validity. When properly implemented and interpreted, these controls provide laboratory scientists with the confidence to distinguish true positive results from false positives, which is especially crucial in diagnostic settings, drug development research, and clinical trial support where decisions with significant consequences depend on accurate molecular data [63] [64]. This application note provides detailed protocols and frameworks for the strategic implementation of negative controls specifically within multi-step nested PCR assays, with a focus on integrating these controls into a contamination-prevention workflow.
Types of Negative Controls in Nested PCR
A comprehensive negative control strategy for nested PCR assays requires multiple control types positioned throughout the experimental workflow. Each control type serves a distinct monitoring function and must be interpreted collectively to provide a complete contamination assessment.
Table 1: Types of Negative Controls for Nested PCR Assays
| Control Type | Placement in Workflow | Monitors For | Expected Result | Interpretation of Contamination |
|---|---|---|---|---|
| Reagent Control | First-round PCR mix preparation | Contaminated reagents, master mix | No amplification | Amplification in first round indicates contaminated reagents |
| Template Control | Template addition step | Cross-contamination during pipetting | No amplification | Amplification in first round suggests cross-contamination during setup |
| First-Round Amplicon Control | Second-round PCR setup | Carryover contamination from first-round products | No amplification | Amplification in second round indicates amplicon carryover |
| Complete Process Control | Sample processing start | Environmental contamination during nucleic acid extraction | No amplification | Amplification suggests contamination during sample preparation |
The Reagent Control contains all PCR components except the template nucleic acid, which is replaced with nuclease-free water. This control specifically detects contamination originating from the laboratory reagents, enzymes, primers, or water used in reaction assembly [62]. The Template Control (also called "No-Template Control" or NTC) is crucial for identifying contamination introduced during the pipetting process when templates are added to reaction mixtures. In the context of nested PCR, a critical additional control is the First-Round Amplicon Control, where water is substituted for the first-round PCR product during the second round of amplification. This control specifically detects carryover contamination of amplicons from the first amplification round, which represents a significant risk factor in nested PCR due to the high concentration of amplification products present in the laboratory environment after the first round [60] [61].
Strategic Placement of Negative Controls
The placement of negative controls within the nested PCR workflow must strategically monitor each potential contamination point. Proper placement enables researchers to pinpoint the exact stage where contamination occurs, facilitating effective troubleshooting and corrective actions.
Workflow Integration
The following diagram illustrates a nested PCR workflow with integrated negative controls at critical points:
Control Placement Protocol
Pre-Amplification Controls:
- Position reagent controls and template controls during the first-round PCR setup
- Include these controls in the same PCR run as test samples
- Process controls through the entire thermal cycling protocol
Post-Amplification Controls:
- Include first-round amplicon controls during transfer of first-round products to second-round reactions
- Maintain physical separation between first-round and second-round setup areas
- Use dedicated pipettes and tips for handling first-round amplification products
Spatial Considerations:
- Perform reagent preparation in a dedicated "clean" area
- Conduct sample processing and nucleic acid extraction in a separate zone
- Perform first-round and second-round PCR setup in different physical spaces
- Implement unidirectional workflow to prevent amplicon back-migration [62]
Interpretation of Negative Control Results
Proper interpretation of negative controls is essential for validating experimental results. The interpretation process must consider both the presence and pattern of amplification in control reactions to determine the source and significance of contamination.
Interpretation Framework
Table 2: Interpretation of Negative Control Results in Nested PCR
| Control Showing Amplification | Pattern Observed | Likely Contamination Source | Recommended Action |
|---|---|---|---|
| Reagent Control Only | Amplification in first round | Contaminated reagents (primers, polymerase, water) | Discard suspect reagents; prepare fresh master mix |
| Template Control Only | Amplification in first round | Cross-contamination during sample addition | Review pipetting technique; use filter tips; implement physical barriers |
| First-Round Amplicon Control | Amplification in second round | Amplicon carryover from first-round products | Improve physical separation; implement UV decontamination; use uracil-DNA-glycosylase |
| Multiple Control Types | Amplification in multiple controls | Widespread contamination or technique issues | Halt testing; decontaminate workspaces and equipment; retrain staff |
Quantitative Interpretation
For quantitative nested PCR methods (e.g., qPCR following nested amplification), the cycle threshold (Ct) values of negative controls provide additional information about contamination magnitude:
- Low-level contamination: Ct values in negative controls >5 cycles higher than the lowest positive sample Ct may represent minimal contamination that doesn't compromise all results [63]
- High-level contamination: Ct values in negative controls within 3 cycles of positive samples indicate significant contamination that invalidates the entire run
- Trend analysis: Gradually decreasing Ct values in negative controls over multiple runs indicates accumulating laboratory contamination requiring systematic decontamination
In clinical validation studies, proper implementation of negative controls has demonstrated high agreement (98.81%) with reference methods when contamination is effectively managed [63]. The consistent absence of amplification in all negative control types provides confidence in true positive results, while any amplification in controls necessitates investigation and potential run rejection.
Research Reagent Solutions for Contamination Control
Implementing an effective negative control strategy requires specific reagents and laboratory materials designed to prevent and detect contamination. The following table outlines essential solutions for contamination management in nested PCR workflows.
Table 3: Research Reagent Solutions for Nested PCR Contamination Control
| Reagent/Material | Function in Contamination Control | Application Notes |
|---|---|---|
| Nuclease-Free Water | Template substitute in negative controls; reagent preparation | Confirms water is not contamination source; use for all dilutions and negative controls |
| dUTP and UNG Enzyme System | Prevents amplicon carryover | Incorporates dUTP in PCR products; UNG degrades contaminating amplicons before amplification |
| Aerosol-Resistant Pipette Tips | Prevents cross-contamination during liquid handling | Essential for all nested PCR setup, especially when handling first-round products |
| Digital Droplet PCR (ddPCR) | Absolute quantification without standard curves | Reduces false positives in low-template samples; validated for nested PCR detection [60] |
| Pre-sterilized Plastics and Tubes | Eliminates contaminating nucleic acids from consumables | Use for all reaction setup; avoids in-lab sterilization variability |
| DNA Decontamination Solutions | Destroys contaminating DNA on surfaces | Regular decontamination of workspaces, equipment, and instruments |
Detailed Experimental Protocol for Nested PCR with Integrated Negative Controls
The following protocol provides a step-by-step methodology for implementing nested PCR with comprehensive negative controls, based on established procedures with demonstrated high sensitivity (LOD: 4.94-14.03 copies/μL) and minimal cross-reactivity [63] [61].
Pre-Assay Preparation
Workspace Organization:
- Designate separate physical areas for reagent preparation, sample processing, first-round PCR setup, first-round product handling, and second-round PCR setup
- Implement unidirectional workflow moving from "clean" to "dirty" areas without backtracking
- Decontaminate all surfaces and equipment with DNA decontamination solution before use
Reagent Preparation:
- Prepare master mix in the dedicated clean area using aerosol-resistant tips
- Aliquot reagents into single-use portions to minimize freeze-thaw cycles and cross-contamination risk
- Include all negative control reactions in experimental planning and reagent calculations
First-Round PCR Setup
Master Mix Formulation (per reaction):
- 12.5 μL 2× PCR buffer
- 0.4 μL each forward and reverse outer primer (10 μM)
- 0.4 μL dNTP mix (10 mM each)
- 0.25 μL DNA polymerase (5 U/μL)
- 8.05 μL nuclease-free water
- 0.1 μL UNG enzyme (if using dUTP/UNG system)
Reaction Assembly:
- Dispense 21.6 μL master mix into appropriately labeled reaction tubes
- Add 3.4 μL template DNA to test samples
- For reagent control: add 3.4 μL nuclease-free water instead of template
- For template control: prepare separate tube with 3.4 μL nuclease-free water added after all samples
- Cap tubes securely before moving to amplification area
Thermal Cycling Conditions:
- UNG incubation (if used): 50°C for 2 minutes
- Initial denaturation: 95°C for 5 minutes
- Amplification (35 cycles): 95°C for 30 seconds, 55-60°C for 30 seconds, 72°C for 1 minute
- Final extension: 72°C for 7 minutes
- Hold at 4°C
Second-Round PCR Setup
Product Transfer:
- Work in the designated "post-amplification" area with dedicated equipment
- Dilute first-round products 1:100 in nuclease-free water
- Use aerosol-resistant filter tips for all product handling
Second-Round Master Mix (per reaction):
- 12.5 μL 2× PCR buffer
- 0.4 μL each forward and reverse inner primer (10 μM)
- 0.4 μL dNTP mix (10 mM each)
- 0.25 μL DNA polymerase (5 U/μL)
- 8.05 μL nuclease-free water
Reaction Assembly:
- Dispense 21.6 μL second-round master mix into clean reaction tubes
- Add 3.4 μL diluted first-round product to test samples
- For first-round amplicon control: add 3.4 μL nuclease-free water instead of diluted product
- Include a complete process control with nuclease-free water only
- Cap tubes securely before thermal cycling
Thermal Cycling Conditions:
- Initial denaturation: 95°C for 5 minutes
- Amplification (35 cycles): 95°C for 30 seconds, 55-60°C for 30 seconds, 72°C for 1 minute
- Final extension: 72°C for 7 minutes
- Hold at 4°C
Post-Amplification Analysis
Control Assessment:
- Analyze negative controls first, before sample results
- Reject entire run if any negative control shows amplification of the expected product
- If contamination is detected, document the pattern and implement appropriate corrective actions
Data Interpretation:
- Only interpret sample results as valid when all negative controls show no amplification
- For quantitative applications, ensure negative control Ct values are at least 5 cycles higher than the lowest positive sample
- Document all control results for quality assurance and troubleshooting
The strategic implementation of multiple negative control types throughout the nested PCR workflow provides an essential monitoring system for detecting contamination at its source. When properly positioned and interpreted, these controls enable researchers to distinguish true positive results from false positives caused by contamination events. The protocols and frameworks presented in this application note provide laboratory scientists with a comprehensive approach to negative control utilization that aligns with rigorous quality assurance standards in research and diagnostic settings. By integrating these practices into routine laboratory workflows, researchers can significantly enhance the reliability of nested PCR results while maintaining the exquisite sensitivity that makes this technique valuable for low-template applications.
Validating Your Assay and Comparing Nested PCR with Other Molecular Methods
Molecular diagnostics play a pivotal role in disease management across human health, veterinary medicine, and agriculture. The analytical validation of these diagnostic assays is a critical prerequisite for generating reliable, reproducible, and clinically meaningful data. This document outlines the core principles and practical methodologies for establishing three fundamental validation parameters—Sensitivity, Specificity, and Limit of Detection (LOD)—within the context of a research thesis focused on optimizing laboratory workflows for nested PCR contamination prevention. Robust validation is especially crucial for nested PCR due to its enhanced sensitivity and consequent vulnerability to amplicon contamination, which can severely compromise assay specificity.
Core Validation Parameters: Definitions and Quantitative Benchmarks
The following parameters form the foundation of any robust assay validation protocol. The table below summarizes their definitions, key evaluation metrics, and representative benchmark values from recent molecular assay development studies.
Table 1: Core Assay Validation Parameters and Representative Benchmarks from Recent Literature
| Parameter | Definition | Evaluation Method | Representative Benchmark (Source) |
|---|---|---|---|
| Sensitivity | The probability that an assay correctly identifies positive samples. | Testing against a panel of confirmed positive target pathogens. | 98.81% agreement with RT-qPCR for a respiratory pathogen multiplex PCR [63]. |
| Specificity | The probability that an assay correctly identifies negative samples and does not react with non-targets. | Testing against a panel of non-target organisms and negative controls. | No cross-reactivity with a panel of 10 respiratory viruses and 4 bacteria [63]; Specific amplification with no cross-reactivity in a simian malaria PCR [65]. |
| Limit of Detection (LOD) | The lowest concentration of an analyte that can be reliably detected by the assay. | Probit analysis of serial dilutions, defined as the concentration detectable with ≥95% probability [63]. | 4.94–14.03 copies/µL for a multiplex respiratory assay [63]; 10 copies/µL for a simian malaria melt curve assay [65]; 3.1 fg/µL for a Fusarium qPCR assay [29]. |
Experimental Protocols for Parameter Establishment
Protocol for Determining Limit of Detection (LOD)
The LOD is established through a rigorous statistical approach to define the lowest analyte level detectable with high confidence.
- Step 1: Material Preparation: Create a standardized stock solution of the target nucleic acid (e.g., from a reference strain or synthetic plasmid). Precisely quantify the stock using a spectrophotometer [29].
- Step 2: Serial Dilution: Perform a log-scale serial dilution (e.g., 10-fold or 2-fold) in a background of negative matrix, such as nuclease-free water or pathogen-free host DNA, to mimic the clinical or environmental sample context [65] [29].
- Step 3: Replicate Testing: Test each dilution level in a minimum of 20 replicate reactions to obtain a statistically robust dataset [63] [65].
- Step 4: Data Analysis and LOD Calculation: Plot the detection rate (%) against the analyte concentration. The LOD is formally defined as the concentration at which ≥95% of the replicates test positive. This is typically determined using probit regression analysis [63] [66].
Protocol for Establishing Sensitivity and Specificity
These parameters are evaluated by challenging the assay with well-characterized panels of samples.
- Sensitivity Panel: Assemble a panel of samples confirmed to be positive for the target pathogen. Confirmation should be via a gold-standard method (e.g., culture, sequencing, or an established reference PCR). The number of positive samples should be sufficient for a meaningful statistical estimate [63] [65].
- Specificity Panel: This is a two-part evaluation:
- Cross-Reactivity Panel: Test against a range of genetically similar and/or clinically related non-target organisms that could potentially be present in the sample type. For a respiratory panel, this included 10 non-target viruses and 4 bacteria [63].
- Negative Controls: Include samples confirmed to be free of the target pathogen (e.g., healthy host tissue or sterile buffer) to rule out non-specific amplification or background signal [65] [11].
- Calculation:
- Sensitivity = [True Positives / (True Positives + False Negatives)] × 100
- Specificity = [True Negatives / (True Negatives + False Positives)] × 100
The Nested PCR Workflow and Contamination Risks
Nested PCR is a powerful technique used to amplify targets present in very low quantities. It involves two consecutive amplification rounds with two sets of primers, the second set (nested primers) binding within the product of the first reaction. This process significantly increases sensitivity but also amplifies the risk of carryover contamination from first-round amplicons into subsequent reactions, leading to false positives [67] [29].
The following diagram illustrates the key stages of the nested PCR workflow and identifies critical control points for preventing contamination.
Contamination Prevention Strategy for Robust Validation
Implementing a stringent contamination control strategy is non-negotiable for validating and performing nested PCR. The following diagram outlines a segregated workflow that is critical for maintaining assay specificity.
Key practices include:
- Physical Separation: Performing pre-PCR activities (reaction mix preparation, template addition) in a dedicated, clean room or hood, physically separated from post-PCR areas where amplified products are handled [11] [29].
- Unidirectional Workflow: Ensuring personnel and materials move from clean pre-PCR areas to post-PCR areas, never in reverse.
- Dedicated Equipment and Consumables: Using separate pipettes, tips, and lab coats for pre- and post-PCR work. A study on phytoplasma detection highlighted the risk of false positives from non-specific amplification, a risk exacerbated by contamination [11].
- Rigorous Use of Controls: Including no-template controls (NTCs) in both the first and second PCR rounds to monitor for contamination at every stage [65].
The Scientist's Toolkit: Research Reagent Solutions
The following table lists essential reagents and their critical functions in developing and validating molecular assays, particularly nested PCR.
Table 2: Essential Research Reagents for Assay Development and Validation
| Reagent / Material | Function and Importance in Validation |
|---|---|
| Reference Strain Nucleic Acids | Serve as positive controls for determining sensitivity, specificity, and LOD. Confirmed identity is crucial for a reliable baseline [63] [65]. |
| Synthetic Plasmid Controls | Provide a quantifiable and consistent standard for generating standard curves and precisely determining the LOD in copy number units [63] [65]. |
| Cross-Reactivity Panel | A curated collection of non-target genomic acids to empirically verify assay specificity and rule out false positives [63] [68]. |
| Nested PCR Primers (Outer & Inner) | Specifically designed primers for two rounds of amplification. Meticulous in silico specificity checks (e.g., via BLAST) are mandatory to ensure target-specific binding [65] [29]. |
| Bst DNA Polymerase (for LAMP) | An isothermal polymerase used in Loop-Mediated Isothermal Amplification (LAMP), an alternative to nested PCR that is less prone to contamination as it occurs in a single tube [29]. |
| dNTPs | The building blocks for DNA synthesis. Consistent quality and concentration are vital for robust amplification efficiency across all validation tests [13]. |
| Hydroxy Naphthol Blue (HNB) | A colorimetric dye used to visualize LAMP reaction results, enabling rapid, instrument-free detection ideal for field applications [29]. |
In molecular biology, the polymerase chain reaction (PCR) serves as a fundamental technique for amplifying specific DNA sequences, but its results require rigorous confirmation to ensure accuracy, especially in sensitive applications like diagnostics and drug development. The extremely high sensitivity of nested PCR, which uses two sets of primers for increased specificity and sensitivity, makes it particularly vulnerable to contamination and false positives [6] [69]. While agarose gel electrophoresis can verify the presence and size of an amplified product, it cannot confirm the exact nucleotide sequence, leaving room for misinterpretation of non-specific amplification or contaminant DNA [49]. Direct DNA sequencing of PCR products provides the definitive confirmation needed to validate experimental results, serving as a critical checkpoint in laboratory workflows focused on contamination prevention [70].
The integration of DNA sequencing into PCR verification protocols is particularly crucial in diagnostic applications, pathogen detection, and authenticity testing where results directly impact clinical outcomes or regulatory decisions. For instance, in microbiological diagnostics, sequencing confirmed nested PCR results for Helicobacter pylori detection in stool samples, eliminating doubts about primer specificity and providing unambiguous identification of the pathogen [10]. Similarly, in food authentication studies, DNA sequencing validated species-specific PCR results, ensuring accurate identification of commercial shrimp products and preventing economic fraud [71]. These applications demonstrate how sequencing transforms presumptive PCR results into confirmed findings, particularly when establishing reliable laboratory protocols for contamination-prone techniques like nested PCR.
Applications and Case Studies
Table: Comparative Analysis of Sequencing-Verified PCR Applications
Table 1: This table summarizes key studies where DNA sequencing provided essential verification of PCR results across different fields.
| Field/Application | PCR Target | Sequencing Role | Key Finding | Reference |
|---|---|---|---|---|
| Infectious Disease (Viral Oncology) | JC polyomavirus large T-antigen in prostate tissue | Confirmatory sequencing of nested PCR products | Verified 58% (29/50) of prostate cancer cases contained viral DNA versus 38% in controls | [6] |
| Plant Pathology | Areca palm yellow leaf phytoplasma (APYL) 16S rDNA | Identified false positives from universal nested PCR primers | Sequencing revealed only 10 of 50 PCR-positive samples were true phytoplasma positives; others were chloroplast or bacterial DNA | [49] |
| Food Authentication | Shrimp species mitochondrial genes (CoI, 16S rRNA) | Validated species-specific PCR results for commercial products | Confirmed accurate species identification in 40 commercial shrimp products, detecting mislabeling | [71] |
| Bacterial Diagnostics | Helicobacter pylori 16S rRNA gene | Verified specificity of nested PCR results from complex samples (stool) | Confirmed H. pylori origin in all NPCR-positive samples, validating assay specificity | [10] |
| Parasitology | Plasmodium species 18S SSU rRNA | Corroborated results from nested PCR and HRM analysis | Provided definitive species identification for malaria parasites, serving as reference method | [12] |
Detailed Case Analyses
Microbiological Diagnostics: A comprehensive study on Helicobacter pylori detection highlights the critical importance of sequencing verification. Researchers developed a nested PCR assay targeting a 148 bp segment of the 16S rRNA gene to identify H. pylori in stool samples. Despite the assay's high sensitivity, the researchers performed DNA sequencing on all NPCR-positive samples to confirm the specificity of their results. This sequencing step definitively confirmed the H. pylori origin in all positive samples, eliminating any doubt about potential false positives from non-specific amplification [10]. This verification was particularly crucial because the study reported higher detection rates via their short amplicon NPCR compared to commercial stool antigen tests, and sequencing provided the necessary validation to support this finding.
Plant Pathology and Phytoplasma Detection: Research on areca palm yellow leaf disease demonstrates how sequencing can reveal significant limitations in standard PCR approaches. When researchers used universal nested PCR primers (P1/P7 followed by R16mF2/R16mR1) to screen 335 areca palm DNA samples, they initially obtained 50 positive results based on amplicon size on agarose gels. However, subsequent sequencing of these products revealed that only 10 of the 50 amplicons were actually derived from phytoplasma DNA. The remaining amplicons originated from areca palm chloroplast DNA (16 samples), other bacterial sequences (20 samples), or yielded unreadable sequences (4 samples) [49]. This case study underscores that relying solely on amplicon size for interpretation can lead to a 80% false positive rate in this context, highlighting the indispensable role of sequencing in validating PCR specificity.
Experimental Protocols
Standard Workflow for Sequencing Verification of PCR Products
The following protocol outlines the complete workflow from PCR amplification to sequence verification, with particular emphasis on contamination control measures essential for nested PCR procedures.
Critical Protocol Steps
Post-Amplification Processing: Following PCR amplification, analyze the reaction products using agarose gel electrophoresis to confirm the presence of a single, sharp band of the expected size [70]. Excise the band under UV light with a clean scalpel, and extract DNA using a gel extraction kit. If the PCR product appears as a smear or has multiple bands, the likelihood of obtaining high-quality sequence data is significantly reduced [70]. This purification step is crucial for removing primers, enzymes, and non-incorporated nucleotides that could interfere with subsequent sequencing reactions.
PCR Product Purification: Completely remove all PCR primers and unincorporated nucleotides before sequencing [70]. This can be accomplished using commercial spin column kits, magnetic bead-based cleanups (such as AMPure XP), or enzymatic treatment with exonuclease I and shrimp alkaline phosphatase. Inadequate purification represents one of the most common causes of sequencing failure, as residual primers can compete with the sequencing primers in the reaction, potentially resulting in mixed reads or premature termination.
Sequencing Reaction and Analysis: For Sanger sequencing, prepare the reaction using 5-10 ng of purified DNA per 100 base pairs of insert size. Utilize the same primer as in the original PCR reaction or an internal primer for larger amplicons. After cycle sequencing, purify the products to remove unincorporated dye terminators. Following capillary electrophoresis, analyze the chromatograms for quality and use Basic Local Alignment Search Tool (BLAST) analysis against genomic databases to verify the identity of the amplified sequence.
Table: Essential Research Reagent Solutions
Table 2: Key reagents and their functions in the PCR verification workflow.
| Reagent/Kit | Function | Application Notes |
|---|---|---|
| DNA Extraction Kits (e.g., DNeasy Tissue Kit) | Isolation of high-quality genomic DNA from various sample types | Critical for removing inhibitors; validated for formalin-fixed paraffin-embedded (FFPE) tissues [6] |
| Gel Extraction Kits | Purification of specific DNA fragments from agarose gels | Essential for isolating target bands from non-specific amplification before sequencing |
| PCR Purification Kits | Removal of primers, enzymes, and dNTPs from amplification reactions | Required for cleaning PCR products before sequencing reactions [70] |
| AMPure XP Beads | Magnetic bead-based purification and size selection | Used in nanopore sequencing libraries for fragment cleanup and selection [72] |
| BigDye Terminator Kit | Fluorescent dye-terminator cycle sequencing | Standard for Sanger sequencing reactions |
| Rapid Barcoding Kit (Oxford Nanopore) | Library preparation for multiplexed sequencing | Enables direct PCR barcoding and sequencing without fragmentation [72] |
| Qubit dsDNA HS Assay | Accurate quantification of double-stranded DNA | Essential for normalizing DNA input for sequencing reactions [72] |
Integration with Contamination Prevention Workflows
Comprehensive Laboratory Workflow for Contamination Prevention
Implementing a rigorous sequencing verification protocol necessitates parallel contamination prevention measures, particularly when working with nested PCR. The following workflow integrates verification with contamination control throughout the experimental process.
Key Contamination Prevention Strategies
Physical Laboratory Design: Maintain separate dedicated areas for pre-PCR (reagent preparation), PCR amplification, and post-PCR (product analysis) activities [18]. This physical separation is crucial for preventing amplicon carryover contamination, which represents the most significant contamination risk in nested PCR workflows. When possible, implement unidirectional workflow practices where personnel and materials move only from "clean" pre-PCR areas to "dirty" post-PCR areas, never in reverse [18].
Procedural Controls: Utilize laminar flow hoods or PCR workstations equipped with HEPA filtration for all pre-PCR setup activities, including reagent preparation, DNA template addition, and especially during nested PCR procedures when adding the first-round product to the second-round reaction mixture [18]. Employ dedicated equipment and supplies for each area, including separate pipettes, tip boxes, tube racks, lab coats, and gloves [18]. Implement rigorous cleaning protocols using DNA-decontaminating solutions such as 10% bleach, DNA-Zap, or UV irradiation to destroy contaminating DNA on surfaces and equipment.
Technical Verification Measures: In addition to sequencing verification, incorporate multiple negative controls throughout the PCR process, including extraction controls (no template) and amplification controls. When designing nested PCR assays, consider shorter amplicon sizes (100-150 bp) for improved detection in samples where DNA may be degraded, as demonstrated in H. pylori detection from stool samples [10]. Always include positive controls with known sequences to verify assay performance and enable comparison with experimental results.
DNA sequencing represents an indispensable confirmatory technique for verifying PCR products, transforming presumptive amplification results into definitively identified nucleic acid sequences. This verification is particularly crucial in nested PCR applications where increased sensitivity comes with heightened vulnerability to contamination and false positives. The integration of sequencing into PCR workflows provides researchers with unambiguous product identification, validates assay specificity, reveals non-specific amplification, and ultimately ensures the reliability of molecular data. When combined with robust contamination prevention protocols—including physical separation of laboratory areas, unidirectional workflows, and rigorous decontamination procedures—sequencing verification creates a comprehensive quality assurance framework essential for diagnostic applications, pharmaceutical development, and rigorous scientific research.
Within molecular diagnostics and research, Polymerase Chain Reaction (PCR) is a foundational technique. Among its variations, Nested PCR and Real-Time PCR (also known as quantitative PCR or qPCR) represent two powerful but distinct approaches. Nested PCR, a two-stage process using two sets of primers, is renowned for its high sensitivity and specificity, particularly when amplifying low-copy-number targets or from suboptimal samples [30]. In contrast, Real-Time PCR allows for the simultaneous amplification and quantification of nucleic acids in a closed-tube system, offering speed and reduced contamination risk [52]. The choice between these methods often hinges on a trade-off between ultimate sensitivity and practical workflow efficiency. This application note provides a direct comparison of these two techniques, with a specific focus on their inherent contamination risks and workflow characteristics, framed within the essential context of laboratory contamination prevention.
Quantitative Comparison at a Glance
The table below summarizes the core characteristics of Nested PCR and Real-Time PCR based on empirical data from recent studies.
Table 1: Direct comparison of Nested PCR and Real-Time PCR performance and workflow
| Parameter | Nested PCR | Real-Time PCR |
|---|---|---|
| Overall Sensitivity | Higher sensitivity in some direct comparisons [73]. | High sensitivity, but may be lower than Nested PCR in some applications [73]. |
| Specificity | High, due to two rounds of primer binding [74]. | High, enhanced by target-specific probes [75]. |
| Detection Limit | Capable of detecting very low parasitemia (e.g., in malaria) [76]. | Consistently detects low inoculum levels (e.g., 3-5 CFU in cosmetics) [75]. |
| Quantification Capability | No | Yes, direct quantification of initial template concentration. |
| Assay Time | Longer (4-6 hours due to two rounds and gel electrophoresis) [73]. | Faster (1-2 hours with no post-processing) [52]. |
| Throughput | Lower, more manual steps [52]. | Higher, amenable to automation and 96/384-well formats. |
| Contamination Risk | High (requires opening tubes for second round) [74] [30]. | Low (closed-tube system) [24]. |
| Result Analysis | End-point (agarose gel electrophoresis) [74]. | Real-time (kinetic). |
| Cost per Reaction | Lower reagent cost. | Higher reagent cost due to specialized enzymes and probes. |
Experimental Protocols for Comparison
To objectively assess the performance and contamination risks of both techniques, the following protocols can be implemented in a controlled study.
Protocol for Nested PCR
This protocol is adapted from studies detecting Plasmodium species and Strongyloides stercoralis [76] [73].
1. First Round PCR Amplification
- Reaction Mix (25 μL Volume):
- Template DNA: 1-2 μL (or 4 μL of pooled gDNA for surveillance) [76]
- External Primers (each): 0.5 μL (final concentration 0.2 μM) [74]
- dNTP Mixture: 0.5 μL (200 μM of each dNTP) [74]
- 10x PCR Buffer: 2.5 μL
- MgCl₂ Solution: 1.5 μL (final concentration 1.5-2.0 mM) [74]
- Taq DNA Polymerase: 0.25 μL (1.25 U) [74]
- Sterile Ultrapure Water: to 25 μL
- Thermal Cycling Conditions:
2. Second Round PCR Amplification
- Reaction Mix (25 μL Volume):
- Thermal Cycling Conditions: Identical to the first round, though cycle number may be reduced to 25-30 cycles [73].
3. Analysis of Products
- Analyze the second-round PCR product using agarose gel electrophoresis (e.g., 1.5-2% gel) alongside a DNA ladder to confirm the expected amplicon size [73].
Protocol for Real-Time PCR
This protocol is modeled on pathogen detection methods in cosmetics and acute leukemias [52] [75].
1. Reaction Setup
- Reaction Mix (Volume as per kit recommendation, e.g., 20-25 μL):
- Template DNA/cDNA: 1-2 μL
- Forward and Reverse Primers (each): Variable concentration (e.g., 200-500 nM)
- Probe (e.g., TaqMan): 100-250 nM OR DNA-Binding Dye (e.g., SYBR Green): 0.5-1X final concentration
- Commercial Real-Time PCR Master Mix (contains buffer, dNTPs, Mg²⁺, hot-start Taq polymerase): 1X
- Passive Reference Dye (if required by instrument): 1X
- Sterile Ultrapure Water: to final volume
- Note: The use of a master mix containing uracil-N-glycosylase (UNG) is highly recommended for contamination control [24] [77]. In this case, dTTP is replaced with dUTP in the nucleotide mix.
2. Thermal Cycling Conditions
- UNG Incubation (if using): 25-50°C for 2-10 minutes [77]
- Initial Denaturation/Enzyme Activation: 95°C for 2-5 minutes
- 40-50 Cycles of:
- Denaturation: 95°C for 10-15 seconds
- Annealing/Extension: 60°C for 30-60 seconds (acquire fluorescence at this step)
- Melt Curve Analysis (for SYBR Green assays only):
- 95°C for 15 seconds
- 60°C for 1 minute
- Ramp to 95°C continuously, acquiring fluorescence throughout.
Contamination Risks and Prevention Strategies
The fundamental difference in workflow between the two techniques is the primary determinant of their contamination risk.
Diagram: Contamination risk comparison and mitigation. Nested PCR's open-tube steps create high risk, while real-time PCR's closed-tube system is inherently lower risk.
Nested PCR: A High-Risk Workflow
The requirement to physically transfer the amplified product from the first PCR reaction to a new tube for the second round of amplification is the most significant contamination hazard in Nested PCR [74] [30]. This action can easily generate aerosols containing billions of amplicons, which can then contaminate reagents, pipettes, and the laboratory environment, leading to false-positive results in subsequent experiments [77]. The subsequent gel electrophoresis step further increases the risk of amplicon release.
Real-Time PCR: A Lower-Risk Alternative
Real-Time PCR significantly mitigates contamination by performing amplification and detection in a fully closed-tube system [24]. There is no need to open the reaction tube after the PCR is set up until the analysis is complete, dramatically reducing the opportunity for amplicons to escape into the laboratory environment.
Essential Contamination Prevention Strategies
Robust laboratory practices are non-negotiable, especially when performing Nested PCR.
- Physical Separation: The most critical measure is establishing physically separated work areas for pre-amplification (reagent preparation, sample setup) and post-amplification (product analysis) activities [24] [77] [18]. This separation should be strict and unidirectional.
- UNG Enzymatic Sterilization: Incorporating the enzyme uracil-N-glycosylase (UNG) into the Real-Time PCR master mix is a highly effective chemical barrier. UNG selectively degrades any contaminating amplicons from previous reactions (which contain dUTP) before the amplification cycle begins, without harming the native DNA template (which contains dTTP) [24] [77].
- Laminar Flow Hoods: Using HEPA-filtered laminar flow hoods or PCR workstations for reagent preparation, reaction setup, and particularly for the tube-opening steps in Nested PCR, provides a clean, particulate-free workspace [18].
- Rigorous Decontamination: Regular cleaning of surfaces and equipment with a 10% sodium hypochlorite (bleach) solution is recommended, as it causes oxidative damage to nucleic acids [24] [77]. UV irradiation of workstations and reagents can also be used to cross-link any contaminating DNA [77].
The Scientist's Toolkit: Essential Research Reagents
Table 2: Key reagents and their functions in Nested PCR and Real-Time PCR
| Reagent / Equipment | Function | Application Notes |
|---|---|---|
| Two Sets of Primers (External & Internal) | Ensure high specificity through two rounds of selective amplification [74]. | Critical for Nested PCR. Primer design is crucial to avoid primer-dimer formation. |
| Taq DNA Polymerase | Heat-stable enzyme that synthesizes new DNA strands. | Used in both techniques. "Hot-start" variants are preferred to reduce non-specific amplification [30]. |
| dNTP Mix | Building blocks (dATP, dGTP, dCTP, dTTP) for new DNA strands. | For UNG control, dTTP is replaced with dUTP in Real-Time PCR [77]. |
| SYBR Green Dye | Fluorescent dye that intercalates into double-stranded DNA. | For Real-Time PCR. Cost-effective but less specific than probe-based methods. |
| TaqMan Probe | Sequence-specific oligonucleotide with a fluorophore and quencher. | For Real-Time PCR. Provides high specificity through hybridization [52]. |
| Uracil-N-Glycosylase (UNG) | Enzyme that degrades uracil-containing DNA to prevent carryover contamination [24] [77]. | Essential for contamination control in Real-Time PCR. |
| Commercial Master Mix | Optimized pre-mixed solution containing buffer, salts, enzymes, dNTPs. | Simplifies setup and improves reproducibility in both techniques. |
| Laminar Flow Hood | Provides a sterile, HEPA-filtered workspace for reagent setup [18]. | Vital for preventing contamination during sensitive steps like Nested PCR setup. |
Nested PCR and Real-Time PCR are both powerful techniques with clear trade-offs. Nested PCR remains a valuable tool for achieving maximum sensitivity and specificity, particularly when target copy numbers are extremely low or sample quality is poor. However, this comes at the cost of a significantly higher risk of amplicon contamination and a more labor-intensive, time-consuming workflow. Real-Time PCR offers a robust, quantitative, and faster alternative with a vastly superior contamination profile due to its closed-tube nature. For most modern diagnostic and research applications, particularly in clinical settings where throughput and reproducibility are paramount, Real-Time PCR is often the preferred method. The decision between them should be guided by a clear understanding of the application's sensitivity requirements balanced against the available laboratory infrastructure and the stringent contamination control protocols that must be enforced, especially if Nested PCR is employed.
The selection of an appropriate nucleic acid amplification technique is pivotal to the success of molecular diagnostics and research applications. This application note provides a detailed comparative analysis of two prominent methods: Nested Polymerase Chain Reaction (Nested PCR) and Loop-Mediated Isothermal Amplification (LAMP). Framed within the critical context of contamination prevention in laboratory workflows, this document presents structured experimental data, detailed protocols, and practical guidance to assist researchers, scientists, and drug development professionals in selecting the optimal methodology for their specific setting—whether controlled laboratory or resource-limited field environments.
Fundamental Principles
Nested PCR is a refinement of conventional PCR that enhances specificity and sensitivity through two successive amplification rounds using two sets of primers. The first round uses outer primers to amplify a larger target region, followed by a second round where inner primers (nested within the first amplicon) amplify a shorter, specific fragment [78] [19]. This dual amplification approach significantly reduces non-specific amplification but requires precise thermal cycling and poses contamination risks from tube transfer between rounds [19].
LAMP is an isothermal amplification technique that utilizes 4-6 distinct primers recognizing 6-8 regions of the target DNA. Amplification occurs at a constant temperature (60-65°C) through a strand displacement mechanism, generating stem-loop DNA structures for exponential amplification [79] [80]. The reaction is highly specific and efficient, with results often visible within 30-60 minutes without requiring thermal cycling equipment [80] [81].
Performance Comparison and Contamination Risks
The table below summarizes key characteristics and contamination control considerations for both techniques:
Table 1: Comparative Analysis of Nested PCR and LAMP Techniques
| Parameter | Nested PCR | LAMP |
|---|---|---|
| Amplification Principle | Thermal cycling (2 rounds) | Isothermal strand displacement |
| Typical Reaction Time | 2-4 hours (including setup) | 60-90 minutes [80] |
| Operating Temperature | Variable (e.g., 94°C, 50-60°C, 72°C) | Constant (60-65°C) [80] |
| Primer Requirements | Two pairs (outer & inner) [78] | 4-6 primers [80] |
| Specificity | Very High (dual primer verification) [19] | High (multiple primer recognition sites) [81] |
| Sensitivity (Detection Limit) | 3.1 fg/µL (F. tricinctum study) [14] | 31 fg/µL (F. tricinctum study) [14] |
| Equipment Needs | Thermal cycler (high-precision) | Water bath/block heater (low-tech) [82] |
| Result Visualization | Gel electrophoresis (post-amplification) | Visual (colorimetric), turbidity, or fluorescence [80] |
| Major Contamination Risk | High (tube opening between rounds) [19] | Low (single-tube, closed-tube detection) |
| Inhibitor Tolerance | Moderate | High (works with minimally processed samples) [81] |
| Throughput Potential | Moderate | High (adaptable to field deployment) [82] |
| Primary Application Setting | Centralized laboratories | Field-use, point-of-care testing [14] [82] |
Quantitative comparisons from recent studies highlight performance differences. In detecting Fusarium tricinctum, qPCR demonstrated the highest sensitivity at 3.1 fg/µL, which was tenfold more sensitive than both LAMP and nested PCR [14]. For feline calicivirus (FCV) detection, nested PCR and RT-LAMP showed identical positivity rates (31.48%) in clinical samples, significantly outperforming conventional PCR (1.85%) [80].
Workflow and Contamination Risk Analysis
The following diagram illustrates the procedural workflows and highlights critical contamination control points for both techniques:
Detailed Experimental Protocols
Nested PCR Protocol for Laboratory Setting
This protocol for detecting Fusarium tricinctum (targeting CYP51C gene) exemplifies the stringent contamination controls required in nested PCR workflows [14] [78].
First Round Amplification
Reaction Setup (25µL total volume):
- Template DNA: 1-2μL (50ng total)
- Outer Primer F/R (10μM): 0.5μL each (0.2μM final)
- dNTP Mix (10mM): 0.5μL (200μM each dNTP final)
- 10× PCR Buffer: 2.5μL
- MgCl₂ (25mM): 1.5μL (1.5mM final)
- Taq DNA Polymerase: 0.25μL (1.25U)
- Nuclease-free Water: to 25μL
Thermal Cycling Conditions:
- Initial Denaturation: 94°C for 2 minutes
- 30-35 Cycles of:
- Denaturation: 94°C for 30 seconds
- Annealing: 45-60°C (primer-specific) for 30 seconds
- Extension: 72°C for 1 minute per 1kb
- Final Extension: 72°C for 5 minutes
- Hold: 4°C
Second Round Amplification
- Template Preparation: Dilute first-round product 1:10 to 1:100 in nuclease-free water.
- Reaction Setup: Identical to first round but using inner primers and diluted product as template.
- Thermal Cycling: Same conditions as first round.
- Product Analysis: Analyze 5-10μL of second-round product by agarose gel electrophoresis.
Contamination Control Notes:
- Physical Separation: Perform reagent preparation, first-round PCR, second-round setup, and product analysis in separate designated areas.
- Equipment Dedication: Use dedicated pipettes and filtered tips for each workflow stage.
- Aliquot Reagents: Prepare master mixes in a UV-treated laminar flow hood.
LAMP Protocol for Field Application
This colorimetric RT-LAMP protocol for Feline Calicivirus (FCV) detection demonstrates field-adaptable methodology [80].
Reaction Setup
- Reaction Components (25µL total volume):
- Template RNA/DNA: 1-2μL
- FIP/BIP Primers (40μM): 1.0μL each (1.6μM final)
- F3/B3 Primers (10μM): 0.5μL each (0.2μM final)
- LF/LB Primers (20μM): 0.5μL each (0.4μM final) [optional]
- dNTP Mix (10mM): 2.5μL (1.4mM each final)
- 10× Isothermal Amplification Buffer: 2.5μL
- MgSO₄ (100mM): 1.0μL (8mM final)
- Betaine (5M): 4.0μL (0.8M final)
- Bst 2.0/3.0 DNA Polymerase: 1.0μL (8U)
- Neutral Red Indicator (5mM): 0.5μL (0.1mM final)
- Nuclease-free Water: to 25μL
Amplification and Detection
- Incubation: 56.3-65°C for 60-70 minutes (constant temperature)
- Result Interpretation:
- Positive: Original orange color changes to bright pink
- Negative: Color remains orange
- Alternative Detection: Turbidity measurement or fluorescence under UV light
Field Application Notes:
- Minimal Equipment: Requires only a portable heat block or water bath.
- Rapid Results: Visual detection within 70 minutes without electrophoresis [80].
- Sample Flexibility: Tolerates minimally processed samples or crude extracts [81].
Research Reagent Solutions
The following table catalogues essential reagents and their functions for implementing these molecular techniques:
Table 2: Essential Research Reagents for Nested PCR and LAMP
| Reagent Category | Specific Examples | Function in Reaction | Technique |
|---|---|---|---|
| Polymerase Enzymes | Taq DNA Polymerase [78] | Thermostable DNA synthesis during thermal cycling | Nested PCR |
| Bst 2.0/3.0 DNA Polymerase | Strand-displacing DNA synthesis at constant temperature | LAMP [80] | |
| Primer Systems | Outer & Inner Primer Pairs [78] | Target-specific binding in two successive rounds | Nested PCR |
| FIP, BIP, F3, B3, LF, LB Primers [80] | Multiple target recognition sites for complex amplification | LAMP | |
| Detection Chemistries | Ethidium bromide, SYBR Safe | Intercalating dyes for gel visualization | Nested PCR |
| Neutral Red, Hydroxynaphthol Blue [80] | Colorimetric pH indicators for visual detection | LAMP | |
| Sample Preparation | Column-based DNA Extraction Kits [14] | High-purity nucleic acid isolation | Both |
| Reaction Buffers | MgCl₂-containing Buffer [78] | Optimizes polymerase activity and fidelity | Nested PCR |
| Betaine-containing Buffer [80] | Reduces secondary structure in high-GC regions | LAMP |
Nested PCR and LAMP represent complementary technologies with distinct advantages for specific application environments. Nested PCR remains the gold standard for laboratory-based applications requiring ultra-high specificity and sensitivity, particularly when sample quality is adequate and contamination controls are rigorously implemented. LAMP technology offers a transformative approach for field-deployed diagnostics, point-of-care testing, and resource-limited settings where rapid results, operational simplicity, and minimal equipment are paramount.
The selection between these techniques should be guided by a comprehensive assessment of the operational environment, required throughput, available infrastructure, and technical expertise. For laboratory workflows focused on contamination prevention research, nested PCR presents both a significant challenge and opportunity for developing robust procedural controls, while LAMP exemplifies how simplified, single-tube workflows can effectively minimize contamination risks while maintaining diagnostic accuracy.
Molecular diagnostics have become foundational to modern infectious disease management, with nested polymerase chain reaction (nested PCR) representing a particularly sensitive method for pathogen detection. This technique significantly enhances sensitivity and specificity through a two-stage amplification process, making it invaluable for detecting low-abundance targets in clinical and environmental samples [83]. However, the exquisite sensitivity of nested PCR comes with substantial risk of contamination from amplicon carryover, requiring sophisticated workflow countermeasures to ensure diagnostic accuracy.
This application note provides a comparative analysis of nested PCR sensitivity across malaria and fungal pathogen case studies, framed within the context of a broader thesis on laboratory workflow for contamination prevention. We present structured quantitative data, detailed experimental protocols, and visual workflows to support researchers, scientists, and drug development professionals in implementing robust nested PCR diagnostics while maintaining amplicon integrity throughout the testing process.
Sensitivity Analysis: Malaria Diagnostics Case Study
Performance Comparison of Diagnostic Methods
Nested PCR demonstrates superior sensitivity for detecting low-level parasitemia often missed by conventional diagnostic methods. The following table summarizes performance characteristics from recent malaria diagnostic studies:
Table 1: Comparative performance of malaria diagnostic methods across multiple studies
| Diagnostic Method | Sensitivity (%) | Specificity (%) | Detection Limit | Study/Pathogen |
|---|---|---|---|---|
| Nested PCR | 96.3-100 | 94.9-100 | 10 parasites/μL | P. falciparum in Nigeria [84] |
| Microscopy | 26.4-96.3 | 100 | 10-50 parasites/μL | P. falciparum in Nigeria [84] |
| RDT (PfHRP2) | 86.0-95.1 | 90.3-97.5 | ~100 parasites/μL | P. falciparum in Nigeria [84] |
| Real-time PCR | 100 (kappa=0.94) | 100 (kappa=0.94) | Not specified | Myanmar study [76] |
| High-Resolution Melting | 100 (vs sequencing) | 100 (vs sequencing) | Not specified | Iran study [12] |
The data demonstrates that nested PCR achieves significantly higher sensitivity than microscopy (100% vs. 26.4%) in asymptomatic infections with low parasite densities [76]. This enhanced detection capability is particularly valuable for identifying submicroscopic malaria reservoirs that sustain transmission in endemic areas.
Workflow for Malaria Nested PCR Detection
Diagram: Nested PCR workflow for malaria species identification
Detailed Protocol: Malaria Species Identification
Principle: This protocol enables sensitive detection and differentiation of Plasmodium species through two rounds of amplification targeting the 18S small subunit ribosomal RNA (SSU rRNA) gene [76] [12].
Table 2: Research reagent solutions for malaria nested PCR
| Reagent/Category | Specific Item | Function/Application |
|---|---|---|
| Sample Collection | Whatman filter paper (No. 3) | Dry blood spot (DBS) sample preservation |
| DNA Extraction | QIAamp DNA Blood Mini Kit | Genomic DNA purification from DBS or whole blood |
| PCR Reagents | Taq DNA Polymerase | DNA amplification |
| dNTP Mix (200µM each) | Nucleotide substrates for DNA synthesis | |
| Primary PCR | rPLU1 & rPLU5 primers | Genus-specific amplification of Plasmodium 18S rRNA |
| Secondary PCR | rFAL1/rFAL2, rVIV1/rVIV2 | Species-specific detection (P. falciparum, P. vivax) |
| rMAL1/rMAL2, rOVA1/rOVA2 | Species-specific detection (P. malariae, P. ovale) | |
| Contamination Control | Uracil-DNA Glycosylase (UDG) | Prevention of amplicon carryover contamination |
Procedure:
DNA Extraction
Primary PCR - Genus Detection
- Prepare 20µL reaction mixture containing:
- 1× PCR buffer
- 2.5mM MgCl₂
- 200µM each dNTP
- 0.02µM primers rPLU1 and rPLU5
- 1U Taq DNA polymerase
- 2-4µL template DNA
- Cycling conditions:
- Initial denaturation: 95°C for 5 minutes
- 35-40 cycles: 95°C for 30 seconds, 55°C for 1 minute, 72°C for 1 minute
- Final extension: 72°C for 4-10 minutes
- Prepare 20µL reaction mixture containing:
Secondary PCR - Species Identification
- Prepare 20µL reaction mixture containing:
- 1× PCR buffer
- 2.5mM MgCl₂
- 200µM each dNTP
- 0.02µM species-specific primer pairs
- 1U Taq DNA polymerase
- 2µL of 1:1000 diluted primary PCR product
- Cycling conditions:
- Initial denaturation: 95°C for 4-5 minutes
- 35 cycles: 94°C for 20-30 seconds, 60°C for 20-30 seconds, 72°C for 45-60 seconds
- Final extension: 72°C for 4-10 minutes
- Prepare 20µL reaction mixture containing:
Detection and Analysis
- Analyze PCR products by 1-2% agarose gel electrophoresis.
- Visualize with ethidium bromide or SYBR Safe staining.
- Identify species by expected band sizes:
- P. falciparum: ~205bp
- P. vivax: ~214bp
- P. malariae: ~144bp
- P. ovale: ~800bp
Contamination Prevention Measures:
- Perform pre- and post-PCR steps in separate physical spaces
- Use dedicated equipment and consumables for each workflow area
- Include negative controls (no-template and extraction controls) in each run
- Implement uracil-DNA glycosylase (UDG) treatment to digest carryover amplicons
Sensitivity Analysis: Fungal Pathogen Case Study
Performance Comparison in Fungal Detection
Nested PCR provides exceptional stability and reliability for detecting fungal pathogens, though with varying sensitivity compared to other molecular methods:
Table 3: Comparative performance of fungal detection methods
| Diagnostic Method | Sensitivity | Specificity | Detection Limit | Study/Pathogen |
|---|---|---|---|---|
| Nested PCR | 54-86% (vs culture) | 54% (vs culture) | 31 fg/µL | Fusarium tricinctum [14] [86] |
| Real-time PCR (qPCR) | 81% (vs culture) | 96% (vs culture) | 3.1 fg/µL | Fusarium tricinctum [14] |
| Blood Culture | Reference standard | Reference standard | Variable | Candida spp. [86] |
| LAMP | Comparable to nested PCR | High specificity | 31 fg/µL | Fusarium tricinctum [14] |
For fungal diagnostics, real-time PCR demonstrated superior specificity (96%) compared to nested PCR (54%) when both were benchmarked against blood culture for Candida bloodstream infections [86]. However, nested PCR showed exceptional stability and reliability for plant pathogen detection, with sensitivity matching LAMP methods [14].
Workflow for Fungal Pathogen Detection
Diagram: Nested PCR workflow for fungal pathogen detection
Detailed Protocol: Fusarium tricinctum Detection
Principle: This protocol detects Fusarium tricinctum, a causal agent of gummosis in Zanthoxylum bungeanum, through nested PCR amplification of the CYP51C gene, which provides species-specific differentiation from closely related Fusarium species [14].
Table 4: Research reagent solutions for fungal nested PCR
| Reagent/Category | Specific Item | Function/Application |
|---|---|---|
| Sample Collection | PDA medium | Fungal culture and isolation |
| DNA Extraction | Column Fungal DNAout 2.0 Kit | Fungal genomic DNA purification |
| PCR Reagents | Taq DNA Polymerase | DNA amplification |
| dNTP Mix (200µM each) | Nucleotide substrates | |
| Primary PCR | CYP-4 F/R primers | First-round amplification of CYP51C gene |
| Secondary PCR | C4-10 F/R primers | Second-round nested amplification |
| Equipment | NanoDrop One Spectrophotometer | DNA quantification and quality assessment |
Procedure:
Fungal Culture and DNA Extraction
- Culture fungal isolates on PDA plates at 20°C for 5 days.
- Collect mycelia and extract genomic DNA using Column Fungal DNAout 2.0 Kit.
- Assess DNA quality and concentration using Nanodrop One spectrophotometer.
- Dilute DNA to 50ng/μL in nuclease-free water.
Primary PCR Amplification
- Prepare 25μL reaction mixture containing:
- 1× PCR buffer
- 2.5mM MgCl₂
- 200μM each dNTP
- 0.2μM each CYP-4 F and CYP-4 R primer
- 1U Taq DNA polymerase
- 2μL template DNA (50ng)
- Cycling conditions:
- Initial denaturation: 95°C for 5 minutes
- 35 cycles: 94°C for 30 seconds, 60°C for 30 seconds, 72°C for 45 seconds
- Final extension: 72°C for 10 minutes
- Prepare 25μL reaction mixture containing:
Secondary Nested PCR
- Prepare 25μL reaction mixture containing:
- 1× PCR buffer
- 2.5mM MgCl₂
- 200μM each dNTP
- 0.2μM each C4-10 F and C4-10 R primer
- 1U Taq DNA polymerase
- 2μL of 1:10 diluted primary PCR product
- Use identical cycling conditions as primary PCR.
- Prepare 25μL reaction mixture containing:
Detection and Analysis
- Separate secondary PCR products on 1.5% agarose gel.
- Visualize with ethidium bromide staining.
- Confirm expected amplicon size (~400bp) under UV illumination.
Contamination Prevention Measures:
- Use separate work areas for sample processing, PCR setup, and post-PCR analysis
- Regularly decontaminate surfaces and equipment with DNA-degrading solutions
- Include multiple negative controls throughout the process
- Use aerosol-resistant pipette tips to prevent cross-contamination
Contamination Control Framework for Nested PCR Workflows
Comprehensive Contamination Prevention Strategy
The enhanced sensitivity of nested PCR necessitates rigorous contamination control measures throughout the diagnostic workflow. The following framework addresses critical control points:
Diagram: Comprehensive contamination control workflow
Key Contamination Control Measures
Physical Separation
- Establish distinct pre-PCR, PCR setup, amplification, and post-PCR areas
- Implement unidirectional workflow to prevent amplicon backflow
- Use dedicated equipment, reagents, and personal protective equipment for each area
Procedural Controls
- Incorporate uracil-DNA glycosylase (UDG) treatment to digest carryover contaminants [83]
- Include multiple negative controls (no-template, extraction, reagent) in each run
- Aliquot reagents to minimize repeated freeze-thaw cycles and cross-contamination
- Use aerosol-resistant pipette tips throughout the procedure
Environmental Monitoring
- Regularly decontaminate surfaces with sodium hypochlorite or DNA-degrading solutions
- Monitor laboratory environments for fungal contamination, particularly when detecting environmental saprophytes that can also be human pathogens [83]
- Validate decontamination procedures through routine testing of surfaces and equipment
Nested PCR remains a powerful molecular diagnostic tool with demonstrated superior sensitivity for detecting low-abundance pathogens in both malaria and fungal infection contexts. The technique consistently outperforms conventional microscopy and rapid diagnostic tests in malaria surveillance, particularly for identifying submicroscopic infections that sustain transmission in endemic areas. While real-time PCR offers advantages in quantification and contamination reduction, nested PCR provides exceptional stability, reliability, and accessibility for resource-limited settings.
Successful implementation requires meticulous attention to contamination prevention throughout the diagnostic workflow. The protocols and frameworks presented herein provide researchers and diagnosticians with comprehensive guidance for maintaining amplicon integrity while leveraging the full sensitivity potential of nested PCR technology. As molecular diagnostics continue to evolve, the fundamental principles of robust assay design and rigorous contamination control remain paramount for accurate pathogen detection and effective disease management.
Conclusion
Preventing contamination in nested PCR is not a single step but an integrated system encompassing rigorous laboratory design, disciplined workflow, and meticulous technique. By adhering to the principles of physical separation, unidirectional workflow, and robust validation, laboratories can fully leverage the exceptional sensitivity and specificity of nested PCR for applications from infectious disease diagnostics to cancer research. The future of nested PCR lies in the continued adoption of closed-tube methods and automated platforms to further minimize contamination risks. Mastering these contamination prevention strategies is fundamental for generating reliable data, ensuring diagnostic accuracy, and advancing biomedical research and drug development with confidence.
References
- 1. Nested Polymerase Chain Reaction - an overview [https://www.sciencedirect.com/topics/biochemistry-genetics-and-molecular-biology/nested-polymerase-chain-reaction]
- 2. Nested PCR: Principle, Protocol and Application [https://www.bocsci.com/resources/nested-pcr-principle-protocol-and-applications.html?srsltid=AfmBOoq1WalI0LBTEikH7kgHpYpZ3EkfWDU8zHzgzyHMvdRpJV-u9Bv6]
- 3. PCR Methods - Top Ten Strategies [https://www.thermofisher.com/us/en/home/life-science/cloning/cloning-learning-center/invitrogen-school-of-molecular-biology/pcr-education/pcr-reagents-enzymes/pcr-methods.html]
- 4. Optimizing single-tube nested PCR for enhanced ... [https://www.sciencedirect.com/science/article/abs/pii/S0378111924007194]
- 5. Peculiarities of Diagnostic Reliability—Nested PCR Versus ... [https://pmc.ncbi.nlm.nih.gov/articles/PMC12301005/]
- 6. Nested PCR detection of JC polyomavirus large T-antigen in ... [https://jenci.springeropen.com/articles/10.1186/s43046-025-00313-y]
- 7. PCR Amplification | An Introduction to PCR Methods [https://www.promega.com/resources/guides/nucleic-acid-analysis/pcr-amplification/]
- 8. The Devil in the Details: Contamination in a PCR Lab [https://www.rapidmicrobiology.com/news/the-devil-in-the-details-contamination-in-a-pcr-lab]
- 9. Carryover Contamination-Controlled Amplicon Sequencing ... [https://pmc.ncbi.nlm.nih.gov/articles/PMC10269707/]
- 10. Peculiarities of Diagnostic Reliability—Nested PCR Versus ... [https://www.mdpi.com/2076-2607/13/7/1498]
- 11. Specific Nested PCR for the Detection of 16SrI and 16SrII ... [https://www.mdpi.com/2223-7747/14/14/2144]
- 12. Optimization of the real-time PCR platform method using ... [https://www.nature.com/articles/s41598-025-16972-9]
- 13. Optimization of the real-time PCR platform method using high ... [https://pmc.ncbi.nlm.nih.gov/articles/PMC12491414/]
- 14. Development and comparative evaluation of LAMP, nested ... [https://pmc.ncbi.nlm.nih.gov/articles/PMC12398972/]
- 15. A comparative study with conventional methods in a tertiary ... [https://pubmed.ncbi.nlm.nih.gov/40696646/]
- 16. How to Work with Challenging or Limited Genomic ... [https://blog.omni-inc.com/blog/how-to-work-with-challenging-or-limited-genomic-samples-updated-for-2025]
- 17. Nested PCR: Principle, Protocol and Application [https://www.bocsci.com/resources/nested-pcr-principle-protocol-and-applications.html?srsltid=AfmBOoqvupfbvULVOVBvt4cwf5J48N_maUYuGIqixLTOh9NUbJiBM_2N]
- 18. Help Prevent PCR Contamination with Laminar Flow Hoods [https://www.sentryair.com/blog/industry-applications/laboratories/help-prevent-pcr-contamination-with-laminar-flow-hoods/]
- 19. Nested PCR [https://www.creative-biolabs.com/gene-therapy/nested-pcr.htm]
- 20. Innovative application of nested PCR for detection of ... [https://pmc.ncbi.nlm.nih.gov/articles/PMC7178846/]
- 21. Nested PCR: Principle, Protocol and Application [https://www.bocsci.com/resources/nested-pcr-principle-protocol-and-applications.html?srsltid=AfmBOorw07GcDhe3qSpMo7-0Et-CkSizQRxvS6crX2eKwqmiKv0GbIBn]
- 22. Nested PCR to optimize rpoB metabarcoding for low- ... [https://pmc.ncbi.nlm.nih.gov/articles/PMC12403564/]
- 23. Dos and don'ts for molecular testing [https://www.who.int/teams/global-malaria-programme/case-management/diagnosis/nucleic-acid-amplification-based-diagnostics/dos-and-don-ts-for-molecular-testing]
- 24. Avoiding Contamination | Thermo Fisher Scientific - ES [https://www.thermofisher.com/us/en/home/life-science/pcr/real-time-pcr/real-time-pcr-learning-center/real-time-pcr-basics/good-laboratory-practice-avoid-contamination-qpcr-experiments.html]
- 25. Nested PCR: Principle, Protocol and Application [https://www.bocsci.com/resources/nested-pcr-principle-protocol-and-applications.html?srsltid=AfmBOopcVugEc9oW8C6IwS_s-fLK2NeE_YLJJTS54bv-WAlixcaCvk1q]
- 26. How to Set Up a Molecular Pathology Lab [https://pmc.ncbi.nlm.nih.gov/articles/PMC10510618/]
- 27. Nested Polymerase Chain Reaction - an overview [https://www.sciencedirect.com/topics/agricultural-and-biological-sciences/nested-polymerase-chain-reaction]
- 28. Nested PCR: Principle, Protocol and Application [https://www.bocsci.com/resources/nested-pcr-principle-protocol-and-applications.html?srsltid=AfmBOop1QuR1V1iW8q9diA83lb7rGiQXnNXTWZBVoCytL_ImltyWrRtd]
- 29. Development and comparative evaluation of LAMP, nested ... [https://bmcmicrobiol.biomedcentral.com/articles/10.1186/s12866-025-04295-8]
- 30. Nested Polymerase Chain Reaction - an overview [https://www.sciencedirect.com/topics/immunology-and-microbiology/nested-polymerase-chain-reaction]
- 31. Polymerase Chain Reaction: Basic Protocol Plus ... [https://pmc.ncbi.nlm.nih.gov/articles/PMC4846334/]
- 32. Nested PCR: Principle, Protocol and Application [https://www.bocsci.com/resources/nested-pcr-principle-protocol-and-applications.html?srsltid=AfmBOory91n6AVMh3leRT1UMXKhhyAgF9NdSV_8LOkWRHWLLWU2Tez93]
- 33. How to prevent PCR contamination [https://www.minipcr.com/how-to-prevent-pcr-contamination/]
- 34. Development of a Highly Sensitive Nested-PCR Procedure ... [https://pmc.ncbi.nlm.nih.gov/articles/PMC101457/]
- 35. Rapid detection of low-level HeLa cell contamination in cell culture... [https://pubmed.ncbi.nlm.nih.gov/30353657/]
- 36. Development of a Synthetic Positive Control Which Also Detects... [https://link.springer.com/article/10.1007/s11008-005-0112-y]
- 37. Nested PCR: Principle, Protocol and Application [https://www.bocsci.com/resources/nested-pcr-principle-protocol-and-applications.html?srsltid=AfmBOorFtS3uA4SiYOY1GrUIj6TdYe40pIJuteQf6uJvictR2fEdNCcv]
- 38. A highly sensitive 1-tube nested real-time RT-PCR assay ... [https://pmc.ncbi.nlm.nih.gov/articles/PMC7126397/]
- 39. Single-tube Multiplex Nested PCR System for Efficient ... [https://pmc.ncbi.nlm.nih.gov/articles/PMC9536825/]
- 40. One-Tube Nested Real-Time PCR Assay for Rapid ... [https://www.frontiersin.org/journals/veterinary-science/articles/10.3389/fvets.2020.586045/full]
- 41. Comparison of Conventional, Nested, and Real-Time ... [https://pmc.ncbi.nlm.nih.gov/articles/PMC3043474/]
- 42. Preventing PCR Amplification Carryover Contamination in a Clinical Laboratory [https://www.annclinlabsci.org/content/34/4/389.full]
- 43. A novel, nested, multiplex, real-time PCR for detection of ... [https://pmc.ncbi.nlm.nih.gov/articles/PMC4049433/]
- 44. Monitoring human cytomegalovirus infection with nested PCR [https://pmc.ncbi.nlm.nih.gov/articles/PMC2859376/]
- 45. Development of a nested-PCR assay for the detection ... [https://www.sciencedirect.com/science/article/abs/pii/S0043135400004267]
- 46. Nested PCR: Principle, Protocol and Application [https://www.bocsci.com/resources/nested-pcr-principle-protocol-and-applications.html?srsltid=AfmBOopXLIMXv8Mv7LrdWq_LPVcXhZtWUp5-0tz9a5kuL0THoYWWSpWD]
- 47. Nested PCR: Principle, Protocol and Application [https://www.bocsci.com/resources/nested-pcr-principle-protocol-and-applications.html?srsltid=AfmBOooAncYDOkfyQPH3HZO02cKk02uuvtq0spxabAKFT2HO5WuAnYea]
- 48. A Nested PCR Assay to Avoid False Positive Detection of ... [https://pubmed.ncbi.nlm.nih.gov/27832178/]
- 49. Specific Nested PCR for the Detection of 16SrI and 16SrII ... [https://pmc.ncbi.nlm.nih.gov/articles/PMC12299459/]
- 50. A Nested PCR Assay to Avoid False Positive Detection of the ... [https://journals.plos.org/plosone/article?id=10.1371/journal.pone.0166320]
- 51. Development and application of Nested PCR and qPCR for ... [https://www.sciencedirect.com/science/article/abs/pii/S0885576525002607]
- 52. Nested-PCR vs. RT-qPCR: A Sensitivity Comparison in the ... [https://www.mdpi.com/2673-8856/4/3/19]
- 53. Preventing False Positive and False Negative PCR Results [https://www.clinicallab.com/preventing-false-positive-and-false-negative-pcr-results-26261]
- 54. PCR conditions | Primer annealing specificity | PCR buffers [https://www.qiagen.com/us/knowledge-and-support/knowledge-hub/bench-guide/pcr/introduction/pcr-conditions]
- 55. Development of Nested Polymerase Chain Reaction with ... [https://www.mdpi.com/2076-2615/13/20/3177]
- 56. Efficient nested-PCR-based method development for ... [https://www.nature.com/articles/s41598-021-00968-2]
- 57. An Efficient Multistrategy DNA Decontamination Procedure ... [https://pmc.ncbi.nlm.nih.gov/articles/PMC2946917/]
- 58. DNA decontamination methods for internal quality ... [https://pmc.ncbi.nlm.nih.gov/articles/PMC6816905/]
- 59. Efficacy of high‐level disinfection of endoscopes ... [https://pmc.ncbi.nlm.nih.gov/articles/PMC10365036/]
- 60. Nested PCR amplification of the mitochondrial hypervariable ... [https://journals.plos.org/plosone/article?id=10.1371/journal.pone.0328633]
- 61. Development of a nested PCR assay for specific detection ... [https://www.frontiersin.org/journals/cellular-and-infection-microbiology/articles/10.3389/fcimb.2022.930585/full]
- 62. How Contamination Happens in Labs (and How to Prevent It) [https://www.msesupplies.com/blogs/news/how-contamination-happens-in-labs-and-how-to-prevent-it?srsltid=AfmBOooZvvWfrd6PZM5yuIJtP1Iukmqh9SfjdqjD63_KxfP-jQmoiDK3]
- 63. Development and clinical validation of a novel multiplex ... [https://www.nature.com/articles/s41598-025-16434-2]
- 64. Development of a diagnostic assay by three-tube multiplex ... [https://www.nature.com/articles/s41598-022-15543-6]
- 65. Development and validation of a multiplex PCR assay with ... [https://pmc.ncbi.nlm.nih.gov/articles/PMC12216036/]
- 66. Comparative Study and Analytical Verification of PCR ... [https://www.sciencedirect.com/science/article/pii/S1525157817301083]
- 67. How Nested PCR Machines Work — In One Simple Flow ... [https://www.linkedin.com/pulse/how-nested-pcr-machines-work-one-simple-flow-2025-viroonm-global-ssnjc/]
- 68. Development and validation of a real-time PCR assay, and ... [https://www.sciencedirect.com/science/article/abs/pii/S030440172500086X]
- 69. Nested PCR: Principle, Protocol and Application [https://www.bocsci.com/resources/nested-pcr-principle-protocol-and-applications.html?srsltid=AfmBOopjgRpXbs7h-ei6C-0B3HOLCKS1oHbn3VisZeWZnLazRvhCV_xI]
- 70. Direct sequencing of PCR products | Yale Research [https://research.yale.edu/direct-sequencing-pcr-products]
- 71. Development of advanced PCR-based methods for ... [https://www.sciencedirect.com/science/article/pii/S0956713524000057]
- 72. Rapid sequencing DNA - PCR Barcoding Kit 24 V14 (SQK- ... [https://nanoporetech.com/document/rapid-sequencing-dna-v14-pcr-barcoding-sqk-rpb114-24]
- 73. Comparison of Nested Polymerase Chain Reaction and ... [https://pmc.ncbi.nlm.nih.gov/articles/PMC4674247/]
- 74. Nested PCR: Principle, Protocol and Application [https://www.bocsci.com/resources/nested-pcr-principle-protocol-and-applications.html?srsltid=AfmBOorp3niSTuw6VU-K09NCackrrf7WvU1bpTxoPl0vKh5-mnAnmfyw]
- 75. Development of real-time PCR methods for quality control ... [https://pmc.ncbi.nlm.nih.gov/articles/PMC12058689/]
- 76. Comparison of Microscopy, Nested-PCR, and Real ... - PMC [https://pmc.ncbi.nlm.nih.gov/articles/PMC4042795/]
- 77. Preventing PCR Amplification Carryover Contamination in ... [https://www.annclinlabsci.org/content/34/4/389.long]
- 78. Nested PCR: Principle, Protocol and Application [https://www.bocsci.com/resources/nested-pcr-principle-protocol-and-applications.html?srsltid=AfmBOorq68Das4EUc0hDX7c_Luo2wkwB1gSBooT0z8Ax23bT6UXSh2cJ]
- 79. Progress in the application of isothermal amplification ... [https://www.frontiersin.org/journals/microbiology/articles/10.3389/fmicb.2025.1601644/full]
- 80. Comparison of PCR, Nested PCR, and RT-LAMP for Rapid ... [https://www.mdpi.com/2076-2615/14/16/2432]
- 81. A new approach for the detection of genetic alterations ... [https://www.nature.com/articles/s41598-025-93086-2]
- 82. a technology transfer assessment study (LAMP-TTA) during a ... [https://malariajournal.biomedcentral.com/articles/10.1186/s12936-025-05631-z]
- 83. PCR-based diagnosis of human fungal infections - PMC [https://pmc.ncbi.nlm.nih.gov/articles/PMC2845394/]
- 84. Performance Evaluation of Nested Polymerase Chain ... [https://pmc.ncbi.nlm.nih.gov/articles/PMC9694681/]
- 85. Increased sensitivity of malaria detection by nested ... [https://www.sciencedirect.com/science/article/abs/pii/S0020751997001471]
- 86. Evaluation of nested and real-time PCR assays in ... [https://www.sciencedirect.com/science/article/pii/S1198743X1460882X]