Mitigating Nested PCR Contamination: Risks, Strategies, and Advanced Solutions for Reliable Diagnostics
This article provides a comprehensive analysis of the contamination risks inherent in conventional, open-tube nested Polymerase Chain Reaction (PCR) protocols, a major concern for researchers and diagnostic professionals.
Mitigating Nested PCR Contamination: Risks, Strategies, and Advanced Solutions for Reliable Diagnostics
Abstract
This article provides a comprehensive analysis of the contamination risks inherent in conventional, open-tube nested Polymerase Chain Reaction (PCR) protocols, a major concern for researchers and diagnostic professionals. It explores the fundamental sources of carryover contamination, detailing how amplified DNA (amplicons) can compromise assay accuracy and lead to false-positive results. The scope extends to established best practices for contamination prevention, including laboratory design, workflow, and decontamination techniques. Crucially, the article evaluates innovative methodological advances, such as single-tube and real-time nested PCR formats, which physically or procedurally eliminate the open-tube step. Finally, it covers validation frameworks and comparative analyses of different PCR formats, offering a roadmap for implementing robust, sensitive, and contamination-free nested PCR assays in biomedical research and drug development.
Understanding the Nested PCR Contamination Problem: Sources and Consequences
Why Nested PCR is Inherently Prone to Contamination
Nested Polymerase Chain Reaction (nested PCR) is a powerful molecular technique renowned for its exceptional sensitivity and specificity, achieved through two successive rounds of amplification with two sets of primers. However, this very design introduces a significant vulnerability: the inherent risk of amplicon contamination, which can lead to false-positive results. This whitepaper delves into the core procedural steps of nested PCR that predispose it to contamination, presents quantitative data on its performance relative to other methods, outlines detailed experimental protocols for contamination assessment, and discusses key mitigation strategies, including the adoption of single-tube nested PCR. The analysis is framed within the critical context of ensuring data integrity in diagnostic and pharmaceutical development workflows.
The Fundamental Contamination Risk in Nested PCR
Nested PCR enhances the detection of low-abundance nucleic acid targets by performing two consecutive PCR amplifications [1] [2] [3]. The first round uses an outer set of primers to amplify the target region. A sample of this first-round product is then physically transferred to a new tube or a new reaction mixture within the same tube to serve as the template for a second round of amplification. This second round employs an inner set of primers that bind within the first amplicon, hence the term "nested" [1] [3].
The critical point of contamination occurs between the first and second rounds of amplification when the reaction tube must be opened to retrieve an aliquot of the first PCR product [1] [3]. This first-round product contains a massive quantity of the target amplicon. During tube opening and sample handling, these amplicons can easily form aerosols—microscopic droplets that become airborne and settle on laboratory surfaces, pipettes, reagent stocks, and other samples [3]. When these contaminating amplicons are introduced into subsequent reactions, they serve as highly efficient templates for the nested primers, leading to false-positive outcomes because they can be amplified even in the absence of the original target template in the sample. This compromises the assay's reliability, a paramount concern in clinical diagnostics and drug development research.
Quantitative Comparisons: Sensitivity at a Cost
The exceptional sensitivity of nested PCR is the primary reason for its use, but this comes with the documented risk of contamination. The table below summarizes comparative data from various studies, highlighting the performance of nested PCR against other PCR methods.
Table 1: Comparative Performance of Nested PCR and Other Amplification Methods
| Pathogen / Application | Method | Sensitivity | Specificity | Key Finding / Contamination Note | Source |
|---|---|---|---|---|---|
| Orientia tsutsugamushi (Scrub Typhus) | Conventional PCR (C-PCR) | 7.3% | 100% | Lower sensitivity, requires high template load. | [4] |
| Nested PCR (N-PCR) | 85.4% | 100% | High sensitivity; requires tube opening between rounds. | [4] | |
| Real-Time PCR (Q-PCR) | 82.9% | 100% | High sensitivity, closed-tube system prevents amplicon contamination. | [4] | |
| Histoplasma capsulatum (Environmental) | Hc100 Nested PCR | 11% (Positivity Rate) | Confirmed | Standard two-tube method; lower detection rate than real-time PCR. | [5] |
| 100-kDa Real-Time PCR | 67% (Positivity Rate) | Confirmed | Higher detected positivity; closed-tube, rapid, lower contamination risk. | [5] | |
| Bovine Herpesvirus 6 (BoHV6) | gB gene Nested PCR | ~6 copies/reaction | 100% | Highly specific, but gel electrophoresis required for product analysis. | [6] |
| gB gene qPCR | ~2 copies/reaction | 100% | Higher sensitivity, enables quantification, closed-tube. | [6] | |
| Cutaneous Leishmaniasis | Modified Nested ITS1 PCR | 2.55 fg parasite DNA | 100% (via RFLP) | Extreme sensitivity; process involves post-PCR handling for RFLP. | [7] |
The data consistently shows that nested PCR offers a dramatic increase in sensitivity over conventional PCR [4]. However, studies directly comparing it to real-time quantitative PCR (qPCR) reveal that qPCR can achieve comparable, and sometimes superior, sensitivity while operating in a closed-tube system that inherently avoids the contamination pitfall of traditional nested PCR [4] [6] [5].
Experimental Workflow and Contamination Pathways
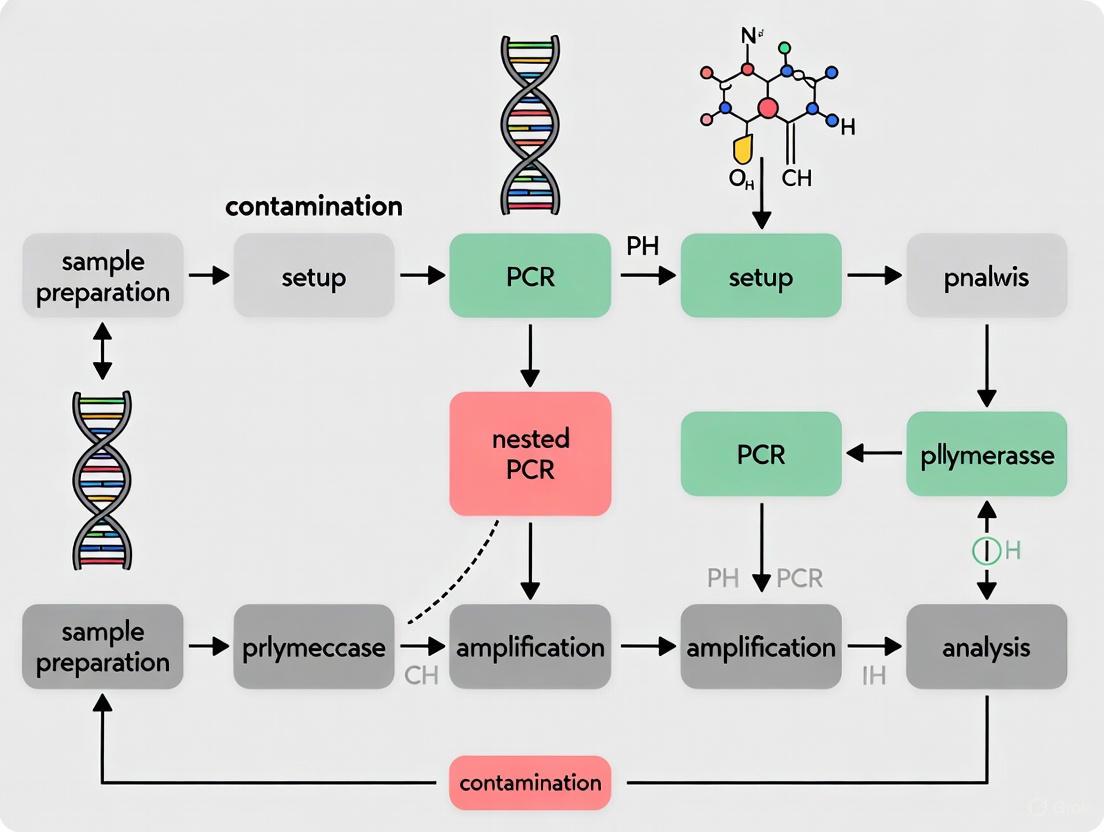
The following diagram illustrates the standard two-tube nested PCR protocol, explicitly highlighting the steps where the risk of contamination is highest.
Detailed Experimental Protocol for Assessing Nested PCR Contamination
To empirically demonstrate the contamination risk, a controlled laboratory experiment can be designed.
Objective: To monitor the occurrence and spread of amplicon contamination during a routine nested PCR workflow.
Materials:
- Template DNA: A plasmid containing a unique target sequence not found in the laboratory's typical samples.
- Primers: Validated outer and nested primer sets for the target.
- PCR Master Mix: Includes Taq DNA polymerase, dNTPs, PCR buffer, and MgCl₂ [1].
- Negative Controls: Nuclease-free water as a no-template control (NTC).
- Equipment: Thermal cycler, microcentrifuges, pipettes, dedicated PCR workstations, and aerosol-filter pipette tips.
Methodology:
- Primary PCR Setup: In a dedicated clean area, prepare the first-round PCR reactions containing the specific plasmid template, outer primers, and master mix. Include a no-template control (NTC-1) from this step.
- First-Round Amplification: Run the first PCR under optimized cycling conditions (e.g., initial denaturation at 94°C for 2 min; 30 cycles of 94°C for 30s, 55°C for 30s, 72°C for 1 min; final extension at 72°C for 5 min) [1].
- Post-Amplification Handling: After the first round, open all reaction tubes, including the one containing the high-titer amplicon, on the laboratory bench to simulate a standard, non-ideal workflow.
- Secondary PCR Setup: Aliquot a small volume (e.g., 1-2 µL) of the first-round product into a new tube containing the second-round master mix with the nested primers. Also, set up multiple NTCs (NTC-2) at this stage by adding water to the second-round master mix in the same workspace.
- Second-Round Amplification: Perform the nested PCR using similar cycling conditions.
- Analysis: Analyze all second-round products, including the NTC-2s, using agarose gel electrophoresis.
Expected Results: In a contamination-prone environment, the NTC-2s from the second round will show positive amplification bands on the gel, confirming that amplicons from the first round escaped during tube opening and contaminated the negative controls.
Mitigation Strategies and the Scientist's Toolkit
Several strategies are employed to mitigate the contamination risk in nested PCR, with the most effective being fundamental changes to the protocol workflow.
Table 2: Key Reagents and Strategies for Contamination Control
| Reagent / Strategy | Function / Principle | Role in Contamination Control |
|---|---|---|
| Single-Tube Nested PCR | Both rounds of PCR are performed in a single, physically closed tube. | Most Effective: Eliminates the need for tube opening between rounds, preventing aerosol release [1] [8]. |
| dUTP and UNG Treatment | Incorporates dUTP into PCR products. Pre-PCR treatment with Uracil-N-Glycosylase (UNG) degrades any contaminating uracil-containing amplicons. | Proactive Decontamination: Chemically destroys carryover contamination from previous PCRs before amplification begins. |
| Physical Separation | Dedicating separate rooms or workstations for pre-PCR (reaction setup), PCR (amplification), and post-PCR (product analysis) activities. | Spatial Barrier: Prevents amplicons from post-PCR areas from entering clean pre-PCR reagents and samples. |
| Aerosol-Filter Pipette Tips | Pipette tips contain a filter that blocks aerosols and liquids from contaminating the pipette shaft. | Primary Prevention: Essential for all molecular biology work, especially when handling amplified products. |
| Hot-Start DNA Polymerase | Polymerase is inactive until a high-temperature activation step, preventing non-specific amplification and primer-dimer formation during reaction setup. | Enhances Specificity: While not a direct contamination control, it improves assay robustness, reducing false positives from mispriming [2]. |
The following diagram illustrates the logical decision pathway for implementing these mitigation strategies, culminating in the single-tube approach.
The single-tube nested PCR method is a significant advancement. It employs physical barriers (like a wax layer or a plastic film in the tube cap) or differential annealing temperatures to keep the two reaction mixes separate during the first round [1] [8]. A simple centrifugation step then mixes the components for the second round without ever opening the tube, thereby retaining the sensitivity of nested PCR while drastically reducing the contamination risk [8].
Nested PCR remains a valuable technique for amplifying scarce nucleic acid targets, but its conventional two-tube format is intrinsically prone to amplicon contamination due to the mandatory tube-opening step. This risk presents a substantial challenge to data fidelity in research and clinical diagnostics. While rigorous laboratory practices like physical separation and UNG treatment can mitigate the problem, the most robust solution lies in adopting engineered alternatives such as single-tube nested PCR or transitioning to closed-tube systems like real-time qPCR where applicable. For the scientific community, a thorough understanding of this vulnerability is not merely a technicality but a fundamental prerequisite for generating reliable and reproducible data in the pursuit of drug development and diagnostic excellence.
In the context of nested polymerase chain reaction (PCR) methodologies, the risk of open-tube manipulation introduces significant potential for contamination, leading to false-positive or false-negative results. Carryover contamination, particularly from previously amplified PCR products (amplicons), represents a critical challenge in molecular diagnostics and research, potentially compromising experimental integrity and regulatory compliance [9]. This technical guide examines the major sources and mechanisms of contamination within PCR workflows, focusing on amplicons, plasmid clones, and sample cross-contamination, while providing evidence-based strategies for contamination prevention and detection. The extreme sensitivity of PCR-based techniques, capable of detecting as few as 10-50 target copies per reaction, makes these methods particularly vulnerable to minute contamination levels [9]. Within regulatory agencies such as the Food and Drug Administration (FDA), false-positive PCR results present substantial obstacles to mission fulfillment, emphasizing the necessity for robust contamination control protocols in laboratory practice [9].
Primary Contamination Categories
PCR contamination manifests primarily through three distinct mechanisms, each with unique characteristics and prevention requirements:
Amplicon Carryover Contamination: Previously amplified PCR products represent the most significant contamination source due to their extremely high concentration (a typical PCR generates approximately 10⁸ copies of target sequence) relative to original template DNA [9]. These amplification products accumulate in laboratory environments, contaminating reagents, equipment, and ventilation systems when proper containment measures are not implemented. The risk amplifies considerably in nested PCR protocols requiring open-tube transfer of first-round amplification products [9] [7].
Plasmid and Nucleic Acid Cross-Contamination: Nucleic acids from organisms or plasmid clones previously analyzed in the laboratory constitute a persistent contamination source [9]. These contaminants may be introduced through various activities, including simultaneous processing of control plasmids, sharing of equipment between different experiments, or even unrelated activities in neighboring laboratories [9]. Plasmid contamination is particularly problematic as these constructs often contain high-copy number targets and can generate false positives at minimal contamination levels.
Sample-to-Sample Cross-Contamination: Pre-amplification sample handling presents multiple opportunities for cross-contamination, especially when processing samples with high target organism concentrations [9]. Contamination vectors include contaminated reagents, disposable supplies, aerosol formation during pipetting, and inadequate technique during nucleic acid extraction procedures [9] [10].
Quantitative Comparison of Contamination Vectors
Table 1: Quantitative Comparison of Major PCR Contamination Sources
| Contamination Source | Typical Concentration | Relative Risk Level | Primary Control Methods |
|---|---|---|---|
| PCR Amplicons | Up to 10⁸ copies/µL [9] | Very High | UNG/dUTP system, closed-tube detection, physical separation [9] |
| Plasmid Clones | Variable (often high-copy) | High | Dedicated areas, careful handling, minimal aliquots [9] |
| Sample Cross-Contamination | Variable (depends on source) | Moderate-High | Aerosol-resistant tips, separate pre/post areas, good technique [9] [10] |
| Environmental Contamination | Low but cumulative | Moderate | UV irradiation, surface decontamination, positive airflow [9] |
Contamination Detection Methodologies
Negative Control Strategies
Implementing comprehensive negative control systems represents the fundamental approach for contamination detection in PCR workflows. Control samples should be interspersed throughout the testing process, including:
- No-Template Controls (NTCs): Contain all reaction components except the target nucleic acid template, processed alongside test samples [10].
- Extraction Controls: Monitor contamination during nucleic acid purification.
- Reagent-Only Controls: Identify contamination present in master mix components.
In amplicon sequencing workflows, nontarget control samples consisting of nuclease-free sterile water can reveal contamination levels through calculation of the target value (T value), defined as the ratio of reads mapped to target loci versus total qualifying reads [10]. Recent studies implementing this approach detected T values ranging from 0.01% to 17.99% in contaminated samples, demonstrating the utility of this quantitative assessment [10].
Synthetic DNA Spike-Ins for Competitive Amplification
The incorporation of synthetic DNA spike-ins represents an advanced strategy for both contamination control and quantification. These engineered fragments contain the same primer-binding regions as the target sequence but include significant nucleotide differences in the amplified region [10]. When added to samples prior to library preparation, spike-ins compete with potential contaminants during amplification, effectively reducing their amplification efficiency. Research demonstrates that supplementing reactions with 10,000 copies of specific spike-ins reduces contamination levels while ensuring samples with minimal target concentrations generate sufficient material for sequencing and analysis [10].
Table 2: Experimental Results of Contamination Control Methods
| Control Method | Contamination Reduction | Detection Limit Improvement | Application Context |
|---|---|---|---|
| UNG/dUTP System | Complete elimination of dUTP-containing amplicons [9] | Not quantified | Various PCR applications [9] |
| Synthetic DNA Spike-Ins | ≥22-fold reduction [10] | 1 copy/reaction [10] | Amplicon sequencing [10] |
| Physical Separation + Filter Tips | T-value reduction from 1.28% to 0.43% [10] | Not quantified | Library construction [10] |
| Standardized Laboratory Workflow | Significant reduction in cross-contamination [11] | Improved sensitivity and specificity [11] | Ruminant fecal pollution tracking [11] |
Contamination Prevention and Control Protocols
Laboratory Design and Workflow Organization
Implementing a unidirectional workflow through physically separated laboratory areas represents the most effective strategy for preventing amplicon carryover contamination [9]. A properly designed PCR laboratory should include:
- Sample Preparation Area: Dedicated space for nucleic acid extraction and reaction setup, located in a separate room or containment hood from amplification and product analysis areas.
- PCR Mix Preparation Area: Separate, clean environment for reagent preparation and reaction assembly.
- Amplification Area: Designated space for thermal cyclers, physically isolated from pre-and post-amplification areas.
- Post-Amplification Analysis Area: Separate location for product detection, gel electrophoresis, and subsequent analysis [9].
This physical separation prevents the movement of amplified products backward into areas dedicated to reaction setup or sample preparation. Studies demonstrate that laboratories with physical isolation between workflow steps show significantly lower contamination levels (mean T value 0.43%) compared to non-separated laboratories (mean T value 0.97-1.28%) [10].
Enzymatic Control Methods
The uracil-DNA glycosylase (UNG) decontamination system provides effective protection against amplicon carryover contamination [9] [10]. This method employs a three-step process:
- Incorporation: During PCR amplification, dUTP substitutes for dTTP in all newly synthesized amplification products, creating distinguishable characteristics from native DNA templates [9].
- Hydrolysis: Before subsequent PCR reactions, mixtures are treated with UNG enzyme at room temperature for 10 minutes, which recognizes and removes uracil residues from contaminating amplification products [9].
- Inactivation and Amplification: UNG is thermally inactivated at 95°C for 5 minutes prior to the actual PCR amplification, preventing degradation of newly synthesized products [9].
The UNG method has been successfully implemented in diverse PCR applications, including single-tube nested real-time PCR formats, substantially reducing false-positive results due to amplification product carryover contamination [9] [12].
Chemical and Physical Decontamination Methods
Routine implementation of chemical and physical decontamination protocols provides additional protection against contamination:
- Surface Decontamination: Regular cleaning of PCR work benches with 10-15% sodium hypochlorite solution (bleach), followed by removal of residual bleach with 70% ethanol [9].
- UV Irradiation: Exposure of PCR supplies, work surfaces, and reagents to UV light at 254 nm wavelength for 5-20 minutes to induce thymidine dimer formation in contaminating DNA, rendering it inactive as a template for amplification [9].
- Equipment Decontamination: Use of aerosol-resistant filter tips in all liquid handling procedures, with studies showing significant contamination reduction (mean T value 0.43% with filter tips versus 1.12% without) [10].
Diagram 1: Comprehensive PCR Contamination Control Framework. This diagram illustrates the multi-layered approach required for effective contamination prevention, incorporating physical, enzymatic, chemical, and monitoring strategies.
Advanced Technical Approaches for Nested PCR
Single-Tube Nested PCR Systems
Single-tube nested PCR formats significantly reduce contamination risk by eliminating open-tube manipulation between amplification rounds [9] [12]. These systems incorporate both primary and nested amplification reactions within a single sealed tube, utilizing differential primer concentrations and annealing temperatures to control sequential amplification. Research demonstrates that balanced heminested PCR techniques, which modify primer design to avoid asymmetric amplification, achieve 75% sensitivity compared to 60% for standard heminested PCR (p=0.02) while maintaining 100% specificity [12].
Real-Time PCR Platforms
Real-time PCR technologies provide closed-tube detection systems that eliminate post-amplification product handling, thereby preventing amplicon exposure to the laboratory environment [9]. These platforms utilize fluorescent-labeled probes to monitor amplification in real-time, combining amplification and detection in a single sealed system. Advanced implementations include:
- Single-tube real-time PCR: Simultaneous amplification and detection of multiple pathogens in a closed system [9].
- High-Resolution Melting (HRM) analysis: Enables species differentiation based on melting temperature profiles without post-amplification manipulation [13].
- TaqMan and LightCycler systems: Commercial platforms incorporating closed-tube detection methodologies [9].
Studies comparing real-time PCR with conventional methods demonstrate equivalent or superior performance, with one evaluation showing 88% agreement between Enterococcus qPCR and EPA method 1600 for beach management decisions, compared to 94% agreement between EPA method 1600 and Enterolert [14].
Modified Primer Design and Amplification Strategies
Innovative primer design strategies enhance amplification efficiency while reducing contamination risk:
- Balanced Heminested PCR: Replaces the original outer primer with a novel primer containing the sequence of the opposite inner primer attached at its 5' end, avoiding asymmetric amplification and improving sensitivity [12].
- Novel Inner Primers: Modified nested ITS1 PCR with custom inner primers demonstrates significantly improved sensitivity, detecting 2.55 fg of parasite DNA compared to 25 fg with conventional ITS1 PCR [7].
- Short Amplicon Targeting: Designing assays to amplify shorter DNA fragments (100-150 bp) improves detection sensitivity in samples where template DNA may be degraded, such as in stool specimens [15].
Diagram 2: Advanced Technical Approaches for Nested PCR Contamination Control. This diagram outlines methodological improvements that reduce contamination risk in sensitive nested PCR applications.
The Scientist's Toolkit: Essential Research Reagents and Materials
Table 3: Research Reagent Solutions for Contamination Control
| Reagent/Material | Function in Contamination Control | Application Examples |
|---|---|---|
| Uracil-DNA Glycosylase (UNG) | Enzymatically degrades dUTP-containing contaminating amplicons from previous reactions [9] | PCR carryover prevention; used in dUTP/UDG system [9] [10] |
| dUTP (Deoxyuridine Triphosphate) | Substitute for dTTP in PCR; incorporated into amplicons making them susceptible to UNG degradation [9] [12] | Marking newly synthesized PCR products for subsequent enzymatic degradation [9] |
| Synthetic DNA Spike-Ins | Engineered DNA fragments that compete with contaminants during amplification; enable quantification [10] | Amplicon sequencing workflows; low template samples [10] |
| Aerosol-Resistant Filter Tips | Prevent aerosol-mediated carryover during pipetting; block contamination of pipette shafts [10] | All liquid handling steps in PCR setup; nucleic acid extraction [10] |
| Sodium Hypochlorite (Bleach) | Chemical decontamination of work surfaces; degrades DNA contaminants [9] | Routine cleaning of PCR work benches and equipment [9] |
| UNG-Compatible DNA Polymerases | Thermostable polymerases compatible with dUTP incorporation and UNG treatment [9] | PCR applications requiring carryover prevention [9] [12] |
| DNA Decontamination Reagents (e.g., DNA-ExitusPlus) | Chemical degradation of contaminating DNA on surfaces and equipment | Laboratory cleaning and equipment decontamination |
Effective management of contamination sources in PCR workflows requires a comprehensive, multi-layered approach addressing amplicons, plasmids, and cross-contamination vectors. The extreme sensitivity of molecular amplification techniques necessitates rigorous implementation of physical containment strategies, enzymatic control methods, and continuous monitoring through appropriate negative controls. Recent methodological advances, including single-tube nested PCR formats, real-time detection platforms, and engineered primer systems, provide powerful tools for reducing contamination risk while maintaining or enhancing analytical sensitivity. For researchers operating in regulatory contexts or diagnostic settings, systematic adoption of these contamination control measures is essential for generating reliable, reproducible results and fulfilling mission-critical objectives. As molecular technologies continue to evolve, maintaining vigilance against contamination sources remains fundamental to scientific integrity across research and applied diagnostic fields.
The Exponential Nature of Amplicon Carryover and False-Positives
In the realm of molecular diagnostics and research, polymerase chain reaction (PCR) techniques offer unparalleled sensitivity for detecting target nucleic acid sequences. Nested PCR, which employs two successive rounds of amplification with two sets of primers, provides exceptional sensitivity and specificity for low-abundance targets [16]. However, this very sensitivity creates a critical vulnerability: the exponential risk of amplicon carryover contamination. Each PCR reaction can generate up to 10⁹ copies of amplification products (amplicons) [17]. These amplicons, if accidentally introduced into subsequent reactions, become templates for further amplification, leading to false-positive results that compromise diagnostic accuracy and research integrity [10] [17]. This technical guide examines the mechanisms underlying this exponential contamination risk and outlines evidence-based strategies for its control, framed within ongoing research on nested PCR open-tube contamination risks.
The Amplification Cascade and Contamination Dynamics
The Nested PCR Process
Nested PCR significantly enhances detection sensitivity by performing two consecutive amplifications. The first round uses an outer primer pair to amplify the primary target, followed by a second round using inner primers that bind within the first amplicon [18] [16]. This nested approach achieves a theoretical increase in sensitivity of 2-3 orders of magnitude compared to conventional PCR [19].
The fundamental vulnerability emerges between the first and second rounds of amplification, where the reaction tube must be opened to transfer the initial PCR product. This step risks releasing billions of amplicons into the laboratory environment [17]. These aerosolized amplicons then contaminate reagents, equipment, and ventilation systems, becoming templates for future reactions and generating false positives that are indistinguishable from true signals [17].
Quantitative Assessment of Contamination Risks
The table below summarizes quantitative findings on contamination levels and control efficacy from recent studies:
Table 1: Quantitative Data on Amplicon Contamination and Control
| Experimental Condition | Contamination Level (T Value%) | Detection Limit | Reference |
|---|---|---|---|
| Standard AMP-Seq workflow | 0.19% - 17.99% (variable) | Not specified | [10] |
| ccAMP-Seq workflow | ≥22-fold reduction | 1 copy/reaction | [10] |
| Nested multiplex PCR for Candida | Not specified | 4 genomes/mL of blood | [20] |
| Culture-based methods (comparator) | Not applicable | ~50% sensitivity (in neonates) | [20] |
The "T value" referenced in the table represents the ratio of reads mapped to target loci versus total qualifying reads, serving as a quantitative measure of contamination [10]. The dramatic variability in standard AMP-Seq workflow contamination levels (0.19% to 17.99%) underscores the unpredictable yet pervasive nature of amplicon carryover [10].
Understanding contamination sources is fundamental to developing effective prevention strategies. Research has identified multiple critical points where carryover contamination occurs:
- Aerosols: Amplicons can aerosolize during tube opening, especially after the first round of nested PCR. Studies demonstrate that even laboratory air can contain detectable levels of contaminating DNA [10].
- Reagents and Equipment: Contaminated master mixes, pipettes, and other laboratory equipment serve as significant contamination reservoirs [10]. One study found that original PCR master mix reagents showed high contamination levels (mean T value 9.18%), while newly purchased mixes showed minimal contamination (mean T value 0.01%) [10].
- Physical Transfer: The nested PCR process inherently requires transferring first-round products to second-round reactions, creating direct contamination opportunities [18] [16].
Table 2: Contamination Control Measures and Their Efficacy
| Control Measure | Mechanism of Action | Implementation Considerations | Efficacy |
|---|---|---|---|
| Physical Separation | Unidirectional workflow through physically isolated rooms | Requires dedicated equipment and supplies for each area | Significantly reduces cross-contamination [10] [17] |
| UNG/dUTP System | Incorporates dUTP into amplicons; UNG enzymatically digests contaminating U-containing products before amplification | Requires optimization of UNG and dUTP concentrations for each assay | Most widely used contamination control technique; effective for most applications [10] [17] |
| Synthetic DNA Spike-Ins | Competitive amplification with contaminating DNA; enables quantification | Must be significantly different from original sequence but with identical primer-binding regions | Reduces contamination levels while improving quantification [10] |
| UV Irradiation | Induces thymidine dimers, rendering contaminating DNA unamplifiable | Less effective for short (<300bp) or G+C-rich templates | Simple, inexpensive, but suboptimal efficacy [17] |
The following diagram illustrates the complete contamination-controlled workflow integrating these measures:
Experimental Protocols for Contamination Control
Carryover Contamination-Controlled Amplicon Sequencing (ccAMP-Seq)
The ccAMP-Seq workflow represents a comprehensive approach to contamination control, integrating multiple strategies [10]:
- Physical Isolation: Perform reagent preparation, sample processing, amplification, and product analysis in separate, physically isolated rooms with unidirectional workflow [10] [17].
- Laboratory Preparation: Treat all work surfaces with 10% sodium hypochlorite (bleach) followed by ethanol to degrade contaminating nucleic acids [17].
- Reaction Setup:
- Use aerosol-filter pipette tips for all liquid handling [10].
- Incorporate dUTP in place of dTTP in the PCR master mix [10].
- Add uracil-DNA glycosylase (UDG) to digest contaminating amplicons from previous reactions [10] [17].
- Include synthetic DNA spike-ins (10,000 copies/reaction) to compete with contaminants and enable quantification [10].
- Thermal Cycling:
- Incubate at room temperature for 10 minutes to allow UNG enzymatic digestion of contaminants [17].
- Proceed with standard amplification protocols: initial denaturation (95°C for 2 min), 30-35 cycles of denaturation (95°C for 30 sec), annealing (45-60°C for 30 sec), and extension (72°C for 1 min) [18].
- Data Analysis: Implement bioinformatics pipelines to identify and remove reads originating from contamination based on spike-in ratios and sequence signatures [10].
Multiplex Nested PCR for Candida Detection
This protocol demonstrates a contamination-controlled approach for pathogen detection [20]:
DNA Extraction:
- Process 1-2 mL blood samples with blood lysis solution and centrifugation.
- Digest with lyticase (250 U/mL) and 2% β-mercaptoethanol at 37°C for 2 hours to break fungal cell walls.
- Purify DNA using commercial kits (e.g., QIAamp DNA mini kit).
First Round Amplification:
- Prepare 25 μL reaction with: 1× PCR buffer, 200 μM dNTPs, 1.5 mM MgCl₂, 0.2 μM universal fungal primers (ITS1 and ITS4), 1.25 U DNA polymerase, and 50 ng template DNA.
- Cycling conditions: 95°C for 5 min; 35 cycles of 95°C for 45 sec, 50°C for 45 sec, 72°C for 45 sec; final extension at 72°C for 5 min.
Second Round Amplification:
- Prepare separate multiplex reactions for different Candida species.
- Use 2 μL of 1:100 dilution of first-round product as template.
- Apply touchdown cycling: 95°C for 5 min; 10 cycles of 95°C for 45 sec, 67-58°C for 45 sec (decreasing 1°C/cycle), 72°C for 45 sec; 20 cycles of 95°C for 45 sec, 58°C for 45 sec, 72°C for 45 sec; final extension at 72°C for 5 min.
Product Detection: Analyze on 2.5% agarose gels stained with fluorescent nucleic acid dye.
The Scientist's Toolkit: Essential Research Reagents
Table 3: Essential Reagents for Contamination-Controlled Nested PCR
| Reagent/Category | Specific Examples | Function & Importance |
|---|---|---|
| Primers | Outer primers, Inner (nested) primers, Multiplex primer sets | Specific target amplification; nested primers increase specificity and sensitivity [18] [16] |
| Enzymes | Thermostable DNA polymerase, Uracil-N-Glycosylase (UNG), Reverse transcriptase (for RT-nested PCR) | DNA amplification; UNG critically digests contaminating dUTP-containing amplicons [10] [17] [16] |
| Nucleotide Analogs | dUTP substitution for dTTP | Creates amplicons susceptible to UNG digestion while maintaining amplification efficiency [10] [17] |
| Contamination Controls | Synthetic DNA spike-ins, 8-methoxypsoralen, Psoralen compounds | Competitive amplification with contaminants; psoralen compounds intercalate and crosslink DNA when exposed to UV, preventing amplification [10] [21] |
| Physical Separation Aids | Aerosol-filter pipette tips, Dedicated equipment for separate rooms, Sodium hypochlorite (bleach) | Prevent aerosol contamination; bleach degrades nucleic acids through oxidation [10] [17] |
The exponential nature of amplicon carryover contamination presents a fundamental challenge in molecular diagnostics, particularly for nested PCR applications requiring high sensitivity. The integration of multiple contamination control strategies—physical separation, UNG/dUTP systems, synthetic spike-ins, and rigorous laboratory practices—provides a robust defense against false-positive results [10] [17]. Ongoing research focuses on closed-tube nested PCR systems and advanced bioinformatics solutions to further mitigate contamination risks while maintaining the exceptional sensitivity required for detecting low-abundance targets in clinical and research settings. As molecular techniques continue to evolve toward higher sensitivity and multiplexing capabilities, vigilant contamination control remains paramount for generating reliable, reproducible results.
Impact on Diagnostic Reliability and Patient Outcomes
Nested Polymerase Chain Reaction (nested PCR) is a powerful molecular technique designed to significantly enhance the sensitivity and specificity of pathogen detection by employing two successive rounds of amplification with two sets of primers [22]. Despite its diagnostic power, a significant challenge inherent to traditional nested PCR is the heightened risk of open-tube contamination, also known as carryover contamination [23] [24]. This occurs when amplified products (amplicons) from the first round of PCR are inadvertently transferred into the second reaction tube, potentially leading to false-positive results [23]. Such diagnostic inaccuracies can directly impact patient outcomes by triggering unnecessary treatments, delaying correct diagnosis, and misguiding public health interventions [25] [15]. This whitepaper examines the impact of nested PCR contamination on diagnostic reliability, explores advanced methodological refinements to mitigate these risks, and discusses the subsequent implications for patient care and drug development.
The Core Contamination Challenge in Traditional Nested PCR
The Mechanism of Contamination
In a standard nested PCR protocol, the reaction is physically split into two separate tubes. The first round of amplification uses an outer set of primers to generate an initial amplicon. A sample of this product must then be manually transferred to a new tube containing the inner primers for the second round of amplification [22]. It is during this transfer step that aerosolized droplets or pipetting errors can lead to the contamination of laboratory surfaces, equipment, and reagents with the high-concentration PCR products [23] [24]. These contaminating molecules can then serve as templates in subsequent diagnostic runs, generating false-positive signals in samples that do not actually contain the target pathogen.
Direct Consequences for Diagnostic Reliability
The diagnostic reliability of any test is paramount. Contamination undermines this by:
- Reducing Specificity: False positives compromise the test's ability to correctly identify disease-free individuals [25].
- Creating Ambiguity: It becomes difficult to distinguish between a true, low-level infection and background contamination, complicating clinical decision-making [15].
Mitigation Strategies and Technical Refinements
To combat contamination, several sophisticated methodological refinements have been developed. The table below summarizes the key characteristics of traditional nested PCR versus two major improved formats.
Table 1: Comparison of Nested PCR Formats and Their Contamination Risk Profiles
| Feature | Traditional Two-Tube Nested PCR | Single-Tube Nested PCR | Single-Tube Balanced Heminested PCR |
|---|---|---|---|
| Procedure | Two physically separate amplification reactions | Two sequential reactions in a single, closed tube | Two sequential reactions in a single, closed tube |
| Tube Transfer | Required (high contamination risk) | Not required | Not required |
| Contamination Risk | High [23] | Significantly Reduced [23] | Significantly Reduced [12] |
| Key Mechanism | Manual transfer of first-round product | Use of primers with different melting temperatures [23] | Use of a chimeric primer to ensure balanced amplification [12] |
| Sensitivity | High (e.g., detects 10 fg DNA [7]) | High (e.g., detects 1 fg DNA [26]) | Higher than standard heminested (75% vs 60% in sputum samples [12]) |
Single-Tube Nested PCR
This approach confines both amplification rounds within a single, sealed tube. The outer and inner primer sets are added simultaneously at the start, but they are designed to function at different annealing temperatures. The first stage uses a high annealing temperature that only permits the outer primers to bind. This is followed by a second stage with a lower annealing temperature that allows the inner primers to amplify the product generated in the first stage [23] [26]. By eliminating tube opening, this method drastically reduces the risk of carryover contamination while retaining high sensitivity, as demonstrated in the detection of Echinococcus spp. and other pathogens [23] [26].
Balanced Heminested PCR
A further innovation, Balanced Heminested PCR, addresses inefficiency in standard single-tube protocols. Traditional heminested PCR uses one outer primer and one inner primer in the second round, leading to asymmetric amplification and lower yields. The balanced version replaces one outer primer with a "chimeric primer" that contains the sequence of the inner primer attached to the 5' end of the opposite outer primer sequence [12]. This design ensures that both DNA strands are amplified efficiently during the second stage, boosting sensitivity without compromising the closed-tube workflow. A study on tuberculosis detection showed this method increased sensitivity from 60% to 75% in smear-negative sputum samples while maintaining 100% specificity [12].
Workflow and Contamination Control
The following diagram illustrates the procedural differences between the traditional and single-tube methods, highlighting key contamination risk points and their mitigation.
Experimental Protocols for Contamination Control
Protocol: Single-Tube Nested PCR for Echinococcus Detection
This protocol, adapted from Zhang et al., demonstrates a specific implementation of the single-tube method [23].
- Primer Design: Two primer sets targeting the COI gene were designed. The outer primers produce a larger fragment, while the inner (nested) primers bind internally to generate a shorter, specific product.
- Reaction Setup: The 25 μL reaction mixture includes:
- Template DNA: 1-2 μL
- Primers: Both outer and inner primer sets are added simultaneously.
- PCR Components: 1× PCR buffer, 1.5-2.0 mM MgCl₂, 200 μM dNTPs, and 1.25 U of Taq DNA polymerase.
- Thermal Cycling Conditions:
- Initial Denaturation: 94°C for 2 minutes.
- First Round (15-30 cycles): Denaturation at 94°C for 30s, Annealing at a higher temperature (e.g., 65°C) for 30s, Extension at 72°C for 1 minute. This stage favors outer primer binding.
- Second Round (15-30 cycles): Denaturation at 94°C for 30s, Annealing at a lower, optimized temperature (e.g., 48°C) for 30s, Extension at 72°C for 1 minute. This stage allows inner primers to bind and amplify.
- Final Extension: 72°C for 5 minutes.
- Contamination Control: The use of a single, sealed tube for the entire process is the primary control measure.
Protocol: Single-Tube Balanced Heminested PCR for Tuberculosis
This protocol, from González et al., highlights the primer design critical to the balanced technique [12].
- Chimeric Primer Design: The outer primer Tb850 is replaced by primer Tb505-850, which is a fusion of the sequences of the inner primer Tb505 and the outer primer Tb850.
- Reaction Setup: The 50 μL reaction contains:
- Template: 20 μL of prepared sample.
- Enzymes: 2.5 U Taq DNA polymerase and 0.5 U Uracil-N-glycosylase (UNG) to degrade carryover contaminants from previous PCRs.
- dNTPs: 200 μM each dATP, dCTP, dGTP; 600 μM dUTP (incorporation of dUTP allows UNG to function).
- Primers: 100 nM chimeric primer (Tb505-850) and 10 nM inner primer (Tb294).
- Thermal Cycling Conditions:
- UNG Incubation: 25°C for 15 minutes (destroys contaminating dUTP-containing DNA).
- Enzyme Inactivation & Initial Denaturation: 94°C for 5 minutes.
- First Stage (30 cycles): 94°C for 45s, 72°C for 1.5 min (combined annealing/extension).
- Second Stage (30 cycles): 94°C for 45s, 55°C for 1 min, 72°C for 30s.
- Key Feature: The chimeric primer ensures that both the first and second rounds of amplification proceed with balanced, efficient primer binding, enhancing sensitivity in a closed-tube system.
Essential Research Reagent Solutions
The following reagents are critical for implementing robust and reliable nested PCR assays, particularly those designed to minimize contamination.
Table 2: Key Research Reagents for Contamination-Controlled Nested PCR
| Reagent / Material | Critical Function | Application Example |
|---|---|---|
| Two Sets of Sequence-Specific Primers | Outer primers for initial target enrichment; inner (nested) primers for specific second-round amplification [23] [20]. | Fundamental to all nested PCR protocols. |
| Thermostable DNA Polymerase (e.g., Taq) | Enzyme that catalyzes the DNA synthesis reaction during thermal cycling [23] [12]. | Essential for PCR amplification. |
| Deoxynucleoside Triphosphates (dNTPs) | The building blocks (A, T, C, G) for synthesizing new DNA strands [22] [12]. | Essential for PCR amplification. |
| Uracil-N-Glycosylase (UNG) & dUTP | Contamination control system; dUTP is incorporated into PCR products, and UNG enzymatically degrades these products before amplification, preventing carryover [12]. | Used in Balanced Heminested PCR to destroy contaminating amplicons [12]. |
| Optimized PCR Buffer with MgCl₂ | Provides the optimal chemical environment (pH, ionic strength) and magnesium ions, a essential cofactor for the polymerase [23] [20]. | Critical for reaction efficiency and specificity. |
| Chimeric Primers | Specialized primers that combine inner and outer sequences to enable balanced, single-tube heminested amplification [12]. | Used in Balanced Heminested PCR to improve sensitivity [12]. |
Impact on Patient Outcomes and Drug Development
The reliability of diagnostic data has a direct and profound cascade effect on clinical and research outcomes.
- Informed Treatment Decisions: Accurate diagnosis prevents the misuse of antibiotics, antifungals, or antiparasitics, avoiding unnecessary side effects, drug resistance, and healthcare costs [15]. For example, reliable detection of Helicobacter pylori or Mycobacterium tuberculosis ensures that only infected patients receive specific, often lengthy, eradication therapies [25] [12].
- Accurate Disease Surveillance and Outbreak Control: Contamination-driven false positives can misrepresent the true prevalence of a disease, leading to misallocation of public health resources. Robust diagnostic methods are crucial for effective disease monitoring programs, as seen in efforts to control cutaneous leishmaniasis in Sri Lanka [7].
- Accelerating Drug Development: In clinical trials for new therapeutics, the misclassification of patients due to false-positive or false-negative diagnostic results can obscure the true efficacy of a drug. A highly specific and sensitive nested PCR assay ensures that patient cohorts are correctly defined, leading to more reliable trial results and a clearer path for drug evaluation and approval [27] [20].
The open-tube contamination risk associated with traditional nested PCR poses a significant threat to diagnostic integrity, with tangible consequences for patient management and medical research. The development and adoption of refined techniques, such as single-tube and balanced heminested PCR, represent critical advancements in molecular diagnostics. By integrating these closed-tube methodologies and robust reagent systems like UNG, laboratories can harness the exceptional sensitivity of nested PCR while minimizing the risk of false positives. The ongoing commitment to optimizing these protocols is fundamental to improving diagnostic reliability, which in turn directly fosters better patient outcomes and supports the rigorous process of drug development.
Proactive Contamination Control: Laboratory Design and Workflow Strategies
Implementing Unidirectional Workflow and Physical Laboratory Separation
The pervasive challenge of amplicon contamination represents one of the most significant technical hurdles in molecular diagnostics and genetic research, particularly when working with highly sensitive amplification techniques like nested Polymerase Chain Reaction (PCR). The implementation of robust preventative strategies centered on unidirectional workflow and physical laboratory separation has emerged as a critical countermeasure against these contamination risks. This technical guide examines the systematic application of these principles within the specific context of nested PCR protocols, where the requirement for post-amplification tube opening creates substantial contamination vulnerability.
Nested PCR, through its two-round amplification process, achieves exceptional sensitivity—often 1000-fold greater than conventional PCR—but this very sensitivity renders it extraordinarily susceptible to false positives resulting from amplicon carryover contamination [23] [12]. The opening of reaction tubes between amplification rounds generates aerosolized amplicons that can persist in laboratory environments and contaminate subsequent reactions, compromising experimental integrity and diagnostic accuracy. This guide establishes a comprehensive framework for implementing engineering and procedural controls that effectively mitigate these risks while maintaining the analytical sensitivity that makes nested PCR invaluable for detecting low-abundance targets in clinical, forensic, and research applications.
The Contamination Challenge in Nested PCR
Vulnerability of Open-Tube Protocols
The fundamental vulnerability of conventional nested PCR stems from its requirement to transfer amplification products from the first reaction into a second reaction tube containing nested primers. This tube opening process occurs after the initial amplification has generated millions to billions of target DNA copies (amplicons), creating significant contamination potential through the generation of aerosolized droplets [28]. These microscopic droplets, containing concentrated amplification products, can contaminate laboratory surfaces, equipment, ventilation systems, and subsequently infiltrate reagent stocks or subsequent reactions [29]. Single-tube nested PCR systems represent a partial engineering solution to this problem by containing both amplification rounds within a sealed vessel, yet contamination risks persist during initial sample preparation and post-amplification analysis [23] [12].
Consequences of Contamination
The ramifications of PCR contamination extend beyond mere experimental inconvenience, potentially generating profoundly misleading results with significant practical consequences:
- False Positives in Diagnostic Settings: In clinical diagnostics, contamination-induced false positives can lead to misdiagnosis, unnecessary treatments, and psychological distress for patients. Historical precedents include documented cases of Lyme disease misdiagnosis resulting from PCR contamination, in one instance resulting in fatal overtreatment [29].
- Compromised Research Integrity: In research contexts, contamination undermines experimental validity, potentially leading to erroneous conclusions, retractions, and misdirected scientific resources.
- Operational Disruption: Contamination events necessitate extensive remedial actions, including reagent disposal, laboratory decontamination, and experimental repetition, resulting in significant time and financial costs [30].
Table 1: Quantitative Comparison of Nested PCR Formats and Contamination Risk
| Parameter | Conventional Two-Tube Nested PCR | Single-Tube Nested PCR | Single-Tube Balanced Heminested PCR |
|---|---|---|---|
| Theoretical Sensitivity | ~1000x improvement over conventional PCR | Comparable to conventional nested PCR | 75% sensitivity vs. 60% for standard heminested (in tuberculosis detection) [12] |
| Relative Contamination Risk | High (tube transfer required) | Moderate (limited to initial setup and final analysis) | Moderate (limited to initial setup and final analysis) |
| Amplicon Aerosol Exposure | High probability during inter-round transfer | Minimal during amplification | Minimal during amplification |
| Implementation Complexity | Moderate | Low | Low-Moderate |
| Suitable Applications | All nested PCR applications | Routine diagnostic detection | High-sensitivity detection of low-abundance targets |
Core Principles: Unidirectional Workflow and Physical Separation
Conceptual Foundation
The fundamental principle underlying effective contamination control involves establishing a strict unilateral movement of materials and personnel through physically segregated laboratory areas dedicated to sequential stages of the PCR process. This systematic approach creates a directional barrier against amplicon infiltration into pre-amplification areas [29] [31]. The conceptual framework parallels industrial separation processes where distinct product mixtures are generated through sequential partitioning operations [32]. In the nested PCR context, this translates to separating the amplification process into discrete physical locations that prevent retrograde amplicon migration toward template preparation areas.
Unidirectional Workflow
The unidirectional workflow model enforces strict one-way movement from "clean" pre-amplification areas to "potentially contaminated" post-amplification areas, with no reverse movement except under controlled conditions involving complete decontamination and clothing changes [29]. This approach mirrors unidirectional data flow architectures in software engineering that prevent feedback loops and maintain system integrity [33], but applied here to physical processes and molecular biology workflows. Personnel must complete all pre-amplification work before entering post-amplification areas, and may not return to pre-amplification areas on the same day without implementing stringent decontamination protocols [31].
Physical Laboratory Separation
Ideal implementation involves four physically separated, dedicated rooms or spaces with independent equipment and supplies [29] [30]. When spatial constraints preclude this ideal configuration, a minimum of two separated areas (pre- and post-amplification) establishes the essential barrier function. Critical separation must be maintained between areas handling template DNA and those processing amplification products, as the latter represent the primary contamination reservoir [28].
Diagram 1: Nested PCR laboratory workflow with physical separation and unidirectional movement.
Implementation Framework
Laboratory Design Specifications
Effective implementation requires meticulous planning of laboratory infrastructure with clear physical boundaries between designated areas. While ideal configurations employ dedicated rooms with separate ventilation systems, practical adaptations can achieve effective separation through strategic spatial organization [29].
Table 2: Laboratory Zone Specifications for Nested PCR Workflows
| Laboratory Zone | Primary Functions | Physical Requirements | Contamination Control Measures |
|---|---|---|---|
| Reagent Preparation | Formulating master mixes, aliquoting reagents, preparing reaction components | Dedicated bench space, UV sterilization capability, laminar flow hood [29] | Positive airflow, regular UV decontamination, dedicated equipment |
| Sample Preparation & DNA Extraction | Processing raw samples, nucleic acid extraction, template quantification | Separate room or enclosed space, biological safety cabinet for potentially infectious samples | Chemical decontamination protocols, aerosol-resistant tips, surface decontamination |
| PCR Setup | Assembling amplification reactions, adding template to master mixes | Dedicated bench space, preferably within laminar flow hood or PCR workstation [29] | Positive airflow environment, dedicated pipettes, pre-aliquoted reagents |
| Amplification | Thermal cycling, reaction incubation | Designated thermal cycler location, separate from setup and post-analysis areas | Contained amplicon generation, limited access during cycling |
| Post-Amplification Analysis | Gel electrophoresis, amplicon detection, product purification | Physically separated room with dedicated equipment, negative airflow relative to clean areas [31] | Strict containment practices, no equipment sharing with pre-amplification areas |
Equipment and Consumables Management
Dedicated equipment allocation represents a critical implementation component, preventing amplicon transfer between laboratory zones through contaminated instruments [28] [30].
- Pipettes: Each laboratory zone must have dedicated pipette sets clearly marked for exclusive use within that area. Post-amplification pipettes must never enter pre-amplification areas.
- Centrifuges and Vortex Mixers: Ideally, separate units should be allocated to pre- and post-amplification areas. When sharing is unavoidable, instruments must be thoroughly decontaminated with 10% bleach solution and UV irradiation before returning to clean areas [31].
- Consumables: Filtered pipette tips are essential throughout all workflow stages to prevent aerosol contamination of pipette shafts [30]. Reagents should be aliquoted into single-use volumes to prevent cross-contamination of stock solutions [28].
- Personal Protective Equipment: Dedicated lab coats must be assigned to each area, with color-coding providing clear visual identification. Gloves must be changed frequently, particularly when moving between different workflow stages or after potential contamination events [29].
Procedural Controls and Techniques
Meticulous technique complements physical controls in preventing contamination throughout the nested PCR process:
- Reagent Assembly: Always prepare master mixes in the reagent preparation area before moving to the PCR setup area for template addition [28].
- Template Addition: Add template DNA last to completely assembled reaction mixtures, preferably within a laminar flow hood or PCR workstation [29].
- Tube Handling: Avoid flicking tubes open; carefully open one tube at a time using both hands to minimize aerosol generation [28].
- Workflow Discipline: Maintain strict adherence to the unidirectional workflow pattern without exception. Never move equipment, supplies, or personnel from post-amplification to pre-amplification areas without comprehensive decontamination [31].
Technical Protocols for Contamination Control
Surface Decontamination Procedures
Regular and systematic decontamination of all work surfaces and equipment is essential for maintaining contamination-free environments. Different contamination scenarios require specific decontamination approaches:
- Routine Surface Decontamination: Wipe all work surfaces with freshly prepared 10% bleach solution before and after each use, allowing 10-15 minutes of contact time before rinsing with deionized water [31] [30]. Fresh bleach solutions must be prepared regularly due to the instability of sodium hypochlorite in diluted form.
- Equipment Decontamination: Dedicate equipment to specific areas whenever possible. For shared equipment that must move between areas, implement comprehensive decontamination protocols using 10% bleach solution followed by 70% ethanol rinse [31].
- UV Irradiation: Use UV light for decontaminating laminar flow hoods, PCR workstations, and other enclosed spaces between uses. UV exposure effectively cross-links any contaminating DNA, rendering it non-amplifiable [29].
Molecular Controls for Contamination Prevention
Technical controls implemented directly within the PCR chemistry provide additional protection against carryover contamination:
- Uracil-N-Glycosylase (UNG) System: Incorporate dUTP instead of dTTP in amplification reactions together with UNG enzyme. UNG selectively degrades uracil-containing DNA from previous amplifications before thermal cycling begins, while being inactivated at PCR temperatures to allow amplification of the current reaction [12] [31]. This method is particularly effective against carryover contamination but requires thymine-rich amplification products for optimal efficiency.
- Negative Controls: Always include multiple no-template controls (NTCs) containing all reaction components except template DNA. These controls should be distributed throughout the plate or run to detect spatial contamination patterns [28] [30]. Systematic NTC analysis can help identify specific contamination sources based on amplification patterns.
Single-Tube Nested PCR Protocol
The development of single-tube nested PCR systems represents a significant engineering control against contamination by eliminating the tube opening step between amplification rounds [23] [12]. The following protocol outlines the implementation of this technique:
Primer Design Strategy:
- Design two primer sets (outer and inner) with distinct annealing temperatures
- Outer primers should have higher annealing temperatures than inner primers
- Alternatively, utilize balanced primer systems where modified outer primers contain inner primer sequences at their 5' ends [12]
Reaction Assembly:
- In the PCR setup area, prepare master mix containing:
- 1X PCR buffer
- 200μM each dNTP (or dUTP for UNG system)
- 1.5-2.5mM MgCl₂ (concentration requires optimization)
- 0.5-1.0U UNG (if using carryover prevention system)
- Outer primers (0.1-0.5μM each)
- Inner primers (0.01-0.1μM each)
- 0.5-1.25U DNA polymerase
- Nuclease-free water to volume
Aliquot master mix into reaction tubes
Add template DNA as the final component (5-10% of total reaction volume)
Thermal Cycling Parameters:
- UNG incubation: 25°C for 15 minutes (if using UNG system)
- Initial denaturation: 94°C for 5 minutes
- First stage amplification (outer primers):
- Denaturation: 94°C for 45 seconds
- Annealing/Extension: 72°C for 1.5 minutes (primer-specific)
- 30 cycles
- Second stage amplification (inner primers):
- Denaturation: 94°C for 45 seconds
- Annealing: 55°C for 1 minute (temperature requires optimization)
- Extension: 72°C for 30 seconds
- 30 cycles
- Final extension: 72°C for 5-10 minutes
This single-tube approach maintains the sensitivity advantages of nested PCR while substantially reducing contamination risk by eliminating inter-round tube transfer [23].
The Scientist's Toolkit: Essential Research Reagent Solutions
Table 3: Essential Materials and Reagents for Contamination-Free Nested PCR
| Item | Specification | Function in Contamination Control |
|---|---|---|
| Laminar Flow Hood/PCR Workstation | HEPA or ULPA filtration, optional UV light source [29] | Creates particulate-free workspace for reagent preparation and PCR setup; physically separates operator from reactions |
| Aerosol-Resistant Filter Tips | Maximum aerosol barrier protection | Prevents particulate and amplicon contamination of pipette shafts and subsequent reactions |
| UNG System | Uracil-N-Glycosylase enzyme + dUTP nucleotide mix [12] [31] | Enzymatically degrades carryover contamination from previous PCR amplifications while preserving current reaction |
| Bleach Solution | Freshly prepared 10% sodium hypochlorite [31] [30] | Chemical decontamination of surfaces and equipment through oxidative degradation of DNA |
| Dedicated Laboratory Coats | Color-coded for different laboratory areas [29] | Prevents clothing-mediated transfer of amplicons between laboratory zones |
| Aliquoted Reagents | Single-use volumes of all critical reagents [28] [30] | Prevents cross-contamination of stock solutions; contains potential contamination to single aliquots |
| No-Template Control (NTC) Reagents | Identical to test reactions except for template DNA [28] [31] | Monitors for contamination in reagent stocks, laboratory environment, and technique |
| Surface Decontamination Solutions | DNA-away or similar commercial DNA-degrading solutions | Alternative to bleach for surface decontamination; effective against adherent DNA |
Monitoring and Troubleshooting
Contamination Incident Management
Despite rigorous prevention efforts, contamination events may still occur. Systematic response protocols minimize impact and prevent recurrence:
- Immediate Response: Discard all potentially contaminated reagents and consumables when contamination is detected in negative controls [30].
- Comprehensive Decontamination: Thoroughly clean all work surfaces, equipment, and laboratory coats with 10% bleach solution [30].
- Reagent Replacement: Replace all opened reagent aliquots and consumables with fresh stocks from unopened containers [28].
- Process Review: Document the contamination incident and review laboratory practices to identify potential breaches in protocol or workflow [30].
Systematic Monitoring Program
Implement regular quality control assessments to detect subclinical contamination before it compromises experimental results:
- Scheduled Environmental Monitoring: Use surface swabs followed by amplification to detect amplicon accumulation in pre-amplification areas.
- Reagent Quality Control: Periodically test reagent aliquots without template to verify absence of contamination.
- Personnel Technique Assessment: Conduct periodic evaluations of technique and workflow adherence through direct observation and performance testing.
The implementation of rigorous unidirectional workflow and physical laboratory separation represents a foundational requirement for reliable nested PCR performance, particularly when working with open-tube protocols. While these systematic controls require significant operational discipline and potentially substantial laboratory reorganization, they provide indispensable protection against the pervasive threat of amplicon contamination. The integration of physical barriers, procedural controls, and molecular techniques establishes a comprehensive defense-in-depth strategy that preserves the exceptional sensitivity of nested amplification while maintaining methodological rigor and result reliability. As molecular diagnostics continues to advance toward increasingly sensitive detection thresholds, these contamination control principles will remain essential for ensuring both research accuracy and diagnostic validity.
The Role of Laminar Flow Hoods and Designated PCR Workstations
In the context of nested polymerase chain reaction (nested PCR) open-tube contamination risk research, maintaining the integrity of samples is paramount. The technique's high sensitivity, achieved through two rounds of amplification, makes it exceptionally vulnerable to cross-contamination from amplified PCR products or environmental DNA [34]. Laminar flow hoods and designated PCR workstations serve as the first line of defense, providing the controlled environments necessary to safeguard sensitive reactions from these pervasive contamination threats. This whitepaper provides an in-depth technical guide for researchers and drug development professionals on selecting and utilizing this critical equipment to ensure the reliability of molecular diagnostics and research outcomes, with a specific focus on mitigating the unique risks associated with open-tube nested PCR procedures.
Equipment Fundamentals: Principles of Airflow and Protection
The core function of both laminar flow hoods and PCR workstations is to maintain a sterile work surface. They achieve this by drawing room air through a High-Efficiency Particulate Air (HEPA) filter, which removes 99.97% of airborne particles as small as 0.3 microns, including dust, bacteria, and fungal spores [35]. This HEPA-filtered air is then supplied to the work area in a laminar, or unidirectional, flow, creating a particle-free environment to protect samples [36] [35].
Laminar Flow Hoods (Clean Benches)
Laminar flow hoods are designed exclusively for product protection. They provide no protection to the user, as the airflow directs aerosols and particulates from the work surface toward the operator [37] [38]. They are ideal for non-hazardous, sensitive procedures such as media preparation, electronics assembly, and plating, but should never be used with infectious, toxic, or radioactive materials [37] [36]. There are two primary configurations, each with distinct advantages:
- Vertical Laminar Flow Hoods: Filtered air flows downward from the top of the cabinet onto the work surface. This design offers a more compact footprint, better vertical clearance for tall equipment, and directs potential particulates away from the user's breathing zone, providing marginally better operator comfort [36] [38]. A potential drawback is that large equipment on the work surface can disrupt the laminar airflow, creating turbulence [36].
- Horizontal Laminar Flow Hoods: Filtered air moves horizontally from the back of the cabinet, across the work surface, and directly toward the operator. This configuration provides a highly uniform airflow with a lower risk of obstruction from equipment, offering excellent product protection and operator visibility [36]. However, because the airflow is directed at the user, it provides the least operator protection and is unsuitable for any hazardous materials [36].
PCR Workstations
PCR workstations are a specialized type of laminar flow enclosure explicitly designed for the setup of polymerase chain reaction assays. Their primary function is to protect samples from contamination during DNA amplification, which is extremely sensitive to cross-contamination by amplicons (amplified PCR products) or environmental DNA [39]. Like standard laminar flow hoods, they do not protect the user from hazardous materials and are not suitable for handling infectious agents [39].
These workstations often incorporate additional decontamination features, most commonly an ultraviolet (UV) germicidal lamp. The UV light (typically at 254 nm) is used to decontaminate exposed work surfaces between processes by breaking up chemical bonds and denaturing DNA and RNA, thereby destroying potential contaminants [39] [40]. It is critical to note that UV light requires direct line of sight to be effective and should not be relied upon as the sole decontamination method; surfaces should always be wiped down with a disinfectant like 70% ethanol prior to and after UV exposure [40].
PCR workstations can be based on two different architectural principles to create a sterile environment [41]:
- Laminar Flow PCR Cabinets: Utilize a constant, unidirectional flow of HEPA-filtered air to sweep particles away from the critical work area.
- Dead Air Enclosures: Rely on the absence of airflow ("dead air") inside the enclosed space to prevent the circulation of particulates, with sterilization achieved through timed UV light exposure between amplifications [41].
Table 1: Comparison of Laminar Flow Hoods, PCR Workstations, and Biosafety Cabinets
| Feature | Laminar Flow Hood (Vertical) | PCR Workstation | Biosafety Cabinet (Class II, Type A2) |
|---|---|---|---|
| Primary Purpose | Product protection | Sample protection from contamination | User, product, and environmental protection [39] |
| Protection Level | Protects work from particulates | Protects samples from particulates & cross-contamination | Protects user from biohazards; protects samples from cross-contamination [39] [37] |
| User Protection | No | No | Yes [39] |
| Airflow Principle | Vertical laminar flow | Vertical laminar flow or dead air [41] | Inflow and downflow; air is HEPA-filtered before recirculation and exhaust [39] |
| UV Light | Sometimes included | Often included for surface decontamination [39] | May be included, but primary protection is via airflow & filtration [39] |
| Ideal Applications | Media prep, tissue culture, electronics | DNA amplification, PCR setup, molecular biology | Microbiological work with pathogens, cell cultures [39] |
| Suitable for Biohazards? | No | No | Yes (Biosafety Level 1-3 agents) [39] |
The Critical Link to Nested PCR Contamination Risks
Nested PCR is a highly sensitive technique that uses two sets of primers to amplify a specific DNA sequence. The process involves a first round of amplification with an outer set of primers, followed by a second round using an inner set of primers that bind within the first PCR product [34]. While this significantly enhances specificity and sensitivity, it also introduces a major contamination risk: the open-tube transfer of the first-round amplification product, which contains a high concentration of the target amplicon, to the second reaction tube [34]. Aerosolized droplets created during this transfer—from pipetting, opening tubes, or even flicking tubes open—are the most significant source of contamination in a PCR laboratory [28]. These aerosols, containing billions of copies of the amplicon, can easily spread to pipettes, bench surfaces, gloves, and laboratory equipment, leading to false-positive results in subsequent experiments [28].
The role of a well-designed PCR workstation or laminar flow hood is to create a physical and aerodynamic barrier that contains and removes these aerosols. The HEPA-filtered laminar airflow acts as a "curtain" that sweeps particles away from the work area and the open tubes, while the UV light helps degrade any DNA contaminants on exposed surfaces between work sessions [39] [40]. Without this controlled environment, the extreme sensitivity of nested PCR becomes its greatest weakness, as it can readily amplify these contaminating amplicons, compromising experimental integrity.
Diagram 1: Nested PCR Aerosol Contamination Pathway
Experimental Protocols for Contamination Control
The following protocols, derived from best practices in molecular biology, are essential for mitigating contamination risks during nested PCR setup.
Protocol 1: Decontamination of the PCR Workstation
Objective: To ensure a sterile work surface before and after PCR setup, preventing the introduction of DNA contaminants.
- Materials: 70% ethanol or commercial DNA decontamination solution (e.g., DNA-away), lint-free wipes, dedicated lab coat, nitrile gloves [40] [28].
- Procedure:
- Pre-Clean: Before beginning work, thoroughly wipe down all interior surfaces of the workstation—including the work surface, sides, and back wall—with 70% ethanol or a DNA-specific decontaminant [40] [28].
- UV Decontamination: If the workstation is equipped with a UV lamp, turn it on for a minimum of 15-20 minutes to irradiate the exposed surfaces. Ensure the sash is closed during this process. Remember that UV light requires direct line of sight and is ineffective on shadowed areas [40].
- Post-Clean: After UV exposure and immediately before starting the PCR setup, wipe down the work surface again with 70% ethanol to remove any DNA fragments denatured by the UV light [40].
- Final Decontamination: Upon completion of work, wipe down all surfaces again with ethanol to remove any potential aerosols created during the procedure.
Protocol 2: Nested PCR Setup with Aerosol Control
Objective: To assemble nested PCR reactions while minimizing the generation and spread of amplicon aerosols.
- Materials: Filter-barrier pipette tips, dedicated pipettors for PCR setup, sterile microfuge tubes, master mix components, outer and inner primers, template DNA [28].
- Procedure:
- Physical Separation: Perform PCR reagent setup in a designated laminar flow PCR workstation located in a separate area from where PCR products (especially first-round amplicons) are analyzed [28]. Store PCR reagents and amplified PCR products in separate refrigerators/freezers [28].
- Aliquot Reagents: Work from small, single-use aliquots of all reagents (water, buffer, dNTPs, polymerase) to prevent contamination of bulk stocks [28].
- Master Mix Preparation: Always use a "master mix" when setting up multiple reactions. Combine all common components (water, buffer, dNTPs, outer primers, polymerase) in a single tube. Mix gently by pipetting to avoid aerosol generation. Pulse-spin the tube in a microcentrifuge to collect liquid from the walls and lid [28].
- Add Template Last: Dispense the master mix into individual PCR tubes. Finally, add the template DNA to each tube, ensuring it is the last component introduced. This practice ensures that any contamination introduced via the pipette when handling the template will not be distributed to all tubes via the master mix [28].
- Careful Tube Handling: Open all tubes carefully using both hands; never flick tubes open with one thumb, as this vigorously aerosolizes the contents [28].
- Post-Amplification Handling: After the first round of amplification, open the tubes in a dedicated area, preferably not in the PCR setup workstation. When transferring the first-round product to the second-round mix, use extreme care and always use fresh filter tips.
Diagram 2: Nested PCR Safe Workflow
The Scientist's Toolkit: Essential Reagents & Materials
The following reagents and materials are critical for implementing an effective contamination control strategy in nested PCR workflows.
Table 2: Essential Research Reagent Solutions for Nested PCR Contamination Control
| Item | Function in Contamination Control |
|---|---|
| HEPA Filter | The core component of a laminar flow system; removes 99.97% of airborne particles ≥0.3 μm, creating a particle-free work surface for sensitive PCR setup [35]. |
| UV Germicidal Lamp | Used within the workstation to decontaminate exposed surfaces between uses by denaturing DNA/RNA through UVC radiation (254 nm), destroying potential amplicon contaminants [39] [40]. |
| 70% Ethanol / DNA Decontaminant | Used for wiping down all surfaces and equipment before and after work. 70% ethanol is effective at denaturing proteins and diluting contaminants, while specialized DNA-away solutions degrade DNA fragments [40] [28]. |
| Filter-Barrier Pipette Tips | Contain a hydrophobic filter that prevents aerosols from contaminating the pipette shaft, which is a major vector for cross-contamination between samples [28]. |
| Dedicated Pipettors | Pipettes used for setting up PCR reactions should never be used for handling post-amplification products. This physically separates pre- and post-PCR workflows [28]. |
| dNTP Mixture | The building blocks (dATP, dCTP, dGTP, dTTP) for DNA synthesis. Aliquot into small, single-use volumes to prevent contamination of the entire stock [28] [34]. |
| Inner & Outer Primers | The two sets of primers required for nested PCR. Like other reagents, these should be aliquoted upon arrival and stored separately from amplified DNA [34]. |
| 10% Bleach Solution | A potent and inexpensive decontaminant for wiping down larger equipment and bench surfaces outside the hood (e.g., centrifuges, vortexers) to degrade any stray DNA amplicons [28]. |
Within the demanding context of nested PCR open-tube contamination risk research, the choice and proper use of a laminar flow hood or designated PCR workstation are non-negotiable. These enclosures provide the foundational controlled environment required to manage the inherent risks of the technique. By understanding the principles of airflow and protection, meticulously applying rigorous experimental protocols for decontamination and setup, and utilizing the correct reagents and materials, researchers can robustly defend their experiments against contamination. This disciplined approach ensures the generation of reliable, reproducible data, thereby upholding the integrity of scientific research and accelerating the pace of drug development and molecular diagnostics.
The exquisite sensitivity of polymerase chain reaction (PCR) is a double-edged sword. While it enables the detection of minute quantities of nucleic acids, this very characteristic makes it exceptionally vulnerable to contamination, especially from previously amplified PCR products (amplicons). This risk is acutely magnified in nested PCR, a technique designed for ultra-sensitive detection. Nested PCR involves a two-stage amplification process where the product of the first PCR is used as a template for a second amplification using primers that bind internally to the first set [42] [16]. This process requires physical transfer of the first-round product to a new reaction tube, creating a significant opportunity for amplicon carryover contamination, which is a premier source of false-positive results [16] [9].
Within a broader thesis on mitigating contamination risks in nested PCR, establishing robust and standard decontamination protocols is not merely a best practice—it is a fundamental requirement for data integrity. This guide details three core decontamination strategies—chemical (bleach), physical (UV irradiation), and enzymatic methods—providing a technical foundation for researchers and drug development professionals to safeguard their experiments and diagnostics.
Core Decontamination Methods
The following sections describe the primary decontamination methods used in molecular biology laboratories. Their efficacy varies based on the application, and a combination of methods is often the most effective strategy.
Chemical Method: Sodium Hypochlorite (Bleach)
Sodium hypochlorite (bleach) is a potent chemical oxidizing agent that efficiently degrades nucleic acids.
- Mechanism of Action: Bleach fragments DNA by oxidizing nucleotide bases, rendering the DNA unamplifiable by PCR [9].
- Protocol and Application: A common and effective practice is to clean laboratory surfaces and equipment with a 10–15% sodium hypochlorite solution, followed by rinsing with 70% ethanol to remove the bleach residue [9]. This two-step process ensures both decontamination and removal of any corrosive residue.
- Efficacy Data: A quantitative study evaluated ten cleaning strategies and found sodium hypochlorite solutions to be among the most effective. For cell-free DNA, a maximum of only 0.3% of the deposited DNA was recovered after decontamination with bleach on plastic, metal, and wood surfaces [43].
Table 1: Efficacy of Selected Decontamination Strategies on Cell-Free DNA
| Cleaning Agent | % DNA Recovered (Plastic) | % DNA Recovered (Metal) | % DNA Recovered (Wood) |
|---|---|---|---|
| Sodium Hypochlorite | ≤ 0.3% | ≤ 0.3% | ≤ 0.3% |
| Trigene | ≤ 0.3% | ≤ 0.3% | ≤ 0.3% |
| Ethanol (70%) | ~16% | ~2% | ~1% |
| Virkon | Information missing | Information missing | Information missing |
| UV Radiation | Information missing | Information missing | Information missing |
Physical Method: Ultraviolet (UV) Irradiation
UV irradiation is a non-contact, convenient method for decontaminating surfaces, consumables, and reagents that cannot be treated with liquids.
- Mechanism of Action: UV light, particularly at a wavelength of 254 nm, introduces thymine-thymine dimers in DNA. This photodamage inhibits polymerase activity during PCR, preventing the amplification of the contaminated DNA [9].
- Protocol and Application: UV irradiation is easily integrated into the laboratory workflow. PCR workstations, pipettes, and consumables (e.g., tube racks, tips) can be exposed to UV light for 5–20 minutes within a UV crosslinker or cabinet [9]. A specific protocol for reagent decontamination suggests that prolonged UV irradiation (up to 1 hour) can be effective, though its efficiency can be reduced by the presence of certain reagents that absorb UV light [44].
- Limitations: A critical limitation of UV irradiation is its diminishing efficiency with short DNA fragments. Studies indicate that it is not efficient enough to degrade short contaminating DNA molecules reliably, which are common in degraded samples or as small amplicons [44].
Enzymatic Method: Uracil-DNA Glycosylase (UNG)
The UNG method is a powerful, pre-emptive technique designed specifically to prevent carryover contamination from previous PCR amplifications.
- Mechanism of Action: This method involves incorporating deoxyuridine triphosphate (dUTP) into all newly synthesized PCR amplicons instead of deoxythymidine triphosphate (dTTP). Before a new PCR is performed, the reaction mixture is treated with the UNG enzyme. UNG recognizes and removes uracil bases from the DNA backbone, fragmenting any contaminating dUTP-containing amplicons from prior reactions. The enzyme is then thermally inactivated during the initial denaturation step of the subsequent PCR, leaving the native, dTTP-containing sample DNA untouched [9].
- Protocol and Application:
- Incorporation: Use a dNTP mixture in PCR where dUTP fully substitutes dTTP.
- Decontamination: In the next PCR setup, add UNG to the master mix and incubate at room temperature (e.g., 25°C) for 10 minutes.
- Inactivation: Heat the reaction to 95°C for 5 minutes to inactivate the UNG before commencing the thermal cycling program [9].
- Limitation: A key limitation of the UNG method is that it is only effective against PCR products generated with dUTP. It cannot eliminate contamination from native DNA or amplicons generated in reactions that used only dTTP [44].
Experimental Protocols for Decontamination Validation
Researchers must validate decontamination protocols in their specific laboratory context. The following workflow, based on published methodologies, provides a framework for such validation.
Diagram 1: Experimental workflow for validating decontamination protocols.
Quantitative Efficacy Testing
A robust method to evaluate decontamination efficiency involves spiking known quantities of DNA onto surfaces, applying the treatment, and quantifying the remaining DNA.
- Sample Preparation: Deposit a known quantity of DNA (e.g., 60 ng of cell-free DNA or a volume of whole blood) onto relevant laboratory surfaces such as plastic, metal, and painted wood. Allow the sample to dry completely [43].
- Application of Treatment: Apply the decontamination agent according to the protocol. For liquid agents, use a calibrated spray bottle and wipe with a standardized technique (e.g., three circular motions with a dust-free paper). Include no-treatment controls to determine the initial DNA quantity [43].
- Sample Collection and Analysis: After the surface has dried, swab the entire contaminated area with a swab moistened with a neutral solution like 0.9% sodium chloride. Extract DNA from the swab and quantify the amount of recovered DNA using a highly sensitive method, such as real-time PCR quantification of mitochondrial DNA [43].
- Data Analysis: Calculate the percentage of DNA recovered for each cleaning strategy compared to the no-treatment control. Effective decontamination strategies will show very low recovery percentages (e.g., <1%) [43].
A Multistrategy Decontamination Procedure for PCR Reagents
Contamination within PCR reagents themselves is a particularly challenging problem. A published multistrategy procedure has demonstrated high efficacy:
- γ-Irradiation: This method introduces double-strand breaks in DNA and is effective for degrading contaminating DNA in many liquid reagents [44].
- UV-Irradiation: Used in conjunction with γ-irradiation to target a broader spectrum of contaminants.
- Enzymatic Treatment with dsDNase: Treatment with a recombinant heat-labile double-strand-specific DNase is highly effective. The key advantage of a heat-labile enzyme is that it can be completely inactivated by a simple heat step (e.g., 5-10 minutes at 65°C) prior to PCR, preventing degradation of the sample DNA and the primers during the amplification reaction [44].
This combined approach has been shown to achieve near-complete reagent decontamination while preserving the efficiency of the PCR, even for the amplification of minute quantities of DNA [44].
The Scientist's Toolkit: Essential Reagents for Decontamination
Table 2: Key Reagents for Laboratory Decontamination
| Reagent/Solution | Function & Application |
|---|---|
| Sodium Hypochlorite (Bleach) | A potent chemical oxidizer for surface decontamination; typically used as a 10-15% solution. [9] |
| Ethanol (70%) | Used to wipe down surfaces after bleach treatment to remove residue; also a general disinfectant. [9] |
| Uracil-DNA Glycosylase (UNG) | An enzyme used in a pre-PCR incubation to selectively fragment carry-over contamination from dUTP-containing amplicons. [9] |
| dUTP | Used to replace dTTP in PCR mixes, allowing future UNG-based degradation of the amplicons to prevent carryover. [9] |
| Double-Strand Specific DNase | An enzyme (often heat-labile) used to degrade contaminating DNA in PCR reagents; inactivated before PCR setup. [44] |
Integrated Contamination Prevention Framework
A successful decontamination strategy relies on integrating multiple methods into a coherent laboratory workflow, rather than relying on a single technique.
Diagram 2: A multi-layered framework for preventing PCR contamination.
- Mechanical Segregation: The cornerstone of contamination prevention is a unidirectional workflow. Laboratories should be physically divided into separate, dedicated areas for sample preparation, PCR mix preparation, amplification, and post-PCR analysis. This prevents amplicons from entering pre-amplification areas [9].
- Closed-Tube Systems: Whenever possible, moving from open-tube nested PCR to single-tube nested real-time PCR or other closed-tube detection formats (e.g., 2D PCR) drastically reduces the risk of amplicon release [9] [45].
- Workflow Integration: Decontamination protocols should be routine. This includes using UV irradiation for cabinets and consumables, the UNG system for all diagnostic PCRs, and regular surface cleaning with bleach. Furthermore, PCR reagents should be acquired from reputable suppliers and, for highly sensitive applications, pre-treated or subjected to in-house decontamination [44].
In the context of sensitive molecular techniques like nested PCR, where the risk of false positives is inherent, rigorous decontamination is non-negotiable. No single method offers a perfect solution; each has its strengths and limitations. Sodium hypochlorite is highly effective for surfaces but corrosive. UV irradiation is convenient but struggles with short DNA fragments. The UNG system is excellent for preventing carryover but is ineffective against native DNA.
Therefore, the most robust defense against contamination is a layered, multistrategy approach that integrates physical laboratory design, chemical and enzymatic decontamination of both surfaces and reagents, and the adoption of closed-tube technologies. By understanding the principles and protocols outlined in this guide, researchers can systematically address contamination risks, thereby ensuring the reliability and credibility of their scientific and diagnostic outcomes.
Best Practices for Reagent and Sample Handling with Filter Tips
In the context of molecular biology research, particularly in sensitive applications like nested PCR, contamination control is paramount for experimental integrity. Nested PCR amplification, with its requirement for opening reaction tubes between amplification rounds, presents a significant contamination risk through aerosolized amplicons [46]. These aerosols, containing billions of copies of the target sequence, can readily contaminate laboratory surfaces, equipment, and reagents, leading to false-positive results in subsequent reactions [28] [47].
Filter tips serve as a primary defense mechanism against this contamination risk. These specialized pipette tips incorporate a barrier filter that prevents aerosols and liquids from entering the pipette barrel during aspiration, thereby protecting both the pipette and subsequent samples from cross-contamination [48] [49]. Within the specific framework of nested PCR contamination risk research, the implementation of filter tips transitions from a recommended practice to an essential component of the experimental workflow, working in concert with physical separation and rigorous decontamination protocols to safeguard results [50].
Understanding Filter Tip Technology and Selection Criteria
Fundamental Principles of Aerosol Barrier Protection
Filter tips function by creating a physical barrier within the tip shaft, typically composed of porous polyethylene or other hydrophobic materials. This barrier is engineered to allow the free passage of air during pipetting while effectively trapping aerosols, liquids, and particulate matter [48]. The filter's efficacy stems from its pore structure, which is small enough to block microscopic droplets (aerosols) that can form during rapid pipetting or when dispensing liquids onto surfaces [51]. These aerosols, if undeterred, could contaminate the pipette's internal mechanism, turning the instrument itself into a source of contamination for future samples.
The necessity of this barrier is particularly pronounced in nested PCR workflows. The initial amplification round generates a high concentration of specific amplicons, which then serve as template for the second round. When tubes are opened to transfer first-round products, the potential for creating contaminated aerosols is substantial [46]. Without proper barrier protection, these amplicons can be drawn into pipette barrels and subsequently released into reagent stocks or other samples, compromising experimental validity [28] [47].
Comprehensive Filter Tip Classification and Performance Characteristics
When selecting filter tips for sensitive molecular applications, researchers must consider multiple performance characteristics to ensure optimal contamination control. The following table summarizes key filter tip types and their specific applications in preventing contamination:
Table 1: Filter Tip Types, Characteristics, and Applications
| Tip Type | Filter Technology | Contamination Protection | Primary Applications | Key Advantages |
|---|---|---|---|---|
| Standard Filter Tips | Porous polyethylene barrier | Prevents aerosol penetration into pipette barrel [48] | Routine molecular biology, PCR setup, nucleic acid handling [49] | Cost-effective for general use; available sterile and DNase/RNase-free |
| Self-Sealing Barrier Tips | Innovative filter creating complete seal | Blocks passage of liquids, aerosols, radioactive isotopes, and biological materials [49] | High-risk nested PCR, radioactive work, infectious agent handling | Superior protection level; prevents liquid aspiration into pipette |
| Low-Retention Filter Tips | Hydrophobic polymer additive + barrier | Reduces sample adhesion to tip interior while providing aerosol protection [48] [49] | Handling precious samples, quantitative assays, forensic analysis | Maximizes sample recovery; maintains accuracy with viscous liquids |
| Solvent-Safe Carbon Tips | Activated carbon barrier | Protects against volatile organic compounds and aggressive solvents [49] | Combinatorial chemistry, organic solvent handling | Prevents pipette damage from corrosive vapors; maintains calibration |
Technical Specifications and Selection Guidelines
Choosing the appropriate filter tip requires careful consideration of both application requirements and compatibility factors. The following technical aspects should guide selection:
- Filter Efficiency: High-quality filter tips should provide >99% efficiency in blocking aerosols across a range of particle sizes, though it's important to note that 100% protection is difficult to achieve across all aerosol particle sizes [51].
- Pipette Compatibility: Universal filter tips with flexible proximal ends (e.g., employing FlexFit technology) can securely fit a wider range of pipette brands and models, ensuring a proper seal that is critical for both accuracy and contamination control [48].
- Sterility Assurance: For PCR and other sensitive applications, filter tips should be certified DNase-, RNase-, and DNA-free, typically achieved through gamma irradiation and manufacturing in controlled environments [48].
- Quality Considerations: Variations in manufacturing quality can affect performance; lower-quality tips may have inconsistent filter placement or material defects that compromise barrier integrity [48].
Integrated Experimental Protocols for Contamination Control
Comprehensive Workflow Design for Nested PCR with Filter Tip Implementation
The following diagram illustrates an integrated experimental workflow that incorporates filter tips as part of a comprehensive contamination control strategy for nested PCR:
Diagram 1: Nested PCR Workflow with Filter Tip Implementation
This workflow highlights the critical control points where filter tips provide essential protection against contamination, particularly when transitioning between PCR rounds where aerosolized amplicons pose the greatest risk [46] [50].
Quantitative Assessment of Filter Tip Efficacy
Research has quantitatively compared the contamination prevention efficacy of filter tips against alternative pipetting systems. The following table summarizes key experimental findings from controlled studies:
Table 2: Experimental Comparison of Contamination Prevention Methods
| Pipetting System | Aerosol Barrier Efficiency | Liquid Aspiration Protection | Experimental Evidence | Limitations |
|---|---|---|---|---|
| Standard Tips (No Filter) | None | None | Control condition showing high contamination rates in PCR assays [28] | Provides no protection; pipette becomes contamination vector |
| Filter Tips | High (but not 100% across all particle sizes) [51] | Partial protection | Significant reduction in false-positive PCR results compared to standard tips [48] | Filter quality varies; may not block smallest aerosol particles |
| Positive Displacement Pipettes | Complete barrier through physical separation | Complete protection | No detectable carryover in radiolabeling studies [51] | Higher cost; requires specialized disposable pistons |
| Combined Approach (Filter Tips + Workflow Separation) | Maximum achievable protection | Enhanced protection | WHO-recommended protocol for molecular testing [50] | Requires strict adherence to unidirectional workflow |
Laboratory Validation Protocol for Filter Tip Performance
Researchers can implement the following experimental protocol to validate filter tip efficacy within their specific laboratory context:
Objective: To quantitatively assess filter tip performance in preventing amplicon carryover contamination in nested PCR workflows.
Materials and Reagents:
- Validated nested PCR assay system with known positive control template
- Two sets of pipettes: one dedicated to pre-PCR work, one for post-PCR work
- Filter tips (test condition) and non-filter tips (control condition)
- PCR reagents: master mix, primers, nucleotides, polymerase
- Gel electrophoresis equipment or real-time PCR system for detection
Methodology:
- Setup Phase: Prepare master mix containing all PCR components except template in a clean, dedicated pre-PCR area using filter tips for all liquid handling [50].
- Template Addition: Split the master mix into two aliquots. To one aliquot, add the positive control template using filter tips. To the second aliquot (negative control), add nuclease-free water using filter tips.
- First Round Amplification: Perform thermal cycling according to established protocol for the specific assay.
- Simulated Contamination Challenge:
- Open amplified positive control tubes and intentionally create aerosols by vigorous pipetting.
- Using the same pipette (either with filter tips or non-filter tips based on test condition), immediately set up new PCR reactions with the previously unused master mix aliquot.
- Detection and Analysis:
- Run second round amplification with nested primers.
- Analyze products by gel electrophoresis or real-time detection.
- Compare results between filter tip and non-filter tip conditions.
Expected Outcomes: Properly functioning filter tips should demonstrate complete prevention of carryover contamination, shown by negative results in the challenged reactions, while non-filter tips will likely show false-positive amplification bands or signals [51].
Quality Control: Include multiple negative controls at different stages to confirm reagent purity and environmental cleanliness [28] [30].
The Scientist's Toolkit: Essential Research Reagent Solutions
The successful implementation of filter tips in contamination-prone workflows requires integration with other specialized reagents and equipment. The following table details essential components of an effective contamination control system:
Table 3: Essential Research Reagent Solutions for Contamination Control
| Tool/Reagent | Function | Application Specifics |
|---|---|---|
| Aerosol Barrier Filter Tips | Prevents cross-contamination during pipetting | Use for all liquid handling in pre-PCR and post-PCR areas; select appropriate filter quality for application sensitivity [48] [49] |
| Hot-Start DNA Polymerase | Reduces non-specific amplification and primer-dimer formation | Enzyme remains inactive until high-temperature activation; improves specificity particularly in early PCR cycles [2] |
| Nuclease-Free Water | Provides contaminant-free aqueous solvent | Use for all reagent preparations and dilutions; aliquot to prevent repeated exposure to potential contaminants [28] |
| Freshly Prepared Bleach Solution (10%) | Effective surface decontaminant that destroys DNA | Wipe down work surfaces before and after use; contact time of 10+ minutes required for complete DNA destruction [50] [30] |
| DNA-Decontaminating Reagents | Commercial formulations for surface DNA destruction | Alternative to bleach for sensitive equipment; validate efficacy for specific application requirements [50] |
| Dedicated Pre-PCR Reagent Aliquots | Prevents contamination of master stocks | Divide bulk reagents into single-use volumes to limit potential contamination events [28] [47] |
| UV Irradiation Chamber | Exposes work surfaces to DNA-destroying UV light | Effective for decontaminating closed spaces like laminar flow hoods; complement to chemical decontamination [50] |
Filter tips represent a critical technological component in a comprehensive strategy to manage contamination risks in nested PCR and other sensitive molecular applications. Their efficacy, however, is maximized only when integrated with complementary approaches including physical workflow separation, rigorous laboratory practices, and appropriate decontamination protocols [50] [30]. The experimental framework presented here provides researchers with both theoretical understanding and practical methodologies for implementing filter tip technology effectively within the context of nested PCR contamination risk research.
As molecular techniques continue to evolve toward greater sensitivity and precision, the role of robust contamination control measures, including advanced filter tip technologies, will only increase in importance. By adopting the systematic approaches outlined in this guide, researchers can significantly enhance the reliability and reproducibility of their molecular analyses while minimizing the costly consequences of amplicon contamination.
Advanced Assay Formats and Techniques to Eliminate Open-Tube Steps
Transitioning to Single-Tube Nested PCR (ST-nPCR) Protocols
Single-tube nested polymerase chain reaction (ST-nPCR) represents a significant advancement in molecular diagnostics, effectively mitigating the primary drawback of conventional nested PCR: the high risk of cross-contamination from amplicon exposure during tube transfer between amplification rounds. This technique consolidates the two amplification steps—using outer and inner primer sets—within a single, closed tube. While it has proven invaluable for detecting fastidious microorganisms, its application is expanding into new fields such as animal genotyping and single-cell analysis. This guide provides a detailed framework for developing, optimizing, and validating robust ST-nPCR protocols, with a particular emphasis on maximizing sensitivity and specificity while minimizing contamination risks.
Conventional nested PCR (nPCR) is renowned for its exceptional sensitivity and specificity, achieved by performing two consecutive amplification rounds with two sets of primers. The first round uses an outer primer set to amplify a larger target sequence, while the second round uses an inner primer set to amplify an internal sequence, thereby significantly enhancing the detection of low-abundance targets [52]. However, a critical vulnerability exists: the requirement to physically transfer the first-round amplicon to a new tube for the second amplification step. This open-tube manipulation creates an substantial risk of aerosol contamination, leading to false-positive results and compromising diagnostic accuracy [53] [54].
ST-nPCR was developed specifically to address this contamination risk. By containing both amplification reactions within a single tube, it eliminates the need for post-amplification handling, thereby offering a robust solution for laboratories focused on high-fidelity results, especially in resource-limited settings [55] [56].
Fundamental Principles and Advantages of ST-nPCR
The core principle of ST-nPCR involves the sequential or semi-sequential activity of outer and inner primer sets within the same reaction vessel. The most common implementation uses primers with different melting temperatures (Tm). The first PCR cycles are performed at a higher annealing temperature, permitting only the outer primers (with their higher Tm) to bind and initiate the first round of amplification. Subsequent cycles are run at a lower annealing temperature, allowing the inner primers (with a lower Tm) to bind to the newly synthesized amplicon and execute the second, nested amplification [55].
Key advantages of this approach include:
- Drastically Reduced Contamination Risk: The single-tube, closed-system nature of the protocol prevents amplicon exposure to the laboratory environment, which is the most common source of false positives in conventional nPCR [52] [54].
- Efficiency and Cost-Effectiveness: The protocol reduces hands-on time, consumable usage (e.g., pipette tips and tubes), and overall analysis time [53].
- High Sensitivity for Demanding Applications: ST-nPCR is particularly effective for analyzing samples with very low DNA concentrations, such as single cells, in vitro-produced embryos, and samples containing fastidious pathogens [52] [55] [57].
Table 1: Comparison of Conventional Nested PCR and Single-Tube Nested PCR
| Feature | Conventional Nested PCR | Single-Tube Nested PCR |
|---|---|---|
| Workflow | Two separate tubes and reactions | A single tube for both reactions |
| Contamination Risk | High (due to tube opening) | Very Low |
| Hands-on Time | High | Reduced |
| Reagent Consumption | Higher | Lower |
| Primer Design Complexity | Standard | Critical (Tm differential, compatibility) |
| Optimization Complexity | Standard | Can be more complex |
| Suitability for High-Throughput | Lower | Higher |
Critical Experimental Parameters and Optimization Strategies
The success of an ST-nPCR assay is highly dependent on the careful optimization of several parameters to ensure that the outer primers are depleted or inactivated before the second amplification round begins. Residual outer primer activity during the low-temperature round can lead to non-specific amplification, primer-dimer formation, and exhaustion of reaction reagents, ultimately reducing sensitivity [55].
Primer Design and Concentration Ratios
Primer design is the most critical factor. Outer and inner primers must be designed to have a significant difference in Tm (typically ≥ 5°C) to facilitate thermal separation of the two amplification rounds [55]. Furthermore, empirical optimization of primer concentrations is essential.
Research on bovine genotyping demonstrated successful ROSA26 gene amplification in single cells across various outer and inner primer combinations, with consistent results observed at lower primer concentrations [52] [57]. A study on Echinococcus detection established an optimal primer ratio, noting that a 1:50 ratio of outer to inner primers (0.04 μM:2.0 μM) provided the best performance [23].
Table 2: Optimized Primer Concentrations from Published ST-nPCR Studies
| Application / Target | Outer Primer Concentration | Inner Primer Concentration | Key Finding |
|---|---|---|---|
| Bovine Genotyping (ROSA26 gene) [57] | 0.2 μM | 0.5 μM | Successful amplification across all concentrations; more consistent results at lower concentrations. |
| Echinococcus spp. Detection [23] | 0.04 μM | 2.0 μM | A 1:50 ratio was identified as optimal for sensitivity and specificity. |
| Dengue Virus Detection [58] | 0.006 μM (0.3 pmoles/rxn) | 0.3 μM (15 pmoles/rxn) | A 1:50 ratio enabled a detection limit of 10-100 viral copies. |
Polymerase Selection
The choice of DNA polymerase can profoundly impact assay sensitivity. The 5'→3' exonuclease activity inherent in standard Taq polymerases can degrade the inner primers if they are bound to the template while the outer primer-derived polymerase strand approaches. A landmark study found that using Q5 Taq polymerase, which lacks 5'→3' exonuclease and strand displacement activity, yielded a superior detection limit of 0.1–1 attogram (equivalent to 0.2–2 plasmid copies) for Chlamydophila abortus [55] [56]. This sensitivity was comparable or superior to TaMan probe-based real-time PCR assays.
Thermal Cycling Conditions
The thermal cycling profile must be meticulously designed to clearly separate the two amplification rounds.
- First Round (High-Temperature): Typically consists of 10-20 cycles with an annealing temperature 2-5°C above the Tm of the inner primers, ensuring exclusive outer primer binding.
- Second Round (Low-Temperature): Comprises 25-40 cycles with an annealing temperature optimized for the inner primers.
For example, an ST-nPCR protocol for Echinococcus spp. used a first-round annealing temperature of 58°C for the outer primers, followed by a second round at 48°C for the inner primers [23].
Alternative ST-nPCR Formats
Immobilized Primer Format
This innovative format involves physically separating the reagents by adsorbing the inner primers onto the inner wall of the PCR tube cap. After the first round of amplification is complete, the tube is briefly centrifuged or inverted to dissolve the inner primers into the reaction mix for the second round, all without opening the tube [53] [58]. This method has been successfully applied to the diagnosis of plague and dengue virus [53] [58].
One-Tube Nested Real-Time PCR
This advanced format integrates the sensitivity of nested PCR with the quantitative capability and closed-tube nature of real-time PCR. All reagents are present from the start, but the assay uses a specialized thermal profile and carefully designed primers to achieve sequential amplification. One such assay for Porcine Cytomegalovirus (PCMV) demonstrated higher detection rates (38.6%) compared to conventional nested PCR (23.6%) and standard PCR (12.6%) [59].
Detailed Experimental Protocol: A Model Workflow
The following workflow, derived from optimized published studies [55] [23], outlines the general steps for establishing a basic ST-nPCR assay.
Step 1: Primer Design and Preparation
- Design outer and inner primer pairs with a Tm differential of at least 5°C.
- Avoid complementarity between all primers to prevent primer-dimer formation.
- Suspend primers in nuclease-free water or TE buffer to create concentrated stocks (e.g., 100 μM).
Step 2: Reaction Setup
- Prepare a master mix on ice containing:
- 1X PCR reaction buffer (compatible with the chosen polymerase)
- 200 μM of each dNTP
- 1.5 - 2.5 mM MgCl₂ (concentration requires optimization)
- Optimized concentrations of outer primers (see Table 2 for guidance)
- Optimized concentrations of inner primers (see Table 2 for guidance)
- 0.5 - 2.5 U of DNA polymerase (standard Taq or specialized polymerase like Q5)
- Nuclease-free water to volume.
- Add template DNA (2-5 μL typically).
- Gently mix and briefly centrifuge to collect the reaction at the bottom of the tube.
Step 3: Thermal Cycling
- Initial Denaturation: 95°C for 3-5 minutes.
- First Round (High-Temperature): 10-15 cycles of:
- 95°C for 30 seconds (denaturation)
- High Annealing Temp (e.g., 58-65°C) for 30-60 seconds (annealing of outer primers only)
- 72°C for 30-60 seconds (extension)
- Second Round (Low-Temperature): 30-40 cycles of:
- 95°C for 30 seconds (denaturation)
- Low Annealing Temp (e.g., 45-55°C) for 30-60 seconds (annealing of inner primers)
- 72°C for 30-60 seconds (extension)
- Final Extension: 72°C for 5-10 minutes.
- Hold: 4-10°C.
Step 4: Amplicon Analysis
- Analyze the PCR products using standard gel electrophoresis (e.g., 1.5-2% agarose gel).
- Visualize the specific band corresponding to the inner amplicon size under UV light.
- For absolute confirmation, products can be purified and sequenced.
The Scientist's Toolkit: Essential Research Reagents
Table 3: Key Reagents for ST-nPCR Protocol Development
| Reagent / Material | Function / Role in ST-nPCR | Optimization Notes |
|---|---|---|
| Outer Primers | Initiate the first round of amplification; generate the template for the inner primers. | Use at low concentration (e.g., 0.04-0.2 μM) to minimize residual activity in the second round. |
| Inner Primers | Execute the second, nested amplification; confer high specificity and sensitivity. | Used at higher concentration (e.g., 0.3-2.0 μM) than outer primers to ensure efficient binding. |
| DNA Polymerase | Enzyme that catalyzes DNA synthesis. | Critical choice. Standard Taq is often sufficient, but polymerases lacking 5'→3' exonuclease (e.g., Q5) can significantly boost sensitivity [55]. |
| dNTPs | Building blocks for new DNA strands. | Standard concentration is 200 μM of each dNTP. |
| MgCl₂ | Cofactor for DNA polymerase; affects primer annealing and enzyme fidelity. | Concentration (1.5-3.0 mM) must be optimized as it critically influences reaction efficiency and specificity. |
| Template DNA | The target nucleic acid to be amplified. | Purity and quantity are crucial. The method is exceptionally suited for low-concentration and low-quality samples [52] [57] [54]. |
| Antisense Oligonucleotides | Optional reagents designed to bind and block residual outer primers during the second round. | Can be used as an advanced optimization strategy to further suppress outer primer interference [55]. |
Troubleshooting Common Challenges
The transition to Single-Tube Nested PCR protocols offers a compelling solution to the persistent problem of amplicon contamination in molecular diagnostics and research. While the initial optimization requires careful attention to primer design, concentration ratios, and enzyme selection, the resulting protocols are robust, cost-effective, and highly sensitive. The technique's proven utility in detecting fastidious pathogens [55] [23] [54] is now being complemented by its growing adoption in novel applications like bovine genotyping and single-cell analysis [52] [57]. As research continues to refine methodologies, such as the integration with real-time PCR platforms [59], ST-nPCR is poised to become an even more powerful and indispensable tool in the scientist's arsenal, enabling reliable detection of the most challenging targets with minimal risk of false positives.
Leveraging Real-Time PCR for Closed-Tube Amplification and Detection
The exquisite sensitivity of polymerase chain reaction (PCR) makes it vulnerable to false-positive results caused by amplicon carryover contamination, presenting a significant challenge in diagnostic laboratories and research settings. Traditional nested PCR, while offering superior sensitivity and specificity, requires transfer of amplification products between first- and second-round reactions, creating substantial contamination risk through aerosolized amplicons containing up to 10⁶ amplification products per aerosol droplet [17]. This contamination risk has impeded the routine adoption of amplification techniques in clinical laboratories, with documented cases of fatal outcomes attributed to false-positive PCR findings [17].
Closed-tube real-time PCR systems address this fundamental limitation by containing the entire amplification and detection process within a sealed vessel. By integrating amplification and detection while preventing product exposure to the laboratory environment, these systems substantially reduce the possibility of false positives due to amplification product carryover contamination [17]. This technical guide explores the principles, methodologies, and applications of closed-tube real-time PCR systems, with particular emphasis on their advantage over open-tube nested PCR formats within the context of contamination risk management.
Technical Foundations of Closed-Tube Detection
Core Principles of Real-Time PCR in a Closed System
Closed-tube real-time PCR systems combine DNA amplification and detection in a sealed system through fluorescence-based monitoring of amplification products as they accumulate. This approach eliminates the need for post-amplification processing, thereby preventing amplicon exposure to the laboratory environment [60] [17]. The fundamental advancement lies in the ability to generate a fluorescent signal only when primers are incorporated into specific amplification products, enabling real-time quantification while maintaining system integrity [60].
These systems employ several detection chemistries that function within sealed tubes, including:
- Energy transfer-labeled primers: Primers contain hairpin structures with donor and acceptor moieties in close proximity on the hairpin stem, generating fluorescence only upon incorporation into amplification products [60]
- Hydrolysis probes (TaqMan): Utilize the 5'→3' exonuclease activity of DNA polymerase to cleave fluorescent probes during amplification [60]
- DNA-binding dyes: Intercalating dyes that fluoresce when bound to double-stranded DNA
The closed-tube format maintains reaction containment throughout thermal cycling and detection, with systems capable of detecting as few as 10 target molecules while generating signal-to-background ratios of 35:1 [60].
Comparison of Open vs. Closed PCR Systems
Table 1: Characteristics of Open-Tube Nested PCR vs. Closed-Tube Real-Time PCR
| Parameter | Traditional Nested PCR | Closed-Tube Real-Time PCR |
|---|---|---|
| Contamination Risk | High (open tube transfer) | Minimal (fully sealed system) |
| Hands-on Time | Extensive | Minimal after setup |
| Throughput | Moderate | High |
| Sensitivity | High (10-100 copies) | Very High (<10 copies) [60] |
| Quantification Capability | Semi-quantitative | Absolute quantification over wide dynamic range |
| Automation Potential | Low | High |
| Cross-Contamination Sources | Amplicon aerosolization, tube opening | Reagent contamination (if present) |
Advanced Closed-Tube Methodologies
One-Tube Nested Real-Time PCR
Innovative one-tube nested quantitative real-time PCR (qPCR) methodologies represent a significant advancement in closed-system amplification. This approach employs two primer sets and two probes that sequentially react within a single closed tube, combining the sensitivity benefits of traditional nested PCR with the contamination control of closed-tube systems [61].
In a recent application for Brucella detection targeting the bcsp31 gene, the one-tube nested qPCR demonstrated:
- 100-fold higher sensitivity than conventional qPCR (100 fg/μL vs. 10 pg/μL) [61]
- 98.6% clinical sensitivity and 100% specificity in 250 clinical samples [61]
- Reduced cycle threshold (CT) values by an average of 6.4 cycles compared to conventional qPCR [61]
- Significantly improved detection rate for low-load samples (CT > 35) [61]
The methodology maintains a closed-tube format throughout amplification and detection, eliminating the contamination risks associated with traditional two-step nested PCR while providing exceptional sensitivity suitable for detecting low-abundance targets in clinical specimens.
Digital PCR for Absolute Quantification
Digital PCR (dPCR) represents the ultimate closed-system approach, providing absolute quantification without standard curves by partitioning samples into thousands of individual reactions. Recent studies demonstrate dPCR's superior accuracy, particularly for high viral loads of influenza A, influenza B, and SARS-CoV-2, and for medium loads of respiratory syncytial virus (RSV) [62]. dPCR exhibits greater consistency and precision than real-time RT-PCR, especially in quantifying intermediate viral levels in complex clinical matrices [62].
While dPCR offers exceptional precision and absolute quantification, its routine implementation is currently limited by higher costs and reduced automation compared to real-time PCR [62] [63]. Nevertheless, for applications requiring absolute quantification without reference standards, dPCR represents the gold standard in closed-system amplification.
Experimental Protocols and Methodologies
Protocol: Closed-Tube Detection Using Hairpin Primers
This protocol adapts the method described by for direct detection of PCR-amplified DNA in a closed system using energy transfer-labeled hairpin primers [60].
Reagents and Equipment
- Forward and reverse primers with 5' hairpin structures labeled with fluorescein (donor) and DABCYL (quencher)
- Taq or Pfu DNA polymerase
- dNTPs
- Appropriate reaction buffer
- Template DNA
- Real-time PCR instrument with compatible fluorescence detection
Procedure
- Reaction Setup: Prepare master mix containing 1X reaction buffer, 200 μM dNTPs, 0.2 μM each hairpin primer, and 1.25 U DNA polymerase per 25 μL reaction
- Template Addition: Add template DNA (1-10 ng genomic DNA or equivalent)
- Thermal Cycling:
- Initial denaturation: 95°C for 2 minutes
- 40 cycles of:
- Denaturation: 95°C for 15 seconds
- Annealing/Extension: 60°C for 1 minute (with fluorescence acquisition)
- Data Analysis: Determine CT values using instrument software and quantify based on standard curve
Key Considerations
- Hairpin primers should be designed with stem stability of -5 to -7 kcal/mol
- Donor and quencher should be positioned for optimal FRET efficiency
- Validate primer specificity using BLAST analysis before implementation
- Optimize primer concentrations to minimize non-specific amplification
Protocol: One-Tube Nested qPCR
This protocol outlines the one-tube nested qPCR approach for highly sensitive detection of specific targets, based on the Brucella detection method with modifications for broader application [61].
Primer and Probe Design
- Design outer primers amplifying 200-300 bp region
- Design inner primers amplifying 100-150 bp internal region
- Design dual-labeled probes for inner primers (FAM/BHQ1)
- Verify all primers for dimer formation and secondary structure
Reaction Setup
- Reaction volume: 20-25 μL
- Components:
- 1X qPCR master mix
- Outer primers: 0.1 μM each
- Inner primers: 0.4 μM each
- Probe: 0.2 μM
- Template DNA: 1-5 μL
- Thermal cycling profile:
- Initial denaturation: 95°C for 5 minutes
- 10 cycles of:
- 95°C for 15 seconds
- 64°C for 30 seconds (reduced fluorescence acquisition)
- 40 cycles of:
- 95°C for 15 seconds
- 60°C for 30 seconds (complete fluorescence acquisition)
Validation Steps
- Determine analytical sensitivity through serial dilutions
- Assess specificity against closely related non-target sequences
- Compare performance against conventional qPCR using clinical samples
- Establish limit of detection and limit of quantification through replicate analysis
Contamination Control Strategies
Integrated Contamination Prevention
While closed-tube systems significantly reduce contamination risk, comprehensive contamination control requires integrated strategies:
Laboratory Design and Workflow
- Physical separation of pre-amplification, amplification, and post-amplification areas [17] [64]
- Unidirectional workflow from clean to contaminated areas [64]
- Dedicated equipment and supplies for each area [64]
- Positive air pressure in reagent preparation areas and negative pressure in amplification areas [64]
Procedural Controls
- Use of aerosol barrier tips for all liquid handling [64]
- Careful tube opening and closing techniques to minimize aerosols [64]
- Surface decontamination with sodium hypochlorite (10%) or DNA-destroying agents [17] [64]
- UV irradiation of workstations and equipment [17] [64]
Biochemical Controls
- dUTP/UNG system: Incorporation of dUTP in place of dTTP allows enzymatic degradation of contaminating amplicons by uracil-N-glycosylase (UNG) prior to amplification [17] [65]
- Chemical modification using isopsoralen or psoralen to render amplicons inactive [17]
Table 2: Comparison of Contamination Control Methods
| Method | Mechanism | Advantages | Limitations |
|---|---|---|---|
| Closed-Tube Systems | Physical containment | Comprehensive protection | None significant |
| dUTP/UNG | Enzymatic degradation of uracil-containing DNA | Easy to incorporate, effective for most applications | Reduced efficacy for GC-rich targets [17] |
| UV Irradiation | Thymidine dimer formation | Inexpensive, no protocol changes | Ineffective for short amplicons (<300 bp) [17] |
| Sodium Hypochlorite | Nucleic acid oxidation | Effective surface decontamination | Corrosive, cannot use on specimens [17] |
| Physical Separation | Spatial segregation | Fundamental prevention strategy | Requires significant laboratory resources [64] |
Quality Control Measures
Robust quality control is essential for reliable closed-tube PCR results:
Control Reactions
- No template controls (NTC): Monitor reagent contamination [65]
- Positive controls: Verify reaction efficiency
- Inhibition controls: Identify PCR inhibitors in samples
- Extraction controls: Monitor nucleic acid extraction efficiency
Performance Validation
- Standard curves: For quantification accuracy assessment
- Replication: Intra- and inter-assay reproducibility testing
- Limit of detection: Determination through probit analysis
- Specificity testing: Against closely related non-target sequences
Research Reagent Solutions
Table 3: Essential Reagents for Closed-Tube Real-Time PCR
| Reagent Category | Specific Examples | Function | Technical Considerations |
|---|---|---|---|
| Polymerases | Taq polymerase, Pfu polymerase | DNA amplification | Pfu offers higher fidelity; both work with hairpin primers [60] |
| Modified Primers | Hairpin primers, Dual-labeled probes | Signal generation only upon specific amplification | Donor (fluorescein) and quencher (DABCYL) provide 35:1 signal:background [60] |
| dNTP Formulations | dUTP/dTTP mixtures | Enable UNG-based carryover prevention | Optimize ratio for specific targets [17] |
| Contamination Control Enzymes | Uracil-N-glycosylase (UNG) | Degrades contaminating uracil-containing amplicons | Most active against T-rich amplicons [17] [65] |
| Fluorescence Quenchers | DABCYL, BHQ-1, BHQ-2 | Quench reporter fluorescence | BHQ compounds offer broader absorption spectra |
| Stabilized Master Mixes | Commercial qPCR master mixes | Provide reaction consistency | Include passive reference dyes for normalization |
Applications and Performance Data
Clinical Diagnostic Applications
Closed-tube real-time PCR systems have demonstrated exceptional performance across diverse applications:
Infectious Disease Detection
- Brucellosis: 98.6% sensitivity and 100% specificity in clinical validation [61]
- Respiratory viruses: Superior quantification of influenza A/B, RSV, and SARS-CoV-2 [62]
- Helicobacter pylori: Detection of degraded DNA in stool samples [15]
Oncology Applications
- Copy number alteration analysis: Validation of oral cancer biomarkers [66]
- Rare mutation detection: Identification of cancer-associated mutations [63]
Performance Comparison with Alternative Technologies
Table 4: Quantitative Performance Comparison of Amplification Technologies
| Technology | Sensitivity | Quantification | Contamination Risk | Best Application |
|---|---|---|---|---|
| Traditional Nested PCR | 10-100 copies | Semi-quantitative | High | Research with limited targets |
| Conventional qPCR | 100 copies | Relative quantification | Low | High-throughput screening |
| One-Tube Nested qPCR | 1-10 copies [61] | Absolute quantification | Very Low | Low-abundance targets |
| Digital PCR | <1 copy | Absolute quantification [63] | Very Low | Rare variant detection [62] |
| NanoString | Similar to qPCR | Digital counting | Low | Multiplexed copy number analysis [66] |
Workflow and Technical Diagrams
Closed-Tube PCR Workflow - This diagram illustrates the unidirectional workflow of closed-tube real-time PCR, highlighting the physical containment that prevents amplicon contamination.
Hairpin Primer Mechanism - This diagram shows the molecular mechanism of hairpin primers that generate fluorescence only upon incorporation into specific amplification products.
Closed-tube real-time PCR systems represent a paradigm shift in molecular detection technology, effectively addressing the fundamental contamination limitations of traditional amplification methods while providing robust, sensitive, and quantitative results. Through integrated approaches combining physical containment, advanced detection chemistries, and biochemical safeguards, these systems enable reliable molecular testing even in high-throughput clinical environments.
The continued evolution of closed-system technologies, including one-tube nested designs and digital PCR platforms, promises further enhancements in sensitivity, multiplexing capability, and accessibility. As molecular diagnostics continues to expand into new applications from liquid biopsy to point-of-care testing, the contamination control afforded by closed-tube systems will remain essential for generating reliable, actionable results.
Optimizing Primer Design and Polymerase Selection for Enhanced Specificity
Nested PCR represents a powerful amplification technique that significantly enhances detection sensitivity and specificity for challenging templates, including low-abundance targets and samples with complex backgrounds. This method employs two successive amplification rounds, where the first round uses an outer primer pair to generate an initial amplicon, which then serves as the template for a second amplification with an inner primer pair that binds within the first product. This sequential targeting mechanism substantially improves specificity by reducing non-specific amplification, as any non-specifically amplified products from the first round are unlikely to be recognized and amplified by the second set of primers [67]. However, the enhanced performance of conventional nested PCR comes with a significant limitation: the requirement to transfer amplification products between reaction vessels dramatically increases contamination risks through aerosolized amplicons, potentially leading to false-positive results that compromise experimental integrity [28] [68].
The critical challenge lies in maintaining the sensitivity and specificity advantages of nested PCR while mitigating contamination risks associated with opening reaction tubes between amplification rounds. This technical guide addresses this challenge through optimized primer design strategies, appropriate polymerase selection, and innovative protocol modifications that collectively enhance specificity while reducing contamination vulnerabilities. By implementing these evidence-based practices, researchers can achieve reliable, reproducible results essential for drug development, diagnostic applications, and basic research requiring precise nucleic acid detection.
Primer Design Fundamentals for Specificity Enhancement
Core Principles for Nested PCR Primer Design
Effective primer design constitutes the foundation for successful nested PCR, with specific considerations that extend beyond conventional single-round PCR requirements. The fundamental principle involves designing two primer pairs that work in sequence: outer primers that generate the primary amplicon, and inner (nested) primers that bind internally to this initial product. This architectural approach ensures that only the specific target undergoes efficient double amplification, while non-specific products are selectively excluded from the second round [67].
Strategic primer design must address several specificity-critical factors. The 3'-end sequence is particularly crucial, as extension efficiency depends heavily on terminal stability. Ideally, 3'-termini should contain C or G residues rather than T or A, as the stronger hydrogen bonding of G and C bases reduces non-specific initiation [69]. For GC content, the optimal range is 40-60%, which provides sufficient binding stability without promoting secondary structure formation [70]. Calculated melting temperatures (Tm) should fall within 42-65°C range, with paired primers having Tms within 5°C of each other to ensure balanced amplification efficiency [70].
Beyond these fundamental parameters, nested PCR requires careful consideration of primer positioning. The inner primers must bind completely within the amplicon generated by the outer primers, typically with a 15-50 base pair offset from each end to ensure efficient nesting. This positioning guarantees that only the specific outer product can serve as an effective template for the second amplification round. Additionally, comprehensive specificity verification using tools like Primer-BLAST against relevant genome databases is essential to avoid off-target binding, particularly in complex genomic samples [69].
Advanced Specificity Considerations
Table 1: Critical Parameters for Nested PCR Primer Design
| Parameter | Optimal Range | Specificity Rationale | Validation Method |
|---|---|---|---|
| Primer Length | 20-30 nucleotides [70] | Sufficient for unique targeting without excessive stability | BLAST analysis against reference database |
| GC Content | 40-60% [70] | Balanced binding strength and specificity | Tm calculation software |
| Melting Temperature (Tm) | 60-63°C (inner primers); Within 5°C for paired primers [69] [70] | Enables specific annealing under optimized conditions | Empirical testing with temperature gradients |
| 3'-End Sequence | C or G residue preferred [69] | Reduces non-specific initiation at non-target sites | Primer dimer analysis tools |
| Amplicon Size | 70-200 bp (qPCR); Up to 3 kb (conventional) [69] [70] | Optimizes amplification efficiency and detection | Agarose gel electrophoresis |
| Inner Primer Position | 15-50 bp from outer primer binding sites [67] | Ensures exclusive amplification of specific outer product | Sequence alignment and mapping |
Further enhancing specificity requires addressing potential structural interactions that compromise amplification efficiency. Primer-dimer formation represents a particularly problematic issue, where primers hybridize to each other rather than the template, creating amplification artifacts that consume reaction components and compete with target amplification [71]. The potential for dimerization can be evaluated using tools like OligoArchitect, which analyzes self-complementarity and cross-dimer formation. Primers with strong 3'-end complementarity (ΔG < -2.0 kcal) should be avoided, as they readily initiate primer-dimer artifacts [71].
Secondary structure within primers themselves represents another specificity challenge. Hairpins, internal loops, and other stable structures can prevent proper template binding, particularly when these structures involve the 3'-terminus where extension initiates. Computational tools can predict these interactions during the design phase, allowing selection of alternative primers with similar specificity but reduced structural complications. For the nested approach specifically, both outer and inner primers must be evaluated for cross-complementarity between sets, not just within pairs, as residual outer primers can persist into the second amplification round [67].
Polymerase Selection and Reaction Optimization
Enzyme Selection Criteria
Polymerase selection critically influences nested PCR specificity, with different enzyme properties suited to particular applications. Standard Taq DNA polymerase remains widely used for routine applications, offering robust amplification across various templates with typical extension rates of 1-2 kb per minute [70]. For templates with secondary structure or high GC content, however, polymerases with proofreading activity or specialized buffer systems may provide enhanced specificity. Hot-start modifications represent particularly valuable features for nested PCR, as they prevent non-specific primer extension during reaction setup by requiring thermal activation, thereby reducing primer-dimer formation and mispriming artifacts [70].
The polymerase selection must also consider the intended application. For diagnostic applications requiring maximum sensitivity, polymerases with enhanced processivity may be preferred, while sequencing applications benefit from proofreading enzymes with higher fidelity. When employing single-tube nested approaches, polymerase stability becomes particularly important, as the enzyme must remain active through both amplification rounds despite potentially suboptimal conditions during the transition between phases [52]. Commercial pre-mixed formulations often provide balanced characteristics suitable for most nested applications, combining hot-start activation with optimized buffer systems that enhance specificity.
Comprehensive Reaction Optimization
Table 2: Optimized Reaction Components for Enhanced Specificity
| Component | Optimal Concentration | Effect on Specificity | Adjustment Guidance |
|---|---|---|---|
| MgCl₂ | 1.5-2.0 mM [70] | Critical cofactor concentration affects enzyme fidelity and primer annealing | Titrate in 0.5 mM increments if non-specific products observed |
| dNTPs | 200 µM each [70] | Balanced nucleotide availability prevents incorporation errors | Reduce to 50-100 µM for higher fidelity (reduces yield) |
| Primers | 0.1-0.5 µM each [70] | High concentrations promote mispriming; low concentrations reduce sensitivity | Optimize using concentration gradient (50-800 nM) [71] |
| Taq DNA Polymerase | 1.25 units/50 µL reaction [70] [67] | Excess enzyme increases non-specific amplification; insufficient reduces yield | Adjust based on template complexity and amplicon length |
| Template DNA | 1pg–10 ng (plasmid); 1ng–1µg (genomic) [70] | High concentrations decrease specificity, especially with high cycle numbers | Dilute complex templates to minimize inhibitor effects |
| Betaine or DMSO | 3-10% (problematic templates) | Reduces secondary structure in GC-rich regions | Add when amplifying difficult templates with high secondary structure |
Beyond individual components, thermal cycling parameters profoundly impact specificity. Annealing temperature represents the most critical adjustable parameter, with optimal temperatures typically 5°C below the calculated Tm of the primers [70]. Temperature gradients provide empirical determination of the ideal annealing conditions, balancing yield and specificity. For nested protocols, the two rounds may require different annealing temperatures, particularly if primer pairs have divergent Tm values. Extension times should be sufficient for complete synthesis without being excessively long, following the general guideline of 1 minute per 1000 base pairs [70].
Cycling parameters must also address the transition between amplification rounds in single-tube systems. Innovative approaches include using primers with different melting temperatures, where outer primers with higher Tm values activate in initial cycles, while inner primers with lower Tm values become dominant in later cycles as the temperature decreases [67]. Alternatively, physical separation methods can immobilize inner primers on tube caps, releasing them only after a specific heating step that eliminates potential contamination [68]. These approaches maintain the specificity advantages of nested PCR while minimizing contamination risks.
Experimental Protocols for Specificity Optimization
Standard Two-Step Nested PCR Protocol
The following protocol outlines an optimized two-step nested PCR procedure adapted from validated methodologies for DRD2 polymorphism analysis [72] and general nested PCR applications [67]. This approach maximizes specificity through controlled reaction conditions and appropriate controls.
First Round Amplification
- Prepare reaction mixture on ice with the following components in a 25μL volume:
- Template DNA: 1-2μL (1pg–10 ng plasmid DNA or 1ng–1μg genomic DNA)
- Outer forward and reverse primers: 0.5μL each (final concentration 0.2μM)
- dNTP mixture: 0.5μL (final concentration 200μM each dNTP)
- 10× PCR buffer: 2.5μL
- MgCl₂: 1.5μL (final concentration 1.5-2.0mM)
- Taq DNA polymerase: 0.25μL (1.25 units)
- Sterile ultrapure water: to 25μL total volume
Execute thermal cycling under the following conditions:
- Initial denaturation: 94°C for 2 minutes
- 25-30 cycles of:
- Denaturation: 94°C for 30 seconds
- Annealing: Temperature optimized for outer primers (typically 45-60°C) for 30 seconds
- Extension: 72°C for 1 minute per 1000bp
- Final extension: 72°C for 5 minutes
- Hold at 4°C
Analyze 5μL of the first-round product by agarose gel electrophoresis to verify successful amplification before proceeding to the second round.
Second Round Amplification
- Dilute the first-round PCR product 1:10 to 1:1000 in sterile water [13].
- Prepare reaction mixture on ice with the following components in a 25μL volume:
- Diluted first-round product: 1-2μL
- Inner forward and reverse primers: 0.5μL each (final concentration 0.2μM)
- Remaining components identical to first round
- Execute thermal cycling using the same conditions as the first round, with annealing temperature optimized for the inner primers.
- Analyze the final product by agarose gel electrophoresis, comparing to appropriate molecular weight standards.
Single-Tube Nested PCR Optimization
To mitigate contamination risks associated with conventional nested PCR, the following single-tube protocol was adapted from bovine genotyping and visceral leishmaniasis diagnosis research [68] [52]. This approach maintains specificity while reducing contamination potential.
Reaction Assembly
- Prepare master mixture containing:
- 1× PCR buffer
- 2.5 mM MgCl₂
- 200 μM each dNTP
- Outer primers: 0.2 μM each
- Inner primers: 0.5 μM each
- 1.25 U Taq DNA polymerase
- Template DNA (single cell to 10 ng)
- Sterile water to 25μL final volume
Utilize specialized thermal cycling conditions:
- Initial denaturation: 94°C for 2 minutes
- 20 cycles for outer primer amplification:
- Denaturation: 94°C for 30 seconds
- Annealing: Higher temperature optimized for outer primers (e.g., 68°C) for 30 seconds
- Extension: 72°C for appropriate duration based on product length
- 20 additional cycles for inner primer amplification:
- Denaturation: 94°C for 30 seconds
- Annealing: Lower temperature optimized for inner primers (e.g., 46°C) for 30 seconds
- Extension: 72°C for appropriate duration
- Final extension: 72°C for 5 minutes
Analyze products by agarose gel electrophoresis or real-time detection systems.
This single-tube approach has demonstrated excellent sensitivity in bovine genotyping studies, successfully detecting genes in samples with low DNA concentration, including single cells and early-stage embryos [52]. The method eliminates cross-contamination between amplification rounds while maintaining high specificity through sequential primer utilization.
Contamination Control and Troubleshooting
Comprehensive Contamination Prevention
Contamination control represents a paramount concern in nested PCR due to the amplification of highly abundant target sequences that can easily contaminate subsequent reactions. Aerosolized amplicons constitute the primary contamination source, generated when opening tubes containing amplified products [28]. These microscopic droplets can distribute throughout the laboratory environment, contaminating pipettes, bench surfaces, and equipment and leading to false-positive results in subsequent experiments.
Implementing rigorous procedural controls is essential for maintaining reaction integrity:
- Physical Separation: Perform PCR setup in a dedicated area physically separated from locations where amplified products are handled, ideally in a UV-equipped hood or dedicated room [28].
- Dedicated Equipment: Use separate sets of pipettes, tips, tubes, and lab coats for pre- and post-amplification procedures, clearly marked to prevent cross-use [28].
- Reagent Aliquoting: Divide bulk reagents into single-use aliquots to minimize repeated exposure to potential contamination sources [28].
- Careful Tube Handling: Avoid flicking tubes open; instead, carefully open tubes with two hands to minimize aerosol generation [28].
- Environmental Decontamination: Regularly clean work surfaces and equipment with 10% bleach solution or commercial DNA-decontaminating solutions [28].
- Negative Controls: Include multiple negative controls (reaction mixture without template) in every experiment to monitor contamination [28].
These practices are particularly crucial for conventional two-step nested PCR, where transfer of first-round products presents significant contamination risk. Even with stringent precautions, single-tube approaches offer inherent advantages for contamination-prone applications.
Troubleshooting Common Specificity Issues
Despite optimized conditions, specificity challenges may persist. Systematic troubleshooting approaches can identify and resolve these issues:
- Non-specific Bands: Increase annealing temperature in 2°C increments, reduce primer concentrations, or decrease cycle number. Magnesium concentration titration may also help, as excess Mg²⁺ reduces specificity [70].
- Primer-Dimer Formation: Redesign primers with reduced 3'-complementarity, implement hot-start activation, or optimize primer concentrations to minimize intermolecular interactions [71].
- No Amplification: Verify template quality and concentration, check primer specificity using in silico tools, reduce annealing temperature, or increase magnesium concentration [70].
- Inconsistent Results Between Replicates: Ensure thorough mixing of reaction components, create master mixes for uniform distribution, and verify consistent thermal cycler performance [71].
- Contamination Evidence: Discard potentially contaminated reagents, implement enhanced decontamination protocols, and redesign experiments with additional negative controls [28].
For persistent challenges, alternative nested approaches may provide solutions. Semi-nested PCR uses three primers instead of four, with one primer from the first amplification reused in the second round, potentially simplifying optimization while maintaining enhanced specificity over single-round PCR [67].
Visualization of Workflow and Contamination Risk Mitigation
This workflow comparison highlights the critical difference between traditional and single-tube nested PCR approaches. The two-tube method requires physical transfer of first-round products, creating contamination risk through aerosolized amplicons that can lead to false-positive results in subsequent reactions [28] [68]. In contrast, single-tube nested PCR contains both amplification phases within the same vessel, typically using temperature-dependent primer activation or physical separation methods to sequentially engage outer and inner primers without opening the reaction tube [68] [52].
Essential Research Reagent Solutions
Table 3: Research Reagent Solutions for Nested PCR Optimization
| Reagent/Category | Function in Nested PCR | Specificity Considerations | Exemplary Products/Approaches |
|---|---|---|---|
| Hot-Start DNA Polymerases | Prevents non-specific amplification during reaction setup | Thermal activation reduces primer-dimer formation and mispriming | Hot-start Taq, Proofreading enzymes for high-fidelity applications [70] |
| Primer Design Tools | In silico specificity verification and parameter optimization | Ensures target-specific binding and compatible melting temperatures | Primer-BLAST, OligoArchitect, commercial design services [71] [69] |
| Dedicated PCR Setup Reagents | Pre-packaged reagents minimize contamination risk | Single-use aliquots prevent cross-contamination between experiments | Aliquoted dNTPs, MgCl₂ solutions, dedicated water stocks [28] |
| Specialized Reaction Tubes | Enable single-tube nested PCR approaches | Immobilized inner primers or temperature-dependent accessibility | Cap-immobilized primers [68], dual-temperature protocols [52] |
| Clean-up and Decontamination Supplies | Eliminate contaminating nucleic acids between experiments | Destroy amplification products from previous reactions | DNA-away, 10% bleach solutions, UV irradiation equipment [28] |
Optimizing primer design and polymerase selection for enhanced specificity in nested PCR requires a multifaceted approach addressing both biochemical parameters and procedural considerations. Through strategic primer design targeting appropriate sequences with optimized thermodynamic properties, selection of polymerases with matched characteristics for specific applications, and implementation of contamination-controlled protocols, researchers can achieve the sensitivity and specificity advantages of nested amplification while minimizing false-positive results.
The evolution toward single-tube nested PCR methodologies represents a promising direction for combining the sensitivity benefits of nested approaches with reduced contamination risk [68] [52]. These innovations, coupled with continued refinement of bioinformatic tools for primer design and reaction optimization algorithms, will further enhance the reliability and accessibility of nested PCR for challenging applications in research, diagnostics, and drug development. As molecular techniques continue to advance, the integration of nested principles with emerging technologies like digital PCR and nanopore sequencing may open new frontiers for precise nucleic acid detection across diverse scientific disciplines.
By implementing the optimized protocols and systematic approaches outlined in this technical guide, researchers can effectively address the core challenge of nested PCR: maintaining exceptional sensitivity and specificity while controlling contamination risks inherent in multi-step amplification processes.
Employing Uracil-DNA Glycosylase (UNG) for Pre-Emptive Amplicon Degradation
Nested PCR is a powerful technique for amplifying low-abundance targets, but its open-tube nature after the first amplification round presents a significant risk for false-positive results due to carryover contamination [73]. Even minute, aerosolized amounts of amplification products from previous reactions can serve as efficient templates in subsequent runs, compromising experimental integrity [74]. This risk is particularly acute in high-sensitivity applications such as medical resequencing, pathogen detection, and mutation discovery in clinical samples [73]. Pre-emptive degradation of potential contaminants before amplification is therefore a critical component of robust molecular assay design. Employing Uracil-DNA Glycosylase (UNG) offers a potent enzymatic strategy to mitigate this risk by selectively degrading uracil-containing DNA, thereby safeguarding the validity of nested PCR results [74] [75].
Uracil-DNA Glycosylase: Mechanism and Specificity
Biological Function and Enzymatic Mechanism
Uracil-DNA Glycosylase is an evolutionarily conserved DNA repair enzyme that initiates the base excision repair pathway by removing uracil bases from DNA molecules [76] [75]. Its primary biological role is to prevent mutagenesis by excising uracil resulting from either spontaneous deamination of cytosine (which generates premutagenic U:G mismatches) or the misincorporation of dUMP during DNA synthesis (creating U:A pairs) [76] [77].
The enzyme catalyzes the hydrolysis of the N-glycosidic bond between the uracil base and the deoxyribose sugar, resulting in the release of a free uracil base and the generation of an abasic (apyrimidinic) site in the DNA backbone [76] [74]. This abasic site is inherently unstable and under subsequent thermal cycling conditions, the phosphodiester backbone breaks, effectively preventing amplification by DNA polymerase [75].
Table 1: Key Characteristics of Family I Uracil-DNA Glycosylase (UNG)
| Feature | Description | Biological Significance |
|---|---|---|
| Classification | Family I UDG, monofunctional glycosylase [76] | Initiates base excision repair (BER) pathway |
| Primary Function | Excises uracil from DNA [75] | Prevents mutagenesis from cytosine deamination |
| Substrate Preference | Single-stranded DNA > U:G mismatches > U:A pairs [76] | Most efficient against deamination hotspots in ssDNA |
| Reaction Catalyzed | Hydrolysis of N-glycosidic bond [76] | Creates an abasic (apyrimidinic) site |
| Result | Free uracil base + DNA with abasic site [74] | Unstable DNA backbone that blocks polymerase |
Structural Basis for Substrate Recognition
Family I UNG enzymes exhibit exquisite specificity for uracil, which is achieved through a sophisticated structural mechanism. The enzyme actively scans the DNA, and upon encountering a potential lesion, it induces a dramatic distortion in the DNA backbone [77]. A series of conserved structural motifs facilitate a "pinch-push-pull" mechanism:
- Pinch: The DNA backbone is compressed by proline-rich and glycine-serine loops [75].
- Push: A minor groove intercalation loop penetrates the DNA helix, everting the nucleotide out of the double helix and into the enzyme's active site [75] [77].
- Pull: The everted base is interrogated in a specific uracil-binding pocket. The pocket's shape is complementary to uracil, and key residues discriminate against other bases: a tyrosine side chain sterically excludes the C5 methyl group of thymine, while a glutamine residue forms a specific hydrogen bond with uracil that cytosine cannot form [75]. This multi-step recognition process ensures that only uracil proceeds to catalytic excision [77].
Implementing UNG for Contamination Control: A Detailed Workflow
The strategic incorporation of UNG into PCR protocols requires modifying standard reactions to generate uracil-containing amplicons, which become susceptible to degradation in future experiments.
Core Principle: dUTP Incorporation and Enzymatic Degradation
The method is based on a simple yet powerful two-step principle:
- dUTP Incorporation: In the initial (and all subsequent) PCRs, dTTP is partially or completely replaced with dUTP in the master mix. During amplification, the DNA polymerase incorporates dUMP into the newly synthesized PCR products [74] [75].
- Pre-Amplification Degradation: In every subsequent PCR setup, the reaction mixture is treated with UNG and incubated at a moderate temperature (typically 50°C for 2 minutes) before the thermal cycling begins. During this step, UNG excises uracil bases from any carryover contaminant DNA, creating abasic sites. When the PCR thermocycling starts, the high denaturation temperature (≥95°C) fragments the DNA backbone at these abasic sites and simultaneously inactivates UNG. This ensures that only the native, uracil-free template DNA remains intact for amplification [74] [75].
Quantitative Performance and Efficacy
The effectiveness of the UNG system in real-world applications is demonstrated by its sensitivity and its ability to eliminate contamination across different experimental setups.
Table 2: Quantitative Efficacy of UNG in Contamination Control
| Application Context | Detection Limit / Efficacy | Key Experimental Findings |
|---|---|---|
| Real-time RT-LAMP for Virus Detection | As low as 100 copies/reaction of viral RNA [78] | UDG supplementation eliminated up to 1×10⁻¹⁶ g/reaction of contaminants, significantly reducing false positives [78]. |
| Nested Patch PCR | Successful amplification of 90 of 94 targeted exons (95.7%) [73] | 90% of all sequencing reads mapped to targeted exons, demonstrating high specificity and effective contamination control in a multiplexed setting [73]. |
| General qPCR Contamination Control | Prevents amplification of dU-containing carryover products [74] | dU-containing PCR products behave like native DNA in blotting and cloning, and UNG does not affect Taq polymerase or other PCR components [74]. |
The Scientist's Toolkit: Essential Reagents and Considerations
Successful implementation of UNG-mediated contamination control requires careful selection of reagents and awareness of technical constraints.
Table 3: Research Reagent Solutions for UNG-Based Contamination Control
| Reagent / Material | Function / Purpose | Key Considerations |
|---|---|---|
| Uracil-DNA Glycosylase (UNG/UDG) | Enzymatically excises uracil from DNA, creating abasic sites that block polymerase progression [74] [75]. | Heat-labile versions (e.g., from Atlantic cod) are available for one-step RT-PCR to prevent degradation of newly synthesized cDNA containing dU [74]. |
| dUTP | Replaces dTTP in PCR master mix; incorporated into amplicons, rendering them susceptible to future UNG degradation [75]. | Must be used in the initial PCR to generate susceptible contaminants. Most DNA polymerases can incorporate dUTP efficiently. |
| UNG-Compatible Master Mix | A ready-to-use solution containing optimized concentrations of UNG, dUTP, polymerase, dNTPs, and buffer. | Simplifies assay setup and ensures component compatibility. Check for the presence of dUTP if using a standard dTTP-based mix. |
| Uracil-Modified Primers | Primers synthesized with uracil residues instead of thymine [75]. | Can be used for specific cloning strategies by making the primer regions susceptible to UNG cleavage, generating sticky-ended PCR products [75]. |
Experimental Protocol: Integrating UNG into a Nested PCR Workflow
The following protocol provides a detailed methodology for incorporating UNG into a standard nested PCR procedure to mitigate carryover contamination.
Reagent Setup and First-Round PCR
- First-Round Master Mix Preparation: For the primary amplification, prepare a master mix that uses a dUTP/dTTP mixture (e.g., a 3:1 ratio of dUTP:dTTP) or a complete substitution of dTTP with dUTP. This ensures all amplicons generated contain uracil.
- Amplification: Perform the first round of PCR using the established thermocycling conditions for your specific target.
- Product Storage: The uracil-containing PCR products can be used directly for the second round or stored for future analysis. Note that these products are now potential contaminants for all future nested PCR experiments.
Second-Round PCR with UNG Guard
- UNG Master Mix Assembly: For the nested (second-round) PCR, prepare the master mix on ice to include:
- UNG Enzyme: Typically 0.2 - 1.0 units per reaction.
- dNTPs: Use the standard dTTP-containing mix. Do not use dUTP here unless you plan for a third round of nesting.
- Nested Primers, DNA Polymerase, Reaction Buffer, and Template (which can be a diluted product from the first-round PCR).
- UNG Incubation: Place the sealed PCR plates or tubes in the thermocycler and run the first step: Incubate at 50°C for 2-10 minutes. During this step, UNG will actively excise uracil from any contaminating DNA present in the reaction mix (e.g., aerosols from first-round product handling).
- Enzyme Inactivation and Amplification: Immediately following the incubation, run the standard PCR thermocycling protocol, starting with a denaturation step at 95°C for 2-5 minutes. This high temperature serves two purposes: it fragments the DNA at the newly created abasic sites, rendering contaminants unamplifiable, and it permanently inactivates the UNG enzyme to prevent degradation of the new nested PCR products. The reaction then proceeds with the nested amplification cycles.
Troubleshooting and Critical Limitations
While highly effective, the UNG system has specific limitations that researchers must consider during experimental design.
- Unsuitability for Certain Templates: UNG is not suitable for amplifying bisulfite-converted DNA, as the conversion process turns unmethylated cytosines into uracils, which would be degraded by UNG [74]. It is also not recommended for nested PCR protocols where the uracil-containing product from an earlier round is the intended template for the next round, as UNG will degrade it [74].
- Residual Activity and Primer Design: Although UNG is heat-inactivated, some residual activity has been reported. It is advised to use an annealing temperature of at least 55°C to minimize potential degradation of newly synthesized dU-containing products in subsequent cycles [74]. Furthermore, primers should ideally contain dA-nucleotides near their 3' ends to ensure efficient degradation of primer-dimers [74].
- Inability to Remove Preexisting Contamination: The UNG method is prophylactic; it cannot remove preexisting contamination from standard dTTP-containing PCR products. Good laboratory practices (physical separation of pre- and post-PCR areas, use of dedicated equipment and consumables) remain essential [74].
Assessing Performance: Sensitivity, Specificity, and Real-World Validation
Polymersse Chain Reaction (PCR) is a cornerstone technique in molecular biology, with its various evolved forms offering distinct advantages for specific applications. This whitepaper provides a comparative analysis of three key PCR methodologies: Conventional PCR, Single-Tube Real-Time PCR, and Real-Time Nested PCR. The analysis is framed within the critical context of contamination risks, particularly the open-tube contamination inherent in traditional nested PCR protocols. As molecular diagnostics continue to demand higher sensitivity and specificity, understanding the technical capabilities, limitations, and contamination profiles of these methods becomes essential for researchers, scientists, and drug development professionals. The nested PCR approach, while significantly enhancing sensitivity, introduces substantial contamination risks that must be mitigated through protocol modifications and stringent laboratory practices [47] [79].
Conventional PCR
Conventional PCR represents the fundamental nucleic acid amplification technique that utilizes thermal cycling to exponentially amplify target DNA sequences. The process involves three basic steps per cycle: denaturation (separating DNA strands at high temperature, typically 95°C), annealing (binding primers to complementary sequences at 55-72°C), and extension (synthesizing new DNA strands at 72°C using Taq polymerase) [79]. Detection and analysis of amplified products occur post-amplification, typically through agarose gel electrophoresis with ethidium bromide staining visualized under ultraviolet light. While this method provides a robust foundation for nucleic acid amplification, its sensitivity is limited compared to more advanced techniques, and the requirement for post-processing creates additional opportunities for contamination and increases hands-on time [79].
Single-Tube Real-Time PCR
Single-Tube Real-Time PCR, also known as quantitative PCR (qPCR), represents a significant advancement over conventional PCR by enabling real-time monitoring of amplification throughout the thermal cycling process. This method incorporates fluorescent reporter molecules—either intercalating dyes or sequence-specific probes—that emit signals proportional to accumulated DNA [79]. The critical distinction lies in its ability to quantify amplification as it occurs, eliminating the need for post-amplification processing. The single-tube format also simplifies setup, minimizes pipetting steps, and substantially reduces contamination risks by maintaining reaction containment [80]. This methodology provides excellent sensitivity with a typical detection limit of 10-100 copies of target nucleic acid, along with a broad dynamic range of quantification spanning 7-8 logarithmic orders of magnitude.
Nested PCR (Traditional Two-Tube Format)
Traditional nested PCR employs two successive amplification rounds to significantly enhance sensitivity and specificity. The initial round uses an outer primer set to amplify a larger target region, followed by transfer of a small aliquot of the first reaction product to a second tube containing inner primers that bind within the initial amplicon [81]. This sequential amplification provides exceptional sensitivity gains of 10- to 1000-fold compared to conventional PCR, enabling detection of extremely low-abundance targets that would otherwise remain undetectable [82] [7]. However, this enhanced sensitivity comes with a substantial contamination risk, as the requirement to transfer amplification products between tubes creates opportunities for aerosol contamination of laboratory surfaces, equipment, and reagents [47].
Single-Tube Nested Real-Time PCR
Single-Tube Nested Real-Time PCR represents an innovative integration of nested PCR principles with real-time detection in a contained system. This methodology sequentially deploys outer and inner primer sets within the same sealed reaction vessel, typically through careful primer design and optimized thermal cycling conditions that stage primer annealing temperatures [83]. The approach maintains the exceptional sensitivity benefits of traditional nested PCR while virtually eliminating the open-tube manipulation that causes carryover contamination. Studies demonstrate this method can achieve detection limits as low as 2.55 femtograms of parasite DNA in leishmaniasis diagnostics, significantly outperforming conventional ITS1 PCR which detected only 25 femtograms [7].
Comparative Performance Analysis
Sensitivity and Detection Limits
Table 1: Comparative Sensitivity of PCR Methodologies Across Applications
| Application Domain | Conventional PCR | Single-Tube Real-Time PCR | Nested PCR (Two-Tube) | Single-Tube Nested Real-Time PCR |
|---|---|---|---|---|
| Porcine Cytomegalovirus (PCMV) Detection [83] | 12.6% (16/127 samples) | Not tested | 23.6% (30/127 samples) | 38.6% (49/127 samples) |
| Severe Fever with Thrombocytopenia Syndrome (SFTS) Virus [82] | 63% positivity (initial samples) | 92.1% positivity (initial samples) | 97.3% positivity (initial samples) | Not separately tested |
| Cutaneous Leishmaniasis [7] | 25 fg detection limit | Not tested | 2.55 fg detection limit (modified nested PCR) | Not separately tested |
| Norovirus Detection [81] | Not tested | Detection limit: 10¹ virus genome copies | Detection limit: 10⁰ virus genome copies | Not separately tested |
| Sepsis Diagnosis (Bacterial/Fungal Detection) [19] | Not tested | 10³ CFU/ml detection limit | 10¹ CFU/ml detection limit (nested system) | Not separately tested |
The sensitivity advantage of nested PCR formats is consistent across diverse applications. In PCMV detection, single-tube nested real-time PCR identified 38.6% of positive samples compared to only 12.6% with conventional PCR [83]. Similarly, for SFTS virus diagnosis, nested PCR demonstrated 97.3% positivity rate versus 63% with conventional PCR in initial patient samples [82]. The remarkable sensitivity of nested formats enables detection of pathogens at extremely low concentrations, such as 2.55 femtograms of Leishmania DNA compared to 25 femtograms with conventional ITS1 PCR [7]. This enhanced detection capability is particularly valuable for applications with low pathogen loads, such as latent infections, early disease stages, and testing in the convalescent phase.
Specificity and Accuracy
Table 2: Specificity and Diagnostic Performance Comparison
| Parameter | Conventional PCR | Single-Tube Real-Time PCR | Nested PCR (Two-Tube) | Single-Tube Nested Real-Time PCR |
|---|---|---|---|---|
| Specificity (SFTS Virus) [82] | 100% | 100% | 100% | Not separately tested |
| Area Under Curve (AUC) - SFTS [82] | 0.819 | 0.97 | 1.000 | Not separately tested |
| Agreement with Sequencing (PCMV) [83] | Partial agreement | Not tested | Partial agreement | Complete agreement (κ = 1) |
| Detection in Convalescent Phase (SFTS) [82] | Poor after 7 days | Good up to 21 days | Excellent up to 40 days | Not separately tested |
Nested PCR methodologies consistently demonstrate superior diagnostic accuracy across applications. In SFTS virus detection, nested PCR achieved perfect Area Under Curve (AUC) of 1.000 compared to 0.819 for conventional PCR and 0.97 for real-time PCR [82]. Single-tube nested real-time PCR showed perfect agreement (κ = 1) with sequencing results for PCMV detection, outperforming both conventional and traditional nested PCR [83]. The exceptional performance of nested formats extends to prolonged detection windows, with nested PCR maintaining sensitivity for SFTS virus detection up to 40 days after symptom onset, far exceeding the detection window of other methods [82].
Contamination Risks and Practical Considerations
Table 3: Contamination Risk and Operational Factors
| Factor | Conventional PCR | Single-Tube Real-Time PCR | Nested PCR (Two-Tube) | Single-Tube Nested Real-Time PCR |
|---|---|---|---|---|
| Contamination Risk | Moderate | Low | Very High | Low |
| Assay Time | ~2-4 hours (plus post-processing) | ~1-2 hours | ~3-6 hours | ~1.5 hours [83] |
| Hands-on Time | Moderate | Low | High | Low |
| Throughput Potential | Moderate | High | Low | High |
| Technical Complexity | Low | Moderate | High | Moderate |
Contamination risk represents the most significant differentiator between nested PCR formats. Traditional two-tube nested PCR poses substantial contamination risk because transferring first-round amplification products to a second tube inevitably generates aerosols containing billions of DNA copies [47]. These aerosols can contaminate laboratory surfaces, equipment, and reagents, leading to false-positive results in subsequent experiments. Single-tube nested real-time PCR eliminates this risk by containing the entire reaction within a sealed vessel [83]. Operational efficiency also differs substantially, with single-tube nested real-time PCR requiring approximately 1.5 hours for completion compared to extended timelines for traditional nested protocols [83].
Experimental Protocols
Sample Preparation:
- DNA extraction from 200 μL of serum or 20 mg of organ tissue homogenate using commercial automated systems
- Quantify DNA content and purity by spectrophotometry (A260/A280 ratio)
- Store extracted DNA at -20°C until use
Reaction Setup:
- Prepare reaction mixture in total volume of 20 μL containing:
- 10 μL of 2× Thunderbird probe qPCR mix
- 2.5 μL of primer-probe mixture (5 pmol each primers and 5 pmol TaqMan probe labeled with FAM-BHQ1)
- 3 μL template DNA
- Include internal control DNA to monitor extraction efficiency and PCR inhibition
- Run positive and negative controls with each assay
Thermal Cycling Conditions:
- Initial denaturation: 95°C for 3 minutes
- First amplification stage (10 cycles):
- Denaturation: 95°C for 3 seconds
- Annealing/Extension: 60°C for 30 seconds
- Second amplification stage (40 cycles):
- Denaturation: 95°C for 3 seconds
- Annealing/Extension: 55°C for 30 seconds
Data Analysis:
- Positive result: Ct value < 35
- Validate with internal control amplification
- Confirm results by sequencing if necessary
First Round Amplification:
- Reaction volume: 20 μL containing:
- 2× PCR master mix
- 1× primer mixture (outer primers PCMVF1 and PCMVR1)
- 3 μL sample DNA
- Thermal cycling conditions:
- Pre-denaturation: 94°C for 5 minutes
- 40 cycles of: 94°C for 30 seconds, 60°C for 30 seconds, 72°C for 30 seconds
- Final extension: 72°C for 10 minutes
Second Round Amplification:
- Transfer 2 μL of first-round PCR product to fresh tube containing:
- 20 μL premixed solution with inner primers (PCMVFB and PCMVR2)
- Thermal cycling conditions:
- Pre-denaturation: 94°C for 5 minutes
- 40 cycles of: 94°C for 30 seconds, 55°C for 30 seconds, 72°C for 30 seconds
- Final extension: 72°C for 10 minutes
Product Analysis:
- Visualize amplified products on agarose gel electrophoresis
- Expected product sizes: 413-bp for conventional PCR, 160-bp for nested PCR
- Confirm amplification by direct sequencing of PCR products
Contamination Management in Nested PCR
The extreme sensitivity of nested PCR makes it particularly vulnerable to contamination, which primarily originates from two sources: amplicon contamination from previous reactions and cross-contamination between samples [47]. Amplicon contamination is especially problematic because PCR products are present at extremely high concentrations (billions of copies per μL) and represent perfect templates for subsequent amplification with the same primers [47]. Contamination vectors include aerosol formation during tube opening, pipette contamination, glove surface transfer, and equipment or surface contact [47]. These contamination routes can compromise experimental results, leading to false positives that undermine research validity and diagnostic accuracy.
Strategic Contamination Prevention
Figure 1: Strategic Laboratory Zoning for Contamination Prevention
Effective contamination control requires implementing a comprehensive strategy based on physical separation and procedural discipline:
Spatial Separation:
- Establish physically separated pre-amplification and post-amplification areas with dedicated equipment [47] [31]
- Maintain unidirectional workflow from clean (pre-amplification) to potentially contaminated (post-amplification) areas [84]
- Implement separate rooms with independent ventilation systems where possible [31]
Procedural Controls:
- Use aerosol-resistant filter tips or positive displacement pipettes to prevent aerosol contamination [84] [47]
- Aliquot all reagents to minimize freeze-thaw cycles and prevent stock contamination [84]
- Include negative controls (no template controls) in every run to monitor contamination [31]
- Open PCR tubes carefully after brief centrifugation to minimize aerosol formation [47]
Decontamination Protocols:
- Regularly decontaminate surfaces and equipment with 10% bleach solution (sodium hypochlorite) [47] [31]
- Use fresh bleach solutions weekly as hypochlorite degrades over time [31]
- Implement UV irradiation for equipment decontamination where appropriate [84]
- Clean pipettes, centrifuges, and vortexers frequently as these are common contamination sources [31]
Biochemical Contamination Control Methods
Advanced biochemical methods provide additional protection against contamination:
Uracil-N-Glycosylase (UNG) System:
- Incorporate dUTP instead of dTTP during amplification, creating uracil-containing DNA
- Add UNG enzyme to subsequent reaction mixes to degrade any contaminating uracil-containing amplicons
- Inactivate UNG at high temperatures before amplification begins [31]
Enzymatic and Chemical Inactivation:
- Use restriction enzymes or psoralen compounds to chemically crosslink and inactivate amplicons
- Implement post-amplification sterilization protocols for reaction vessels
Essential Research Reagent Solutions
Table 4: Essential Research Reagents for Nested PCR Applications
| Reagent Category | Specific Examples | Function and Importance |
|---|---|---|
| Polymerase Systems | SuperScript IV RT/Platinum Taq High Fidelity Enzyme Mix [81], Perpetual Taq Polymerase [19], Thunderbird probe qPCR mix [83] | Provides thermostable enzyme activity for amplification with reverse transcription capability where needed |
| Specialized Primers/Probes | TaqMan probes (FAM-BHQ1 labeled) [83], Outer and inner primer sets [83] [19], DIG-labeled oligonucleotide probes [81] | Enable sequence-specific detection and facilitate nested amplification in single-tube formats |
| Nucleic Acid Preparation | Miracle-AutoXT Nucleic Acid Extraction System [83], DEPC-treated water [81], DNase I treatment reagents [84] | Ensure high-quality template preparation free of contaminants and enzymatic inhibitors |
| Contamination Control | UNG enzyme systems [31], Bleach decontamination solutions [47] [31], Aerosol-resistant filter tips [84] | Prevent false positives through amplicon degradation and physical barrier protection |
| Buffer Systems | Color-changing PCR buffers [80], Optimized magnesium solutions (6.5-11.5 mM) [19], 2× master mixes | Maintain optimal reaction conditions and provide visual verification of proper mixing |
The comparative analysis of conventional, single-tube real-time, and nested PCR methodologies reveals a clear trade-off between sensitivity and contamination risk. Traditional two-tube nested PCR provides exceptional sensitivity with detection limits up to 1000-fold lower than conventional PCR, but introduces significant contamination risks through mandatory open-tube manipulations. Single-tube nested real-time PCR elegantly addresses this limitation by combining the sensitivity benefits of nested amplification with the contamination control of contained systems. For researchers operating within contamination-sensitive environments or applications requiring the highest sensitivity, single-tube nested real-time PCR represents the optimal balance of performance and practicality. Implementation of rigorous laboratory zoning, disciplined workflow practices, and appropriate biochemical controls remains essential regardless of format selection, particularly when employing nested principles for low-abundance target detection.
Measuring Gains in Analytical Sensitivity and Specificity
Analytical sensitivity and specificity are critical performance parameters that define the detection capability and accuracy of molecular diagnostic tests. Within nested polymerase chain reaction (PCR) methodologies, these parameters are profoundly influenced by technical procedures, particularly the risk of open-tube contamination. This technical guide provides a comprehensive framework for quantitatively measuring gains in analytical sensitivity and specificity achieved through optimized nested PCR protocols while mitigating amplicon contamination. We present standardized experimental methodologies, detailed protocols from current research, and systematic approaches for validating improvements in these key performance characteristics, specifically addressing the context of contamination risk in open-tube nested PCR systems.
Analytical sensitivity refers to the lowest concentration of an analyte that a diagnostic test can reliably detect, often expressed as the limit of detection (LOD) [85] [86]. In molecular diagnostics, this translates to the minimum number of DNA or RNA copies detectable per reaction. Analytical specificity, conversely, describes a test's ability to exclusively detect the target sequence without cross-reacting with non-target sequences, including closely related organisms or background nucleic acids present in complex samples [86]. These parameters differ from diagnostic sensitivity and specificity, which measure test performance against a clinical reference standard in patient populations [87] [86].
In nested PCR, the fundamental principle of performing two consecutive amplification rounds with two sets of primers naturally enhances both sensitivity and specificity compared to conventional PCR [88]. The initial amplification with outer primers increases the target template concentration, while the secondary amplification with inner primers binding within the first amplicon exponentially amplifies the target while reducing non-specific amplification. However, the requirement to transfer first-round amplification products to a second reaction tube in conventional nested PCR procedures introduces substantial contamination risk through amplicon carryover, potentially compromising test specificity through false-positive results [88] [29] [89]. Consequently, accurately measuring gains in analytical performance must concurrently address contamination control methodologies.
Methodologies for Quantifying Analytical Performance
Determining Analytical Sensitivity (Limit of Detection)
Establishing analytical sensitivity requires testing serial dilutions of a standardized target material to determine the lowest concentration consistently detected. The following methodology provides a robust framework for nested PCR applications:
Procedural Framework:
- Standard Preparation: Create a reference standard using quantified whole organisms, synthetic DNA, or cloned target sequences in a matrix resembling clinical samples [85].
- Serial Dilution: Prepare a logarithmic dilution series (e.g., 10-fold dilutions) covering concentrations from abundantly detectable to potentially undetectable levels.
- Replicate Testing: Test each dilution level with a minimum of 20 replicates to establish statistical confidence in detection rates [85] [90].
- Data Analysis: Calculate the percentage of positive results at each dilution level. The LOD is typically defined as the lowest concentration where ≥95% of replicates test positive [90].
For binary results (positive/negative), sensitivity is reported as percent positivity at specific concentrations. For quantitative methods (e.g., real-time PCR), include the mean quantification cycle (Cq) value and standard deviation at each dilution [90].
Establishing Analytical Specificity
Analytical specificity validation requires challenging the assay with non-target materials to assess cross-reactivity potential:
Procedural Framework:
- Cross-Reactivity Panel: Test a comprehensive panel including near-neighbor species, genetically similar pathogens, commensal microbiota, and human genomic DNA [85] [86].
- Interference Studies: Evaluate potential interference from substances endogenous to sample matrices (e.g., hemoglobin, immunoglobulins, anticoagulants) [83] [85].
- Specificity Verification: Confirm amplification specificity through sequence analysis of PCR products via direct sequencing [83].
Table 1: Experimental Design for Assessing Analytical Specificity
| Assessment Type | Panel Components | Acceptance Criterion |
|---|---|---|
| Cross-Reactivity | Near-neighbor species, phylogenetically related organisms | No amplification signal or Cq value >35 cycles |
| Genomic Interference | Human genomic DNA, microbiota from sample source | No false-positive amplification |
| Substance Interference | Heparin, EDTA, hemoglobin, tissue homogenates | No significant change in Cq values (<3 cycles) |
Experimental Protocols for Enhanced Nested PCR
One-Tube Nested Real-Time PCR Protocol
The one-tube nested real-time PCR approach combines the sensitivity benefits of nested amplification with contamination reduction by containing both amplification rounds in a single, sealed tube [83]. This method utilizes primers with different melting temperatures and probe-based detection to achieve sequential amplification without physical transfer of amplicons.
Reagent Composition:
- 10 μL of 2× Thunderbird probe qPCR mix
- 2.5 μL of primer-probe mixture (5 pmol each primer, 5 pmol TaqMan probe labeled with FAM-BHQ1)
- 3 μL template DNA
- Molecular grade water to 20 μL total volume [83]
Thermal Cycling Conditions:
- Initial Denaturation: 95°C for 3 minutes
- First Amplification Round (10 cycles):
- Denaturation: 95°C for 3 seconds
- Annealing/Extension: 60°C for 30 seconds
- Second Amplification Round (40 cycles):
- Denaturation: 95°C for 3 seconds
- Annealing/Extension: 55°C for 30 seconds [83]
Detection Method: Fluorescence measurement during the 55°C annealing/extension step of the second amplification round. A sample is considered positive when the cycle threshold (Ct) value is <35 [83].
Single-Tube Nested PCR with Antisense Oligonucleotides
For conventional nested PCR applications without real-time detection capability, antisense oligonucleotides provide an alternative method for minimizing primer interference in single-tube formats:
Primer Design Strategy:
- Design outer primers with higher melting temperature (∼68°C) and longer length (25 bp)
- Design inner primers with lower melting temperature (∼46°C) and shorter length (17 bp)
- Incorporate antisense oligonucleotides complementary to the 3' end of outer primers to block their activity during second-round amplification [89]
Thermal Cycling Optimization:
- First Round (20-30 cycles): Use high annealing temperature (68°C) to favor outer primer binding
- Second Round (20-30 cycles): Use low annealing temperature (46°C) to favor inner primer binding while antisense oligonucleotides suppress outer primer activity [88] [89]
Figure 1: Single-Tube Nested PCR Workflow Preventing Amplicon Contamination
Quantitative Comparison of Nested PCR Formats
Direct comparison of nested PCR methodologies demonstrates significant gains in analytical performance when appropriate contamination control measures are implemented.
Table 2: Performance Comparison of PCR Methodologies for Pathogen Detection
| PCR Method | Detection Rate (%) | Time to Result | Contamination Risk | Key Applications |
|---|---|---|---|---|
| Conventional PCR | 12.6% (16/127 samples) [83] | ~2-3 hours | Low | High viral load detection, target confirmation |
| Traditional Nested PCR (Two-Tube) | 23.6% (30/127 samples) [83] | ~3-4 hours | High | Pathogen discovery, low abundance targets |
| One-Tube Nested Real-Time PCR | 38.6% (49/127 samples) [83] | ~1.5 hours [83] | Low | Clinical diagnostics, high-throughput screening |
| Single-Tube Nested with Antisense Oligos | Significant improvement over two-tube nested [89] | ~2.5 hours | Moderate | Research settings, retrospective studies |
The implementation of one-tube nested real-time PCR demonstrated a 3-fold increase in detection rate compared to conventional PCR (38.6% vs. 12.6%) while reducing processing time by approximately 50% compared to traditional two-tube nested protocols [83]. This performance enhancement stems from combining the amplification power of nested primers with the specificity of probe-based detection while minimizing amplicon contamination through single-tube containment.
Contamination Control in Nested PCR Workflows
Effective contamination control is essential for maintaining analytical specificity in nested PCR applications. Implementing rigorous laboratory procedures preserves the integrity of amplification results by preventing false positives from amplicon carryover.
Laboratory Design Considerations:
- Physical Separation: Establish distinct pre-PCR and post-PCR work areas with unidirectional workflow [29]
- Dedicated Equipment: Use separate pipettes, centrifuges, and consumables for pre- and post-amplification procedures [29]
- Environmental Controls: Implement laminar flow hoods with HEPA/ULPA filtration for reagent preparation and amplification setup [29]
Procedural Safeguards:
- Unidirectional Workflow: Technicians should move exclusively from clean (pre-PCR) to potentially contaminated (post-PCR) areas without backtracking [29]
- Decontamination Protocols: Regular cleaning of workspaces with DNA-degrading agents (e.g., sodium hypochlorite, UV irradiation) [29]
- Process Validation: Incorporate negative controls (no-template and extraction controls) in every run to monitor contamination [83] [85]
Figure 2: Comprehensive Contamination Control Framework for Nested PCR
Research Reagent Solutions
Implementing robust nested PCR protocols with enhanced analytical performance requires specific reagent systems optimized for sensitivity, specificity, and contamination control.
Table 3: Essential Research Reagents for Enhanced Nested PCR
| Reagent Category | Specific Product Examples | Function in Assay Performance |
|---|---|---|
| Nucleic Acid Extraction | Miracle-AutoXT Automated System [83] | Standardized nucleic acid purification with inclusion of extraction controls |
| PCR Master Mixes | Thunderbird Probe qPCR Mix [83] | Optimized enzyme blends for efficient amplification with probe chemistry |
| Reference Materials | ACCURUN Molecular Controls [85] | Whole-organism controls for challenging extraction through detection |
| Performance Panels | AccuSeries Linearity Panels [85] | Multiplexed reference materials for LOD determination and verification |
| Inhibition Monitoring | Internal Control DNA [83] | Non-competitive control for detecting PCR inhibitors in reaction mix |
Accurate measurement of gains in analytical sensitivity and specificity requires systematic implementation of standardized protocols, appropriate controls, and rigorous contamination mitigation strategies. One-tube nested PCR methodologies demonstrate significant advantages over traditional formats, providing approximately 3-fold greater sensitivity than conventional PCR while substantially reducing false-positive results through amplicon containment. The quantitative frameworks presented herein enable researchers to rigorously validate improvements in these critical performance parameters while addressing the contamination risks inherent in nested PCR workflows. As molecular diagnostics continues to advance toward increasingly sensitive detection platforms, these methodologies provide essential guidance for maintaining analytical rigor while pushing detection boundaries in clinical and research applications.
Validation Frameworks Using Clinical and Environmental Samples
The detection and accurate identification of pathogens through molecular techniques are fundamental to medical diagnostics, environmental monitoring, and public health surveillance. Among these techniques, nested Polymerase Chain Reaction (nested PCR) is renowned for its exceptional sensitivity and specificity, capable of detecting low abundance targets in complex sample matrices. However, its implementation carries an inherent risk of false-positive results due to amplicon contamination, particularly in traditional two-tube protocols where reaction tubes are opened between amplification rounds. This technical guide establishes comprehensive validation frameworks to ensure result reliability while managing contamination risks, with protocols applicable across clinical and environmental settings.
Performance Comparison of Molecular Detection Methods
The selection of a detection method involves balancing sensitivity, specificity, throughput, and contamination risk. The table below summarizes the comparative performance of different PCR-based techniques, providing a foundation for validation planning.
Table 1: Comparison of PCR-Based Detection Method Performance
| Method | Typical Sensitivity | Key Advantage | Key Limitation | Contamination Risk |
|---|---|---|---|---|
| Conventional PCR | ~5×10⁴ copies/μL (plasmid) [4] | Simplicity, low cost | Lower sensitivity | Low |
| Traditional Two-Tube Nested PCR | ~5 copies/μL (plasmid) [4] | High sensitivity and specificity | High contamination risk from tube opening | High |
| Single-Tube Nested PCR | Similar to two-tube nested PCR [91] | Reduced contamination risk; maintains high sensitivity | Primer design complexity | Moderate |
| Real-Time PCR (qPCR) | ~50 copies/μL (plasmid) [4] | Quantification, rapid, closed-tube | Limited multiplexing without advanced approaches | Low |
| Nested Real-Time PCR | 1-2 log₁₀ improvement over one-step methods [81] | Superior sensitivity for low target levels | Complex workflow, moderate contamination risk | Moderate |
Performance varies significantly by application. For Severe Fever with Thrombocytopenia Syndrome (SFTS) virus diagnosis, nested PCR demonstrated 85% detection versus 44% for conventional PCR in patient samples collected over 40 days [82]. Similarly, for Erwinia amylovora detection in plant material, single-tube nested PCR identified 78% positive samples versus 55% with standard PCR [91].
Validation Framework Components
In Silico Validation
In silico validation is the computational assessment of primer and probe specificity before laboratory work, serving as the first critical validation step.
- Procedure: Primer and probe sequences are aligned against nucleotide databases using tools like BLAST. Specialized software (e.g., PCRv) automates this process, checking for complementary to target variants and potential cross-reactivity with non-target organisms [92].
- Application: In Acanthamoeba detection research, in silico analysis revealed that commonly used JDP2 primer could not align with genotypes T7, T8, T9, T17, and T18, leading to the development of a modified primer (JDP2-M) for comprehensive genotype coverage [93].
Analytical Sensitivity and Specificity
Analytical sensitivity defines the lowest target quantity reliably detected, while analytical specificity confirms non-reactivity with non-targets.
- Sensitivity Determination: Conduct limit of detection (LOD) experiments using serial dilutions of target DNA/cDNA. For example, a nested PCR for Legionella pneumophila detected 10-50 colony forming units per sample [94].
- Specificity Testing: Validate against a panel of related non-target strains. The single-tube nested PCR for Erwinia amylovora was tested against 71 target strains, 24 non-target pathogenic species, and 16 saprophytic bacteria, demonstrating 100% specificity [91].
Clinical and Environmental Sample Validation
Diagnostic accuracy must be confirmed using real-world samples against an appropriate reference standard.
- Clinical Validation: For scrub typhus diagnosis, nested PCR showed 85.4% sensitivity in patient blood samples within 4 weeks of fever onset, compared to 7.3% for conventional PCR [4].
- Environmental Validation: For Histoplasma capsulatum detection in organic fertilizers, real-time PCR demonstrated a 67% positivity rate versus 11% for nested PCR in Colombian environmental samples [5].
Table 2: Essential Research Reagent Solutions for Nested PCR Validation
| Reagent Category | Specific Examples | Function in Validation |
|---|---|---|
| DNA Extraction Kits | FastDNA SPIN Kit For Soil (MP Biomedicals), QIAamp UCP Pathogen Mini Kit (Qiagen) | Remove PCR inhibitors from complex matrices (e.g., soil, plant material) |
| PCR Master Mixes | TaqPath ProAmp Master Mix, Platinum SuperFi II PCR Master Mix | Provide high-fidelity amplification with optimized buffer conditions |
| Enzyme Systems | SuperScript III RT/Platinum Taq High Fidelity Enzyme Mix | Combine reverse transcription and PCR for RNA virus detection |
| Positive Control Materials | Quantified gDNA from ATCC, cloned plasmid DNA with target insert, synthetic gBlocks | Standardize sensitivity measurements and run-to-run comparison |
| Primer/Probe Sets | Target-specific nested primers, hydrolysis probes for real-time PCR | Ensure specific amplification; modified primers can enhance genotype coverage |
Experimental Protocols for Core Applications
Protocol: Single-Tube Nested PCR for Plant Pathogen Detection
This protocol for Erwinia amylovora detection exemplifies contamination-controlled nested PCR [91].
- Primer Design: Employ two primer pairs with different annealing temperatures targeting plasmid pEA29. External primers have higher annealing temperature than internal primers.
- Reaction Setup: Combine external and internal primer pairs in a single tube with DNA template and PCR reagents. A typical volume is 25-50 μL.
- Thermal Cycling:
- Initial denaturation: 95°C for 5 min
- First amplification (20-25 cycles): Denaturation at 95°C for 15-30 sec, annealing at higher temperature (external primers only) for 15-30 sec, extension at 72°C for 30-60 sec
- Second amplification (35-40 cycles): Denaturation at 95°C for 15-30 sec, annealing at lower temperature (both primer pairs) for 15-30 sec, extension at 72°C for 30-60 sec
- Final extension: 72°C for 5-10 min
- Contamination Control: Implement strict unidirectional workflow and include negative controls (no template and extraction blanks).
Protocol: Nested Real-Time PCR for Virus Detection
This two-step protocol for norovirus detection combines the sensitivity of nested PCR with real-time detection [81].
- First-Strand cDNA Synthesis: Convert viral RNA using target-specific or random primers and reverse transcriptase.
- First-Round PCR: Amplify cDNA with outer primers (e.g., JV12Y and JV13I for norovirus). Cycling conditions: 50°C for 15 min (RT); 95°C for 2 min; 45 cycles of 95°C for 30 sec, 37°C for 40 sec, 72°C for 40 sec; final extension at 72°C for 5 min.
- Second-Round Real-Time PCR: Transfer 2.5 μL of first-round product to a new reaction containing inner primers and FAM-labeled probes. Cycling conditions: 95°C for 2 min; 45 cycles of 95°C for 15 sec, 52°C for 30 sec, 72°C for 30 sec.
- Validation: Include standard curves for quantification and determine Ct values for sensitivity assessment.
Figure 1: Nested PCR Validation Workflow with Critical Control Points
Contamination Mitigation Strategies
Contamination control is paramount in nested PCR due to amplification of previously amplified products. A multi-layered approach is essential.
- Physical Separation: Establish distinct pre- and post-amplification areas with separate equipment, reagents, and lab coats. Implement unidirectional workflow.
- Single-Tube Protocols: Adopt single-tube nested PCR where possible. This closed-tube approach maintains sensitivity while dramatically reducing contamination risk [91].
- Enzymatic Controls: Incorporate uracil-N-glycosylase (UNG) into master mixes to degrade carryover contamination from previous reactions.
- Process Validation: Include multiple negative controls (no-template, extraction blanks) across all runs. In environmental surveillance, use samples from non-endemic areas as negative controls [5].
Figure 2: Contamination Risk Mitigation Strategy Framework
Robust validation frameworks for nested PCR applications must address both performance metrics and contamination risks. The protocols and comparisons presented here provide laboratory scientists with structured approaches for assay development and validation. As molecular diagnostics evolve, integration of in silico validation with controlled laboratory implementation remains fundamental to generating reliable data for both clinical decision-making and environmental surveillance. Future developments in closed-tube systems and advanced multiplexing approaches will further enhance the utility of nested PCR while minimizing its principal limitation of contamination vulnerability.
Nested Polymerase Chain Reaction (PCR) stands as a cornerstone technique in molecular diagnostics, renowned for its exceptional sensitivity and specificity in pathogen detection. This method utilizes two successive rounds of PCR amplification with two sets of primers, significantly enhancing the detection capability for low-abundance targets present in clinical and environmental samples [95]. The inner primers, which bind within the sequence amplified by the outer primers, ensure a dramatic reduction in non-specific amplification, making nested PCR particularly valuable for identifying pathogens that are difficult to culture or present in minute quantities [15] [95].
However, a significant drawback of conventional nested PCR is the high risk of open-tube contamination. The requirement to transfer the first-round PCR product to a new tube for the second amplification step creates opportunities for aerosolized amplicons to contaminate laboratory environments, reagents, and subsequent reactions, leading to false-positive results [96] [97]. This article delves into this critical challenge, presenting case studies of successfully implemented nested PCR assays for detecting Helicobacter pylori, Brucella spp., and other pathogens, with a specific focus on methodologies that mitigate contamination risks. We will explore innovative adaptations like one-tube nested PCR and compare quantitative performance data across various implementations to provide a comprehensive technical guide for researchers and diagnosticians.
The Contamination Challenge in Nested PCR
The primary source of contamination in nested PCR is the generation and spread of aerosolized amplicons—tiny droplets containing the amplified PCR product. These aerosols are readily created when opening reaction tubes after the first round of amplification, especially with vigorous techniques like flicking tubes open [28]. Once airborne, these contaminants can settle on laboratory surfaces, equipment, gloves, and even lab coats, subsequently finding their way into new PCR setups and being amplified again.
The consequences of such contamination are severe, potentially leading to misdiagnosis, erroneous research data, and significant wasted resources in troubleshooting and reagent replacement. A robust contamination control program is therefore not optional but essential for any laboratory employing nested PCR. Key strategies, as identified across multiple sources, include [28] [97]:
- Physical Separation: Dedicating separate rooms or, at a minimum, separate, enclosed spaces for pre-PCR (reaction setup, sample preparation) and post-PCR activities (product analysis). These areas should have dedicated equipment, lab coats, and supplies that never cross over [28] [97].
- Workflow and Practice: Establishing a unidirectional workflow from pre-PCR to post-PCR areas. Technicians should not re-enter the pre-PCR area after working in the post-PCR area without changing gloves and lab coats. Reactions should be assembled using master mixes, and the template DNA should be added last [28].
- Decontamination Procedures: Regular decontamination of work surfaces and equipment with a 10% bleach solution or commercial DNA-degrading agents (e.g., DNA-away) is effective. UV irradiation (254 nm) can be used in pre-PCR hoods to cross-link and inactivate contaminating DNA, though it is less effective for shorter amplicons [97].
- Chemical and Biochemical Methods: Incorporating uracil-DNA-glycosylase (UDG) into the PCR mix is a highly effective method. In this system, dTTP is replaced with dUTP in the master mix, resulting in uracil-containing amplicons. Any contaminating amplicons from previous reactions can then be enzymatically degraded by UDG before the start of the new PCR cycle, preventing their re-amplification [97].
- Rigorous Use of Controls: Always including multiple negative controls (e.g., no-template controls) is crucial for monitoring contamination. Without them, low-level contamination can go undetected for long periods [28].
The following diagram illustrates a workflow that integrates these key contamination control measures into the nested PCR process.
Case Studies in Pathogen Detection
Case Study 1: Detection of Helicobacter pylori in Stool Samples
H. pylori, a global pathogen associated with gastritis, ulcers, and gastric cancer, is challenging to detect in stool samples due to low bacterial loads and degraded DNA.
Experimental Protocol: A recent study developed a highly sensitive nested PCR targeting the 16S rRNA gene to overcome the limitations of the stool antigen test (SAT) [15]. Researchers designed two primer sets: an outer set amplifying a 454 bp region and an inner set for a shorter 148 bp fragment. Stool samples from 208 gastroenterological patients and 100 asymptomatic volunteers were processed for DNA extraction. The first round of PCR used the outer primers, and a small aliquot of this product was transferred to a second reaction containing the inner primers for the nested amplification. The specificity of all PCR products was confirmed by DNA sequencing.
Key Findings and Performance: The study revealed that H. pylori DNA in stool is often fragmented. The long-amplicon (454 bp) NPCR had low sensitivity (6.25%), while the short-amplicon (148 bp) NPCR dramatically improved detection rates to 51.0% in patients and 66.6% in asymptomatic volunteers, all confirmed by sequencing [15]. This highlights that amplicon length is a critical factor for success when targeting degraded DNA in complex samples like stool.
Contamination Mitigation: The protocol adhered to strict rules commonly used in forensic laboratories, including physical separation of pre- and post-PCR workspaces, use of dedicated equipment and lab coats, and extensive use of negative controls to rule out false positives from laboratory contamination [15].
Case Study 2: Rapid and Sensitive Detection of Brucella spp.
Brucellosis, a zoonotic disease, is traditionally diagnosed using culture and serological tests, which are time-consuming or lack sensitivity. Molecular methods offer a rapid alternative.
Experimental Protocol: A novel one-tube nested quantitative real-time PCR (qPCR) was developed to detect Brucella, targeting the bcsp31 gene [61]. This method uses two pairs of primers and two probes (FAM-labeled) that react sequentially within a single, closed tube. The assay was validated using 250 clinical samples and compared directly with conventional qPCR.
Key Findings and Performance: The one-tube nested qPCR demonstrated a 100-fold higher analytical sensitivity (100 fg/μL) than conventional qPCR. In clinical samples, it showed 98.6% sensitivity and 100% specificity, significantly outperforming conventional qPCR (84.1% sensitivity) [61]. Critically, it reduced the cycle threshold (CT) values by an average of 6.4, greatly improving the detection of low-load samples (CT > 35).
Contamination Mitigation: The closed-tube approach is the core contamination control feature of this assay. By performing both amplification rounds in a single tube without ever opening it, the risk of aerosol contamination is virtually eliminated, making the assay both highly sensitive and robust for clinical use [61].
Additional Case Studies
Campylobacter jejuni in Ground Chicken: An ultra-sensitive single-tube nested PCR (STN-PCR) was developed for the foodborne pathogen C. jejuni [96]. The assay, targeting the hipO gene, used outer and inner primers with different annealing temperatures to perform both PCR rounds in one tube. It achieved a detection limit of 10 DNA copies, 100 times more sensitive than conventional PCR, and successfully detected the pathogen in spiked ground chicken samples without the cross-contamination risks of open-tube transfers.
Porcine Cytomegalovirus (PCMV): A one-tube nested real-time PCR was compared to conventional and nested PCR for detecting PCMV, a critical pathogen in xenotransplantation safety [59]. The one-tube method demonstrated a superior detection rate (38.6%) compared to nested PCR (23.6%) and conventional PCR (12.6%), with all results confirmed by sequencing. The assay provided results in approximately 1.5 hours, showcasing the combination of speed, sensitivity, and contamination control.
The quantitative performance of these nested PCR implementations is summarized in the table below for easy comparison.
Table 1: Performance Comparison of Nested PCR Methods in Pathogen Detection
| Pathogen | Sample Type | Method | Key Performance Metric | Result | Reference |
|---|---|---|---|---|---|
| Helicobacter pylori | Stool | Nested PCR (148 bp) | Clinical Sensitivity | 51.0% | [15] |
| Brucella spp. | Clinical Samples | One-Tube Nested qPCR | Analytical Sensitivity | 100 fg/μL | [61] |
| Brucella spp. | Clinical Samples | One-Tube Nested qPCR | Clinical Sensitivity | 98.6% | [61] |
| Campylobacter jejuni | Pure Culture | Single-Tube Nested PCR | Detection Limit | 10 DNA copies | [96] |
| Porcine Cytomegalovirus | Tissue & Blood | One-Tube Nested RT-PCR | Detection Rate | 38.6% | [59] |
The Scientist's Toolkit: Essential Reagents and Materials
Successful implementation of a contamination-controlled nested PCR assay requires careful selection of reagents and materials. The following table details key solutions used in the featured experiments.
Table 2: Essential Research Reagent Solutions for Contamination-Controlled Nested PCR
| Reagent / Material | Function / Description | Contamination Control Consideration | |
|---|---|---|---|
| Primers (Outer & Inner) | Specifically designed to amplify a target within the first amplicon. Inner primers should have a higher annealing temperature in one-tube systems. | Verified for specificity using BLAST; aliquoted to minimize freeze-thaw cycles and cross-contamination. | [61] [96] |
| dNTP Mix (with dUTP) | Provides the nucleotides (dATP, dCTP, dGTP, and dUTP) for DNA synthesis. | Using dUTP instead of dTTP allows for subsequent destruction of contaminating amplicons with UDG enzyme. | [97] |
| Uracil-DNA-Glycosylase (UDG) | An enzyme that cleaves uracil-containing DNA, preventing amplification of carryover contaminants. | Added to the PCR master mix and incubated prior to amplification to degrade contaminating amplicons from previous runs. | [97] |
| Taq DNA Polymerase | Thermostable enzyme that catalyzes DNA synthesis. | A high-fidelity version is not always necessary but can be selected. Purchased as a concentrated stock and aliquoted. | [95] |
| PCR Buffer & MgCl₂ | Provides optimal chemical environment (pH, ions) for polymerase activity. MgCl₂ concentration is critical for primer annealing. | Purchased as a 10x concentrate and aliquoted. The MgCl₂ concentration must be optimized for each primer set. | [95] |
| Nuclease-Free Water | The solvent for all reactions; must be free of nucleases that would degrade DNA and primers. | A common source of contamination. Should be filter-sterilized through a 0.45μ nitrocellulose filter and aliquoted. | [97] |
Advanced Methodologies: One-Tube Nested PCR Protocols
The one-tube nested PCR methodology represents a significant advancement in mitigating contamination. The following workflow details the general protocol, integrating the contamination controls from the Scientist's Toolkit.
Detailed Step-by-Step Protocol:
Reaction Assembly: In a single PCR tube, combine the following components on ice to create a master mix. It is critical to include a UDG enzyme in this step when using dUTP [97].
- Nuclease-Free Water: to a final volume of 25 µL.
- 10x PCR Buffer: 2.5 µL.
- MgCl₂ Solution (e.g., 25 mM): 1.5 µL (Final concentration 1.5-2.0 mM).
- dNTP Mix with dUTP: 0.5 µL (Final concentration 200 µM each dNTP).
- Outer Forward and Reverse Primers: 0.5 µL each (Final concentration 0.2 µM).
- Inner Forward and Reverse Primers: 0.5 µL each (Final concentration 0.2 µM).
- Uracil-DNA-Glycosylase (UDG): 0.2-0.5 U per reaction.
- Taq DNA Polymerase: 0.25 µL (1.25 U).
- Template DNA: 1-2 µL (added last).
Thermal Cycling: Place the tube in a thermal cycler and run a program with the following sequential stages [61] [96] [59]:
- UDG Incubation: 37°C for 5-10 minutes. This allows UDG to cleave any contaminating uracil-containing DNA from previous amplifications.
- Polymerase Activation/Initial Denaturation: 95°C for 3-5 minutes. This step simultaneously inactivates the UDG enzyme and activates the hot-start polymerase, while also denaturing the template DNA.
- First Round Amplification (10-15 cycles):
- Denaturation: 95°C for 30 seconds.
- Annealing: High temperature (e.g., 60-68°C) for 30 seconds. This temperature is specific to the outer primers and promotes their binding.
- Extension: 72°C for 1 minute.
- Second Round Amplification (30-40 cycles):
- Denaturation: 95°C for 30 seconds.
- Annealing: Low temperature (e.g., 46-55°C) for 30 seconds. This temperature allows the inner primers to bind efficiently to the products of the first round.
- Extension: 72°C for 1 minute.
- Final Extension: 72°C for 5-10 minutes.
Product Analysis: After the run is complete, analyze the PCR product. For traditional one-tube nested PCR, this can be done via agarose gel electrophoresis. For one-tube nested real-time PCR, the results are provided in real-time through fluorescence measurements, and the tube never needs to be opened, offering the highest level of contamination security [61] [59].
The case studies presented herein demonstrate that nested PCR remains an indispensable tool for the detection of challenging pathogens across clinical, food safety, and veterinary fields. The key to its successful implementation lies in directly addressing its primary vulnerability: open-tube contamination. Methodological innovations, particularly one-tube nested PCR and its real-time quantitative variant, have proven to be powerful solutions. These advanced protocols effectively decouple the exceptional sensitivity of nested PCR from its historical contamination risks.
Furthermore, the data underscores that best practices—including rigorous physical separation of workspaces, the use of master mixes, meticulous aliquoting of reagents, and the strategic application of biochemical methods like UDG treatment—form a foundational framework for any molecular diagnostic lab. As evidenced by the successful detection of H. pylori, Brucella, and C. jejuni, the combination of optimized primer design, awareness of sample-specific challenges like DNA degradation, and robust contamination control measures enables researchers to leverage the full power of nested PCR. This ensures the generation of reliable, accurate, and reproducible data that is critical for both scientific research and public health.
Conclusion
The risk of open-tube contamination in nested PCR presents a significant challenge, but it is not insurmountable. A multi-layered defense strategy is paramount, combining rigorous foundational practices—such as strict unidirectional workflow and thorough decontamination—with the adoption of advanced methodological solutions. The evolution towards single-tube and real-time nested PCR formats represents a critical leap forward, offering high sensitivity while systematically eliminating the primary contamination vector. As validated by comparative studies across various pathogens, these integrated approaches ensure the reliability and accuracy required for high-stakes applications in clinical diagnostics, drug development, and public health monitoring. Future directions will likely focus on further streamlining these robust protocols, making highly sensitive and contamination-resistant molecular diagnostics more accessible and routine in laboratories worldwide.
References
- 1. Nested PCR: Principle, Protocol and Application [https://www.bocsci.com/resources/nested-pcr-principle-protocol-and-applications.html?srsltid=AfmBOooZ9NgJxs9L8L6c-G0QUx6fzAxbBUbqz32WpRBmlUxZrisM7Voz]
- 2. PCR Methods - Top Ten Strategies [https://www.thermofisher.com/us/en/home/life-science/cloning/cloning-learning-center/invitrogen-school-of-molecular-biology/pcr-education/pcr-reagents-enzymes/pcr-methods.html]
- 3. Nested Polymerase Chain Reaction - an overview [https://www.sciencedirect.com/topics/agricultural-and-biological-sciences/nested-polymerase-chain-reaction]
- 4. Comparison of Conventional, Nested, and Real-Time ... [https://pmc.ncbi.nlm.nih.gov/articles/PMC3043474/]
- 5. Nested and Real-Time Polymerase Chain Reaction ... [https://pmc.ncbi.nlm.nih.gov/articles/PMC9128683/]
- 6. Comparison of nested PCR and qPCR for the detection ... [https://www.sciencedirect.com/science/article/pii/S0166093413003388]
- 7. Development of a Highly Sensitive Nested PCR and Its ... [https://www.mdpi.com/2076-2607/10/5/990]
- 8. One-Tube Nested RT-PCR Enabled by Using a Plastic Film ... [https://pmc.ncbi.nlm.nih.gov/articles/PMC7087936/]
- 9. Regulatory Concern of Polymerase Chain Reaction (PCR) ... [https://www.intechopen.com/chapters/52932]
- 10. Carryover Contamination-Controlled Amplicon Sequencing ... [https://pmc.ncbi.nlm.nih.gov/articles/PMC10269707/]
- 11. Comparison of PCR and quantitative real-time ... [https://www.sciencedirect.com/science/article/abs/pii/S0043135413005460]
- 12. Single-Tube Balanced Heminested PCR for Detecting ... [https://pmc.ncbi.nlm.nih.gov/articles/PMC86365/]
- 13. Optimization of the real-time PCR platform method using ... [https://www.nature.com/articles/s41598-025-16972-9]
- 14. Comparison of Rapid Quantitative PCR-Based and ... [https://pmc.ncbi.nlm.nih.gov/articles/PMC2976187/]
- 15. Peculiarities of Diagnostic Reliability—Nested PCR Versus ... [https://www.mdpi.com/2076-2607/13/7/1498]
- 16. Nested Polymerase Chain Reaction - an overview [https://www.sciencedirect.com/topics/biochemistry-genetics-and-molecular-biology/nested-polymerase-chain-reaction]
- 17. Preventing PCR Amplification Carryover Contamination in ... [https://www.annclinlabsci.org/content/34/4/389.long]
- 18. Nested PCR: Principle, Protocol and Application [https://www.bocsci.com/resources/nested-pcr-principle-protocol-and-applications.html?srsltid=AfmBOoocQnmUV7UoWOdlTjOl9mCAbpi_swblr4E6C0A3m0HRtV8KFGUS]
- 19. A novel, nested, multiplex, real-time PCR for detection of ... [https://pmc.ncbi.nlm.nih.gov/articles/PMC4049433/]
- 20. A multiplex nested PCR for the detection and identification of ... [https://bmcinfectdis.biomedcentral.com/articles/10.1186/1471-2334-14-406]
- 21. Primers Determine the Sensitivity of PCR-mediated ... [https://www.sciencedirect.com/science/article/pii/S1016847823132882]
- 22. Nested PCR: Principle, Protocol and Application [https://www.bocsci.com/resources/nested-pcr-principle-protocol-and-applications.html?srsltid=AfmBOoqSCeKW8vikuinhrLr5D2PzqKRmLY5nN7BJ61hlF119I4DKwmOp]
- 23. Optimization of single-tube nested PCR for the detection ... [https://www.sciencedirect.com/science/article/abs/pii/S0014489423000358]
- 24. What are some sources of PCR contamination? [https://help.takarabio.com/36168/kb/article/110039/what-are-some-sources-of-pcr-contamination]
- 25. Diagnostic reliability of nested PCR depends on the primer ... [https://pubmed.ncbi.nlm.nih.gov/32057175/]
- 26. Single-tube Multiplex Nested PCR System for Efficient ... [https://pmc.ncbi.nlm.nih.gov/articles/PMC9536825/]
- 27. Development of a Nested Qualitative Real-Time PCR ... [https://pmc.ncbi.nlm.nih.gov/articles/PMC1248492/]
- 28. Clean Up Your Act! How To Clean Up PCR Contamination [https://bitesizebio.com/20773/clean-up-your-act-how-to-clean-up-pcr-contamination/]
- 29. Help Prevent PCR Contamination with Laminar Flow Hoods [https://www.sentryair.com/blog/industry-applications/laboratories/help-prevent-pcr-contamination-with-laminar-flow-hoods/]
- 30. How to prevent PCR contamination [https://www.minipcr.com/how-to-prevent-pcr-contamination/]
- 31. Avoiding Contamination | Thermo Fisher Scientific - ES [https://www.thermofisher.com/us/en/home/life-science/pcr/real-time-pcr/real-time-pcr-learning-center/real-time-pcr-basics/good-laboratory-practice-avoid-contamination-qpcr-experiments.html]
- 32. Separation process [https://en.wikipedia.org/wiki/Separation_process]
- 33. marcoboerner/R2DFlow: A unidirectional data flow . implementation [https://github.com/marcoboerner/R2DFlow]
- 34. Nested PCR: Principle, Protocol and Application [https://www.bocsci.com/resources/nested-pcr-principle-protocol-and-applications.html?srsltid=AfmBOooK4WmEkAgwMvVWwxKwdQZVDFFOnAOFwy_PQTPg0oe0jccC0LNl]
- 35. Laminar Flow Hood Airflow: Understanding Dynamics - Youth [https://youthfilter.com/news/laminar-flow-hood-airflow-understanding-dynamics/]
- 36. "Comparing Vertical and Horizontal Laminar Flow Cabinets ... [https://aelabgroup.com/comparing-vertical-and-horizontal-laminar-flow-cabinets-for-laboratory-applications/]
- 37. Biological Safety Cabinet vs Laminar Flow Hood [https://www.ossila.com/pages/biological-safety-cabinets-laminar-flow-hoods]
- 38. Vertical Laminar Flow Hoods vs. Biological Safety Cabinets [https://www.airscience.com/vertical-laminar-flow-hoods-vs-biological-safety-cabinets]
- 39. PCR Workstation vs. Biosafety Cabinet: Understanding the ... [https://www.airscience.com/pcr-workstation-vs-biosafety-cabinet-understanding-the-differences]
- 40. Laminar flow hood: working tips - Cellculture2 - Altervista [https://cellculture2.altervista.org/laminar-flow-hood-working-tips/]
- 41. PCR Cabinets - Dead Air Enclosure vs Laminar Flow - Tion [https://www.tion.co.uk/education/pcr-cabinets-dead-air-enclosure-vs-laminar-flow/]
- 42. Nested PCR: Principle, Protocol and Application [https://www.bocsci.com/resources/nested-pcr-principle-protocol-and-applications.html?srsltid=AfmBOopXrHLZeL0Q0kE7RzJGThFNMDTpriQ59uMrD3Wvp6CRmGt338tJ]
- 43. Evaluation of Different Cleaning Strategies for Removal ... [https://pmc.ncbi.nlm.nih.gov/articles/PMC8775027/]
- 44. An Efficient Multistrategy DNA Decontamination Procedure of ... [https://journals.plos.org/plosone/article?id=10.1371/journal.pone.0013042]
- 45. Application of 2D polymerase chain reaction for single-tube ... [https://www.frontiersin.org/journals/microbiology/articles/10.3389/fmicb.2025.1528094/full]
- 46. Nested PCR: Principle, Protocol and Application [https://www.bocsci.com/resources/nested-pcr-principle-protocol-and-applications.html?srsltid=AfmBOoqSvGTmBpd4uNjZ5lordh0KocF-KrCIjqtb3irbOFZTqmig9e4e]
- 47. PCR product contamination and how to deal with it [https://bento.bio/resources/bento-lab-advice/pcr-product-contamination-what-it-is-how-it-occurs-and-how-to-deal-with-it/]
- 48. How to Choose the Right Pipette Tips for your Experiment [https://bitesizebio.com/4074/the-pcr-controls-you-must-use/]
- 49. Selecting the Right Pipette Tip [https://www.thermofisher.com/us/en/home/life-science/lab-plasticware-supplies/lab-plasticware-supplies-learning-center/lab-plasticware-supplies-resource-library/fundamentals-of-pipetting/liquid-handling-selection/selecting-the-right-pipette-tip.html]
- 50. Dos and don'ts for molecular testing [https://www.who.int/teams/global-malaria-programme/case-management/diagnosis/nucleic-acid-amplification-based-diagnostics/dos-and-don-ts-for-molecular-testing]
- 51. Contamination-pipetting: relative efficiency of filter tips ... [https://www.nature.com/articles/nmeth887]
- 52. Optimizing single-tube nested PCR for enhanced ... [https://www.sciencedirect.com/science/article/abs/pii/S0378111924007194]
- 53. Development and evaluation of a single tube nested PCR ... [https://pubmed.ncbi.nlm.nih.gov/17966431/]
- 54. A highly sensitive modified nested PCR to enhance case ... [https://bmcinfectdis.biomedcentral.com/articles/10.1186/s12879-019-4180-3]
- 55. Improving sensitivity of single tube nested PCR to detect ... [https://pmc.ncbi.nlm.nih.gov/articles/PMC7002839/]
- 56. Improving sensitivity of single tube nested PCR to detect ... [https://www.sciencedirect.com/science/article/pii/S2405844020300918]
- 57. Optimizing single-tube nested PCR for enhanced ... [https://pubmed.ncbi.nlm.nih.gov/39127412/]
- 58. Single-tube nested PCR using immobilized internal primers ... [https://pmc.ncbi.nlm.nih.gov/articles/PMC1993823/]
- 59. One-Tube Nested Real-Time PCR Assay for Rapid ... [https://www.frontiersin.org/journals/veterinary-science/articles/10.3389/fvets.2020.586045/full]
- 60. A closed tube format for amplification and detection of DNA ... [https://pmc.ncbi.nlm.nih.gov/articles/PMC146748/]
- 61. A novel, highly sensitive, one-tube nested quantitative real ... [https://pmc.ncbi.nlm.nih.gov/articles/PMC10714840/]
- 62. Comparative Performance of Digital PCR and Real-Time RT ... [https://pmc.ncbi.nlm.nih.gov/articles/PMC12474457/]
- 63. Digital PCR (dPCR) vs Real-Time PCR (qPCR) [https://firalismolecularprecision.com/2025/04/09/dpcr-qpcr-differences/]
- 64. The Devil in the Details: Contamination in a PCR Lab [https://www.rapidmicrobiology.com/news/the-devil-in-the-details-contamination-in-a-pcr-lab]
- 65. Controlling for contamination in qPCR testing - LGC [https://blog.biosearchtech.com/how-to-control-for-contamination-in-qpcr-testing]
- 66. Comparison of real-time PCR and nCounter NanoString ... [https://www.nature.com/articles/s41598-025-08036-9]
- 67. Nested PCR: Principle, Protocol and Application [https://www.bocsci.com/resources/nested-pcr-principle-protocol-and-applications.html?srsltid=AfmBOopKoyGwJ-SIKfQeixijjXaYKRaRu84FseMyLq_Jkn1f5INxbfQX]
- 68. Optimization of single-tube nested PCR for the diagnosis of ... [https://pubmed.ncbi.nlm.nih.gov/23507078/]
- 69. qPCR Primer Design: A Handy Step-by-Step Guide [https://bitesizebio.com/10041/designing-qpcr-primers/]
- 70. Guidelines for PCR Optimization with Taq DNA Polymerase [https://www.neb.com/en-us/tools-and-resources/usage-guidelines/guidelines-for-pcr-optimization-with-taq-dna-polymerase?srsltid=AfmBOoq1ezm_hUfJjsnQzP0iR6HKDPwSiIL73_kLt52qCbscQoJnqWYO]
- 71. PCR Assay Optimization and Validation [https://www.sigmaaldrich.com/US/en/technical-documents/technical-article/genomics/pcr/assay-optimization-and-validation?srsltid=AfmBOorWyyPLDpmXWP5tsOqArb0qagKinSW2GWkBl0_3pZ774OiT8WxJ]
- 72. A Nested Allele-Specific Multiplex Polymerase Chain ... [https://pmc.ncbi.nlm.nih.gov/articles/PMC3328935/]
- 73. Nested Patch PCR enables highly multiplexed mutation ... [https://pmc.ncbi.nlm.nih.gov/articles/PMC2577855/]
- 74. What is UNG/UDG? [https://www.thermofisher.com/us/en/home/life-science/pcr/real-time-pcr/real-time-pcr-learning-center/real-time-pcr-basics/what-is-ung-udg.html]
- 75. Uracil-DNA glycosylase [https://en.wikipedia.org/wiki/Uracil-DNA_glycosylase]
- 76. Uracil-DNA glycosylases—Structural and functional ... [https://pmc.ncbi.nlm.nih.gov/articles/PMC4253808/]
- 77. Uracil-DNA glycosylase: Structural, thermodynamic and ... [https://pmc.ncbi.nlm.nih.gov/articles/PMC3000906/]
- 78. Advanced uracil DNA glycosylase-supplemented real-time ... [https://www.nature.com/articles/srep27605]
- 79. Polymerase Chain Reaction (PCR) - StatPearls - NCBI - NIH [https://www.ncbi.nlm.nih.gov/books/NBK589663/]
- 80. Single-Tube Analysis Can Help You Avoid These 5 ... [https://www.thermofisher.com/blog/life-in-the-lab/single-tube-analysis-can-help-you-avoid-these-5-common-rt-pcr-challenges/]
- 81. Comparison of a one-step real-time RT-PCR and a nested ... [https://journals.plos.org/plosone/article?id=10.1371/journal.pone.0248581]
- 82. Comparison of RT-PCR, RT-nested PCRs, and real-time ... [https://www.nature.com/articles/s41598-021-96066-4]
- 83. One-Tube Nested Real-Time PCR Assay for Rapid ... [https://pmc.ncbi.nlm.nih.gov/articles/PMC7656657/]
- 84. Could your PCR be affected by contamination? | IDT [https://www.idtdna.com/page/support-and-education/decoded-plus/could-your-pcr-be-affected-by-contamination/]
- 85. Molecular Diagnostics - Part 5: Analytical Sensitivity and ... [https://blog.seracare.com/molecular-serology-blog/verification-part5]
- 86. Analytical Specificity - an overview [https://www.sciencedirect.com/topics/agricultural-and-biological-sciences/analytical-specificity]
- 87. Diagnostic Testing Accuracy: Sensitivity, Specificity, Predictive ... [https://www.ncbi.nlm.nih.gov/books/NBK557491/]
- 88. Nested PCR: Principle, Protocol and Application [https://www.bocsci.com/resources/nested-pcr-principle-protocol-and-applications.html?srsltid=AfmBOorIs2cMUWg6X-7MMp296lJdBi0VgxQxZfvzBmuW3ksbB0Z0cSLa]
- 89. Development of a highly sensitive single-tube nested PCR ... [https://www.sciencedirect.com/science/article/abs/pii/S0044848613003104]
- 90. Analytical Sensitivity [https://www.apsnet.org/DAVN/Tools/Calculators/Pages/Analytical-Sensitivity.aspx]
- 91. Development of a Highly Sensitive Nested-PCR Procedure ... [https://pmc.ncbi.nlm.nih.gov/articles/PMC101457/]
- 92. PCR diagnostics: In silico validation by an automated tool ... [https://www.sciencedirect.com/science/article/pii/S0166093419301247]
- 93. Efficient nested-PCR-based method development for ... [https://www.nature.com/articles/s41598-021-00968-2]
- 94. A nested polymerase chain reaction for detection of ... [https://www.sciencedirect.com/science/article/pii/S1198743X14643408]
- 95. Nested PCR: Principle, Protocol and Application [https://www.bocsci.com/resources/nested-pcr-principle-protocol-and-applications.html?srsltid=AfmBOorUu1nQUVEmtV2A8mH1yFXt6LsMc1B_FKjQv9KaKgILsm3yFChA]
- 96. Development of an ultra-sensitive single-tube nested PCR ... [https://www.sciencedirect.com/science/article/abs/pii/S0740002022000764]
- 97. | PDF Pcr contamination prevention [https://www.slideshare.net/slideshow/pcr-contamination-prevention/42247326]