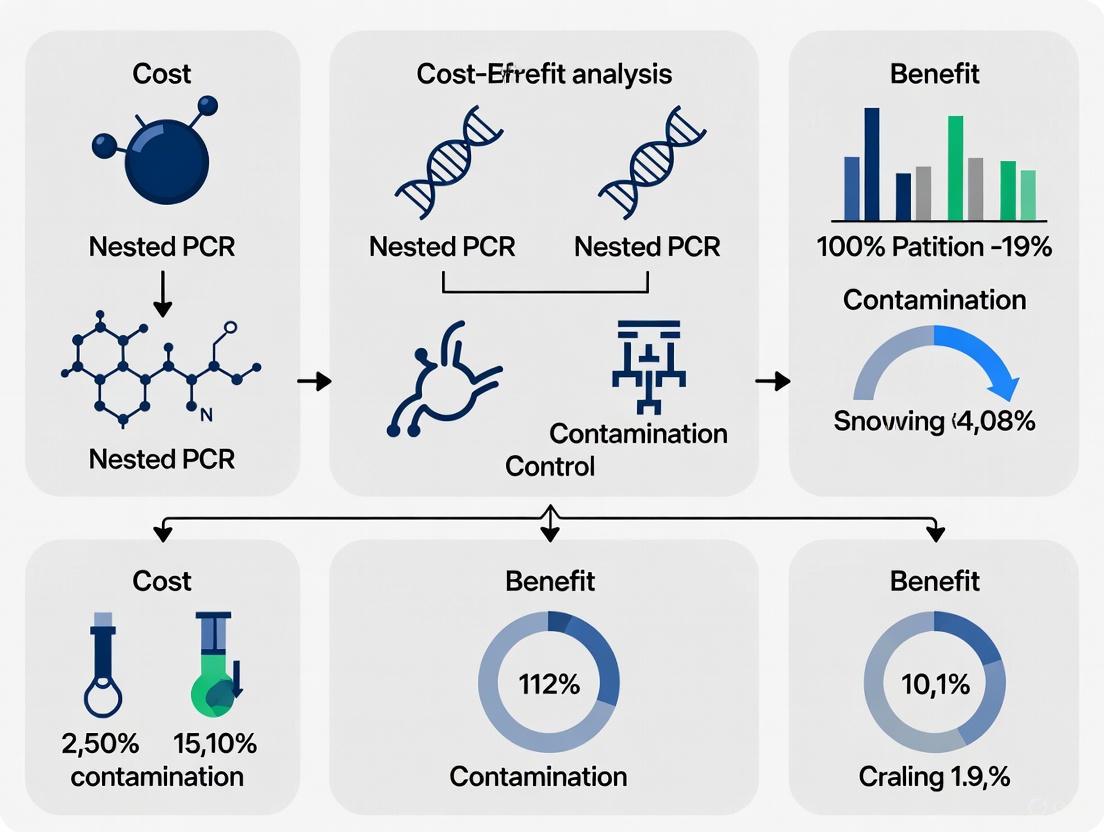
Nested PCR Contamination Control: A Cost-Benefit Analysis for Robust Molecular Diagnostics
This article provides a comprehensive cost-benefit analysis of contamination control methods for nested PCR, a powerful but contamination-prone molecular technique.
Nested PCR Contamination Control: A Cost-Benefit Analysis for Robust Molecular Diagnostics
Abstract
This article provides a comprehensive cost-benefit analysis of contamination control methods for nested PCR, a powerful but contamination-prone molecular technique. Tailored for researchers and diagnostic developers, we explore the foundational principles of amplicon carryover, evaluate the economic and practical trade-offs of various sterilization and barrier methods, and offer optimized troubleshooting protocols. By comparing the performance of nested PCR against alternative techniques like qPCR and LAMP, this guide delivers actionable strategies for implementing cost-effective contamination control that safeguards data integrity without compromising fiscal responsibility in research and clinical settings.
The High Stakes of Contamination: Understanding the Why and How in Nested PCR
Nested PCR stands as a powerful molecular technique designed to dramatically enhance the sensitivity and specificity of nucleic acid detection. By employing two successive rounds of amplification with two sets of primers, the method achieves exceptional detection capabilities for low-abundance targets. However, this very strength constitutes its greatest vulnerability: the requirement to handle amplified products between reactions creates significant contamination risks that can compromise experimental integrity. Within drug development and clinical diagnostics, where results directly impact therapeutic decisions and regulatory approvals, understanding this balance is paramount. This analysis examines the contamination risks inherent to nested PCR protocols and evaluates the cost-benefit equation of various mitigation strategies, providing researchers with evidence-based frameworks for implementation decisions.
How Nested PCR Works: The Source of Both Power and Vulnerability
Nested PCR operates through a two-stage amplification process that significantly enhances detection capabilities compared to conventional PCR. The initial round amplifies a target DNA region using outer primers, generating a primary amplicon that serves as template for the second reaction. This subsequent amplification employs inner primers that bind internal to the first primer set, specifically enriching the target sequence [1].
This architectural design provides substantial benefits but also introduces specific vulnerabilities:
- Enhanced Sensitivity: The dual amplification approach can increase detection sensitivity by 10- to 1000-fold compared to conventional PCR, enabling identification of rare pathogens or low-abundance targets [2] [3].
- Improved Specificity: The requirement for two independent primer binding events virtually eliminates spurious non-specific amplification products [1].
- Contamination Vulnerability: The physical transfer of first-round amplification products to a second tube creates opportunities for amplicon carryover contamination, where billion-copy amplification products can contaminate subsequent reactions [1] [4].
The diagram below illustrates the nested PCR workflow and its critical vulnerability points:
Performance Comparison: Nested PCR Versus Alternative Methods
The decision to implement nested PCR involves careful consideration of its performance characteristics relative to emerging methodologies. The technique's exceptional sensitivity must be balanced against its contamination risks and operational requirements.
Sensitivity and Detection Capabilities
Table 1: Analytical Sensitivity Comparison Across PCR Platforms
| Method | Detection Limit | Target | Application Context | Reference |
|---|---|---|---|---|
| Nested PCR | 4 genomes/mL | Candida species | Candidaemia detection | [5] |
| Nested PCR | 2×101 copies/reaction | BoHV6 gB gene | Viral detection in blood | [3] |
| Nested PCR | 8 oocysts | Cryptosporidium parvum | Finished water testing | [6] |
| Real-time PCR | 3.1 fg/µL | Fusarium tricinctum CYP51C gene | Plant pathogen detection | [7] |
| Blood Culture | ~50% sensitivity | Candida species | Clinical gold standard | [5] |
| Competitive Nested RT-PCR | Significantly higher sensitivity | BCR-ABL transcripts | Minimal residual disease in CML | [8] |
The exceptional sensitivity of nested PCR is evidenced across multiple applications. In candidaemia detection, nested PCR demonstrated 24.0% positivity compared to 14.8% for blood cultures, identifying all culture-positive patients plus additional cases missed by conventional methods [5]. Similarly, for monitoring minimal residual disease in chronic myeloid leukemia, nested competitive RT-PCR detected BCR-ABL fusion transcripts in 44.6% of samples that were negative by real-time PCR [8].
Operational Considerations and Limitations
Table 2: Method Operational Characteristics and Limitations
| Parameter | Nested PCR | Real-time PCR | LAMP |
|---|---|---|---|
| Turnaround Time | 4-8 hours | 1-2 hours | 1-2 hours |
| Equipment Requirements | Standard thermocycler | Real-time PCR instrument | Water bath/block heater |
| Throughput Capacity | Moderate | High | High |
| Quantification Capability | Semi-quantitative | Absolute quantification | Semi-quantitative |
| Contamination Risk | High | Moderate | Low |
| Technical Expertise Required | Advanced | Intermediate | Basic |
| Cost per Reaction | Low | High | Moderate |
The operational burden of nested PCR extends beyond contamination concerns. The method requires significant hands-on time and expertise, with protocols noting careful physical separation of pre- and post-amplification areas to minimize false positives [5] [4]. One candidaemia detection protocol specifically implemented "separate rooms equipped with safety cabinets" for reaction preparation, DNA extraction, and amplification to prevent amplicon carryover [5].
Contamination Control: Experimental Evidence and Mitigation Protocols
The implementation of robust contamination controls is not merely advisable but essential for reliable nested PCR applications. Research demonstrates that uncontrolled contamination can generate false-positive rates exceeding 50% in some clinical contexts, fundamentally compromising diagnostic validity [9].
Evidence-Based Contamination Control Methods
Multiple studies have systematically evaluated contamination mitigation strategies:
- Physical Separation: Workflow segregation into distinct pre- and post-amplification zones remains the cornerstone of contamination prevention. Laboratories implementing unidirectional workflow patterns report 80-90% reduction in false-positive amplifications [4].
- Laminar Flow Protection: Utilization of HEPA-filtered laminar flow hoods for reaction setup creates ISO Class 5 cleanroom conditions, reducing particulate contamination. One protocol specifically recommended laminar flow hoods for "nested PCR reactions when adding round 1 PCR to round 2 reaction" [4].
- Chemical Decontamination: DNA-degrading agents including sodium hypochlorite, DNA-Zap, and specialized enzymes effectively eliminate contaminating amplicons from surfaces and equipment [4].
- UV Irradiation: Exposure to ultraviolet light (254-280 nm) crosslinks contaminating DNA, with UVC Portable Clean Rooms providing automated decontamination cycles between procedures [4].
Implementation Framework for Contamination Control
The diagram below outlines a comprehensive contamination control protocol for nested PCR implementation:
The Researcher's Toolkit: Essential Reagents and Controls
Successful nested PCR implementation requires meticulous attention to reagent quality and systematic control strategies. The following components represent essential elements for reliable nested PCR workflows.
Table 3: Essential Research Reagents and Controls for Nested PCR
| Reagent/Solution | Function | Implementation Consideration |
|---|---|---|
| Inner & Outer Primers | Target-specific amplification | Design with non-overlapping binding sites; verify specificity in silico |
| DNA Polymerase | Enzymatic amplification | Use high-fidelity enzymes for first round; optimize concentration |
| dNTPs | Nucleotide substrates | Quality critical for both amplification rounds; aliquot to prevent degradation |
| Reaction Buffers | Optimal enzyme activity | May require optimization for each primer set; include MgCl₂ |
| Negative Controls | Contamination detection | Include no-template and no-primer controls in each run |
| Internal Positive Controls | Inhibition monitoring | Especially critical for clinical samples [6] |
| DNA Decontamination Reagents | Amplicon elimination | Enzymatic (DNase) or chemical (sodium hypochlorite) treatments |
The critical importance of internal positive controls was demonstrated in water testing applications, where inhibitors frequently cause false-negative results without appropriate controls [6]. Similarly, in clinical diagnostics, incorporating human β-actin gene amplification ensured DNA integrity and identified amplification inhibitors in patient samples [5].
Nested PCR remains a powerful detection methodology whose exceptional sensitivity demands rigorous contamination management. The technique provides unparalleled detection capabilities for low-abundance targets in drug development and clinical diagnostics, with documented superiority over gold-standard methods in specific applications. However, this analytical power carries operational burdens that extend beyond reagent costs to encompass specialized laboratory design, stringent workflow controls, and comprehensive staff training. Researchers must weigh nested PCR's 10- to 1000-fold sensitivity advantage against the infrastructure and vigilance required to manage its contamination risks effectively. In contexts where ultimate detection sensitivity is paramount and appropriate controls can be implemented, nested PCR continues to offer capabilities unmatched by alternative amplification platforms.
In the realm of molecular diagnostics and research, the exquisite sensitivity of polymerase chain reaction (PCR) techniques renders them uniquely vulnerable to contamination, potentially compromising experimental integrity and diagnostic accuracy. Carryover contamination poses a significant threat to the reliability of nucleic acid amplification tests, particularly in sensitive applications like nested PCR and next-generation sequencing (NGS) library preparation [10] [11]. The false-positive results generated by contamination can lead to severe consequences in clinical diagnostics, including inappropriate patient management, and in research settings, can invalidate experimental findings [12] [13]. This guide objectively compares contamination control methods through the lens of cost-benefit analysis, providing researchers with evidence-based strategies to mitigate the three primary contamination sources: aerosolized amplicons, cross-contamination between samples, and plasmid clone contamination. Understanding these sources and implementing robust countermeasures is paramount for laboratories where detection sensitivity and result accuracy are critical.
Contamination in PCR-based methods primarily originates from three distinct sources, each with unique mechanisms and challenges for containment. The following table summarizes the key characteristics of these primary contamination sources.
Table 1: Characteristics of Primary PCR Contamination Sources
| Contamination Source | Description | Primary Risks | Common Contexts |
|---|---|---|---|
| Aerosolized Amplicons | Previously amplified PCR products (amplicons) become airborne and contaminate reagents, equipment, or new reaction setups [12] [10]. | High false-positive rate due to abundant target sequences; particularly problematic in high-throughput or multi-step PCR [10] [11]. | NGS library prep [12] [11]; post-amplification handling (gel electrophoresis, purification) [10] [14]. |
| Cross-Contamination | Direct transfer of target nucleic acids between samples during handling or processing [10] [13]. | False positives from high-concentration samples contaminating low-concentration or negative samples; pre-amplification contamination [10] [13]. | Batch processing of clinical samples [13]; improper pipetting techniques; shared reagent use. |
| Plasmid Clones | Contamination from purified plasmid DNA or bacterial clones used as positive controls or in parallel experiments [13] [15]. | False positives due to high-copy-number plasmid targets; contamination of laboratory environments and common reagents [13]. | Colony PCR [15]; cloning workflows; use of plasmid controls; cell lines harboring recombinant viruses [13]. |
Aerosolized amplicons represent perhaps the most pernicious contamination source due to the enormous quantity of amplified DNA generated in a single PCR reaction, which can easily contaminate laboratory surfaces, ventilation systems, and reagents [10]. Cross-contamination between samples often occurs during nucleic acid extraction or pipetting, especially when handling large sample batches [13]. Plasmid clone contamination is particularly problematic because cloned sequences are often present at high copy numbers and can persistently contaminate laboratory environments and common reagents, including PCR buffers and enzyme mixes [13].
Quantitative Comparison of Contamination Control Methods
Various strategies have been developed to control PCR contamination, each with different efficacy, implementation complexity, and cost implications. The experimental data supporting these methods provides a basis for objective comparison.
Table 2: Efficacy and Cost-Benefit Analysis of Contamination Control Methods
| Control Method | Experimental Efficacy/Data | Relative Cost | Key Advantages | Key Limitations |
|---|---|---|---|---|
| Physical Separation & Workflow | Mean contamination level significantly lower (0.43%) with filter tips in standardized labs vs. 1.28% in general labs without filter tips [12]. | Low (procedural) | Highly effective as primary prevention; no reagent costs [12] [10]. | Requires dedicated space and equipment; dependent on strict technician adherence. |
| dUTP/UDG System | Effectively cleaves carryover amplicons before PCR; widely adopted in diagnostic workflows [12] [10]. | Low | Simple addition to master mix; effective against amplicon carryover; hot-start capability [10]. | Does not prevent contamination from genomic DNA or plasmids; requires dUTP incorporation [10]. |
| Synthetic DNA Spike-Ins | Competitive amplification reduced contamination T values to 0.05% vs. 1.14% in NTCs without spike-ins; enabled quantification [12]. | Medium | Dual function: contamination control and quantification; compatible with other methods [12]. | Requires custom design and synthesis; additional optimization needed. |
| K-Box System | Effectively blocked spike-in contaminations even at high rates in two-step PCR NGS libraries [11]. | Medium (primer synthesis) | Specifically designed for two-step PCR; provides both prevention and identification of residual contamination [11]. | Requires complex primer design; implementation limited to two-step PCR protocols. |
| UV Irradiation | Induces thymidine dimers in DNA, making contaminating nucleic acid inactive as a template [10]. | Low | Easy implementation; effective for decontaminating surfaces and reagents [10]. | Variable effectiveness; requires transparent materials for direct treatment; safety concerns. |
The dUTP/UDG (Uracil-DNA Glycosylase) system represents one of the most cost-effective enzymatic methods, where dUTP is incorporated into PCR products instead of dTTP, and prior to amplification, any contaminating uracil-containing amplicons from previous reactions are cleaved by UDG and rendered non-amplifiable [10]. The K-box method introduces sample-specific sequence elements into first-round PCR primers that must be recognized by second-round primers for amplification to occur, thereby preventing amplification of any amplicons lacking the correct K-box sequences from contaminating previous reactions [11].
Detailed Experimental Protocols for Key Contamination Control Strategies
Protocol for Implementing the dUTP/UDG System
The dUTP/UDG method is a widely adopted enzymatic strategy for preventing carryover contamination. The following protocol is adapted from established procedures [10]:
- PCR Reaction Setup: Prepare the PCR master mix substituting dTTP with dUTP in the nucleotide mixture. The final concentration of dUTP should be equivalent to the dTTP concentration in a standard protocol (e.g., 200 μM each dNTP).
- UNG Treatment: Add 1 unit of Uracil-N-Glycosylase (UNG) per 50 μL reaction. Incubate the reaction mixtures at room temperature (20-25°C) for 10 minutes to allow UNG to cleave any contaminating uracil-containing DNA from previous amplifications.
- Enzyme Inactivation and Amplification: Heat the reactions to 95°C for 5 minutes to inactivate the UNG enzyme. This step also serves as the initial denaturation step for the PCR. Proceed with the standard thermal cycling protocol.
This method is highly effective for preventing false positives from amplicon carryover and is compatible with most PCR applications, including real-time PCR and two-step amplification protocols [12] [10].
Protocol for the K-Box Method in Two-Step PCR
The K-box method provides a sophisticated contamination control system specifically designed for two-step PCR procedures used in NGS library preparation [11]:
- Primer Design:
- First-Step Primers: Design forward and reverse primers that include, from 5' to 3': a K1 sequence (7 nt, sample-specific), a K2 sequence (3 nt, sample-specific), an S sequence (2 nt, separator), and finally the target-specific sequence. The K1 and K2 sequences should be unique for each sample or sample group.
- Second-Step Primers: Design primers containing the K1 sequence (or its complement) at their 3' end, followed by the adapter sequences and barcodes required for NGS at the 5' end.
- First PCR Amplification: Perform the first PCR using the K-box-tailed specific primers.
- Second PCR Amplification: Use the first PCR product as a template for the second amplification with the K1-containing primers. Only products from the first PCR that contain the correct K1 sequences will be efficiently amplified in the second PCR.
- Contamination Monitoring: The sample-specific K2 sequences embedded in the amplicons can be used during bioinformatics analysis to trace and identify the source of any residual contamination that might occur.
This method effectively suppresses carryover contamination and mis-pipetting errors between samples in a multiplexed workflow, making it ideal for sensitive diagnostic NGS applications [11].
Diagram 1: K-box mechanism for preventing carryover contamination.
Protocol for Laboratory Workflow Physical Separation
A unidirectional workflow is a fundamental, non-chemical method for preventing contamination, relying on spatial separation of PCR steps [10] [14]:
- Laboratory Zoning: Establish at least three physically separated areas:
- Area 1: Pre-PCR (Reagent Preparation). A dedicated, clean room or hood for preparing PCR master mixes. No DNA templates, amplicons, or plasmid clones should be introduced into this area. Reagents, pipettes, and consumables used here should never leave and then re-enter.
- Area 2: Sample Preparation/Nucleic Acid Extraction. A separate area for handling samples and extracting nucleic acids.
- Area 3: Post-PCR Analysis. A dedicated area for analyzing PCR products (e.g., gel electrophoresis, sequencing library quantification). Amplicons should never be brought back into Areas 1 or 2.
- Workflow Direction: Personnel should always move from the cleanest area (Pre-PCR) to the dirtiest (Post-PCR), never in reverse, on a daily basis. If moving backwards is necessary, changing lab coats and following decontamination procedures is mandatory.
This physical separation is considered the first and most crucial line of defense against all forms of PCR contamination [12] [10] [14].
The Scientist's Toolkit: Essential Reagents and Materials
Successful implementation of contamination control strategies requires specific reagents and materials. The following table details key solutions used in the featured experiments.
Table 3: Essential Research Reagents for Contamination Control
| Reagent/Material | Function in Contamination Control | Example Application/Note |
|---|---|---|
| Filter Tips or Positive Displacement Pipettes | Prevent aerosol contamination from pipettes, a common source of cross-contamination [12] [14]. | Found to significantly reduce contamination levels (0.43% vs 1.12% T value) compared to non-filter tips [12]. |
| dUTP and UNG Enzyme | Enzymatic degradation of carryover amplicons from previous PCRs [12] [10]. | Core components of the dUTP/UDG system; requires substitution of dTTP with dUTP in PCR mix [10]. |
| Synthetic DNA Spike-ins | Competitively inhibit amplification of contaminating DNA; also used for quantification [12]. | Custom-designed sequences with same primer-binding regions but different internal sequence; 10,000 copies/reaction was effective [12]. |
| Bleach (Sodium Hypochlorite) & Ethanol | Chemical decontamination of work surfaces and equipment. Degrades DNA on non-porous surfaces [10] [14]. | Surfaces are cleaned with 10-15% bleach solution, followed by 70% ethanol to remove the bleach [10]. |
| K-box Tailed Primers | Sample-specific sequences that prevent cross-amplification of contaminants in two-step PCR [11]. | Bioinformatically designed primers with K1 (suppression), K2 (detection), and S (separator) elements [11]. |
| DNA Decontamination Wipes/Sprays | Quick decontamination of benchtops, pipettors, and equipment to prevent DNA contamination [13]. | Particularly useful when performing nested PCR and other sensitive applications [13]. |
Diagram 2: Unidirectional laboratory workflow for contamination prevention.
The effective management of PCR contamination requires a layered, defense-in-depth approach tailored to the specific laboratory application and contamination source. No single method provides complete protection; however, the integration of physical controls, such as unidirectional workflow and filter tips, with biochemical methods like the dUTP/UGI system or the novel K-box design, creates a robust barrier against false-positive results. The cost-benefit analysis favors implementing fundamental physical and workflow controls first, as they provide broad-spectrum prevention at minimal cost. For laboratories employing highly sensitive nested PCR or complex NGS workflows, investing in more sophisticated methods like synthetic spike-ins or the K-box system becomes justified by the enhanced reliability and reduced cost of repeated experiments due to contamination events. Ultimately, a culture of continuous vigilance, combined with strategically selected and implemented technical solutions, is paramount for maintaining the integrity of molecular data in both research and diagnostic settings.
False positive results in molecular diagnostics, particularly those stemming from polymerase chain reaction (PCR) contamination, present significant financial and reputational risks to clinical and research laboratories. This guide examines the cost-benefit analysis of contamination control methods for nested PCR, a technique renowned for its high sensitivity yet concomitant vulnerability to amplicon carryover contamination. Through comparative case studies across disease diagnostics, we evaluate the performance of various contamination control strategies, providing supporting experimental data and detailed methodologies. The analysis underscores that while robust contamination control protocols necessitate upfront investment, they are ultimately cost-saving by preventing the substantial direct and indirect costs associated with false-positive results, thereby protecting laboratory credibility and patient outcomes.
The exquisite sensitivity of polymerase chain reaction (PCR) has revolutionized molecular biology and clinical diagnostics [10]. However, this very strength is also its greatest weakness, as the technique is highly susceptible to contamination, leading to false-positive results [10] [4]. This is particularly true for nested PCR, which employs two successive rounds of amplification to significantly enhance sensitivity and specificity for detecting low-abundance targets [16] [17]. The core vulnerability lies in the requirement to transfer the first-round amplification product to a second reaction tube, creating opportunities for amplicon carryover contamination [16]. These false positives can trigger a cascade of negative consequences, including misdiagnosis, inappropriate treatment, and substantial financial losses, while simultaneously eroding trust in the laboratory's capabilities [4].
This article performs a cost-benefit analysis of contamination control methods within the specific context of nested PCR. We compare standard versus advanced preventive strategies, quantifying their performance through experimental data from clinical and research settings. The objective is to provide researchers, scientists, and drug development professionals with a clear, evidence-based framework for evaluating and implementing robust contamination control protocols that protect both their finances and their reputations.
The Nested PCR Contamination Challenge
Nested PCR is designed to amplify a specific DNA sequence through two separate rounds of amplification, each utilizing a distinct set of primers [16]. The first primer pair anneals to sequences upstream from the second set and is used in an initial PCR of 15-30 cycles. The resulting amplicon is then used as a template for a second primer pair, which binds to a sequence internal to the first amplicon [16] [17]. This two-step process significantly increases the overall sensitivity and specificity of the assay, making it indispensable for applications like detecting low-density infections or working with degraded samples [18] [19].
Despite its utility, the fundamental workflow of nested PCR introduces a critical point of failure. The physical transfer of the first-round product to a second tube for the next round of amplification presents a prime opportunity for carryover contamination [16]. A typical PCR can generate over 10^8 copies of the target sequence, and these amplicons can aerosolize, contaminating laboratory equipment, reagents, and ventilation systems [10] [4]. Subsequent experiments can then amplify these contaminating amplicons instead of the true target, leading to false-positive outcomes. The high number of total cycles in nested PCR further compounds this risk, making stringent contamination control not just recommended, but essential [17].
Visualizing the Contamination Pathway and Control Strategy
The diagram below illustrates the critical control points in the nested PCR workflow where contamination is most likely to occur and must be managed.
Case Studies: Financial and Diagnostic Impacts of False Positives
The consequences of false-positive results due to PCR contamination extend beyond mere laboratory inconvenience. The following case studies quantify the diagnostic and financial implications across different medical fields.
Case Study 1: Tuberculous Meningitis Diagnostics
A study evaluating an IS6110 sequence-based nested PCR for detecting Mycobacterium tuberculosis in pleural fluid samples revealed critical performance disparities compared to conventional methods [19].
Table 1: Diagnostic Performance of Nested PCR for Pleural Tuberculosis
| Diagnostic Method | Sensitivity | Specificity | Positive Samples (n=50) | Key Limitations |
|---|---|---|---|---|
| AFB Smear Microscopy | 60.00% | 100.00% | 3 | Low sensitivity, requires high bacterial load |
| Culture (LJ Medium) | - | - | 5 | Long turnaround time (weeks) |
| Adenosine Deaminase (ADA) | 80.00% | 62.22% | 21 | Not specific, cross-reacts with other infections |
| Nested PCR (IS6110) | 100.00% | 56.67% | 29 | False positives from contamination or non-target amplification |
The nested PCR assay demonstrated perfect sensitivity (100%) but markedly lower specificity (56.67%) [19]. The authors noted that the 21 PCR-negative samples included subjects without clinical evidence of tuberculosis, suggesting that a portion of the 29 PCR-positive results were likely false positives arising from contamination or amplification of non-target sequences [19]. In a clinical context, such false positives can lead to unnecessary administration of anti-tuberculosis therapy, which is associated with significant drug toxicities, extended patient monitoring, and avoidable healthcare costs.
Case Study 2:Pneumocystis cariniiPneumonia (PCP) Diagnosis
A comparative study of 91 pneumonia episodes scrutinized the clinical significance of nested PCR versus immunofluorescence (IF) for detecting Pneumocystis carinii [20].
Table 2: Nested PCR vs. Immunofluorescence for PCP Diagnosis
| Diagnostic Method | Sensitivity | Specificity | Key Clinical Interpretation |
|---|---|---|---|
| Immunofluorescence (IF) | 60% | 97% | High specificity makes it suitable for confirming clinical PCP. |
| Nested PCR | 96% | 59% | High risk of detecting subclinical colonization, leading to false clinical positives. |
The study concluded that while IF was the most specific method for diagnosing clinical PCP, nested PCR could identify additional clinical cases [20]. However, the high sensitivity of nested PCR came with a significant trade-off: a pronounced risk of detecting mere subclinical colonization, rather than active disease. In a clinical setting, acting on these "true positive but clinically irrelevant" results would constitute a false positive for the purpose of treatment decisions, potentially leading to unnecessary and costly anti-fungal therapy and extended hospitalization.
Case Study 3: Cost-Effectiveness of High-Sensitivity Diagnostics in Malaria Surveillance
A prospective economic analysis of reactive case detection (RACD) for malaria in Aceh Province, Indonesia, provides direct insight into the financial weight of diagnostic choices [21]. The study compared the standard diagnostic, microscopy, against the more sensitive loop-mediated isothermal amplification (LAMP).
Table 3: Cost-Effectiveness of Malaria RACD: Microscopy vs. LAMP
| Cost Metric | Microscopy Only | LAMP Only | Incremental Cost (LAMP vs. Microscopy) |
|---|---|---|---|
| Cost per Infection Found | $8,930 | $6,915 | - |
| Incremental Cost-Effectiveness Ratio (ICER) | - | - | $5,907 per additional infection detected |
| Key Finding | Less costly but misses low-density infections. | More costly per test but more cost-effective per true infection found. | Cost-effectiveness improves with increasing infection prevalence. |
Although this study compared microscopy and LAMP, the principle is directly transferable to the context of standard versus rigorously controlled, highly sensitive nested PCR. Using a less sensitive test to avoid contamination-related costs leads to false negatives, allowing disease transmission to continue unnoticed and increasing long-term public health costs. Conversely, investing in a sensitive molecular test like nested PCR with robust contamination controls, while having a higher upfront cost, is more cost-effective per true infection identified, as it prevents downstream costs associated with missed cases [21].
Experimental Protocols for Contamination Control
Implementing rigorous experimental protocols is fundamental to mitigating the risk of false positives. The following methodologies, drawn from the literature, form the cornerstone of an effective defense.
Protocol 1: Physical Separation and Workflow Management
A primary defense is the mechanical separation of PCR activities [10] [4].
- Detailed Methodology: A typical PCR laboratory should be divided into at least three distinct, dedicated areas [10].
- Pre-PCR Area (Clean Area): A dedicated space for reagent preparation, master mix formulation, and DNA sample extraction. This area must be strictly isolated from any post-PCR materials.
- Amplification Area: A separate room or hooded enclosure housing the thermal cyclers.
- Post-PCR Area (Contaminated Area): A designated area for all activities involving amplified PCR products, including gel electrophoresis, product purification, and sequencing.
- Critical Control Point: Laboratory personnel must adhere to a unidirectional workflow, moving from the clean pre-PCR area to the post-PCR area, but never in reverse, without decontamination procedures [4]. This includes using dedicated lab coats, pipettes, and disposable supplies for each area [10].
Protocol 2: Enzymatic Decontamination with Uracil-DNA Glycosylase (UNG)
This widely used chemical method proactively degrades contaminating amplicons from previous reactions [10].
- Principle: dUTP is substituted for dTTP in all PCR reactions, generating amplicons that incorporate uracil [10]. Before each new PCR, the reaction mixture is treated with the UNG enzyme, which cleaves uracil-containing DNA strands. The UNG is then thermally inactivated prior to the amplification cycles, leaving the native, thymine-containing sample DNA untouched [10].
- Experimental Workflow:
- Reaction Setup: Prepare PCR master mix containing dUTP instead of dTTP and including UNG.
- Decontamination Incubation: Incubate the reaction mix at room temperature for 10 minutes. Any contaminating uracil-containing amplicons will be hydrolyzed.
- Enzyme Inactivation & Amplification: Heat the reaction to 95°C for 5 minutes to inactivate UNG, then proceed with the standard PCR cycling protocol.
Protocol 3: UV Irradiation
UV irradiation provides a simple and effective method to decontaminate surfaces and reagents before use [10].
- Principle: UV light at a wavelength of 254 nm induces the formation of thymine dimers in DNA, rendering the contaminating nucleic acid unable to function as a template for amplification [10].
- Application: Expose work benches, pipettes, and other non-plastic supplies to UV light in a crosslinker or UV light box for 5-20 minutes prior to setting up PCR reactions [10]. This is an effective step for inactivating any DNA that may be present on surfaces.
Visualizing the Integrated Contamination Control Workflow
The following diagram synthesizes these key protocols into a single, integrated defense strategy against contamination.
The Scientist's Toolkit: Essential Reagents for Contamination Control
The following table details key reagents and equipment necessary for implementing the contamination control strategies discussed in this article.
Table 4: Research Reagent Solutions for PCR Contamination Control
| Item | Function & Application | Key Consideration |
|---|---|---|
| Uracil-DNA Glycosylase (UNG) | Enzyme that hydrolyzes uracil-containing DNA; core component of enzymatic decontamination. | Must be thoroughly inactivated before PCR cycling to avoid degradation of new dUTP-containing amplicons. |
| dUTP Nucleotides | Replaces dTTP in PCR mixes, generating amplicons susceptible to UNG cleavage. | Must be compatible with the DNA polymerase used to ensure efficient incorporation. |
| HEPA/ULPA Laminar Flow Hood | Provides an ISO Class 5 clean air workspace for pre-PCR setup, protecting samples from environmental contamination. | Essential for nested PCR reactions when transferring first-round product [4]. |
| UV Crosslinker / Light Box | Emits 254 nm UV light to induce thymine dimers in contaminating DNA on surfaces and tools. | Effective for decontaminating non-porous surfaces and equipment; plastics may be degraded. |
| Dedicated Pipette Sets | Physically separated pipettes for pre-PCR, amplification, and post-PCR areas to prevent amplicon carryover. | A fundamental and non-negotiable practice for any molecular diagnostics laboratory. |
| Sodium Hypochlorite (Bleach) | Chemical decontaminant for cleaning work surfaces; denatures DNA and other nucleic acids. | Standard practice is to use a 10-15% solution, followed by wiping with 70% ethanol to remove the bleach [10]. |
The financial and reputational costs associated with false-positive results in nested PCR are too significant to ignore. As demonstrated through the case studies, the consequences range from unnecessary medical treatments and patient harm to substantial and wasteful healthcare expenditure and eroded trust in laboratory data. A rigorous cost-benefit analysis unequivocally shows that investing in a multi-layered contamination control strategy—incorporating physical separation, enzymatic decontamination with UNG, UV irradiation, the use of laminar flow hoods, and stringent workflow management—is not merely a technical best practice but a financial and ethical imperative. For researchers and drug development professionals, building these protocols into the foundation of their molecular workflows is the most effective insurance policy against the profound costs of false positives.
In molecular biology, the exquisite sensitivity of techniques like the polymerase chain reaction (PCR) is a double-edged sword. While it enables the detection of trace amounts of nucleic acid, this very capability makes these methods highly vulnerable to contamination from amplification products (amplicons) generated in previous reactions [22]. This contamination risk is acutely elevated in nested PCR, a method which involves a second round of amplification using primers internal to the first set, thereby significantly increasing sensitivity and specificity [23] [24].
A single PCR reaction can generate as many as 10^9 copies of the target sequence, and the aerosolized droplets from these reactions can contain up to 10^6 amplicons [22]. Without stringent controls, the buildup of these aerosols can contaminate laboratory reagents, equipment, and ventilation systems, leading to false-positive results that compromise diagnostic accuracy, clinical decisions, and research integrity [22]. Among the most effective and foundational contamination control strategies is the strict spatial separation of pre- and post-amplification activities. This principle is not merely a recommendation but a critical requirement for reliable nested PCR, forming the cornerstone of a robust contamination control strategy as outlined by Good Laboratory Practice (GLP) and global health authorities [25].
The Science of Spatial Separation: Principles and Workflows
The Unidirectional Workflow Principle
The core principle of spatial separation is a unidirectional workflow that moves from "clean" areas (pre-amplification) to "dirty" areas (post-amplification) without backtracking [22] [25]. This physical segregation prevents the introduction of amplicons into reagents, samples, and equipment used in the initial setup of reactions. The workflow should be organized into a minimum of three distinct zones [25]:
- Reagent Preparation and Mastermix Assembly (Pre-PCR): This should be the cleanest area, dedicated to preparing amplification reagents and master mixes. No nucleic acid templates or amplified products should be introduced here.
- Nucleic Acid Extraction and Template Addition (Pre-PCR): A separate area is used for extracting nucleic acids from samples. The addition of template DNA to the mastermix is performed in this zone.
- Amplification and Product Analysis (Post-PCR): This designated "dirty" area houses thermal cyclers and equipment for analyzing amplified products (e.g., gel electrophoresis systems). No pre-PCR reagents or samples should be brought into this area.
For nested PCR, an additional layer of precaution is necessary. The preparation of the mastermix for the second round of PCR should occur in the clean Reagent Preparation area. However, the inoculation of this second-round mix with the product from the first PCR must be carried out in a dedicated containment area, such as a laminar flow cabinet within the Post-PCR Amplification room [25].
Logical Workflow for Nested PCR
The following diagram illustrates the critical path and strict unidirectional flow required to prevent amplicon carryover contamination in a nested PCR assay.
Comparative Analysis of Contamination Control Methods
While spatial separation is the primary defense, it is most effective when integrated with other physical, chemical, and enzymatic barriers. The following table compares the core contamination control methods used in molecular diagnostics.
Table 1: Comparative Analysis of PCR Contamination Control Methods
| Method | Mode of Action | Key Advantages | Key Limitations | Implementation in Nested PCR |
|---|---|---|---|---|
| Spatial Separation [22] [25] | Physical segregation of pre- and post-amplification workflows | Prevents introduction of amplicons into reaction setup; Foundational to all other methods | Requires dedicated space/equipment; Unidirectional personnel flow can be challenging | Critical; Requires separate areas for 1st and 2nd round mastermix prep and template addition |
| Uracil-N-Glycosylase (UNG) [22] | Enzymatic degradation of uracil-containing carryover amplicons prior to amplification | Highly effective for sterilization of reaction mix; Closed-tube system | Reduced activity on G+C-rich targets; Requires dUTP in mastermix | Compatible; Must be incorporated into both amplification rounds for full protection |
| Chemical Inactivation (Bleach) [22] [25] | Oxidative damage to nucleic acids on surfaces and equipment | Inexpensive and highly effective decontaminant | Corrosive to metals and plastics; Cannot be used on reagents or samples | Essential for daily surface decontamination and managing spills in all areas |
| UV Irradiation [22] | Induction of thymidine dimers in nucleic acids, rendering them unamplifiable | Useful for decontaminating surfaces, equipment, and reagents pre-exposure | Ineffective on short or G+C-rich amplicons; Damages primers and enzyme if overexposed | Best for decontaminating pre-PCR workstations, cabinets, and consumables before use |
Experimental Data: Impact of Spatial Separation on Assay Performance
Case Study: Detection ofFusarium tricinctuminZanthoxylum bungeanum
A 2025 study developing nested PCR for plant pathogen detection highlights the practical necessity of stringent contamination controls, including spatial separation, to achieve high sensitivity and specificity [7]. The research team developed and compared three molecular methods—LAMP, nested PCR, and real-time PCR—for detecting Fusarium tricinctum, the causal agent of gummosis disease.
The experimental protocol involved:
- Primer Design: Two pairs of specific primers were designed targeting the CYP51C gene of F. tricinctum [7].
- DNA Extraction: Genomic DNA was extracted from fungal cultures and infected plant tissues using a commercial kit [7].
- Nested PCR Protocol: The first round of amplification used external primers. A 1:1000 dilution of the first-round product was then used as the template for the second round of amplification with internal primers. Thermal cycling conditions included an initial denaturation at 95°C, followed by 35 cycles of denaturation, annealing, and extension [7].
- Spatial Controls: The study explicitly followed Good Laboratory Practice for molecular testing, which mandates separate rooms or physically separated areas for mastermix preparation, nucleic acid extraction, amplification, and product analysis to prevent amplicon carryover [25].
The results demonstrated that nested PCR, conducted with these controls, showed exceptional stability and reliability, with a sensitivity tenfold higher than conventional PCR, detecting DNA concentrations as low as 3.1 fg/µL [7]. This level of sensitivity makes the assay vulnerable to false positives without proper spatial segregation, underscoring the method's role in ensuring data integrity.
Table 2: Performance Metrics of Molecular Detection Methods for F. tricinctum [7]
| Detection Method | Target Gene | Sensitivity | Key Advantages | Contamination Risk Profile |
|---|---|---|---|---|
| Nested PCR | CYP51C | 3.1 fg/µL | Exceptional stability and reliability | High due to tube opening between rounds; mandates spatial separation |
| Real-time PCR (qPCR) | CYP51C | 3.1 fg/µL | Highest sensitivity; enables absolute quantification; closed-tube | Lower; no post-amplification manipulation |
| LAMP | CYP51C | 31 fg/µL | Rapid, cost-effective, visual results; isothermal | Medium; closed-tube possible, but product can aerosolize during reading |
The Scientist's Toolkit: Essential Reagents and Materials
The following table details key reagents and materials required for implementing a robust nested PCR assay with effective contamination control.
Table 3: Essential Research Reagent Solutions for Nested PCR and Contamination Control
| Item | Function/Role in the Workflow | Key Considerations |
|---|---|---|
| Two Pairs of Primers (Outer & Inner) [23] [24] | Outer primers generate the initial amplicon; inner primers bind internally for the second round, enhancing specificity and sensitivity. | Primers must be designed for the same target template with the inner set located inside the binding site of the outer set. |
| Taq DNA Polymerase [23] [26] | Enzyme that synthesizes new DNA strands by extending the primers. | "Hot-start" versions can reduce non-specific amplification in early cycles. |
| dNTP Mixture [23] [26] | Provides the essential nucleotides (dATP, dCTP, dGTP, dTTP) for DNA synthesis. | For UNG use, dTTP is replaced with dUTP in the mastermix [22]. |
| PCR-grade Water [26] [25] | Certified to be free of nucleases, contaminants, and inhibitors. | Used for making master mixes and dilutions; aliquoting is recommended. |
| 10% Sodium Hypochlorite (Bleach) [22] [25] | Primary chemical decontaminant for destroying amplicons on surfaces and equipment. | Must be made fresh daily; requires a minimum 10-minute contact time. |
| Uracil-N-Glycosylase (UNG) [22] | Contamination control enzyme that degrades carryover amplicons containing uracil. | Added to the mastermix; incubated prior to thermal cycling. |
| Aerosol-resistant Filter Pipette Tips [25] | Prevent aerosols from contaminating the pipette shaft and subsequent samples. | Mandatory for all liquid handling; confirm fit with pipette brand. |
| Dedicated Equipment & Lab Coats [25] | Each designated area (pre-PCR, post-PCR) must have its own set of equipment and PPE. | Prevents transfer of amplicons on equipment and clothing. |
The critical need for pre- and post-amplification spatial separation is an indisputable core principle in molecular biology, particularly for sensitive techniques like nested PCR. The experimental evidence and comparative analysis confirm that while methods like UNG decontamination provide valuable secondary defenses, they do not replace the fundamental protection offered by a rigorously maintained unidirectional workflow. The implementation of dedicated rooms, separate equipment, and strict procedural discipline, as outlined by WHO and other authoritative bodies, is not an optional luxury but a non-negotiable standard for ensuring the validity, reproducibility, and reliability of molecular test results. For researchers and drug development professionals, investing in the laboratory infrastructure and training required to uphold this principle is a cost-effective strategy that pays dividends in data quality and ultimately, in patient and consumer safety.
A Practical Toolkit: Evaluating the Cost and Efficacy of Control Methods
In molecular biology, particularly in techniques like nested PCR, the prevention of contamination is not merely a best practice but a fundamental necessity for assay integrity. Nested PCR, which involves two successive rounds of amplification, exponentially increases the risk of amplicon contamination, potentially leading to false-positive results. Physical barriers and unidirectional workflows represent the most robust defense against this risk, forming a critical line of quality control. This guide provides an objective comparison of the core contamination control methods, framing their implementation within a comprehensive cost-benefit analysis for research and drug development settings. The decision to invest in physical infrastructure must be weighed against the significant costs of erroneous data, project delays, and compromised diagnostic results.
Methodological Comparison: Core Techniques for Contamination Control
The cornerstone of effective contamination control in a molecular laboratory is a unidirectional workflow. This process dictates that materials and personnel move in a single, linear path from "clean" areas (where pre-amplification reagents are prepared) to "dirty" areas (where amplified DNA is handled), with no backtracking permitted [27]. This physical segregation is designed to prevent PCR amplicons from contaminating new reactions.
Experimental Protocols for Workflow Validation
The efficacy of a unidirectional workflow is not assumed; it must be validated through controlled experiments. The following protocols are essential for establishing and verifying a contamination-free environment.
- Protocol for Airborne Contamination Monitoring: Place open microcentrifuge tubes filled with a master mix (containing all PCR components except the template DNA) in various locations within the Pre-PCR and reagent preparation areas. After a set exposure time (e.g., 30 minutes), cap the tubes and run them through a standard PCR cycle. Any amplification product detected via gel electrophoresis indicates airborne amplicon contamination, pinpointing vulnerabilities in the laboratory's physical containment [27].
- Protocol for Surface Contamination Monitoring: Routinely swab work surfaces, equipment (e.g., centrifuges, pipettes), and common touchpoints (e.g., freezer handles) in the Pre-PCR areas. Use DNA-free swabs and elution buffers, then use the eluate as a template in a highly sensitive PCR reaction designed to detect the laboratory's most common amplicons. Consistent negative results from these environmental tests confirm the effectiveness of surface decontamination procedures and the physical separation of spaces [27].
Comparative Analysis of PCR Techniques
The choice of amplification method itself significantly influences the contamination risk profile and, consequently, the required stringency of physical barriers. The table below compares nested PCR and real-time PCR (qPCR) across key performance and operational metrics.
Table 1: Performance Comparison of Nested PCR and Real-Time PCR
| Characteristic | Nested PCR | Real-Time PCR (qPCR) |
|---|---|---|
| Sensitivity | Exceptionally high; capable of detecting as few as 3.5 CFU/25g in food samples [28] or 100 trophozoites/mL [29]. Often 1-2 logs more sensitive than single-round PCR [30]. | High; can be equivalent to nested PCR in some optimized assays [28], but may be 1 log less sensitive in others [30]. |
| Contamination Risk | Very High. Requires opening reaction tubes after the first round to add reagents for the second round, releasing amplicons into the environment [30]. | Low. The reaction is a single, closed-tube process from start to finish, minimizing the risk of amplicon release [31]. |
| Workflow & Speed | Slower, multi-step process requiring manual intervention between rounds, typically taking more than a day [28]. | Faster, automated process with no post-amplification handling, providing results in under 2 hours [31]. |
| Required Physical Barriers | Mandatory. Strict unidirectional workflow with separate, dedicated rooms for pre- and post-PCR steps is strongly recommended [27]. | Highly recommended, but the closed-tube nature offers more flexibility. Dedicated spaces are still ideal for robust operations. |
| Cost Implication | Higher indirect costs due to need for more laboratory space, dedicated equipment sets, and increased labor for workflow maintenance. | Lower indirect costs; can be implemented with less spatial separation, reducing facility and equipment duplication needs. |
Visualizing the Molecular Laboratory Workflow
The following diagram illustrates the idealized unidirectional workflow, depicting the linear movement of samples and reagents through physically separated zones to prevent contamination.
The Scientist's Toolkit: Essential Research Reagent Solutions
Implementing a robust contamination control strategy requires specific reagents and equipment. The following table details key items essential for maintaining the integrity of sensitive molecular assays like nested PCR.
Table 2: Essential Reagents and Equipment for Contamination Control
| Item | Function in Contamination Control |
|---|---|
| UV-treated Dead Air Box (DAB) | Provides a contained, particulate-free workspace within a larger room for critical pre-PCR steps like reagent aliquoting and master mix preparation, acting as a physical barrier against airborne contaminants [27]. |
| Filter Pipette Tips | Physical barrier inside the pipette tip that prevents aerosol carryover from the pipette shaft into reactions, protecting stock reagents and samples from cross-contamination [27]. |
| dUTP and UNG Enzyme System | A biochemical barrier. dUTP is incorporated into amplicons instead of dTTP. In subsequent reactions, Uracil-N-Glycosylase (UNG) enzymatically degrades any contaminating amplicons from previous reactions before PCR cycling begins [31]. |
| Internal Amplification Control (IAC) | A non-target DNA sequence co-amplified with the target. It verifies that a negative result is truly negative and not due to PCR failure caused by inhibitory substances in the sample, thus preventing false negatives and unnecessary repeat testing [28]. |
| Plasmid DNA Standards | Used for generating standard curves for quantitative assays and as positive controls. Their preparation and high-concentration stock dilution must be performed in a dedicated Pre-PCR area to avoid becoming a source of contamination themselves [28] [27]. |
| Commercial Nucleic Acid Extraction Kits | Provide optimized protocols and reagents for efficient isolation of inhibitor-free DNA, which is crucial for reliable amplification and reduces false results that waste resources and complicate data interpretation [28]. |
Cost-Benefit Analysis of Physical Barrier Implementation
The decision to invest in physical infrastructure involves weighing significant upfront and operational costs against the tangible and intangible benefits of data integrity and operational efficiency.
Cost Components
- Capital Expenditure (CapEx): This is the most substantial financial barrier. It includes the cost of constructing or renovating laboratory spaces to create multiple, isolated rooms with dedicated HVAC systems. Positive air pressure in the "clean" Pre-PCR room is ideal to prevent the influx of contaminated air [27].
- Equipment Duplication: A unidirectional workflow necessitates multiple sets of expensive equipment (e.g., pipettes, centrifuges, vortexers)—one for each dedicated room. This prevents the transfer of amplicons on equipment surfaces [27].
- Operational Expenditure (OpEx): Increased costs are associated with maintaining separate consumable inventories, additional cleaning and validation protocols, and potentially longer walking paths for staff, which can marginally reduce workflow efficiency.
Benefits and Return on Investment (ROI)
- Prevention of Costly Errors: A single contamination event can invalidate weeks or months of research data, delay drug development timelines, or lead to incorrect diagnostic results. The cost of a false positive in a clinical or pharmaceutical setting can be astronomical, far outweighing the initial investment in physical barriers.
- Assay Reliability and Reproducibility: Nested PCR is renowned for its high sensitivity, capable of detecting low-copy targets like 3.5 UFC/25 g in food samples [28] or a few copies of a viral genome [3]. This sensitivity is only reliably harnessed in a contamination-free environment. Physical barriers protect this investment in highly sensitive assay development.
- Operational Flexibility for Diverse Assays: A properly designed laboratory with physical segregation is not limited to nested PCR. It can safely accommodate a wide range of sensitive molecular techniques, including Sanger sequencing, genotyping, and next-generation sequencing (NGS), making it a versatile and long-term asset [27].
The implementation of physical barriers through dedicated rooms and a strict unidirectional workflow represents a critical strategic investment for any laboratory relying on nested PCR or other high-sensitivity molecular techniques. While the initial capital and operational costs are non-trivial, the cost-benefit analysis strongly favors implementation. The investment is justified by the profound need to ensure data integrity, safeguard research and development timelines, and maintain diagnostic accuracy. In molecular biology, the price of robust contamination control is invariably lower than the cost of unreliable results.
Within the controlled environments of research and drug development, maintaining sterile conditions is paramount. Surface decontamination is a critical line of defense against contamination that can compromise sensitive procedures, including molecular techniques like nested PCR. While a plethora of disinfectants exists, bleach (sodium hypochlorite) and ethanol are among the most ubiquitous due to their efficacy and relative accessibility. This guide provides an objective, data-driven comparison of bleach and ethanol for surface treatment, framing the analysis within a cost-benefit framework essential for laboratory management and protocol standardization. The assessment focuses on key parameters critical for research settings: biocidal efficacy across a spectrum of microorganisms, material compatibility, occupational safety, and direct costs.
Comparative Efficacy Against Microorganisms
The primary function of a disinfectant is to inactivate microorganisms. The efficacy of bleach and ethanol varies significantly depending on the target pathogen and the application context.
Bleach (Sodium Hypochlorite) is a powerful oxidizing agent recognized for its broad-spectrum activity. It is effective against a wide range of pathogens, including vegetative bacteria, fungi, lipid and non-lipid viruses, and bacterial spores [32]. For instance, a 0.63% sodium hypochlorite solution can achieve a 10-log reduction of poliovirus on surfaces, a testament to its potent virucidal activity [33]. Its effectiveness is influenced by concentration and contact time; a 10-minute contact time with a 5000 ppm (0.5%) solution is often recommended for general lab disinfection [32].
Ethanol, typically at 70% concentration, is a potent protein denaturant. Its efficacy is most pronounced against enveloped viruses and vegetative bacteria [34] [35]. However, it is less effective against non-enveloped viruses (e.g., norovirus, adenovirus) and bacterial spores, and its rapid evaporation can compromise the required contact time for reliable disinfection [32] [35]. A study on an ethanol-based disinfectant (PURELL Surface Sanitizer) demonstrated effectiveness against human norovirus, but its performance was comparable only to high-concentration (1000-5000 ppm) bleach in the presence of soil load [36].
Table 1: Comparative Biocidal Efficacy of Bleach and Ethanol
| Microorganism Type | Bleach (Sodium Hypochlorite) | 70% Ethanol |
|---|---|---|
| Vegetative Bacteria | Excellent (Bactericidal) [32] | Excellent [35] |
| Enveloped Viruses | Excellent (Virucidal) [32] [34] | Excellent [35] |
| Non-enveloped Viruses | Excellent (e.g., Poliovirus, Norovirus) [32] [36] [33] | Slow action/Variable efficacy [35] |
| Fungal Spores | Good (Fungicidal) [32] | Effective, but dependent on strain and contact time [35] |
| Bacterial Spores | Effective at higher concentrations and extended contact [32] | Not effective [35] |
| Mycobacterium tuberculosis | Effective [32] | Information Limited |
Experimental Protocols and Methodologies
To critically assess the data on disinfectants, understanding the underlying experimental methods is crucial. The following are standardized protocols representative of those used to generate the efficacy data cited in this guide.
Suspension Virucidal Assay (ASTM E1052)
This standard method evaluates the efficacy of a disinfectant against a virus in suspension.
- Virus Preparation: A standardized titer of the test virus (e.g., norovirus in stool suspension or Tulane virus cell culture lysate) is prepared [36].
- Interfering Substance: The virus preparation is mixed with a defined concentration of an organic load (e.g., 5% fetal bovine serum) to simulate light or heavy soil conditions [36].
- Disinfectant Exposure: The virus-soil mixture is combined with the disinfectant (e.g., bleach at various concentrations or the ethanol-based product) for a predetermined contact time (e.g., 30 or 60 seconds) [36].
- Neutralization: After the contact time, an aliquot is immediately transferred to a neutralization solution (e.g., D/E neutralization broth or cell culture media) to stop the disinfectant's action [36].
- Titer Quantification: The neutralized sample is assayed to determine the remaining infectious virus. For cultivable viruses, this is done via plaque assay (PFU/mL). For non-cultivable viruses like human norovirus, RNA is extracted and quantified by RT-qPCR to estimate genome copy reduction [36].
Surface Carrier Test
This method evaluates disinfectant efficacy on hard, non-porous surfaces, which is more representative of real-world application.
- Surface Inoculation: A known quantity of the test microorganism is applied to a specified surface (e.g., stainless steel coupons) and allowed to dry [36] [33].
- Disinfectant Application: The disinfectant is applied to the contaminated surface for a specific contact time, often using a controlled wiping motion or spray technique [37].
- Virus Recovery and Neutralization: After contact, the microorganisms are recovered from the surface using an elution buffer. The eluate is neutralized to prevent further disinfectant action [36].
- Analysis: The recovered microorganisms are quantified using culture-based methods (for bacteria/fungi) or molecular/ infectivity assays (for viruses) to determine the log reduction compared to an untreated control [36] [37].
Diagram 1: Disinfectant Selection and Application Workflow
Cost-Benefit and Operational Considerations
Beyond pure efficacy, the choice of disinfectant hinges on practical laboratory considerations such as cost, safety, and material compatibility.
Cost Analysis: Bleach is exceptionally cost-effective. Household bleach is inexpensive, and working dilutions (e.g., 500-5000 ppm) are highly diluted, making it the most economical option [32]. A study in an ICU setting demonstrated that using a lower concentration (500 mg/L) of chlorine disinfectant was significantly less costly than using 2000 mg/L, with no statistical difference in disinfection efficacy under the test conditions [37]. While ethanol is also relatively low-cost, it is generally more expensive per volume of ready-to-use product than diluted bleach.
Material Compatibility and Safety: A significant drawback of bleach is its corrosivity to metals such as stainless steel and aluminum, and its potential to damage painted surfaces [32] [34]. It is also a skin, eye, and respiratory irritant, and requires adequate ventilation [32] [34]. Decomposition over time and inactivation by organic matter necessitate the preparation of fresh solutions regularly [32] [34]. In contrast, 70% ethanol is less corrosive and is therefore preferred for disinfecting sensitive equipment like optical instruments [32]. However, it is flammable, requires well-ventilated spaces, and can swell or crack certain plastics and rubbers with prolonged use [32] [34]. Recent research also highlights that ethanol-based disinfectant sprays can emit significant quantities of volatile organic compounds (VOCs) and nano-sized particles, posing a potential inhalation health risk [38].
Table 2: Operational and Safety Comparison
| Parameter | Bleach | 70% Ethanol |
|---|---|---|
| Relative Cost | Very Low [32] [37] | Low to Moderate |
| Material Corrosivity | High (corrodes metals, damages paints) [32] [34] | Low (but can damage some plastics/rubber) [32] [34] |
| Key Hazards | Skin/eye/respiratory irritant; corrosive; toxic [32] [34] | Flammable; eye irritant; toxic; emits VOCs [32] [38] |
| Organic Matter Interference | High (easily inactivated) [32] [34] | Moderate (reduced activity) [32] |
| Solution Stability | Low (degrades with time, heat, light) [34] | High (stable if properly stored) |
The Scientist's Toolkit: Essential Reagents for Decontamination Research
Evaluating disinfectants requires specific reagents and materials to ensure accurate and reproducible results. The following table details key items used in the featured studies.
Table 3: Key Research Reagents and Materials
| Item | Function/Application | Example from Context |
|---|---|---|
| Sodium Hypochlorite (NaOCl) | The active ingredient in bleach; used as a broad-spectrum disinfectant standard. | Prepared at various concentrations (100-5000 ppm) for efficacy testing [36] [37]. |
| Ethanol / Isopropanol | Active ingredients in alcohol-based disinfectants; evaluated for efficacy against specific pathogens. | Tested as a base for formulations, often at 60-80% concentrations [36] [35]. |
| D/E Neutralization Broth | Used to immediately halt the action of a disinfectant at the end of the contact time in an efficacy test. | Critical for accurate quantification of surviving microorganisms in suspension assays [36]. |
| Stainless Steel Coupons | A standardized, non-porous surface used in carrier tests to simulate real-world environmental surfaces. | Used as a representative hard surface for disinfectant testing [39] [36]. |
| ATP Bioluminescence Assay | A rapid hygiene monitoring tool that measures adenosine triphosphate (ATP) as a proxy for organic residue. | Used in field studies to quickly assess the cleanliness of surfaces post-disinfection [37]. |
| Tripartite Soil Load | A standardized mixture of organic substances (e.g., serum, mucin) used to simulate "dirty" conditions. | Added to test suspensions to evaluate disinfectant efficacy in the presence of interfering substances [36]. |
Both bleach and ethanol are indispensable tools in the arsenal against laboratory contamination. The choice between them is not a matter of which is universally superior, but which is optimal for a specific application.
- Bleach is the clear choice when the highest level of assurance is required, particularly against the most resistant pathogens like non-enveloped viruses (e.g., norovirus in gastroenteritis outbreaks) or bacterial spores. Its low cost and broad-spectrum efficacy make it ideal for general surface decontamination, spill management, and situations where material corrosion is not a primary concern. However, its handling requires strict safety protocols.
- Ethanol is best suited for routine disinfection of clean surfaces where the target pathogens are known to be susceptible (e.g., enveloped viruses, vegetative bacteria). Its advantages include rapid action, lower corrosivity to metals, and ease of use. It is the preferred choice for decontaminating sensitive equipment and in settings where flammability and VOC emissions can be adequately managed.
For laboratories engaged in high-fidelity molecular biology, such as nested PCR, where amplicon contamination is a primary concern, a tiered decontamination strategy is recommended. Critical areas and spills should be treated with a validated bleach solution to ensure destruction of any contaminating nucleic acids and hardy pathogens, while ethanol can be employed for rapid wiping of instruments and surfaces during routine workflow. This cost-benefit driven approach ensures both efficacy and operational efficiency, safeguarding the integrity of sensitive research and development processes.
The pursuit of diagnostic accuracy in molecular biology is perpetually challenged by the risk of amplicon contamination, which can lead to false-positive results and compromise the integrity of experimental data. This is particularly critical in sensitive amplification techniques like nested PCR, which, while significantly boosting detection sensitivity, involves transferring first-round amplification products into a second reaction tube, thereby dramatically increasing the risk of carryover contamination [40] [41]. Within this context, two primary strategies have emerged for contamination control: enzymatic methods using Uracil-N-Glycosylase (UNG) and physical methods embodied by single-tube nested PCR protocols. This guide provides an objective comparison of these approaches, focusing on the critical balance between reagent costs and labor savings to inform decision-making for researchers, scientists, and drug development professionals. The analysis is framed within a broader thesis on cost-benefit analysis of nested PCR contamination control methods, weighing the direct financial outlay for reagents against the operational efficiencies and error reduction offered by different systems.
Understanding the Contamination Control Mechanisms
Enzymatic Control with Uracil-N-Glycosylase (UNG)
UNG, also known as Uracil DNA Glycosylase, is a DNA repair enzyme that catalyzes the hydrolysis of the N-glycosylic bond between the uracil base and the sugar-phosphate backbone in uracil-containing single-stranded or double-stranded DNA [42] [43] [44]. Its primary function in vitro is to prevent carryover contamination in PCR reactions by degrading DNA from previous amplifications. The mechanism involves a straightforward two-step process: First, UNG excises uracil bases from DNA, creating abasic sites. Second, the phosphodiester backbone at these abasic sites is cleaved under alkaline conditions, high temperature, or through the action of specific endonucleases, rendering the DNA unamplifiable [43]. This system is effective because practitioners incorporate dUTP instead of dTTP during PCR. Subsequent reactions are then pre-treated with UNG, which selectively degrades any uracil-containing contaminating amplicons while leaving the native thymine-containing template DNA intact. The enzyme is typically inactivated at high temperatures (e.g., 94°C for 2-5 minutes) before the actual PCR amplification begins, thus protecting the newly synthesized dUTP-containing products [44].
Physical Control with Single-Tube Nested PCR
Single-tube nested PCR (ST-nPCR) represents a physical and procedural approach to contamination control. Instead of enzymatically degrading contaminants, it eliminates the primary source of contamination: the transfer of amplicons between tubes. This method consolidates both amplification rounds into a single, closed tube [45] [41]. The reaction is typically designed with two sets of primers—outer and inner—that have different annealing temperatures. The first PCR cycles are performed at a higher annealing temperature, allowing only the outer primers to bind and amplify a larger target region. Subsequent cycles are run at a lower annealing temperature, enabling the inner primers to bind within the first amplicon and generate a smaller, specific product, all without opening the tube [45]. This closed-tube system drastically reduces the risk of aerosol-mediated contamination, thereby preserving the integrity of the workspace and subsequent reactions without requiring enzymatic pretreatment.
Table 1: Core Mechanism Comparison of UNG vs. Single-Tube Nested PCR
| Feature | UNG-Based Control | Single-Tube Nested PCR |
|---|---|---|
| Primary Principle | Enzymatic degradation of contaminating amplicons | Physical prevention via a closed-tube system |
| Core Mechanism | Hydrolysis of uracil-containing DNA prior to amplification | Sequential primer annealing at different temperatures in one tube |
| Key Reagent | UNG enzyme + dUTP mix | Specialized primer design |
| Compatibility | Can be added to standard PCR setups | Requires optimization of primer ratios and thermal cycling conditions |
Comparative Experimental Data and Performance
Sensitivity and Specificity
Multiple studies have demonstrated that both methods can achieve high sensitivity and specificity when properly optimized. Research on detecting Fusarium tricinctum showed that nested PCR formats generally offer exceptional sensitivity and reliability [46]. A study on Leishmania chagasi directly compared conventional nested PCR with single-tube nested PCR, finding a detection limit of 1 fg for traditional nested PCR and 10 fg for the single-tube format, indicating a minor sensitivity trade-off for the latter [41]. Furthermore, the development of a duplex one-step recombinase-aided PCR (DO-RAP) for detecting Mycobacterium tuberculosis drug resistance highlights the trend towards single-tube systems that achieve sensitivities as low as 2 copies/reaction without the need for UNG, while also maintaining 100% specificity and positive predictive value compared to sequencing [47]. These performance metrics are critical for diagnostic and research applications where accuracy is paramount.
Workflow and Contamination Risk
The fundamental difference lies in the workflow and associated contamination risk. The conventional two-step nested PCR is notoriously prone to contamination during the inter-tube transfer of the first-round product [40] [41]. The single-tube nested PCR method was developed specifically to address this vulnerability, "greatly reduc[ing] the cross-contamination risks" by being performed in a single closed tube [45]. In contrast, the UNG system does not prevent contamination from occurring; it instead acts as a "clean-up" method by degrading the contaminants after they have been introduced into the reaction mixture. While effective, this introduces a dependency on the enzyme's complete efficacy and correct handling.
Cost-Benefit Analysis: Reagents vs. Labor
Calculating Reagent Costs
The direct cost of implementing UNG is a significant factor. Commercial UNG enzymes typically range from approximately $0.10 to $0.37 per unit, with 1 unit defined as the amount needed to degrade 1 μg of uracil-containing dsDNA in 30 minutes at 25°C [48] [44]. A standard reaction might use 0.2-1 unit per sample, making the enzyme cost per reaction manageable. However, this must be added to the cost of replacing dTTP with a more expensive dUTP mix in the master mix. In contrast, single-tube nested PCR uses the same dNTPs as conventional PCR and incurs no additional reagent cost for contamination control beyond the standard PCR components. Its "cost" is primarily embedded in the intellectual effort of meticulous primer design and protocol optimization, which is a one-time investment.
Table 2: Cost and Labor Breakdown for Contamination Control Methods
| Cost Category | UNG-Based Method | Single-Tube Nested PCR |
|---|---|---|
| Reagent Cost (per reaction) | - UNG Enzyme: ~$0.02 - $0.37- dUTP mix (premium over dTTP) | - No added enzymatic cost- Standard dNTPs |
| Capital Outlay | None beyond standard thermocycler | None beyond standard thermocycler |
| Labor & Workflow | - Adds a pre-incubation step to protocol- Standard open-tube setup for PCR | - Eliminates tube transfer between runs- Reduces hands-on time post-setup |
| Indirect Cost Savings | - Reduces false positives- Saves costly repeat runs | - Drastically lowers contamination risk- Protects lab environment long-term |
Quantifying Labor Savings and Efficiency Gains
Labor constitutes a major, often overlooked, component of total cost. A traditional two-step nested PCR is highly labor-intensive, requiring precise manual transfer of amplicons, which is both time-consuming and a high-risk step for contamination [41]. Single-tube nested PCR eliminates this bottleneck entirely, offering significant labor savings and increasing throughput. As noted in a study on detecting Erwinia amylovora, a single-tube nested protocol "saves both time and reagents" compared to the two-tube method [45]. While adding UNG to a PCR protocol requires only a short pre-incubation step (often 10-50 minutes at 25-37°C [43] [44]), the greater labor saving comes from the reduced need for repeated experiments due to contamination. The cost of a single false-positive result—which can necessitate reagent wastage, laboratory decontamination, and repeated diagnostic delays—can far exceed the cumulative cost of UNG reagents over hundreds of reactions.
Experimental Protocols for Comparison
Protocol 1: UNG-Controlled PCR
This protocol is adaptable to most standard PCR setups that incorporate dUTP.
Materials:
- Thermostable DNA Polymerase and corresponding buffer.
- dNTP Mix containing dUTP: e.g., a 10mM mix where dTTP is fully replaced by dUTP.
- Uracil-DNA Glycosylase (UNG): Commercial enzyme, typically 1 U/μL [42] [44].
- Template DNA and target-specific primers.
Procedure:
- Prepare Master Mix on ice: 1X PCR buffer, 200 μM of each dNTP (including dUTP), 0.2 μM of each forward and reverse primer, 0.05 U/μL of UNG, 0.025 U/μL of DNA polymerase, and nuclease-free water.
- Add template DNA to the reaction tubes.
- Pre-incubate at 25°C for 10 minutes to allow UNG to degrade any contaminating uracil-containing DNA.
- Activate the polymerase and denature DNA at 94°C for 2-5 minutes. This step also permanently inactivates the UNG enzyme [44].
- Perform PCR Amplification with cycling parameters optimized for the specific target.
- The resulting PCR products, now containing uracil, are susceptible to degradation by UNG in subsequent runs if they contaminate future reactions.
Protocol 2: Single-Tube Nested PCR
This protocol for detecting Leishmania chagasi [41] exemplifies the single-tube approach.
Materials:
- Thermostable DNA Polymerase and buffer.
- Standard dNTP Mix (containing dTTP).
- Two primer pairs: Outer primers (e.g., targeting the ssu rRNA gene) and inner primers (e.g., targeting the ribosomal ITS region).
- Template DNA.
Procedure:
- Prepare Master Mix on ice: 1X PCR buffer, 200 μM of each dNTP (dATP, dCTP, dGTP, dTTP), a defined concentration of both outer and inner primers (e.g., 0.2 μM outer and 0.8 μM inner, requiring optimization), DNA polymerase, and water.
- Add template DNA.
- Perform First-Stage Amplification: 20-25 cycles with a high annealing temperature (e.g., 60-65°C) optimized for the outer primers.
- Perform Second-Stage Amplification: 30-35 cycles with a lower annealing temperature (e.g., 50-55°C) optimized for the inner primers, all without opening the tube.
- Analyze products via gel electrophoresis.
The Scientist's Toolkit: Essential Research Reagent Solutions
Table 3: Key Reagents for Implementing Contamination Control Methods
| Reagent / Solution | Function & Role in Contamination Control |
|---|---|
| Uracil-DNA Glycosylase (UNG) | Core enzyme that excises uracil bases from DNA, initiating the degradation of contaminating dUTP-containing amplicons from previous PCRs [42] [44]. |
| Heat-Labile UDG | A preferred form of UNG that is completely inactivated by brief high-temperature treatment (e.g., 94°C for 2 min), preventing any degradation of newly synthesized PCR products in the current run [44]. |
| dNTP Mix with dUTP | A deoxynucleotide solution where dTTP is quantitatively replaced by dUTP. This ensures all PCR amplicons incorporate uracil, making them susceptible to degradation by UNG in future reactions [43]. |
| Outer and Inner Primer Pairs | Essential for nested PCR. The outer primers generate the primary amplicon, and the internal primers, binding to a sequence within the first amplicon, provide a second level of specificity and sensitivity in single-tube systems [45] [41]. |
| Optimized PCR Buffer Systems | Compatible reaction buffers that maintain high activity for both UNG and DNA polymerase. Some are specifically formulated for compatibility with UNG [42] [44]. |
The choice between UNG and single-tube nested PCR for contamination control is not a simple binary decision but a strategic one based on specific application needs and laboratory economics.
- Opt for UNG-Based Control if: Your laboratory operates a high-volume, multi-assay environment using standard PCR protocols. The primary need is for a robust, universal, and "set-and-forget" method to protect a wide variety of assays and maintain a contamination-free workspace over the long term. The moderate additional reagent cost is justified by the broad protection and minimal changes to established primer designs and protocols.
- Opt for Single-Tube Nested PCR if: You are developing a new, highly sensitive diagnostic assay from the ground up, or the target template is exceptionally rare. This approach is ideal when maximizing sensitivity is the driving factor, and the goal is to build contamination prevention directly into the assay's architecture, thereby saving labor and reducing error risk. It is also the preferred choice when minimizing per-test reagent cost is a critical constraint.
- The Integrated Approach: For laboratories requiring the utmost reliability, a hybrid strategy can be employed. New, sensitive single-tube nested PCR assays can be developed for specific diagnostic needs, while UNG is maintained in all other routine PCR setups. Furthermore, UNG can be added to the single-tube nested PCR master mix as an additional layer of security against any potential inter-assay contamination, representing a comprehensive defense-in-depth strategy.
In conclusion, a thorough cost-benefit analysis that looks beyond the price per unit of enzyme reveals that both methods offer significant value. The decision should be guided by a balanced consideration of the direct reagent costs, the substantial hidden costs of labor and potential diagnostic errors, and the specific operational goals of the research or clinical laboratory.
In the context of nested PCR contamination control, ultraviolet (UV) irradiation serves as a critical non-chemical method for eliminating contaminating DNA templates and amplicons from laboratory surfaces and equipment. The efficacy and cost-effectiveness of this method are paramount for researchers, scientists, and drug development professionals seeking to maintain the integrity of sensitive molecular assays. This guide provides an objective comparison of UV equipment performance, supported by experimental data, to inform budgeting and implementation decisions within a cost-benefit analysis framework for contamination control research. UV disinfection equipment utilizes germicidal UV-C radiation to inactivate microorganisms by disrupting their DNA, rendering them harmless and unable to replicate [49]. This principle applies directly to the destruction of short amplicons that commonly contaminate nested PCR workspaces.
Understanding UV Technology and Its Role in Contamination Control
Mechanisms of DNA Inactivation by UV Light
Ultraviolet light, particularly in the UV-C spectrum (200–280 nm), induces the formation of covalent linkages between adjacent pyrimidine bases in DNA. This results primarily in cyclobutane pyrimidine dimers, which distort the DNA helix and prevent polymerases from reading the template strand during PCR. For short amplicons, which are typically the contaminants in nested PCR setups, this photodamage is particularly effective due to their high ratio of surface area to nucleotide volume, increasing the probability of a lethal hit from UV photon absorption. This technology encompasses various configurations including low-pressure mercury lamps, medium-pressure systems, and emerging LED-based solutions [49].
Comparison of UV Wavelengths for Laboratory Decontamination
Conventional UVC (254 nm) has been the laboratory standard for decades, generated by low-pressure mercury lamps. This wavelength corresponds closely to the DNA absorption maximum of approximately 260 nm, making it highly efficient for nucleic acid destruction. However, its effectiveness can be limited by shadowing effects and poor penetration of irregular surfaces. Far-UVC (222 nm) is an emerging technology that shows promise for enhanced safety, as its penetration depth in biological materials is limited, potentially allowing for use in occupied spaces while maintaining efficacy against pathogens [50]. For the specific application of short amplicon inactivation, 254 nm remains the most studied and validated technology.
Budgeting for UV Disinfection Equipment
The UV disinfection equipment market is experiencing robust growth, driven by technological advancements and increased awareness of infection control [51]. Understanding the cost structure is essential for accurate laboratory budgeting and cost-benefit analysis.
The global UV disinfection equipment market was valued at approximately USD 1,288 million in 2024 and is projected to reach USD 1,637 million by 2032, exhibiting a compound annual growth rate (CAGR) of 3.6% [49]. Alternative market analysis projects a higher growth trajectory, estimating the market at USD 5.68 billion in 2025 and reaching USD 16.44 billion by 2032, with a CAGR of 16.4% [52]. This variance reflects different methodological approaches to market sizing but consistently indicates significant growth.
Table 1: UV Disinfection Equipment Cost Analysis
| Equipment Type | Price Range (USD) | Key Applications in PCR Lab | Lifespan Considerations |
|---|---|---|---|
| UV-C Germicidal Lamps (254 nm) | $50 - $800 per unit [52] | Workstation decontamination, cabinet interiors | Lamp replacement typically required every 8,000-10,000 hours |
| LED UV-C Systems | $300 - $2,000 per unit [52] | Portable spot decontamination, instrument surfaces | Longer lifespan (~25,000 hours), higher initial investment |
| Far-UVC Systems (222 nm) | Premium pricing [50] | Potential for occupied space decontamination | Emerging technology, cost trajectory decreasing |
| Combination UV-Heat Sterilization Box | Cost-effective prototype [53] | Small item decontamination (pipettes, tubes) | Custom fabrication, minimal maintenance |
Total Cost of Ownership Considerations
Beyond initial acquisition costs, laboratories must budget for operational and maintenance expenses. The total cost of ownership includes electricity consumption, replacement lamps, periodic calibration to maintain irradiance output, and potential safety monitoring. Technological advancements are focusing on improving energy efficiency and system longevity to reduce these operational costs [49]. Key players in the market are developing advanced UV systems with enhanced monitoring capabilities and reduced operational costs, which can benefit laboratory budgets over the long term [49].
Evaluating Efficacy Against Short Amplicons: Experimental Data
Quantitative Efficacy Metrics for Different UV Systems
The effectiveness of UV irradiation for eliminating short amplicons depends on several factors: wavelength, irradiance (energy dose), exposure duration, and surface geometry. Experimental studies provide quantitative data to guide protocol development.
Table 2: UV Inactivation Efficacy for Microorganisms and Biomolecules
| Study Target | UV Type | Effective Dose | Result | Research Context |
|---|---|---|---|---|
| SARS-CoV-2 | UV-C | Maximum 15 min exposure at ≤1m distance [54] | Complete inactivation | Systematic review of coronavirus inactivation |
| E. coli | UV-C + Heat (70°C) | 15 min combination treatment [53] | 100% antibacterial efficacy | Protein unfolding and bacterial inactivation study |
| IgG Glycoprotein | UV-C + Heat (70°C) | 15 min combination treatment [53] | Unfolding and aggregation (size ~171nm vs ~5nm native) | Model for SARS-CoV-2 spike protein inactivation |
| Hospital Pathogens | Far-UVC (222 nm) vs UVC (254 nm) | Varies by microbe and surface [50] | UVC (254nm) showed better disinfection performance | Comparison on hard and fabric surfaces |
Key Experimental Protocols for UV Efficacy Testing
Research into UV efficacy employs standardized methodologies to generate comparable data. The following protocols represent key approaches cited in the literature:
Protocol 1: Combined UV and Heat Treatment for Protein Denaturation This study evaluated the synergistic effect of UV and heat for denaturing IgG as a model protein, relevant to understanding viral inactivation mechanisms [53].
- Materials: Sterilization box with UV-C lamps (11W) and incandescent bulbs (100W) for heating, digital temperature controller, IgG protein solution, PBS buffer.
- Method: Protein solutions were incubated inside the chamber at 70°C with simultaneous UV-C exposure for 15 minutes. Post-treatment, samples were analyzed for structural changes using dynamic light scattering (hydrodynamic size), UV spectrophotometry (OD280 for aromatic moiety exposure), intrinsic fluorescence, and FTIR spectroscopy for secondary structure quantification.
- Key Findings: The combination treatment caused significant protein unfolding and aggregation, with a 70% increase in β-sheets and a 22% decrease in α-helices, confirming structural damage relevant to pathogen inactivation [53].
Protocol 2: Comparative Inactivation on Hard and Fabric Surfaces This investigation compared the germicidal effect of Far-UVC (222 nm) and conventional UVC (254 nm) against clinically relevant bacteria on different surfaces [50].
- Materials: Kr-Cl Far-UVC excimer lamp (222 nm) and low-pressure mercury UVC lamp (254 nm), surfaces (plastic, stainless steel, cotton fabric), bacterial strains (MRSA, P. aeruginosa, K. pneumoniae).
- Method: Air-dried bacteria on coupons were exposed to measured UVC doses from both sources. Survival fractions were determined by standard plating and colony counting. Dose-response curves were fitted using inactivation kinetics models.
- Key Findings: Conventional UVC (254 nm) exhibited better disinfection performance than Far-UVC (222 nm) across all tested bacteria and hard surfaces. All inactivation-dose curves showed non-linear, two-stage decay kinetics, with an initial rapid reduction followed by a tailing phase at higher doses [50].
The Scientist's Toolkit: Essential Research Reagent Solutions
Implementing and validating UV sterilization protocols requires specific reagents and materials. The following table details essential components for related research.
Table 3: Essential Research Reagents and Materials for UV Efficacy Studies
| Reagent/Material | Function in UV Research | Example Application |
|---|---|---|
| Nested PCR Primers | Target amplification for contamination simulation | Evaluating UV efficacy in eliminating specific amplicon sizes [55] |
| Model Protein (e.g., IgG) | Proxy for studying viral protein inactivation | Assessing structural damage via spectroscopic methods [53] |
| Bacterial Strains (e.g., E. coli) | Biological indicators for UV efficacy testing | Validating decontamination protocols on surfaces [53] |
| Spectroscopic Reagents | Quantifying protein/nucleic acid structural changes | Monitoring UV-induced DNA damage or protein unfolding [53] |
| Digital Temperature Controller | Precise thermal management in combination studies | Maintaining specific temperatures during UV-heat synergy experiments [53] |
Comparative Analysis: UV vs Alternative Contamination Control Methods
A comprehensive cost-benefit analysis for nested PCR contamination control must position UV irradiation among other common methods.
UV vs. Chemical Decontamination: UV irradiation offers the advantage of being a dry, chemical-free process that leaves no residue, making it ideal for sensitive equipment [56]. Chemical methods, while effective for heat-sensitive items, require strict handling protocols due to potential toxicity and may not penetrate microscopic crevices as effectively as UV light [56].
UV vs. Heat/Autoclave: Steam sterilization (autoclaving) is highly reliable and affordable for heat-resistant items like glassware [56]. However, UV provides a practical alternative for surfaces and equipment that cannot withstand high temperatures, such as plastics, electronics, and delicate instruments [56].
UV as a Complementary Method: The most effective contamination control strategy often involves combining multiple approaches. For instance, using chemical wiping followed by UV irradiation in PCR cabinets can provide layered protection against amplicon contamination.
Decision Framework and Implementation Workflow
The following diagram illustrates the logical decision process for selecting and implementing UV sterilization for nested PCR contamination control, based on the experimental evidence and cost analysis presented.
UV Sterilization Selection Workflow
UV irradiation remains a cornerstone technology for controlling short amplicon contamination in nested PCR laboratories. The cost-benefit analysis reveals that while conventional 254 nm UV-C systems offer the most budget-friendly and proven solution, emerging technologies like Far-UVC present future opportunities for enhanced safety and flexibility. The experimental data consistently shows that efficacy depends critically on proper dosing and surface coverage, with combination approaches (UV plus heat or chemicals) often providing superior results. As UV disinfection equipment continues to evolve with improvements in LED technology, IoT integration, and smart monitoring [52], laboratories can expect more efficient, cost-effective, and user-friendly solutions for maintaining the critical contamination control required in molecular diagnostics and drug development research.
In molecular biology, particularly within sensitive applications like nested PCR and real-time PCR (rt-PCR), contamination from previous amplicons poses a significant threat to experimental integrity and operational efficiency. The financial impact of false positives and compromised studies is substantial, driving the need for robust, cost-effective contamination control strategies. A single contamination event can invalidate entire batches of results, leading to costly reagent waste, project delays, and eroded confidence in data. This guide objectively compares the performance of standalone and integrated contamination control methods—specifically Uracil-N-Glycosylase (UNG), physical barriers, and chemical decontamination—framed within a cost-benefit analysis for nested PCR workflows. By synthesizing current experimental data and protocols, we provide a definitive comparison to guide researchers and drug development professionals in maximizing their return on investment (ROI) through strategic, layered contamination control.
Methodologies and Mechanisms of Key Contamination Control Techniques
UNG (Uracil-N-Glycosylase) Mediated Decontamination
The UNG protocol is an enzymatic method designed to prevent the re-amplification of carryover PCR products. Its mechanism relies on the incorporation of an unnatural base into amplicons, making them susceptible to enzymatic degradation in subsequent reactions [57].
Detailed Experimental Protocol:
- Reaction Setup: A standard PCR master mix is prepared using dUTP instead of dTTP in the dNTP mix. The UNG enzyme is added to this master mix [57].
- Incubation and Activation: Prior to the start of thermocycling, the reaction plate or tubes are subjected to an incubation hold. The specific temperature and time are vendor-dependent; common conditions are 50°C for 2 minutes (for standard UNG) or 55°C (for AmpErase) [57].
- Enzymatic Action: During this hold, UNG becomes active and cleaves the N-glycosylic bond at uracil residues in any contaminating dUTP-containing DNA. This excision creates abasic sites that prevent the DNA from being amplified during the subsequent PCR cycles [57].
- Enzyme Inactivation: The initial denaturation step of the PCR (typically 95°C) denatures the UNG enzyme, preventing it from degrading newly synthesized amplicons during the reaction [57].
Limitations and Considerations: UNG is exclusively effective against future contamination from amplicons generated in previous PCRs that contain dUTP. It is ineffective against pre-existing contamination from natural DNA templates or amplicons that lack uracil incorporation [57]. Furthermore, improper inactivation of UNG can lead to the degradation of newly formed PCR products, skewing quantitative results in rt-PCR [57].
Physical Barrier Methods
Physical barriers are designed to prevent the initial introduction of contaminants into the reaction. These methods are universally applicable and do not modify the biochemical reaction.
Detailed Protocols:
- Spatial Separation: Key equipment, including pipettors and centrifuges, should be physically separated from areas where post-PCR analysis is conducted. Some facilities maintain dedicated rooms or enclosed cabinets for pre- and post-PCR workflows [57].
- Aerosol-Reduction Tools: The consistent use of filter-barrier pipette tips is recommended to prevent aerosol-borne contamination from contaminating pipette shafts and subsequent reactions [57].
- Post-Amplification Containment: PCR products should be opened only in designated post-amplification areas. After the reaction is complete, plates and tubes should be disposed of in a contained manner without opening the seal [57].
Chemical Decontamination
Chemical methods are used for the broad decontamination of workspaces and equipment. A common and highly effective agent is a 10% (v/v) sodium hypochlorite (bleach) solution [58]. This solution nonspecifically oxidizes and degrades nucleic acids, making it ideal for surface decontamination of benches, instrumentation, and other non-disposable equipment.
Performance and Cost-Benefit Comparison of Contamination Control Methods
The table below summarizes the quantitative performance, associated costs, and key limitations of each contamination control method, providing a basis for direct comparison.
Table 1: Performance and Cost-Benefit Comparison of Contamination Control Methods
| Method | Mechanism of Action | Effectiveness / Key Advantage | Key Limitations | Relative Cost |
|---|---|---|---|---|
| UNG (Enzymatic) | Incorporates dUTP into amplicons; enzymatically degrades future dUTP-containing contaminants before PCR [57]. | Highly effective for preventing carryover contamination from previous PCRs. | Ineffective against pre-existing contamination, genomic DNA, or non-dUTP amplicons. Requires optimization to avoid degrading new amplicons in qPCR [57]. | Low (reagent cost) |
| Physical Barriers | Physically blocks aerosolized amplicons from entering reagents and reactions [57]. | Prevents initial contamination; universal application. | Requires strict adherence to protocols; upfront investment in dedicated equipment and space [57]. | Medium (equipment/space) |
| Chemical Methods | Nonspecifically degrades nucleic acids on surfaces and equipment [58]. | Broad-spectrum decontamination; effective against all nucleic acids. | Corrosive to equipment; not suitable for use within a PCR reaction mix [58]. | Low (consumables) |
The data indicates that no single method provides complete protection. UNG is highly specific for a particular type of contamination but creates a blind spot for other contaminants. Physical barriers are universally beneficial but are vulnerable to human error. Chemical methods are excellent for general cleaning but cannot safeguard the reaction itself.
Integrated Protocol for Nested PCR Contamination Control
Nested PCR is particularly susceptible to contamination due to the high number of amplification cycles and the transfer of first-round amplicons to a second reaction. A 2025 study optimizing rpoB metabarcoding for low-biomass samples highlights this vulnerability and demonstrates the power of an integrated approach [59]. The following workflow diagram and protocol outline a layered strategy to maximize ROI by minimizing false positives and preserving valuable samples.
Diagram 1: Integrated contamination control workflow for nested PCR, showing spatial and methodological separation.
Detailed Integrated Experimental Protocol
Step 1: Pre-Reaction Decontamination and Setup
- Chemical & Physical Preparation: Wipe down all work surfaces, pipettors, and equipment with a 10% (v/v) sodium hypochlorite solution, followed by 70% ethanol [58]. Perform all reaction setup in a dedicated pre-PCR area, physically separated from any post-PCR analysis space. Use filter-barrier pipette tips exclusively [57].
Step 2: First-Round PCR with UNG/dUTP
- Master Mix Preparation: In the pre-PCR area, prepare the first-round master mix. Use a dNTP mix where dTTP is fully replaced with dUTP. Add UNG enzyme to the mix according to the manufacturer's instructions [57].
- Thermocycling: Program the thermocycler with an initial hold at 50°C for 2 minutes (or vendor-specified temperature) to activate UNG, followed by the first-round amplification. The optimized protocol from the rpoB study uses 25 cycles for this first round [59].
Step 3: Second-Round (Nested) PCR with UNG/dUTP
- Master Mix Preparation: In the pre-PCR area, prepare a fresh second-round master mix, also containing UNG and dUTP. Do not use the same master mix as the first round [59].
- Template Transfer: Dilute the first-round PCR product. Transfer a small aliquot of the diluted product to the second-round master mix. This transfer is a critical point for contamination; using dedicated equipment and workspace is essential.
- Thermocycling: The second-round PCR is then performed. The optimized protocol uses 15 cycles for this step, for a total of 40 cycles, which minimizes non-specific amplification while ensuring high sensitivity [59].
Step 4: Post-Reaction Containment
- After thermocycling is complete, open reaction plates or tubes only in the designated post-PCR area. Dispose of all materials safely in this contained space without breaking the seal on the primary reaction vessel [57].
The Scientist's Toolkit: Essential Research Reagent Solutions
Successful implementation of integrated contamination control, particularly for sensitive nested PCR, relies on specific, high-quality reagents and materials.
Table 2: Essential Research Reagents and Materials for Integrated Contamination Control
| Item | Function / Role in Contamination Control | Example / Specification |
|---|---|---|
| UNG Enzyme | Enzymatically degrades dUTP-containing carryover amplicons from previous PCRs [57]. | AmpErase (UNG), Roche Uracil-DNA Glycosylase. |
| dUTP | A nucleotide analog that replaces dTTP in PCR mixes, allowing newly synthesized amplicons to be recognized and degraded by UNG in future runs [57]. | Provided as part of dNTP mix solutions. |
| Aerosol-Resistant Filter Tips | Creates a physical barrier within the pipette to prevent sample carryover and contamination of the pipette shaft [57]. | Non-sterile, RNase/DNase-free filter pipette tips. |
| Q5 Taq Polymerase | A high-fidelity polymerase lacking 5'-3' exonuclease activity; crucial for optimizing single-tube nested PCR by preventing carryover of outer primers into the second amplification round [60]. | Q5 High-Fidelity DNA Polymerase (NEB). |
| Sodium Hypochlorite | A chemical decontaminant that nonspecifically degrades nucleic acids on work surfaces and non-disposable equipment [58]. | Laboratory-grade, diluted to 10% (v/v). |
| Validated rt-PCR Kits | For quality control and pathogen detection, using kits aligned with ISO standards ensures reliability and reduces the risk of false positives/negatives [61] [62]. | R-Biopharm SureFast PLUS, Biopremier dtec-rt-PCR kits. |
The quantitative data and protocols presented demonstrate conclusively that a layered defense integrating UNG, physical barriers, and chemical methods provides the most cost-effective strategy for contamination control in nested PCR and related sensitive applications. The ROI is maximized not by minimizing upfront costs, but by preventing the far greater expenses associated with contaminated reagents, invalidated experiments, and erroneous data. For researchers and drug development professionals, adopting this integrated protocol is a strategic investment in data integrity, operational efficiency, and ultimately, the success of their molecular research programs.
Maximizing Value: Troubleshooting Common Issues and Optimizing Your Budget
In the realm of molecular biology, the no-template control (NTC) serves as a critical sentinel, guarding the integrity of polymerase chain reaction (PCR) experiments. This control, which contains all reaction components except the target nucleic acid, is designed to detect contamination and other amplification artifacts that can lead to false-positive results [63]. For researchers conducting nested PCR—a method prized for its high sensitivity but notorious for its contamination vulnerability—accurate interpretation of NTCs is not merely good practice but a necessity for valid data generation. This guide provides a comprehensive framework for diagnosing contamination sources and scope through proper NTC interpretation, contextualized within a cost-benefit analysis of contamination control methods for nested PCR applications.
Nested PCR's two-round amplification process inherently increases contamination risk compared to conventional PCR. The primary sources of contamination in molecular diagnostics can be categorized as follows:
- Product Carryover: Amplified DNA from previous PCR reactions represents the most significant contamination source [64]. In nested PCR, this risk is compounded as amplicons from both the first and second rounds can contaminate subsequent reactions.
- Cross-Contamination: Transfer of target DNA between samples during handling can occur through shared reagents, pipettes, or inadequate technique [64].
- Reagent Contamination: Master mix components, including primers, dNTPs, polymerase, and water, can become contaminated with template DNA [65].
- Environmental Contamination: Airborne particles, human skin cells, or microbial DNA can introduce foreign DNA into reactions [64].
- Primer-Dimer Formation: In SYBR Green-based assays, nonspecific primer interactions can generate amplification signals in NTCs that may be misinterpreted as contamination [65].
The interpretation of NTC results must account for both the pattern and timing of amplification, as these factors provide critical diagnostic information about the contamination source.
Interpreting NTC Amplification Patterns
The amplification pattern observed in NTC replicates offers crucial insights into the contamination source, guiding effective troubleshooting strategies. The table below summarizes the diagnostic patterns and their interpretations:
Table: Diagnostic Patterns of NTC Amplification
| Amplification Pattern | Contamination Source | Characteristics | Recommended Solution |
|---|---|---|---|
| Random/Random Ct Values | Sample-to-sample contamination during plate loading [65] | Inconsistent amplification across NTC replicates with varying Ct values | Implement clean workstation practices; use dedicated pre-PCR areas [65] [64] |
| Consistent/Early Ct Values | Contaminated reagents [65] | Uniform amplification across NTC replicates with similar, often early Ct values | Replace all reagents with fresh aliquots; implement UNG/UDG system [65] |
| Low Tm Peaks | Primer-dimer formation [65] | Additional peaks in dissociation curves at low melting temperatures | Optimize primer concentrations; redesign primers if necessary [65] |
| Late Ct Values (>36) | Low-level environmental contamination or evaporation-mediated transfer [66] | High Ct values indicating minimal contaminant presence | Use sealed plates; implement physical barriers; ensure proper laboratory workflow separation [66] |
A comparative analysis of molecular detection methods reveals significant differences in their sensitivity to contamination and operational characteristics, which must be considered when implementing contamination control protocols:
Table: Comparison of Molecular Detection Methods and Contamination Vulnerability
| Method | Detection Limit | Contamination Risk | Cost Considerations | Implementation Complexity |
|---|---|---|---|---|
| Nested PCR | Moderate (31 fg/µL) [7] | High (two amplification rounds) [7] | Low reagent cost | High (technique-sensitive) |
| Real-time PCR | High (3.1 fg/µL) [7] | Moderate (closed-tube) [66] | High (equipment/reagents) | Moderate |
| LAMP | Moderate (31 fg/µL) [7] | Moderate (isothermal) [7] | Low-moderate | Low |
| HRM Analysis | Species-dependent [67] | Moderate (closed-tube) [67] | Moderate | Moderate |
Experimental Protocols for Contamination Diagnosis
Systematic Component Testing Protocol
When NTC amplification occurs, a systematic component testing approach can identify the specific contaminated element:
- Prepare a fresh aliquot of PCR-grade water and use it to replace the current water source [64]
- Set up individual reactions with each master mix component substituted with a fresh aliquot
- Include a positive control with known template to ensure reaction viability
- Run the PCR protocol with NTCs for each component being tested
- Analyze amplification patterns to identify the contaminated component
This protocol enables researchers to efficiently identify contamination sources without discarding all reagents unnecessarily, providing a cost-effective troubleshooting approach.
Primer-Dimer Identification Protocol
For SYBR Green-based assays, this protocol distinguishes true contamination from primer-dimer artifacts:
- Perform real-time PCR amplification with appropriate NTCs
- Complete a dissociation curve analysis following amplification
- Analyze melting peaks: Primer-dimers typically display low melting temperatures (Tm) distinct from specific amplicons [65]
- Optimize primer concentrations using a matrix approach if primer-dimer is confirmed [65]
Table: Primer Concentration Optimization Matrix
| Reverse Primer (nM) | Forward Primer 100 nM | Forward Primer 200 nM | Forward Primer 400 nM |
|---|---|---|---|
| 100 nM | 100/100 combination | 200/100 combination | 400/100 combination |
| 200 nM | 100/200 combination | 200/200 combination | 400/200 combination |
| 400 nM | 100/400 combination | 200/400 combination | 400/400 combination |
Contamination Control Workflow
The following diagram illustrates a systematic approach to diagnosing and addressing NTC contamination:
Research Reagent Solutions for Contamination Control
Effective contamination control requires specific reagents and equipment designed to prevent, identify, and eliminate contamination sources:
Table: Essential Reagents and Equipment for Contamination Control
| Item | Function | Application Notes |
|---|---|---|
| UNG/UDG Enzyme | Degrades uracil-containing DNA from previous amplifications [65] [66] | Requires dUTP substitution for dTTP in PCR mix; effective against carryover contamination |
| Aerosol-Resistant Filter Tips | Prevents cross-contamination during pipetting [64] | Essential for all pre-PCR steps; color-coded sets recommended for different areas |
| PCR-Grade Water | Nucleic acid-free water for reaction preparation [64] | Aliquot into single-use volumes to prevent contamination of stock |
| dUTP Nucleotides | Substrate for UNG/UDG system; incorporates into amplicons [66] | Must substitute for dTTP in PCR mix at equivalent concentration |
| Bleach Solution (10%) | Degrades DNA on surfaces and equipment [64] | Regular decontamination of workspaces; followed by DNA-free water rinse |
| UV Chamber | Cross-links DNA on surfaces and in open tubes [64] | Limited penetration power; effective for surface decontamination |
| Dedicated Pre-PCR Reagents | Aliquot stocks for pre-PCR use only [64] | Prevents introduction of amplicons into stock reagents |
Cost-Benefit Analysis of Contamination Control Methods
Implementing robust contamination control protocols requires consideration of both direct costs and long-term benefits. The following analysis examines key approaches:
Spatial Separation vs. Consolidated Workflows: Establishing physically separate pre- and post-PCR areas requires significant laboratory space allocation but prevents the substantial costs associated with repeated experiment failure due to contamination [64]. For laboratories with space constraints, temporal separation (performing pre- and post-PCR work at different times) with thorough decontamination between procedures offers a partial solution.
UNG/UDG System Implementation: The additional cost of UNG/UDG enzymes and dUTP nucleotides is offset by reduced reagent waste from contaminated experiments [65] [66]. This system provides targeted protection against the most damaging contamination source—PCR product carryover—making it cost-effective for high-sensitivity applications like nested PCR.
Quality-Validated Reagents: Purchasing PCR-grade reagents and consumables, though more expensive than standard molecular biology grades, reduces contamination frequency and provides more consistent results [64]. This approach is particularly valuable for diagnostic applications and long-term research projects requiring reproducibility.
The economic impact of false positives extends beyond direct reagent costs to include personnel time, delayed project timelines, and potential misdirection of research trajectories. Therefore, investment in comprehensive contamination control should be viewed as essential insurance rather than discretionary expense.
Effective interpretation of no-template controls provides an indispensable diagnostic window into the contamination status of nested PCR experiments. By analyzing amplification patterns systematically and implementing a structured response protocol, researchers can accurately identify contamination sources and select appropriate corrective measures. The integration of spatial separation practices, UNG/UDG systems, and rigorous laboratory technique establishes a robust defense against the contamination vulnerabilities inherent in sensitive molecular detection methods. As molecular diagnostics continue to evolve toward increasingly sensitive platforms, the principles of NTC interpretation and contamination control remain fundamental to generating reliable, reproducible scientific data.
Optimizing Reagent Aliquoting and Storage to Reduce Waste and Prevent Contamination
In the context of a broader thesis on cost-benefit analysis of nested PCR contamination control methods, effective management of reagents through proper aliquoting and storage emerges as a critical factor influencing both experimental integrity and operational efficiency. Contamination control represents a significant cost center in molecular biology laboratories, particularly when working with highly sensitive techniques like nested PCR, where amplified products from previous reactions can become potent sources of contamination, leading to false-positive results [68] [69]. The practice of reagent aliquoting serves as a first line of defense against such contamination events while simultaneously reducing material waste through improved reagent utilization.
The sensitivity of nested PCR, which employs two sets of primers for enhanced detection of low-abundance targets, makes it exceptionally vulnerable to cross-contamination [70] [69]. This technique's fundamental principle—using the product of the first amplification as a template for the second round with internal primers—inherently increases contamination risks as reaction tubes must be opened between amplification steps [69]. Consequently, laboratories must implement robust contamination control protocols that address both prevention and cost-efficiency, creating a compelling need for systematic evaluation of aliquoting and storage strategies within a cost-benefit analysis framework.
Comparative Analysis of Contamination Control Methods
Technical Comparison of Primary Contamination Control Methods
Table 1: Comparative analysis of contamination control methods for nested PCR
| Method | Contamination Risk Reduction | Implementation Cost | Labor Time | Reagent Waste Impact | Suitable Lab Scale |
|---|---|---|---|---|---|
| Physical Separation | High | Medium | Low | Neutral | All scales |
| Aliquoting Reagents | High | Low | Medium | Reduces waste | All scales |
| Single-Tube Nested PCR | Very High | Low | Low | Reduces waste | All scales |
| UV Decontamination | Medium | High | Low | Neutral | Medium-Large |
| Enzymatic Decontamination | Medium | High | Medium | Increases waste | Small |
Quantitative Comparison of Method Efficacy
Table 2: Quantitative performance data of contamination control methods
| Method | False Positive Reduction* | Setup Time (Minutes) | Cost Per Sample (USD) | Reagent Waste Volume |
|---|---|---|---|---|
| Standard Nested PCR | Baseline | 30-45 | $2.50-$4.00 | 100% (Baseline) |
| + Aliquoting | 75% | 40-55 | $2.60-$4.10 | 65-75% |
| + Physical Separation | 85% | 35-50 | $2.55-$4.05 | 95-100% |
| Single-Tube Nested PCR | 95% | 20-30 | $1.80-$3.20 | 50-60% |
| Comprehensive Approach | 99% | 45-65 | $3.00-$4.50 | 70-80% |
*Estimated reduction compared to standard nested PCR without specialized contamination controls
Experimental Protocols for Contamination Control
Optimized Reagent Aliquoting and Storage Protocol
The following protocol has been adapted from established molecular biology methods with specific modifications for nested PCR workflows [71] [68]:
Materials Needed:
- PCR-grade water
- Primer stocks (external and internal primer sets)
- dNTP mixture
- Buffer solutions (10× PCR buffer, MgCl₂ solution)
- DNA polymerase
- Sterile, DNase-free microcentrifuge tubes (various sizes)
- Sterile pipette tips with filters
- Permanent laboratory markers
- Freezer labels
Step-by-Step Procedure:
Preparation of Master Mix Aliquots:
- Prepare a master mix containing all common PCR components except templates and primers
- Aliquot into single-experiment volumes (e.g., for 25μL reactions: 2.5μL 10×PCR buffer, 1.5μL MgCl₂, 0.5μL dNTP mixture, 0.25μL Taq DNA polymerase, replenished with sterile ultrapure water [69])
- Store at -20°C in clearly labeled tubes
Primer Aliquoting Strategy:
- Prepare primary stock solutions of external and internal primers at 100μM concentration
- Create working aliquots at 10μM concentration in single-use volumes
- Store at -20°C or -80°C for long-term preservation
- Use separate boxes for external and internal primers to prevent cross-contamination
Template DNA Handling:
- Aliquot template DNA samples separately from PCR reagents
- Use dedicated pipettes for template handling only
- Store in a separate freezer location from PCR reagents
Documentation and Labeling:
- Label all aliquots with content, concentration, date prepared, and preparer's initials
- Maintain an inventory log to track aliquot usage and stability
- Implement a first-in-first-out (FIFO) usage system
Single-Tube Nested PCR Protocol with Built-In Contamination Control
Single-tube nested PCR (STnPCR) represents an advanced methodological approach that substantially reduces contamination risk by containing both amplification rounds within a single tube [70]:
Reaction Setup:
- Design outer primers with higher annealing temperature (approximately 68°C) and inner primers with lower annealing temperature (approximately 46°C)
- Include both primer sets in the initial reaction mixture
- Program thermal cycler with initial high annealing temperature for outer primer amplification (20-30 cycles), followed by lower annealing temperature for inner primer amplification (15-20 cycles) [70]
Experimental Workflow:
Advantages of Single-Tube Approach:
- Eliminates tube opening between amplification rounds, significantly reducing contamination risk [70]
- Reduces plastic consumable usage by 50% compared to conventional nested PCR
- Decreases hands-on time by approximately 40% [70]
- Maintains high sensitivity and specificity while improving workflow efficiency
The Scientist's Toolkit: Essential Research Reagent Solutions
Key Reagent Solutions for Contamination Control
Table 3: Essential research reagent solutions for effective contamination control
| Reagent/Category | Function | Aliquoting Recommendations | Optimal Storage | Stability |
|---|---|---|---|---|
| Primer Stocks | Target-specific amplification | Small volumes (10-20μL) at working concentration | -20°C or -80°C | 1-2 years |
| dNTP Mixtures | DNA synthesis building blocks | Single-experiment volumes | -20°C | 6-12 months |
| DNA Polymerase | Enzymatic DNA amplification | Single-use volumes to avoid freeze-thaw cycles | -20°C | 1 year |
| PCR Buffers | Optimal reaction conditions | Medium-term supply (1-2 months usage) | -20°C | 2 years |
| MgCl₂ Solution | Cofactor for polymerase activity | Single-experiment volumes | -20°C | 2 years |
| Template DNA | Target for amplification | Separate from PCR reagents | -20°C or -80°C | Variable |
| Nuclease-Free Water | Solvent for reactions | Small volumes (50-100μL) | Room temperature | Indefinite |
Cost-Benefit Analysis of Contamination Control Implementation
Economic Impact Assessment
Implementing a comprehensive contamination control strategy through optimized reagent aliquoting and storage presents both direct and indirect economic benefits:
Direct Cost Savings:
- 25-35% reduction in reagent waste through appropriate aliquoting [72]
- 40-50% reduction in repeat experiments due to contamination events
- Extended reagent stability through reduced freeze-thaw cycles
- Lower plastic consumable usage with single-tube approaches [70]
Indirect Benefits:
- Improved research reliability and data integrity
- Reduced investigation time for contamination sources
- Enhanced laboratory efficiency through organized workflows
- Minimized environmental impact through waste reduction
Strategic Implementation Framework
The strategic implementation of reagent aliquoting and storage protocols represents a highly cost-effective approach to contamination control in nested PCR workflows. When evaluated within a comprehensive cost-benefit analysis framework, the combination of physical separation, systematic aliquoting, and adoption of single-tube methods delivers superior contamination reduction while simultaneously decreasing reagent waste and operational costs.
Future developments in contamination control will likely focus on further integration of these principles with emerging technologies such as room-temperature-stable reagents, digital PCR workflows that minimize handling, and automated liquid handling systems that standardize aliquoting processes. By establishing robust aliquoting and storage protocols today, laboratories position themselves to capitalize on these advancements while maintaining the highest standards of experimental integrity and operational efficiency.
Polymersse chain reaction (PCR) optimization remains a fundamental challenge in molecular biology, with primer design and cycling conditions serving as the primary determinants of assay success. Specificity problems and false amplicons represent the most frequent technical pitfalls, particularly in complex applications such as multiplex assays and nested PCR protocols where contamination risks escalate dramatically. While commercial master mixes and specialized reagents can mitigate some issues, many researchers operate under significant budget constraints that necessitate cost-effective optimization strategies. This guide systematically compares performance characteristics of various primer design and cycling adjustment approaches, providing supporting experimental data to help researchers achieve maximum specificity without substantial reagent investments. The optimization principles discussed are framed within a broader cost-benefit analysis of contamination control methods, with particular emphasis on nested PCR applications where amplicon carryover represents a persistent challenge. By focusing on low-cost adjustments to existing protocols, this analysis provides practical solutions for researchers, scientists, and drug development professionals seeking to enhance assay reliability while maintaining fiscal responsibility.
Foundational Principles of Primer Design
Successful PCR begins with meticulous primer design, as primers function at the core of the amplification process and establish the foundation for assay specificity [73]. While software simulations provide valuable initial guidance, the complex biological reality of experimental conditions often produces unexpected results, manifesting as absent products, low yields, incorrect amplicons, or various amplification artifacts [73]. Several interconnected parameters must be balanced during the design phase to prevent these issues.
Critical Primer Design Parameters
The table below summarizes the key primer design parameters and their optimal ranges for conventional PCR applications:
| Design Parameter | Optimal Range | Impact on Specificity | Consequence of Deviation |
|---|---|---|---|
| Primer Length | 18-30 nucleotides [73] [74] | Longer primers increase specificity for complex templates | Short primers reduce specificity; very long primers hybridize slowly and produce less amplicon yield [74] |
| Melting Temperature (Tm) | 55-70°C [73] [74] | Determines annealing temperature selection | Tm differences >5°C between primers cause inefficient binding and spurious amplification [73] |
| GC Content | 40-60% [73] [74] | Balanced binding strength | High GC content promotes non-specific binding; low GC reduces binding efficiency [73] |
| 3'-End Sequence | Avoid 3+ consecutive G/C residues (GC clamp) [73] [74] | Prevents mispriming at non-target sites | GC clamps promote non-specific binding and false positives [74] |
| Self-Complementarity | Minimal hairpins and dimer formation [73] [74] | Reduces primer-self interactions | Primer-dimers compete with target amplification and consume reaction components [74] |
Structural Considerations and Secondary Structures
Beyond the basic parameters, primer secondary structure represents a critical but frequently overlooked design consideration. Hairpin formations within individual primers and complementarity between primer pairs can drastically reduce amplification efficiency by preventing proper template binding [73] [74]. DNA polymerases are notably slowed by thermo-stable secondary structures, particularly in GC-rich regions where these structures are more likely to form [73]. Spatial thinking is essential during design—avoiding complementarity at the 3' ends of primer pairs prevents extension into primer-dimer artifacts that consume reaction components and compete with target amplification [73]. While specialized modifications like phosphorothioate linkages can inhibit nuclease degradation, most applications can achieve sufficient specificity through careful sequence design alone [73].
Figure 1: Primer Design Parameters and Specificity Relationships. Proper balancing of multiple interdependent design criteria is essential for preventing common amplification failures.
Cycling Condition Optimization Strategies
Once primers are properly designed, thermal cycling parameters must be optimized to exploit their sequence-specific binding characteristics. The annealing temperature (Ta) represents the most critical cycling variable, directly controlling the stringency of primer-template interactions [75]. Despite sophisticated Tm calculation algorithms, the optimal Ta must be determined empirically as primer design programs often use incorrect prediction parameters [75].
Annealing Temperature Optimization
The relationship between primer melting temperature (Tm) and annealing temperature presents a common optimization challenge. While Tm represents the temperature at which 50% of the DNA duplex dissociates, the optimal Ta for maximum specificity often falls 2-5°C above this value [74]. This relationship varies significantly with buffer composition, metal ion concentration, pH, and additives such as DMSO [74]. Gradient PCR represents the most practical approach for empirical Ta determination, allowing simultaneous testing across a temperature range to identify the optimal stringency conditions [76]. As illustrated in comparative experiments, the optimal annealing temperature often produces dramatically different results, with suboptimal temperatures yielding non-specific amplification or complete reaction failure [76].
For laboratories handling diverse targets, universal annealing buffers containing isostabilizing components offer a streamlined alternative. These specialized formulations increase primer-template duplex stability, enabling specific binding at a standardized 60°C annealing temperature even with primers of varying Tm [76]. This innovation facilitates assay co-cycling—simultaneous amplification of different targets using the same thermal protocol—without compromising specificity or yield [76].
Advanced Cycling Techniques
Beyond basic annealing optimization, several specialized cycling techniques can enhance specificity in challenging applications:
Touchdown PCR: This method begins with an annealing temperature above the primer Tm and gradually reduces it to the recommended range during subsequent cycles [73]. The higher initial stringency ensures that only the most specific primer-template interactions initiate amplification, with these favored products dominating later cycles.
Hot Start PCR: By limiting polymerase activity until elevated temperatures are reached, this approach prevents primer-dimer formation and non-specific extension during reaction setup [76].
Two-Step PCR: Combining annealing and extension steps can reduce cycling time while potentially improving specificity for certain amplicons, though this approach requires careful optimization of the unified step temperature and duration.
Nested PCR Contamination Control Methods
Nested PCR dramatically enhances detection sensitivity by performing two sequential amplification rounds with inner primers that bind within the initial amplicon [2] [6]. This approach improves sensitivity by 100- to 1000-fold compared to conventional methods, making it particularly valuable for pathogen detection in complex samples [2]. However, this enhanced sensitivity comes with increased contamination risk as first-round amplicons can serve as templates for second-round reactions, generating false positives [77].
Conventional vs. Modified Nested PCR Protocols
Traditional nested PCR protocols require transferring first-round amplification products to separate reaction tubes for the second amplification round, creating multiple opportunities for amplicon carryover [77]. Modified single-tube nested PCR (Mo-STNPCR) approaches address this vulnerability by containing both amplification rounds within the same sealed tube [77].
The table below compares the performance characteristics of different nested PCR contamination control methods:
| Method | Sensitivity | Contamination Risk | Cost Considerations | Implementation Complexity |
|---|---|---|---|---|
| Conventional Nested PCR | 100-1000x more sensitive than conventional PCR [2] | High (tube transfer required) [77] | Lower reagent cost | Moderate (multiple handling steps) |
| Single-Tube Nested PCR (Mo-STNPCR) | 100% sensitivity reported for leishmaniasis detection [77] | Low (closed system) [77] | Moderate (specialized primer immobilization) | High (initial setup complexity) |
| Primer Separation Techniques | Equivalent to conventional nested PCR [77] | Moderate (physical barriers in tube) | Low (no specialized reagents) | Low to moderate |
In a direct comparison for leishmaniasis diagnosis, the Mo-STNPCR method demonstrated 100% sensitivity and specificity, outperforming light microscopy (75% sensitivity) and in-vitro culture (72.5% sensitivity) while eliminating the carryover contamination risks associated with conventional nested PCR [77]. Similar benefits have been reported in respiratory pathogen detection, where multiplex nested PCR achieved a 48.5% positive detection rate compared to 20.1% for virus isolation and 13.5% for immunofluorescence assays [2].
Figure 2: Nested PCR Method Performance Comparison. Modified single-tube approaches maintain high sensitivity while significantly reducing contamination risks associated with conventional methods.
Experimental Protocols and Validation Data
Primer Design and Optimization Workflow
A systematic approach to primer design and validation ensures robust assay performance while minimizing optimization time. The following three-step guideline has proven effective for developing specific primer sets:
Target Selection and In Silico Design: Select target genes and design primers with appropriate length (18-30 nucleotides) and GC content (40-60%) [73] [74] [78]. For respiratory pathogen detection, researchers aligned 10-20 representative strains of each pathogen using Clustal X, then designed primers to produce easily differentiated amplicon sizes [2].
In Silico Validation: Verify primer specificity using BLAST analysis against relevant databases, checking for cross-homology with non-target sequences [78] [79]. Use primer analysis tools to predict potential secondary structures and dimer formations [2].
Experimental Optimization: Systematically optimize primer concentrations and annealing temperatures through gradient PCR [78] [76]. For SARS-CoV-2 detection, this approach eliminated spurious primer dimers and established specific hybridization conditions [78].
Cost-Benefit Analysis of Contamination Control Methods
When evaluating contamination control strategies for nested PCR, researchers must balance implementation costs against potential losses from false results. The modified single-tube nested PCR (Mo-STNPCR) method for leishmaniasis detection illustrates this balance—while the per-test cost was $22 compared to $3 for light microscopy and $6 for in-vitro culture, the method provided definitive diagnosis in cases where first-line methods failed [77]. This cost-benefit ratio becomes particularly favorable when considering the clinical consequences of undiagnosed cases or the research implications of false positives.
In environmental DNA detection, a nested PCR approach for Cryptobranchus alleganiensis salamanders provided an order of magnitude improvement in detection limit over previous methods while eliminating the off-target amplification observed with conventional primers [80]. This enhanced sensitivity enables more reliable population monitoring with potential cost savings through reduced sampling requirements.
The Scientist's Toolkit: Research Reagent Solutions
Successful implementation of optimized PCR protocols requires appropriate selection of reagents and supporting materials. The following table details essential components for establishing reliable amplification assays:
| Reagent/Material | Function | Cost-Saving Considerations |
|---|---|---|
| Gradient Thermal Cycler | Empirical determination of optimal annealing temperatures [76] | Shared facility use; older models sufficient for optimization |
| Universal Annealing Buffer | Enables single annealing temperature for diverse primer sets [76] | Reduces optimization time; facilitates assay standardization |
| Hot-Start DNA Polymerase | Reduces non-specific amplification during reaction setup [76] | Premium enzymes offset by reduced repeat testing |
| Spectrophotometer/Nanodrop | Accurate primer concentration measurement [73] | Essential for reproducible results; prevents failed reactions |
| Primer Analysis Software | In silico evaluation of secondary structures and dimer potential [2] [74] | Free online tools (e.g., NCBI BLAST, Primer-BLAST) provide adequate functionality |
Strategic primer design combined with optimized cycling conditions provides a cost-effective pathway to enhanced PCR specificity and reduced false amplicons. The systematic approach outlined—emphasizing proper primer parameters, empirical annealing temperature optimization, and contamination-conscious nested PCR protocols—delivers significant performance improvements without substantial reagent investments. For researchers conducting cost-benefit analyses of contamination control methods, modified single-tube nested PCR approaches represent a favorable balance between implementation complexity and amplicon carryover prevention. By adopting these low-cost adjustments and maintaining rigorous validation practices, research and diagnostic laboratories can achieve publication-quality results while operating within constrained budgets.
In molecular biology, particularly in sensitive applications like nested PCR, the battle against contamination is perpetual. The decision to decontaminate a piece of equipment or simply replace a consumable is more than a matter of cost; it is a critical calculation that impacts the reliability, reproducibility, and validity of experimental data. Contaminating DNA molecules can be remarkably resilient, and their complete elimination is essential for the accuracy of hypersensitive PCR applications [81]. This guide provides a structured, evidence-based framework for making this decision, grounded in experimental data on decontamination efficacy. By comparing the performance of various decontamination methods against the baseline of replacement, we aim to equip researchers with the tools to protect their experiments and their budgets.
Section 1: The Experimental Basis - Quantifying Decontamination Efficacy
To make an informed choice, one must first understand the proven effectiveness of common decontamination strategies. The following data, synthesized from controlled studies, measures the amount of DNA recovered from various surfaces after treatment.
Table 1: Efficiency of Decontamination Strategies on Different Surfaces
| Decontamination Agent | Mechanism | Maximum DNA Recovered (Cell-Free DNA) | Maximum DNA Recovered (Blood) | Key Considerations |
|---|---|---|---|---|
| Sodium Hypochlorite (Bleach) [82] [83] | Oxidative agent causing DNA strand breaks | ≤ 0.3% on plastic, metal, and wood | Data not available | Highly effective; freshly diluted solutions are more reliable than stored ones [83]. |
| Trigene [83] | Commercial disinfectant cleaner | ≤ 0.3% on plastic, metal, and wood | Data not available | A highly effective commercial formulation. |
| Virkon [83] | Peroxygen-based disinfectant | Data not available | ≤ 0.8% | Showed high efficacy for cell-contained DNA in blood. |
| UV Radiation [83] [81] | Induces pyrimidine dimers and DNA strand breaks | Inefficient when used alone | Inefficient when used alone | Less effective on short DNA fragments; performance is surface-dependent [83] [81]. |
| Ethanol (70%) [83] | Protein denaturant | Inefficient when used alone | Inefficient when used alone | A common but insufficient method for DNA removal on its own. |
Experimental Protocol for Decontamination Efficiency Testing: The data in Table 1 was generated through a standardized protocol designed to quantitatively assess cleaning strategies [83]:
- Surface Contamination: Human DNA (60 ng of cell-free DNA or 10 µL of whole blood) was deposited in a marked area on three common laboratory surfaces: plastic, metal, and wood.
- Application of Treatment: After a 2-hour drying period, liquid cleaning agents were applied via a single spray from a calibrated bottle. The area was wiped with dust-free paper in three circular motions and left to dry.
- Sample Collection: The entire marked area was swabbed with a saline-moistened cotton swab to collect residual DNA.
- Quantification: DNA was extracted from the swabs and quantified using a highly sensitive real-time PCR assay for mitochondrial DNA, allowing for the detection of trace residues.
- Data Analysis: The percentage of DNA recovered after cleaning was calculated by comparing the results to "no-treatment" controls from the same surfaces.
Section 2: A Decision Framework for Replacement vs. Decontamination
The following workflow synthesizes the experimental data and practical considerations into a logical pathway to guide researchers. It emphasizes that the choice is not universal but depends on the nature of the item, the level of contamination, and the sensitivity of the work.
Interpreting the Decision Workflow
The diagram above outlines the key decision points. The following points elaborate on the scientific and practical rationale:
- The Case for Replacement: Replacement is the safest and most straightforward option for low-cost consumables (e.g., pipette tips, plastic tubes) and for any item used in hypersensitive nested PCR applications where even a single contaminating molecule can cause false positives [81]. Furthermore, porous materials like painted wood have been shown to retain significantly more DNA after cleaning compared to non-porous surfaces like plastic and metal, making them high-risk candidates for replacement [83].
- The Case for Decontamination: Decontamination is a cost-effective and viable strategy for non-porous, reusable equipment such as metal centrifuge rotors, plastic document folders, and laboratory surfaces [82] [83]. As the data in Table 1 shows, powerful oxidizing agents like sodium hypochlorite (bleach) and commercial disinfectants like Trigene are highly effective, leaving behind a maximum of only 0.3% of contaminating DNA.
- The Challenge of Short DNA Fragments: A critical finding from decontamination research is that many common treatments, including UV irradiation, are not effective for eliminating very low-molecular-mass DNA fragments (shorter than 200 bp) [81]. These short fragments are the primary target in ancient DNA and forensic studies and are common amplicons in nested PCR. If contamination with short fragments is suspected, replacement is strongly favored over decontamination.
Section 3: The Scientist's Toolkit for Contamination Control
A robust contamination control strategy extends beyond the replace/decontaminate decision. It involves a suite of reagents and practices that form the first line of defense.
Table 2: Essential Research Reagent Solutions for Contamination Control
| Item | Function in Contamination Control | Practical Application |
|---|---|---|
| Sodium Hypochlorite [82] [83] | High-level disinfectant that oxidizes and breaks down DNA. | Wiping down non-porous surfaces and equipment. Use freshly diluted solutions for maximum efficacy. |
| Ethyl Alcohol (75%) [82] | Medium-level disinfectant that denatures proteins. | Often used for initial cleaning or spraying into the air to settle aerosols before more rigorous decontamination. |
| UV Light (254 nm) [82] [81] | Creates thymine dimers and other lesions in DNA, preventing amplification. | Irradiating benches, hoods, and reagents. Note: Efficiency is limited for short DNA fragments and on shadowed surfaces. |
| Uracil-N-Glycosylase (UNG) [81] | Enzymatically degrades carry-over contamination from previous PCRs. | Added to PCR mixes when dUTP is used in place of dTTP during amplification. Ineffective on native, contaminating DNA. |
| DNase I [81] | An endonuclease that cleaves DNA. | Can be used to treat reagents before PCR setup, but must be thoroughly inactivated (e.g., by heat) before adding DNA polymerase. |
| Specific Enzymes (e.g., dsDNase) [81] | Targeted digestion of double-stranded DNA contaminants. | A promising method for reagent decontamination, as it can be more effective than broad-spectrum treatments. |
Section 4: Integrated Protocols and Cost-Benefit Analysis
A Validated Multistrategy Decontamination Protocol
For situations where decontamination is the chosen path, a comprehensive, multi-pronged approach is most effective. The following protocol, validated in a clinical PCR laboratory, ensures surface DNA contamination is effectively identified and eliminated [82]:
- Environmental Surveillance: Before decontamination, perform targeted sampling of air and surfaces using swabs moistened with saline. Use these samples as templates for PCR to identify and map contamination sources.
- Aerosol Settlement: Spray a 75% ethyl alcohol solution into the air before cleaning the rooms.
- UV Irradiation: Irradiate the rooms with UV light for 1 hour.
- Surface Wiping: Wipe down all objects and equipment with a hypochlorite solution to remove settled particles.
- Equipment-Specific Cleaning: Wipe down intricate equipment, such as disassembled centrifuge rotors or PCR instruments, with absolute ethyl alcohol.
- Frequency: This entire procedure should be carried out twice per day for approximately two weeks to achieve and maintain a decontaminated state. Use separate sets of cleaning tools for each room to prevent cross-contamination.
The Cost-Benefit Analysis
The decision to replace or decontaminate ultimately hinges on a balance of several factors beyond the initial price tag.
Table 3: Comprehensive Cost-Benefit Analysis
| Factor | Replacement | Decontamination |
|---|---|---|
| Direct Cost | High (constant purchase of new items). | Low (investment in disinfectants and labor). |
| Decontamination Efficacy | 100% effective. | High (≤0.3% DNA left) but not absolute; depends on method and surface [83]. |
| Risk of Amplicon Carry-over | Eliminated. | Requires rigorous, validated protocols to mitigate. |
| Labor & Time | Low (quick and simple). | High (requires meticulous and repetitive procedures) [82]. |
| Experimental Integrity | Highest possible assurance. | High assurance when protocols are strictly followed and monitored with controls. |
| Environmental Impact | Higher (plastic waste). | Lower (promotes reuse). |
The most cost-effective and scientifically sound strategy for contamination control is proactive prevention. A laboratory environment designed for unidirectional workflow (separating pre- and post-PCR areas), the use of aerosol-resistant tips, and rigorous personal protective equipment are fundamental [83] [81]. The replace vs. decontaminate decision is a critical part of this ecosystem.
Based on the experimental data and analysis presented, the following best practices are recommended:
- Establish a Strict Policy: Classify laboratory items into categories (e.g., "always replace," "always decontaminate," "decontaminate and re-evaluate") based on their cost, function, and risk profile.
- Validate Your Methods: Do not assume a decontamination method works. Implement quantitative checks, such as swabbing surfaces and running no-template control PCRs, to verify the effectiveness of your cleaning protocols [82] [83].
- Prioritize for Sensitivity: Let the sensitivity of your work guide your rigor. For hypersensitive nested PCR applications, the balance should always shift towards replacement for consumables and equipment that come into direct contact with PCR reagents or templates.
- Adopt a Multistrategy Approach: No single decontamination method is perfect for all scenarios. The most reliable results are achieved by combining physical, chemical, and enzymatic strategies tailored to different reagent categories and surfaces [81].
By integrating this evidence-based guide into standard operating procedures, laboratories can optimize their resources while steadfastly guarding against the pervasive threat of contamination, ensuring the integrity of their molecular diagnostics and research outcomes.
In the realm of molecular diagnostics, particularly with highly sensitive techniques like nested PCR, contamination events represent more than mere inconveniences—they constitute critical failures with far-reaching financial, clinical, and reputational consequences. The exquisite sensitivity of nested PCR, which allows for the detection of minute quantities of nucleic acids, simultaneously renders it vulnerable to false positives from amplicon carryover contamination [22]. A single contamination event can compromise entire research projects, lead to misdiagnosis in clinical settings, and necessitate costly laboratory shutdowns for decontamination. Within a broader cost-benefit analysis framework of contamination control methods, investments in comprehensive personnel training emerge not as an optional expense but as a fundamental component of laboratory operational excellence. This guide objectively compares the performance of rigorous training protocols against alternative contamination control methods, demonstrating how strategic investments in human capital yield superior returns in assay reliability and resource preservation.
Understanding the Contamination Challenge in Nested PCR
Nested PCR employs two successive amplification rounds with two sets of primers targeting the same sequence, dramatically enhancing sensitivity and specificity compared to conventional PCR [2]. This very advantage, however, creates a heightened contamination risk. The first round generates amplicons that serve as template for the second round, and these amplified products can contaminate reagents, equipment, and workspaces if improperly handled [4]. A typical PCR reaction can generate up to 10⁹ copies of the target sequence, and even microscopic aerosols can contain as many as 10⁶ amplification products [22]. When these contaminants enter subsequent reactions, they become templates for amplification, producing false-positive results that can invalidate experimental data or lead to clinical misdiagnosis.
Documented cases highlight the severe repercussions of contamination. In clinical settings, false-positive PCR results have led to misdiagnoses, including at least two documented cases of Lyme disease—one with a fatal outcome—where patients received unnecessary treatments based on contaminated results [22]. Contamination can also derail research, with some studies requiring formal retraction of published manuscripts due to false-positive PCR reactions [22]. The economic costs extend beyond wasted reagents to include staff time for troubleshooting, repeated experiments, extensive decontamination procedures, and potential liability in clinical settings.
Table: Comparative Analysis of Contamination Control Methods for Nested PCR
| Control Method | Mechanism of Action | Relative Cost | Implementation Complexity | Effectiveness in Reducing False Positives | Key Limitations |
|---|---|---|---|---|---|
| Physical Laboratory Separation | Creates physical barriers between pre- and post-amplification areas | High (structural modifications) | High | High (when properly maintained) | Requires significant space and infrastructure |
| UNG Enzyme Treatment | Incorporates uracil into amplicons; UNG degrades contaminants before amplification | Low to Moderate | Low | High for most targets | Reduced efficacy with GC-rich targets; may not be compatible with all assays [22] |
| UV Irradiation | Induces thymidine dimers in contaminating DNA | Moderate | Moderate | Moderate (less effective on short fragments) | Variable efficacy; can damage reagents and equipment [22] |
| Rigorous Personnel Training | Prevents contamination through standardized techniques and workflows | Moderate (initial investment) | Moderate to High | Very High (when comprehensive) | Requires ongoing reinforcement and monitoring |
| Laminar Flow Hoods | Provides ISO Class 5 clean air workspace for sensitive steps | Moderate | Low to Moderate | High for particulate exclusion | Does not address technique errors; maintenance required [4] |
Core Components of Effective Personnel Training Protocols
Unidirectional Workflow and Spatial Separation
The foundation of contamination prevention lies in establishing and maintaining a strict unidirectional workflow that physically separates pre-amplification activities from post-amplification processes [25]. Training must emphasize that movement should only proceed from "clean" areas (pre-PCR) to "dirty" areas (post-PCR), never in reverse. The World Health Organization recommends, at minimum, physically separated areas for: (1) mastermix preparation, (2) nucleic acid extraction and template addition, (3) amplification, and (4) product analysis [25]. Ideally, these should be separate rooms with dedicated equipment, but when space is constrained, laminar flow cabinets can create contained clean areas for reagent preparation [4]. Personnel must be trained that moving from post-PCR to pre-PCR areas on the same day should be avoided, but when unavoidable, requires thorough hand washing, changing of gloves and lab coats, and no transfer of equipment [25].
Aseptic Technique and Pipetting Proficiency
Proper pipetting technique represents a critical skill demanding meticulous training. Incorrect pipetting can create aerosols, leading to cross-contamination between samples and contamination of reagents [25]. Personnel should be trained to: always use aerosol-resistant filter tips, centrifuge tubes briefly before opening to avoid splashing, open tubes carefully, and keep tubes capped when not in immediate use [25]. Training programs should include practical assessments where trainees demonstrate competency in pipetting, template addition, and reaction assembly without contaminating controls. The use of powder-free gloves is also essential, as powder can inhibit PCR reactions [25].
Decontamination Procedures and Contamination Monitoring
Regular decontamination of workspaces and equipment is fundamental, and personnel must be trained in proper protocols. Surfaces should be cleaned before and after use with 10% sodium hypochlorite (freshly made daily) with a minimum contact time of 10 minutes, followed by wiping with sterile water to remove residual bleach [25]. For equipment that cannot tolerate bleach (such as centrifuges and vortexes), 70% ethanol followed by UV irradiation is recommended [25]. Incorporating No Template Controls (NTCs) in every run is crucial for monitoring contamination. If NTC wells show amplification, it indicates potential contamination of reagents or the environment [84]. Training should emphasize that any experiment with contaminated controls must be invalidated and repeated, reinforcing the cost of contamination events.
Experimental Data: Quantifying the Impact of Training on Assay Performance
Sensitivity and Specificity Comparisons
Multiple studies demonstrate how proper technique in sensitive nested PCR assays directly impacts diagnostic yield. A comprehensive study on respiratory pathogen detection developed a rapid multiplex nested PCR system that detected 21 different pathogens. The assay achieved an overall positive rate of 48.5%, significantly higher than the 20.1% achieved by virus isolation and 13.5% by direct immunofluorescence assay [2]. This improved yield was attributed to both the inherent sensitivity of nested PCR and the ability to detect non-cultivatable viruses, highlighting how proper assay execution enables detection that simpler methods miss.
A 2025 study on Helicobacter pylori detection further illustrates the critical relationship between technique, amplicon size, and sensitivity. Researchers found that while a stool antigen test required 100 times more cells than nested PCR for a 454 bp amplicon, it was more sensitive in identifying positive stool samples. This paradox was resolved when they developed a nested PCR for a shorter 148 bp segment, which detected H. pylori in 51.0% of gastroenterology patients compared to only 6.25% with the longer amplicon approach [18]. This underscores how technical considerations, including amplicon design and handling of degraded samples, must be incorporated into training protocols to optimize real-world performance.
Table: Performance Comparison of Detection Methods with Technical Variations
| Detection Context | Method 1 | Sensitivity/Detection Rate 1 | Method 2 | Sensitivity/Detection Rate 2 | Key Technical Factor |
|---|---|---|---|---|---|
| Respiratory Pathogens [2] | Multiplex Nested PCR | 48.5% overall positive rate | Virus Isolation | 20.1% overall positive rate | Sample handling and amplification efficiency |
| H. pylori in Stool [18] | Nested PCR (148 bp amplicon) | 51.0% in symptomatic patients | Nested PCR (454 bp amplicon) | 6.25% in symptomatic patients | Amplicon size selection for degraded samples |
| H. pylori in Stool [18] | Nested PCR (148 bp amplicon) | 66.6% in asymptomatic volunteers | Stool Antigen Test | 35% in asymptomatic volunteers | DNA extraction efficiency and inhibition management |
| Cryptosporidium parvum in Water [6] | Nested PCR | 97% reproducibility (35/36 samples) | RT-PCR | 33% reproducibility (2/6 samples) | Assay robustness against environmental inhibitors |
Cost-Benefit Analysis of Training Investments
When evaluating contamination control methods through a cost-benefit lens, personnel training demonstrates compelling advantages. While initial training requires investment in development time, materials for practical sessions, and dedicated trainer hours, these costs are typically offset by:
- Reduced reagent waste from repeated experiments due to contamination
- Decreased instrument downtime for extensive decontamination procedures
- Improved research efficiency and publication reliability
- Enhanced patient safety in clinical diagnostics through accurate results
The integration of uracil-N-glycosylase (UNG) into protocols offers a valuable technical countermeasure, but trained personnel are essential for its proper implementation. UNG works by incorporating uracil (dUTP) instead of thymine (dTTP) during PCR. The enzyme then hydrolyzes any uracil-containing contaminants from previous reactions before amplification begins [22]. However, personnel must be trained to optimize dUTP/UNG concentrations for each assay, understand that UNG is less effective with GC-rich targets, and properly handle reactions post-amplification [22]. This exemplifies how technical solutions and personnel training are complementary, not alternative, investments.
Essential Research Reagent Solutions for Contamination Control
Equipping personnel with appropriate reagents and materials is fundamental to executing proper technique. The following table details essential components of a contamination-control toolkit for nested PCR laboratories:
Table: Essential Research Reagent Solutions for Nested PCR Contamination Control
| Reagent/Material | Function in Contamination Control | Key Implementation Notes |
|---|---|---|
| Aerosol-Resistant Filter Tips | Prevents aerosol transfer between samples and contamination of pipette shafts | Confirm compatibility with laboratory pipette brands before purchase [25] |
| Aliquoted Reagents | Prevents repeated freeze-thaw cycles and contamination of master stocks | Create single-experiment aliquots to avoid repeated opening of stock solutions [84] |
| Uracil-N-Glycosylase (UNG) | Enzymatically destroys carryover amplicons from previous reactions | Requires incorporation of dUTP in PCR mix; most effective with thymine-rich targets [22] |
| Fresh Sodium Hypochlorite (10%) | Decontaminates surfaces through oxidative damage to nucleic acids | Prepare fresh daily; allow 10+ minutes contact time; follow with ethanol or water rinse [25] |
| Ethanol (70%) | Cleans surfaces and equipment incompatible with bleach | For metal parts of centrifuges/vortexes; often used with UV irradiation for full effect [25] |
| No Template Control (NTC) Reagents | Monitors for contamination in reaction components and environment | Must include all reagents except template DNA; amplification indicates contamination [84] |
| Hot-Start DNA Polymerase | Reduces non-specific amplification and primer-dimer formation | Improves specificity, indirectly reducing potential contamination from non-target products [25] |
Within the broader cost-benefit analysis of nested PCR contamination control methods, personnel training protocols represent a strategically sound investment with demonstrated returns in assay reliability, operational efficiency, and result validity. While technical solutions like UNG treatment and physical separation provide essential barriers against contamination, they remain dependent on consistently proper execution by trained personnel. The experimental data presented reveals that technique quality directly impacts sensitivity and specificity, with comprehensive training serving as the unifying factor that maximizes the effectiveness of all other control methods. Laboratories that prioritize and continuously reinforce these protocols will not only prevent costly contamination events but will also establish a culture of quality that enhances all molecular diagnostics and research outputs.
Beyond Nested PCR: Validating Control Methods and Comparing Diagnostic Platforms
Nested Polymerase Chain Reaction (nested PCR) stands as a powerful molecular technique that significantly enhances both the sensitivity and specificity of nucleic acid amplification through two successive rounds of PCR using two sets of primers [16]. This method enables researchers to detect extremely low quantities of target DNA, even from suboptimal samples such as formalin-fixed, paraffin-embedded tissues [85]. However, this exceptional sensitivity comes with a substantial risk: the heightened vulnerability to contamination through carryover of amplicons from the first amplification round, which can lead to false-positive results and compromised data integrity [16] [66].
For researchers and drug development professionals, implementing and validating a robust contamination control strategy is not merely good laboratory practice—it is essential for generating reliable, reproducible results. This guide provides a comprehensive framework for benchmarking contamination control methods in nested PCR workflows, comparing alternatives through an evidence-based, cost-benefit lens to help laboratories establish validated protocols that balance analytical performance with practical implementation considerations.
The Contamination Challenge in Nested PCR
In nested PCR, the primary contamination risk arises from the necessary transfer of the first-round amplification products to a second tube for the subsequent amplification round [16]. These amplicons can aerosolize or be accidentally transferred to reagents, equipment, or subsequent samples, creating pervasive contamination that can persist in laboratory environments for extended periods.
The consequences of contamination are particularly severe in diagnostic and drug development contexts, where false positives can lead to incorrect treatment decisions, flawed research conclusions, and significant financial losses. As noted in studies of norovirus detection, the exceptional sensitivity of PCR methods makes them vulnerable to even minimal contamination, which can generate false-positive results even in no-template controls (NTCs) with high cycle threshold values [66].
Comparative Analysis of Contamination Control Methods
We evaluated five primary contamination control strategies for nested PCR workflows based on effectiveness, implementation complexity, cost, and compatibility with high-throughput environments. The table below presents a structured comparison to guide selection decisions.
Table 1: Comprehensive Comparison of Nested PCR Contamination Control Methods
| Control Method | Mechanism of Action | Effectiveness Metrics | Implementation Requirements | Cost Considerations | Suitability for Workflow |
|---|---|---|---|---|---|
| Physical Separation | Spatial isolation of pre- and post-PCR activities | Contamination rate reduction: >90% [16] | Dedicated rooms/areas for reagent preparation, sample handling, and amplification | High (space requirements) | Excellent for core facilities |
| UNGs Treatment | Enzymatic degradation of dUTP-containing amplicons | Carryover prevention: ~100% [66] | dUTP substitution for dTTP in master mix; UNG enzyme incorporation | Moderate (reagent costs) | Ideal for high-throughput automated systems |
| UV Irradiation | DNA strand crosslinking through ultraviolet exposure | Effectiveness varies: 70-90% [86] | UV light sources in workstations, hoods, or equipment | Low to moderate | Good for surface and equipment decontamination |
| Chemical Decontamination | DNA degradation using sodium hypochlorite or hydrochloride | Contamination reduction: >95% [86] | Standard laboratory chemicals; safety protocols for handling | Very low | Excellent for routine surface cleaning |
| Workflow Automation | Robotic systems minimizing human-mediated transfer | Human error reduction: >80% [87] | Robotic liquid handlers; integrated PCR systems | Very high | Ideal for drug development with high sample volumes |
Key Metrics for Validating Contamination Control Efficacy
Quantitative Performance Indicators
Validating contamination control strategies requires tracking specific, measurable indicators over time. Laboratories should establish baseline contamination rates before implementing new controls, then monitor these metrics consistently to demonstrate statistically significant improvements.
Table 2: Essential Validation Metrics for Contamination Control Protocols
| Validation Metric | Target Benchmark | Measurement Frequency | Data Interpretation Guidelines |
|---|---|---|---|
| No-Template Control (NTC) Positivity Rate | <2% of runs [88] | Every experimental run | Investigate root cause if >2 consecutive positive NTCs |
| Amplification Efficiency in Low-Template Samples | 90-110% [88] | During assay validation and quarterly | Correlate with contamination frequency |
| Inter-Run Reproducibility | CV <10% for positive controls [88] | Monthly across multiple operators | Increased CV may indicate sporadic contamination |
| Sample Cross-Contamination Index | <0.1% between high-positive and negative samples [9] | During validation studies | Critical for quantitative applications |
| Surface Contamination (Wipe Tests) | Zero detectable amplicons on critical surfaces [86] | Weekly in PCR setup areas | Immediate decontamination required for positives |
Experimental Protocols for Validation
Protocol 1: Contamination Spike-and-Recovery Assessment
This protocol evaluates a method's capacity to prevent and detect contamination events using known positive samples.
Materials and Reagents:
- High-positive control material (≥10⁶ copies/μL)
- Negative matrix (extraction-free molecular grade water)
- UNG enzyme (if implementing enzymatic controls)
- dUTP/dNTP mixture (for UNG-based methods)
- Environmental swabs for surface testing
Methodology:
- Prepare a dilution series of positive control material (10⁶ to 10¹ copies/μL)
- Process high-positive samples (≥10⁶ copies/μL) alongside negative controls
- Alternately position high-positive and negative samples in the workflow
- Include NTCs after high-positive samples to detect aerosol contamination
- Perform surface swabbing before and after runs on critical equipment
- Analyze all samples and controls via the nested PCR protocol
- Quantify contamination rate as: (Number of false positives / Total negatives) × 100
Validation Criteria: Successful implementation demonstrates <1% cross-contamination between adjacent high-positive and negative samples, with zero amplification in NTCs positioned after high-positive samples [66] [9].
Protocol 2: Longitudinal Contamination Monitoring
This approach assesses contamination control sustainability through systematic monitoring over time, essential for laboratories processing variable sample types.
Methodology:
- Implement a standardized contamination tracking system
- Record NTC results for every experimental run
- Perform weekly wipe tests of critical areas (pipettes, work surfaces, equipment)
- Document all decontamination procedures and reagent preparations
- Analyze contamination rates monthly, correlating with staff, reagent lots, and equipment use
- Establish statistical process control charts to identify trends
Validation Criteria: A successful program demonstrates stable or decreasing contamination rates over ≥3 months, with prompt investigation and resolution of any deviations [86].
The Scientist's Toolkit: Essential Research Reagent Solutions
Implementing effective contamination control requires specific reagents and materials designed to prevent, monitor, and eliminate DNA contamination. The following table details essential components for establishing a robust contamination control system.
Table 3: Essential Research Reagent Solutions for Nested PCR Contamination Control
| Reagent/Material | Function | Implementation Example | Validation Requirement |
|---|---|---|---|
| dUTP/dNTP Mixture | Incorporates uracil into amplicons for UNG degradation | Replace 25-50% of dTTP with dUTP in PCR master mix | Verify amplification efficiency matches dTTP-only controls |
| UNG Enzyme | Enzymatically cleaves uracil-containing contaminants | Add 0.5-1.0 U/μL to master mix with incubation at 25-37°C for 10 min | Demonstrate complete degradation of spiked uracil-containing amplicons |
| Surface Decontamination Solutions | Degrades DNA on equipment and surfaces | 10% sodium hypochlorite or commercial DNA degradation solutions | Wipe test confirmation post-decontamination |
| Molecular Grade Water | Contamination-free PCR reagent preparation | Use for all reagent preparations and dilutions | Confirm absence of amplification in water-only controls |
| Aerosol Barrier Pipette Tips | Prevents cross-contamination during liquid handling | Use for all sample and reagent transfers, especially post-amplification | Compare contamination rates with standard tips |
| UNG-Compatible Buffer Systems | Maintains enzyme activity while supporting PCR | Specific buffer formulations optimized for UNG activity | Verify UNG activity throughout PCR thermal cycling |
Cost-Benefit Analysis of Contamination Control Implementation
Quantitative Assessment Framework
When selecting contamination control strategies, laboratories must balance effectiveness with practical implementation costs. A comprehensive cost-benefit analysis should encompass both direct financial impacts and operational considerations.
Direct Cost Factors:
- Reagent and consumable expenses (e.g., UNG enzyme, dUTP, barrier tips)
- Capital equipment requirements (dedicated workstations, UV cabinets)
- Laboratory space allocation for physical separation
- Personnel time for implementation and monitoring
Indirect Benefit Considerations:
- Reduced repeat testing due to contamination events
- Increased reliability of experimental results
- Protection of valuable sample resources
- Maintenance of research and diagnostic timelines
Studies demonstrate that laboratories processing >100 samples weekly typically achieve return on investment within 6-12 months when implementing UNG-based systems, while physical separation shows longer payback periods but provides foundational protection for diverse molecular applications [87] [66].
Integrated Workflow for Optimal Contamination Control
The following workflow diagram illustrates an integrated approach to contamination control in nested PCR, combining multiple strategies for maximum effectiveness:
Validating contamination control strategies for nested PCR requires a systematic, metrics-driven approach that aligns with the specific applications, throughput requirements, and quality standards of each laboratory. By implementing the benchmarking framework outlined in this guide—incorporating quantitative metrics, experimental validation protocols, and regular monitoring—research and drug development teams can establish robust contamination control systems that protect the integrity of their molecular data.
The most successful laboratories recognize that contamination control is not a one-time implementation but an ongoing process of monitoring, validation, and improvement. As PCR technologies continue to evolve toward greater sensitivity and automation, the principles of rigorous contamination management remain fundamental to generating reliable, reproducible results that advance scientific understanding and therapeutic development.
In the realm of molecular diagnostics and research, the polymerase chain reaction (PCR) has revolutionized how scientists detect and analyze genetic material. Among the various PCR adaptations, nested PCR and quantitative real-time PCR (qPCR) have emerged as powerful yet distinct techniques, each with unique advantages and limitations. While nested PCR employs a two-step amplification process with two sets of primers to enhance specificity and sensitivity, qPCR allows for real-time monitoring and quantification of amplified DNA through fluorescent detection systems [89]. The selection between these methodologies represents a critical decision point for researchers and diagnosticians, requiring careful consideration of analytical needs, resource constraints, and practical laboratory considerations.
This comparative analysis examines the fundamental trade-offs between nested PCR and qPCR through the lens of cost-benefit optimization, with particular emphasis on their relative performance in sensitivity, speed, and contamination risk management. By synthesizing experimental data from diverse applications including pathogen detection [7] [90], clinical diagnostics [91] [92], and food safety testing [30], this review provides evidence-based guidance for method selection in research and diagnostic contexts.
Technical Mechanisms and Workflows
Nested PCR: Enhanced Specificity Through Sequential Amplification
Nested PCR operates through a two-stage amplification process designed to improve both specificity and sensitivity. The initial round of amplification uses an outer set of primers targeting a larger DNA fragment. The product from this first reaction then serves as the template for a second amplification using inner primers that bind within the first amplified region [89]. This sequential approach significantly reduces non-specific binding and enhances the detection limit for low-abundance targets.
The fundamental workflow consists of: (1) DNA extraction and purification; (2) first-round PCR with outer primers; (3) transfer of a small aliquot of the first PCR product to a new reaction tube; (4) second-round PCR with inner primers; and (5) analysis of final products typically via agarose gel electrophoresis. While this method dramatically increases sensitivity and specificity, the requirement for multiple tube transfers elevates contamination risks from amplicon carryover, necessitating rigorous laboratory controls and physical separation of pre- and post-amplification areas [30].
qPCR: Real-Time Quantification in a Closed System
qPCR, also known as real-time PCR, enables continuous monitoring of DNA amplification throughout the reaction cycles rather than just endpoint detection. This is achieved through fluorescent reporting systems such as DNA-binding dyes (e.g., SYBR Green) or sequence-specific probes (e.g., TaqMan) [89]. The point at which the fluorescence signal crosses a predetermined threshold (Cycle Threshold or Ct value) correlates with the initial amount of target DNA, allowing for precise quantification.
The qPCR workflow includes: (1) DNA/RNA extraction; (2) preparation of a single reaction mixture containing all necessary components including fluorescent detection system; (3) amplification with real-time fluorescence detection; and (4) data analysis without the need for gel electrophoresis. The closed-tube nature of qPCR significantly reduces contamination risks while providing quantitative data, rapid turnaround, and broader dynamic range compared to conventional PCR methods [89].
Comparative Workflow Visualization
Figure 1: Comparative workflows of nested PCR and qPCR, highlighting key differences in procedure length and contamination risk points.
Critical Performance Parameters: Experimental Evidence
Analytical Sensitivity Comparison
Sensitivity represents a crucial performance metric, particularly for applications requiring detection of low-abundance targets. Experimental comparisons across multiple studies reveal method-specific sensitivity profiles influenced by target selection, reagent optimization, and detection systems.
Table 1: Experimental Sensitivity Comparisons Between Nested PCR and qPCR
| Application Context | Target | Nested PCR Sensitivity | qPCR Sensitivity | Reference |
|---|---|---|---|---|
| Fusarium tricinctum detection | CYP51C gene | 31 fg/μL | 3.1 fg/μL (10x more sensitive) | [7] |
| Toxoplasmosis diagnosis | B1 gene | 50% positive in patient samples | 100% positive in patient samples | [90] |
| Norovirus detection | ORF1-ORF2 junction | Consistently detected 1 log10 lower virus | Standard detection limit | [30] |
| Histomoniasis diagnosis | Histomonas meleagridis | Highest sensitivity among methods | Lower than nested PCR | [92] |
| Acute leukemia diagnosis | Genetic alterations | Lower sensitivity for fusions | Higher sensitivity at diagnosis | [91] |
Contrary to the common assumption that qPCR universally offers superior sensitivity, evidence demonstrates significant variability across applications. In pathogen detection, qPCR demonstrated 10-fold higher sensitivity (3.1 fg/μL vs. 31 fg/μL) for Fusarium tricinctum when targeting the CYP51C gene [7]. Similarly, for toxoplasmosis diagnosis using the B1 gene, qPCR detected 100% of positive cases compared to only 50% with nested PCR in patient peripheral blood mononuclear cells [90].
However, nested PCR shows superior performance in specific contexts. A specialized nested real-time PCR format for norovirus detection consistently identified one log10 lower virus concentrations compared to one-step real-time RT-PCR [30]. Similarly, for histomoniasis diagnosis, conventional nested PCR demonstrated higher sensitivity than both conventional PCR and real-time PCR formats [92]. These discrepancies highlight the impact of assay design and target selection on ultimate sensitivity.
Operational Considerations: Speed, Cost and Workflow Efficiency
Practical implementation factors significantly influence method selection, particularly in clinical or high-throughput settings where turnaround time and operational complexity directly impact utility.
Table 2: Operational and Economic Comparison
| Parameter | Nested PCR | qPCR |
|---|---|---|
| Hands-on Time | High (multiple setup steps) | Moderate (single reaction setup) |
| Total Assay Duration | 4-6 hours (including gel analysis) | 1-2 hours (no post-processing) |
| Equipment Costs | Lower (standard thermocycler) | Higher (specialized real-time instrument) |
| Reagent Costs | Lower per reaction | Higher (fluorescent dyes/probes) |
| Labor Costs | Higher (extensive manual processing) | Lower (automated analysis) |
| Contamination Risk | High (multiple open-tube steps) | Low (closed-tube system) |
| Throughput Capacity | Lower | Higher |
| Technical Expertise Required | Higher | Moderate |
qPCR offers significant workflow advantages through its closed-tube format and elimination of post-amplification processing. The ability to monitor amplification in real-time reduces total assay time from 4-6 hours for nested PCR to just 1-2 hours [89]. This operational efficiency comes at the cost of higher capital investment for specialized instrumentation and generally higher per-reaction costs due to fluorescent detection chemistries.
Nested PCR remains more accessible for laboratories with limited equipment budgets, requiring only standard thermocyclers and electrophoresis equipment. However, the extensive manual processing, multiple reagent additions, and gel analysis requirements increase hands-on time and technical demands on personnel. The economic trade-offs between capital investment and operational efficiency must be evaluated within specific resource contexts and testing volumes.
Contamination Risk Assessment
Contamination represents a critical methodological challenge in amplification-based techniques, with significant implications for diagnostic accuracy and experimental reliability.
The two-step amplification and product transfer in nested PCR creates multiple opportunities for amplicon contamination, potentially leading to false-positive results [30]. This risk necessitates rigorous laboratory practices including physical separation of pre- and post-amplification areas, dedicated equipment, and careful technique. Some studies have addressed this limitation through modified approaches such as "nested real-time PCR" that incorporate the second amplification within a qPCR format, reducing contamination while maintaining sensitivity advantages [30].
In contrast, qPCR's closed-tube design significantly reduces contamination risk by eliminating post-amplification processing [89]. The continuous monitoring of amplification within sealed reaction vessels prevents aerosolization of amplicons and cross-contamination between samples. This characteristic makes qPCR particularly advantageous for clinical diagnostics where false positives carry significant consequences, and for high-throughput applications where manual error risk increases with sample volume.
Research Reagent Solutions and Experimental Implementation
Successful implementation of either methodology requires careful selection and optimization of core reagents and protocols. The following experimental components represent critical factors in assay performance.
Table 3: Essential Research Reagents and Their Functions
| Reagent Component | Function in Nested PCR | Function in qPCR | Optimization Considerations |
|---|---|---|---|
| DNA Polymerase | Thermostable enzyme for sequential amplifications | Reverse transcriptase included for RT-qPCR; hot-start variants preferred | Enzyme fidelity, processivity, and inhibitor tolerance |
| Primer Sets | Two pairs (outer and inner) for sequential amplification; 18-25 bp length | Single pair; designed with Tm ~60°C; avoidance of secondary structures | Specificity testing, concentration optimization, dimer formation potential |
| Detection Chemistry | Intercalating dyes (Ethidium Bromide) for gel visualization | Sequence-specific probes (TaqMan) or DNA-binding dyes (SYBR Green) | Probe specificity, quenching efficiency, dye compatibility with instrument |
| dNTPs | Building blocks for DNA synthesis; 200μM each standard | Quality-critical for efficient amplification and accurate quantification | Purity, concentration, stability, freeze-thaw cycle limitation |
| Reaction Buffer | MgCl2 concentration optimization critical | Often optimized with MgCl2 and stabilizers included | Mg2+ concentration, pH, additive composition |
| Positive Controls | Essential for both amplification steps | Required for standard curve generation and run validation | Sequence-verified plasmids, synthetic oligonucleotides, or reference materials |
Protocol Implementation: Fusarium Detection Case Study
A comparative study developing detection methods for Fusarium tricinctum, a pathogen causing gummosis in Zanthoxylum bungeanum, illustrates optimized protocols for both techniques [7]:
Nested PCR Protocol:
- Primer Design: Target-specific primers designed against conserved regions of the CYP51C gene (300-500 bp)
- First Round Amplification: 25μL reaction with 50ng genomic DNA, 200μM dNTPs, 1.5mM MgCl2, 0.2μM outer primers, 1U DNA polymerase
- Thermal Cycling (Round 1): Initial denaturation 95°C/5min; 35 cycles of 95°C/30s, 58°C/30s, 72°C/45s; final extension 72°C/10min
- Second Round Amplification: 1:50 dilution of first-round product, identical reaction conditions with inner primers
- Detection: 2% agarose gel electrophoresis, ethidium bromide staining, UV visualization
qPCR Protocol:
- Primer/Probe Design: Dual-labeled TaqMan probes targeting CYP51C gene
- Reaction Setup: 20μL reaction with 2μL template DNA, 1x master mix, 400nM primers, 200nM probe
- Thermal Cycling: Initial denaturation 95°C/10min; 45 cycles of 95°C/15s, 60°C/1min
- Data Analysis: Standard curve quantification using plasmid standards, threshold determination using instrument software
This side-by-side implementation demonstrated qPCR's 10-fold superior sensitivity while highlighting nested PCR's reliability and lower equipment requirements [7].
Application-Specific Method Selection Guidelines
Method selection should be guided by specific application requirements rather than presumed technical superiority. The following decision framework supports context-appropriate choice:
Figure 2: Decision framework for selecting between nested PCR and qPCR based on application requirements and resource constraints.
Recommended Applications for Nested PCR
Nested PCR demonstrates particular utility in:
- Low-abundance target detection in complex backgrounds [30]
- Resource-limited settings with standard thermocycler availability [7]
- Research applications requiring maximum sensitivity without quantification needs
- Targets with sequence heterogeneity where two-stage amplification improves specificity
- Protocols where cost constraints prohibit qPCR reagents and instrumentation
Recommended Applications for qPCR
qPCR offers superior performance for:
- Clinical diagnostics requiring rapid turnaround and contamination control [90]
- Quantification applications including gene expression and viral load monitoring [89]
- High-throughput screening programs benefiting from automation
- Kinetic studies requiring real-time monitoring of amplification efficiency
- Labs with sufficient resources to justify instrument investment
The nested PCR versus qPCR decision represents a classic trade-off between sensitivity, practicality, and quantitative capability. While qPCR generally offers advantages in speed, quantification, and contamination control, nested PCR maintains relevance for ultra-sensitive detection in resource-limited settings and specialized applications.
Future methodological developments may further blur these distinctions, with emerging approaches like digital PCR providing absolute quantification and exceptional sensitivity [93], and modified nested qPCR formats combining the sensitivity advantages of nested approaches with the practicality of closed-tube systems [30]. The ongoing optimization of both techniques will continue to expand their applications across research, clinical, and public health contexts.
Method selection should ultimately be guided by specific application requirements, available resources, and performance validation using relevant controls and standards. By understanding the nuanced cost-benefit relationships between these powerful amplification techniques, researchers and diagnosticians can optimize their molecular detection strategies for both technical excellence and practical implementation.
The advancement of molecular diagnostics has revolutionized pathogen detection, with techniques like nested PCR (Polymerase Chain Reaction) and LAMP (Loop-Mediated Isothermal Amplification) serving as critical tools for researchers and clinicians. This guide provides an objective comparison of these two established methods, framing the analysis within the broader context of cost-benefit considerations for diagnostic applications. The critical distinction lies in their amplification mechanisms: nested PCR relies on thermal cycling with two successive primer sets to enhance specificity and sensitivity, while LAMP employs isothermal amplification with multiple primers recognizing distinct target regions, enabling rapid results under constant temperature conditions. Understanding their operational parameters, performance characteristics, and implementation requirements is essential for selecting the appropriate methodology for specific diagnostic settings, particularly when balancing analytical rigor with practical constraints like resource limitations and field-deployability.
Fundamental Principles and Workflows
Nested PCR is a refinement of conventional PCR that significantly reduces non-specific amplification and increases detection sensitivity. The process involves two successive amplification rounds. The first round uses an outer primer set to generate a primary amplicon. A small aliquot of this product is then transferred to a second reaction containing inner primers that bind within the first amplicon, resulting in a shorter, specific product. This two-step process enhances specificity but inherently increases contamination risk because tubes must be opened between reactions, potentially allowing amplicons from the first round to contaminate subsequent setups [94] [95]. The requirement for precise thermal cycling—typically involving denaturation (94-95°C), annealing (temperature varies based on primer Tm), and extension (72°C) steps—demands sophisticated instrumentation and extends processing time.
LAMP is an isothermal nucleic acid amplification technique that utilizes 4-6 distinct primers recognizing 6-8 regions of the target DNA. Amplification occurs at a constant temperature (60-65°C) through a strand displacement mechanism, eliminating the need for thermal denaturation cycles. The reaction is typically catalyzed by Bst DNA polymerase, which exhibits high strand displacement activity. The process generates magnesium pyrophosphate as a byproduct, leading to turbidity that can be measured quantitatively. Additionally, the reaction can be combined with colorimetric indicators like hydroxy naphthol blue (HNB) or calcein, enabling visual interpretation of results without electrophoresis [94] [95] [96]. The closed-tube nature of LAMP reactions significantly reduces contamination risk compared to nested PCR.
The diagram below illustrates the fundamental workflow differences between these two techniques:
Comprehensive Performance Metrics
Direct comparative studies across multiple pathogen systems provide robust data for evaluating the relative performance of nested PCR versus LAMP. The following table summarizes key performance metrics from recent experimental investigations:
Table 1: Comparative performance metrics of nested PCR and LAMP across various pathogens
| Pathogen Detected | Sensitivity (LoD) | Specificity | Amplification Time | Reference |
|---|---|---|---|---|
| Entamoeba histolytica | Nested PCR: 100 trophozoitesLAMP: 1 trophozoite | 100% for both methods | Nested PCR: ~4 hoursLAMP: ~60 minutes | [95] |
| Mycobacterium marinum | Nested PCR and LAMP showed equal sensitivity in clinical samples | Comparable specificity | Nested PCR: >2 hoursLAMP: 60 minutes | [94] |
| Fusarium tricinctum | qPCR: 3.1 fg/µL (most sensitive)Nested PCR and LAMP: Similar sensitivity | All methods demonstrated high specificity | LAMP: 60 minutes (visual detection)Nested PCR: >2 hours | [96] |
| Plasmodium falciparum (malaria) | Nested PCR detected submicroscopic infections (10 parasites/µL)Microscopy and RDT less sensitive | Nested PCR: Highest specificityMicroscopy: Operator dependent | Nested PCR: Several hoursRDT: 15-20 minutes (but less sensitive) | [97] |
| SARS-CoV-2 | LAMP: 1.4 copies/µL salivaComparable to RT-PCR | >96% for LAMP | LAMP: <30 minutesRT-PCR: Several hours | [98] |
The data consistently demonstrates that LAMP achieves comparable or superior sensitivity to nested PCR while significantly reducing amplification time. For instance, in detecting Entamoeba histolytica, LAMP demonstrated a 100-fold higher sensitivity than nested PCR, detecting a single trophozoite compared to 100 trophozoites for nested PCR [95]. Similarly, for Mycobacterium marinum diagnosis, LAMP shared the same sensitivity as nested PCR in clinical samples but was easier to perform and faster [94].
Experimental Design and Methodologies
Detailed Protocol for Nested PCR
The nested PCR protocol involves sequential amplification steps with rigorous contamination control measures:
First Round PCR Setup:
- Reaction volume: 25 μL
- Reaction composition: 12.5 μL of 2× Taq Plus Master Mix II, 0.5 μM of each outer primer, and 2 μL of template DNA [94]
- Thermal cycling conditions: Initial denaturation at 95°C for 5 minutes; 35 cycles of denaturation at 95°C for 30 seconds, annealing at 62°C for 50 seconds, and extension at 72°C for 1 minute; final extension at 72°C for 10 minutes [94]
Product Transfer with Contamination Control:
- Physical separation of pre- and post-amplification areas
- Use of dedicated pipettes with aerosol barrier tips
- Aliquot dilution: 1 μL of first-round PCR products diluted in 22 μL RNase-free water for the second reaction [94]
Second Round PCR Setup:
- Reaction volume: 50 μL
- Reaction composition: 25 μL of 1.25 U of Taq DNA polymerase mix, 2 μL of 5 pmol each of inner primers, 1 μL of diluted first-round product, and 22 μL RNase-free water [94]
- Thermal cycling: Similar to first round but with optimized annealing temperature for inner primers
Amplicon Detection:
- Gel electrophoresis: 1.5% agarose stained with ethidium bromide
- Product verification: Sequencing of positive PCR products and comparison with GenBank database [94]
Detailed Protocol for LAMP
The LAMP methodology emphasizes simplicity and rapid visualization:
Reaction Setup:
Isothermal Amplification:
Amplicon Detection Methods:
- Colorimetric: Addition of hydroxy naphthol blue (HNB) prior to amplification - color change from violet to sky blue indicates positive reaction [96]
- Metal indicator: Calcein-manganese dye - color change from orange to green under UV light [95]
- Turbidity: Direct measurement of magnesium pyrophosphate precipitate [99]
- Lateral flow dipstick: Using hapten-labelled primers for rapid visual detection [95]
- Gel electrophoresis: Traditional method showing ladder-like pattern [94]
The LAMP workflow is visually summarized in the following diagram:
Practical Implementation Analysis
Equipment, Cost, and Field-Deployability Assessment
The operational requirements and associated costs of diagnostic techniques significantly influence their implementation in diverse settings:
Table 2: Comparative analysis of equipment needs, cost, and field-deployability
| Parameter | Nested PCR | LAMP |
|---|---|---|
| Essential Equipment | Thermal cycler (two runs required), gel electrophoresis system, UV transilluminator, dedicated areas for pre- and post-amplification to prevent contamination | Simple heating block, water bath, or thermos, basic centrifuge and vortexer |
| Approximate Equipment Cost | $5,000-$15,000 for standard thermal cycler and electrophoresis setup | $200-$500 for basic heating blocks; <$200 for field-deployable systems [100] [98] |
| Reagent Cost per Test | Moderate to high (two sets of primers, additional enzymes and consumables) | Generally lower, though Bst polymerase may have higher unit cost |
| Technical Expertise Required | High (technique-sensitive, contamination management, complex optimization) | Moderate to low (simple protocol, minimal optimization) |
| Infrastructure Demands | Stable electrical supply, dedicated workspace with physical separation of pre- and post-amplification areas | Minimal infrastructure; portable power sources sufficient |
| Suitability for Point-of-Care | Low due to equipment requirements, lengthy process, and contamination risks | High - multiple studies demonstrate field-deployable applications [100] [98] |
| Sample Processing Time | 3-6 hours (including two amplification rounds and analysis) | 30-90 minutes (single-step amplification with rapid detection) |
The equipment cost disparity is particularly striking. While conventional PCR thermocyclers typically cost thousands of dollars, field-deployable LAMP systems have been developed for under $200 [100]. Similarly, a comprehensive SARS-CoV-2 testing system using HP-LAMP (High-Performance LAMP) required only basic laboratory equipment including pipettes, a mini centrifuge, a vortexer, and two heat blocks retailing for approximately $250 each [98].
Research Reagent Solutions
Successful implementation of either methodology requires specific reagent systems optimized for each application:
Table 3: Essential research reagents for nested PCR and LAMP applications
| Reagent Category | Specific Examples | Function in Assay | Implementation Considerations |
|---|---|---|---|
| Polymerase Enzymes | Taq DNA polymerase (nested PCR)Bst DNA polymerase (LAMP) | DNA amplification with thermal stability (Taq)Strand displacement activity at constant temperature (Bst) | Bst polymerase lacks 5'→3' exonuclease activity; optimized buffer systems enhance performance for both enzymes |
| Primer Systems | Outer and inner primer pairs (nested PCR)FIP, BIP, F3, B3, LF, LB primers (LAMP) | Target-specific binding and amplificationRecognition of multiple target regions for strand displacement | LAMP primer design is more complex but enables high specificity; nested PCR primers require careful positioning for sequential amplification |
| Detection Chemistry | Ethidium bromide, SYBR GreenHNB, calcein-manganese, magnesium pyrophosphate | Fluorescent intercalation for gel visualizationColorimetric or turbidimetric change for visual detection | Colorimetric LAMP detection enables naked-eye interpretation without specialized equipment |
| Sample Preparation Kits | QIAamp DNA Microbiome KitColumn-based fungal DNA extraction kits | Efficient nucleic acid isolation from complex samplesSpecialized protocols for different sample matrices | Sample purification less critical for LAMP due to higher tolerance to inhibitors [94] |
| Contamination Control | UDG (uracil-DNA glycosylase) with dUTPPhysical separation and dedicated equipment | Enzymatic prevention of amplicon carryoverProcedural controls to minimize cross-contamination | Critical for nested PCR due to tube opening between rounds; less concern for closed-tube LAMP |
The comparative analysis between nested PCR and LAMP reveals a clear trade-off between technical robustness and practical implementation. Nested PCR remains a valuable research tool when ultimate sensitivity and sequence verification are required, particularly in well-equipped laboratory settings. However, its susceptibility to contamination, lengthy processing time, and sophisticated equipment requirements limit its utility in resource-limited or point-of-care scenarios.
LAMP technology demonstrates significant advantages in speed, operational simplicity, and field-deployability while maintaining high sensitivity and specificity. The isothermal nature of the reaction, combined with visual detection methods, positions LAMP as an ideal solution for rapid screening programs, field diagnostics, and resource-limited settings. The substantially lower equipment costs and minimal infrastructure requirements further enhance its accessibility.
The selection between these methodologies should be guided by specific application requirements. For laboratories prioritizing maximum sensitivity and having established contamination control protocols, nested PCR provides proven performance. For applications demanding rapid results, field deployment, or high-throughput screening with minimal infrastructure, LAMP offers a technically robust and economically viable alternative. Ongoing technical advances in both platforms continue to expand their applications, with LAMP particularly poised to address growing needs for decentralized diagnostic testing across diverse scientific and clinical contexts.
This guide provides an objective comparison of modern pathogen detection technologies, with a specific focus on the cost-benefit outcomes of Nested PCR (NPCR) relative to other molecular diagnostics like real-time PCR (qPCR). Effective pathogen control hinges on early, accurate identification. The following table summarizes core performance metrics established by recent experimental studies.
Table 1: Performance Comparison of Pathogen Detection Methods
| Detection Method | Target Pathogen | Reported Sensitivity | Key Strengths | Key Limitations |
|---|---|---|---|---|
| Nested PCR (NPCR) | Severe Fever with Thrombocytopenia Syndrome Virus (SFTSV) | 100% (37/38 initial samples); detected infection up to 40 days post-onset [101]. | Superior sensitivity in later infection stages; high resistance to PCR inhibitors; lower per-reaction cost than qPCR [28] [101]. | Higher contamination risk; longer hands-on time; not inherently quantitative [101]. |
| Real-Time PCR (qPCR) | Listeria monocytogenes | 30 copies/reaction; 3.5 UFC/25g in artifically contaminated cheese [28]. | Fast results; quantitative output; lower contamination risk due to closed-tube system [28] [46]. | Higher equipment and reagent costs; can be more sensitive to inhibitor presence in samples [28] [46]. |
| Real-Time PCR (qPCR) | Fusarium tricinctum | 3.1 fg/µL DNA concentration [46]. | Tenfold higher sensitivity than NPCR and LAMP; enables absolute pathogen quantification [46]. | As above. |
| Loop-Mediated Isothermal Amplification (LAMP) | Fusarium tricinctum | 31 fg/µL DNA concentration [46]. | Rapid, cost-effective, and visually interpretable results; ideal for field applications [46]. | Not inherently quantitative; requires careful primer design [46]. |
| Electronic Nose with ML | Fusarium oxysporum | 94.4–96.8% classification accuracy for tomato plants [102]. | Extremely rapid, non-invasive; can predict physiological parameters (R=0.97-0.99) [102]. | Requires model training; performance is specific to trained conditions/pathogens [102]. |
Detailed Experimental Protocols and Data
Understanding the experimental context from which performance data are derived is crucial for selecting the appropriate method.
Protocol: Nested PCR for SFTS Virus Detection
This protocol, which demonstrated superior sensitivity for late-stage infection detection, targets the viral M-segment [101].
- Sample Type: Patient blood samples.
- Nucleic Acid Extraction: Standard methods for RNA extraction from blood.
- First-Round PCR (RT-PCR):
- Primers: Specific for the SFTSV M-segment (external primers).
- Reaction Mix: Contains reverse transcriptase, reaction buffer, dNTPs, primers, and RNA template.
- Cycling Conditions: Reverse transcription, followed by initial denaturation and 30-40 cycles of amplification.
- Second-Round PCR (Nested):
- Template: A small aliquot (e.g., 2 µL) of the first-round PCR product.
- Primers: Internal primers that bind within the first amplicon.
- Cycling Conditions: Similar to the first round, with 25-30 cycles.
- Analysis: Products are visualized on an agarose gel. A band of the expected size confirms a positive result [101].
Protocol: Comparison of NPCR and qPCR forListeria monocytogenes
This study directly compared NPCR and qPCR for detecting a foodborne pathogen in soft cheese [28].
- Sample Preparation: Cheese samples were artificially contaminated with L. monocytogenes and enriched in culture broth. DNA was extracted via boiling and centrifugation.
- Internal Amplification Control (IAC): An IAC was co-amplified with the target (HlyA gene) in the NPCR to identify false negatives due to reaction inhibitors.
- qPCR: Utilized a plasmid DNA standard for the HlyA gene for quantification.
- Key Finding: Both NPCR (with IAC) and qPCR showed identical sensitivity (3.5 UFC/25 g) in contaminated food samples. The NPCR was noted as being less sensitive to inhibitory substances and reinforced the reliability of negative results without significantly increasing costs [28].
Protocol: Electronic Nose for EarlyFusariumDetection
This non-molecular approach highlights an alternative for pre-symptomatic detection [102].
- Sample Preparation: Processing tomato plants were inoculated with different concentrations of F. oxysporum spores. Measurements were taken from plant leaves and soil.
- E-Nose Operation: A portable device with a 9-sensor array was placed over the sample. Sensors detected volatile organic compounds (VOCs) over a 2-minute period.
- Data Processing: Machine learning models (Artificial Neural Networks) were trained using e-nose output data to classify infection levels and predict plant physiological parameters.
- Key Finding: The models achieved over 94% accuracy in classifying infection levels in plants and soil, and strongly predicted photosynthesis and transpiration rates, enabling detection before visual symptoms appeared [102].
Nested PCR Experimental Workflow
Cost-Benefit and Socioeconomic Impact Analysis
The choice of detection method has direct financial implications, from reagent costs to the economic impact of outbreaks.
Table 2: Cost-Benefit and Economic Impact Findings
| Context | Key Finding | Quantitative Outcome | Citation |
|---|---|---|---|
| TR4 Prevention in Colombian Banana Farms | Cost-benefit analysis of preventive measures (cement paths, disinfecting stations). | Net Present Value (NPV): $95,389-$112,527/ha. Benefit-Cost Ratio (BCR): 3.1 to 4.2. | [103] |
| Preventive Site-Specific Fungicide (PSSS) in Wheat | Economic benefit of variable-rate fungicide application for Fusarium Head Blight vs. uniform rate (UR). | PSSS increased economic return by 93.12–94.93 €/ha in 2 of 3 fields. | [104] |
| Waterborne Cryptosporidium Outbreak in Ireland | Total societal cost of a single outbreak. | Total cost > €19 million (≈ $22.44 million USD), or approx. €120,000/day. | [105] |
The high benefit-cost ratios for preventive measures underscore the financial logic of investing in robust detection and biosecurity [103]. A proactive approach is economically justified when compared to the massive costs of a full-scale outbreak, as demonstrated by the Cryptosporidium case [105].
Detection Method Selection Logic
The Scientist's Toolkit: Essential Research Reagents and Materials
Table 3: Key Research Reagent Solutions for Pathogen Detection
| Reagent / Material | Function in Experiment | Specific Example |
|---|---|---|
| Internal Amplification Control (IAC) | Co-amplified with the target to distinguish true negative results from PCR failure due to inhibitors. | A synthesized 85-bp DNA sequence cloned into a plasmid, used in NPCR for L. monocytogenes [28]. |
| Plasmid DNA Standard | Serves as a quantifiable standard for calibrating molecular assays and determining copy number sensitivity. | Linearized plasmid containing the cloned HlyA gene used for qPCR and NPCR sensitivity determination [28]. |
| Pathogen-Specific Primers | Designed to bind to unique genomic regions for specific amplification. | Primers targeting the CYP51C gene for F. tricinctum [46], the HlyA gene for L. monocytogenes [28], or the 16S rRNA gene for H. pylori [9]. |
| Electronic Nose Sensor Array | Detects a profile of Volatile Organic Compounds (VOCs) emitted by infected plants or samples. | A 9-sensor array (e.g., MQ3 for alcohol, MQ4 for methane) used for early detection of F. oxysporum [102]. |
| DNA Extraction Kits (Commercial vs. Boiling) | Isolates PCR-quality DNA from complex matrices like food, soil, or clinical specimens. | Commercial kits (e.g., Column Fungal DNAout 2.0) vs. the boiling method (greater yield, lower purity) [28] [46]. |
In molecular biology, particularly in sensitive polymerase chain reaction (PCR) applications, the exquisite sensitivity that makes these techniques powerful also renders them profoundly vulnerable to contamination. Amplicon accumulation, if uncontrolled, can contaminate laboratory reagents, equipment, and ventilation systems, making carryover from previously amplified DNA a major source of false-positive results [10]. The consequences extend beyond scientific inaccuracy; contamination events lead to misdiagnosis, erroneous treatment, costly reagent waste, and labor-intensive laboratory shutdowns for decontamination [106] [4]. Among common techniques, nested PCR—which uses two sets of primers and two rounds of amplification to achieve high sensitivity and specificity—is especially prone to contamination because it requires physical manipulation of first-round amplification products [16] [30].
This article presents a cost-benefit analysis of contamination control methods, framing the transition from manual, open systems to automated, closed-system technologies as a strategic, future-proof investment. We will compare traditional nested PCR against real-time quantitative PCR (qPCR) and other integrated solutions, evaluating their performance, operational economics, and long-term value in ensuring data integrity and laboratory efficiency.
Comparative Analysis of Nested PCR and Real-Time PCR
Performance and Contamination Risk
The core of the contamination control challenge lies in the fundamental workflow differences between traditional and modern PCR methods.
Diagram: A comparison of workflow steps and contamination risk points between Nested PCR and Real-Time PCR. Orange steps indicate high contamination risk, while green indicates a closed, low-risk process.
As illustrated, the nested PCR workflow involves multiple open-tube steps, each representing a potential point for amplicon release into the laboratory environment. In contrast, real-time PCR is a closed-tube system where amplification and detection occur simultaneously within a sealed vessel, dramatically reducing opportunities for amplicon escape [10].
Experimental Data: Sensitivity, Specificity, and Practical Performance
Independent studies have directly compared these methodologies across various applications. The data below summarizes key performance metrics from published experimental evaluations.
Table 1: Direct comparison of Nested PCR and Real-Time PCR performance from experimental studies.
| Application / Pathogen | Method | Sensitivity | Specificity | Key Findings | Source |
|---|---|---|---|---|---|
| Vibrio vulnificus (Blood samples) | Nested PCR | 86% | 73% | Higher sensitivity than conventional PCR but lower specificity. | [107] |
| Real-Time Q-PCR | 100% | 100% | Most sensitive and specific; also the most rapid method. | [107] | |
| Bovine Herpesvirus 6 (BoHV6) | Nested PCR | 2 × 10¹ copies/reaction | 100% | Specific, but less sensitive. | [3] |
| Real-Time Q-PCR | 2 × 10⁰ copies/reaction | 100% | Greater sensitivity, ease of use, and faster results. | [3] | |
| Norovirus (GII.2) | One-Step Real-Time RT-PCR | 10² genome copies | N/R | Robust detection for higher viral loads. | [30] |
| Nested Real-Time PCR | 10¹ genome copies | N/R | Consistently detected one log₁₀ lower virus; higher contamination risk. | [30] | |
| Fusarium tricinctum (Plant pathogen) | Nested PCR | 31 fg/µL | High | Exceptional stability and reliability. | [7] |
| Real-Time Q-PCR | 3.1 fg/µL | High | Highest sensitivity; enabled absolute quantification. | [7] |
The data consistently shows that real-time PCR offers superior specificity and often greater sensitivity than nested PCR. While one study found nested PCR to be more sensitive for Norovirus detection [30], this advantage comes with the inherent, elevated risk of false positives due to amplicon contamination, a factor that must be weighed heavily in a cost-benefit analysis.
The Contamination Control Toolbox: Strategies and Economics
Traditional Contamination Control Methods
Before the advent of fully closed systems, laboratories relied on a combination of physical and biochemical methods to control contamination. These remain relevant, particularly for labs using open-system assays like nested PCR.
- Physical Segregation and Workflow: A fundamental strategy involves separating laboratory areas for pre- and post-PCR activities, enforcing a unidirectional workflow from "clean" to "dirty" areas to prevent amplicon carryback [10] [4]. This requires significant laboratory space and disciplined operational protocols.
- Laminar Flow Hoods: Using HEPA or ULPA-filtered laminar flow hoods or portable clean rooms for reagent preparation and sample manipulation creates a particulate-free workspace, protecting samples from environmental contamination [4].
- Decontamination Techniques:
- Chemical: Surfaces are routinely decontaminated with sodium hypochlorite (bleach) to hydrolyze DNA, followed by ethanol to remove the bleach residue [10].
- Enzymatic: The Uracil-DNA Glycosylase (UNG) system is widely used. During PCR, dUTP is incorporated into amplicons instead of dTTP. In subsequent reactions, UNG enzyme degrades any contaminating uracil-containing amplicons before amplification, providing a powerful biochemical barrier to carryover contamination [10].
- UV Irradiation: UV light is used to induce thymidine dimers in contaminating DNA, rendering it unable to serve as a template. UV light boxes are commonly used to irradiate reagents and equipment before PCR setup [10].
The Shift to Automation and Closed Systems
The limitations of manual methods—being labor-intensive, prone to human error, and requiring dedicated space—drive the economic argument for automation.
- Real-Time PCR (qPCR): This technology represents a paradigm shift by integrating amplification and detection in a sealed tube. The process is automated, with no need for post-amplification handling, thereby virtually eliminating the risk of amplicon contamination [10]. It also provides quantitative data, faster turnaround times, and higher throughput [107] [62].
- Fully Integrated Automated Systems: Modern diagnostic platforms (e.g., FilmArray, ePlex, etc.) encapsulate the entire process—from nucleic acid extraction to amplification and detection—within a single, disposable cartridge or chip [16] [106]. These "sample-to-answer" systems represent the pinnacle of contamination control through engineering, minimizing human intervention to the simple loading of a raw sample.
Cost-Benefit Analysis: Manual Controls vs. Integrated Technologies
The decision to invest in new technology must be justified by a clear economic and operational return on investment (ROI). The following table breaks down the key cost factors.
Table 2: Economic and operational comparison of contamination control strategies.
| Factor | Traditional Methods (with Nested PCR) | Automated Closed Systems (e.g., qPCR) |
|---|---|---|
| Initial Capital Outlay | Lower (standard thermal cyclers) | Higher (specialized real-time PCR instruments) |
| Consumable Cost per Test | Lower | Higher (proprietary plates, reagents) |
| Labor & Time Cost | High (manual setup, multiple rooms, extensive cleaning) | Low (streamlined workflow, minimal hands-on time) |
| Cost of Contamination | Very High (repeat testing, lab shutdown, wasted reagents, lost productivity) | Negligible (inherently prevented by design) |
| Data Quality & Value | Risk of false positives/negatives undermines data integrity | High-quality, reliable, and quantitative data |
| Scalability & Throughput | Low to moderate | High (plate-based automation) |
| Operational Complexity | High (requires strict discipline and training) | Low (simplified, standardized protocols) |
The "True Cost" of Contamination
A critical calculation in this analysis is the often-hidden cost of a contamination event. These include:
- Direct Costs: Discarding contaminated reagents, environmental swabbing ("wipe testing"), and labor for investigation and cleaning [106].
- Indirect Costs: Delayed project timelines, missed deadlines, loss of researcher and stakeholder trust, invalidated experimental data, and in clinical settings, the risk of patient misdiagnosis and associated liabilities [106] [4].
When these potential costs are factored in, the higher upfront investment in closed-system technologies can be quickly offset by the avoidance of even a single major contamination incident.
The Scientist's Toolkit: Essential Reagents and Materials
The implementation of robust contamination control, whether traditional or modern, relies on a core set of reagents and tools.
Table 3: Key research reagents and solutions for PCR and contamination control.
| Reagent / Material | Function / Description | Application Context |
|---|---|---|
| Uracil-DNA Glycosylase (UNG) | Enzyme that degrades uracil-containing DNA; used with dUTP for carryover prevention. | Pre-PCR setup in qPCR and some conventional PCR protocols [10]. |
| dUTP | Deoxyuridine Triphosphate. Incorporated into PCR products in place of dTTP, making them susceptible to UNG. | Used in conjunction with UNG for enzymatic contamination control [10]. |
| HEPA/ULPA Filter | High/Ultra Low Penetration Air filters. Creates an ISO Class 5 cleanroom environment for sample prep. | Used in Laminar Flow Hoods and Portable Clean Rooms [4]. |
| Platinum Taq DNA Polymerase | A robust, hot-start enzyme that minimizes non-specific amplification and improves sensitivity. | Used in both nested and real-time PCR assays [30]. |
| Nucleic Acid Extraction Kit | For purifying DNA/RNA from complex samples (e.g., blood, tissue, cosmetics). Critical for removing PCR inhibitors. | Essential first step in all molecular workflows [7] [62]. |
| Hydrolysis Probes (TaqMan) | Fluorescently-labeled probes that are cleaved during amplification, enabling real-time detection in a closed-tube. | The core detection chemistry for many real-time qPCR assays [16]. |
The economic outlook for contamination control is unequivocally centered on automation, integration, and closed-system technologies. While traditional methods like nested PCR and physical segregation remain in use and can be effective with rigorous discipline, their hidden costs and operational inefficiencies are substantial. The body of experimental evidence clearly demonstrates that modern real-time PCR and fully integrated platforms provide superior specificity, reliability, and quantitative data, all while fundamentally solving the amplicon contamination problem through engineering.
For research institutions and drug development companies, future-proofing operations means viewing the adoption of closed-system technologies not as a mere capital expense, but as a strategic investment. It is an investment in data integrity, operational efficiency, and risk mitigation. The long-term economic benefit lies in generating reproducible, high-quality results faster, avoiding the profound costs of contamination events, and freeing highly skilled personnel to focus on scientific inquiry rather than manual contamination control. The future of molecular biology is closed, automated, and economically sound.
Conclusion
Effective nested PCR contamination control is not a one-size-fits-all proposition but a strategic balance of cost, efficiency, and reliability. The most economically sustainable approach integrates foundational physical and chemical barriers with targeted enzymatic methods like UNG. While initial investments in spatial separation and training are essential, they prevent far greater costs associated with erroneous results and repeated experiments. The choice between nested PCR and alternatives like qPCR or LAMP should be guided by application-specific needs: qPCR offers superior quantification and a closed-tube system that minimizes contamination risk, whereas LAMP provides a low-cost, rapid option for field use. As molecular diagnostics advance, the integration of automated, closed-system platforms will further shift the cost-benefit calculus, reducing manual handling and the associated contamination risks. By adopting the rigorous, cost-aware strategies outlined here, researchers and diagnostic professionals can ensure the integrity of their nested PCR results while maintaining fiscal responsibility, thereby accelerating reliable discoveries and clinical applications.
References
- 1. Nested Polymerase Chain Reaction - an overview [https://www.sciencedirect.com/topics/agricultural-and-biological-sciences/nested-polymerase-chain-reaction]
- 2. Rapid Multiplex Nested PCR for Detection of Respiratory ... [https://pmc.ncbi.nlm.nih.gov/articles/PMC2168518/]
- 3. Comparison of nested PCR and qPCR for the detection ... [https://www.sciencedirect.com/science/article/pii/S0166093413003388]
- 4. Help Prevent PCR Contamination with Laminar Flow Hoods [https://www.sentryair.com/blog/industry-applications/laboratories/help-prevent-pcr-contamination-with-laminar-flow-hoods/]
- 5. A multiplex nested PCR for the detection and identification of ... [https://pmc.ncbi.nlm.nih.gov/articles/PMC4223582/]
- 6. Development of a nested-PCR assay for the detection ... [https://www.sciencedirect.com/science/article/abs/pii/S0043135400004267]
- 7. Development and comparative evaluation of LAMP, nested ... [https://pmc.ncbi.nlm.nih.gov/articles/PMC12398972/]
- 8. Comparison of competitive-nested PCR and real-time PCR in ... [https://pubmed.ncbi.nlm.nih.gov/12454751/]
- 9. Peculiarities of Diagnostic Reliability—Nested PCR Versus ... [https://www.mdpi.com/2076-2607/13/7/1498]
- 10. Regulatory Concern of Polymerase Chain Reaction (PCR) ... [https://www.intechopen.com/chapters/52932]
- 11. A new method to prevent carry-over contaminations in two ... [https://pmc.ncbi.nlm.nih.gov/articles/PMC4787772/]
- 12. Carryover Contamination-Controlled Amplicon Sequencing ... [https://pmc.ncbi.nlm.nih.gov/articles/PMC10269707/]
- 13. DNA Contamination - an overview [https://www.sciencedirect.com/topics/immunology-and-microbiology/dna-contamination]
- 14. Could your PCR be affected by contamination? | IDT [https://www.idtdna.com/page/support-and-education/decoded-plus/could-your-pcr-be-affected-by-contamination/]
- 15. Plasmids 101: Colony PCR [https://blog.addgene.org/plasmids-101-colony-pcr]
- 16. Nested Polymerase Chain Reaction - an overview | ScienceDirect Topics [https://www.sciencedirect.com/topics/biochemistry-genetics-and-molecular-biology/nested-polymerase-chain-reaction]
- 17. Nested Polymerase Chain Reaction - an overview [https://www.sciencedirect.com/topics/immunology-and-microbiology/nested-polymerase-chain-reaction]
- 18. Peculiarities of Diagnostic Reliability—Nested PCR Versus ... [https://pmc.ncbi.nlm.nih.gov/articles/PMC12301005/]
- 19. Evaluation of Nested Polymerase Chain Reaction for ... [https://pmc.ncbi.nlm.nih.gov/articles/PMC3879890/]
- 20. Clinical significance of nested polymerase chain reaction ... [https://www.sciencedirect.com/science/article/pii/S1198743X14640386]
- 21. Costs and cost-effectiveness of malaria reactive case ... [https://malariajournal.biomedcentral.com/articles/10.1186/s12936-018-2361-y]
- 22. Preventing PCR Amplification Carryover Contamination in ... [https://www.annclinlabsci.org/content/34/4/389.long]
- 23. Nested PCR: Principle, Protocol and Application [https://www.bocsci.com/resources/nested-pcr-principle-protocol-and-applications.html?srsltid=AfmBOor2OrZ-uGVjDjea9xw2g3buhj4y9p1uBpxnlTwVvZt0dQW4PvWX]
- 24. Nested Polymerase Chain Reaction (PCR) [https://pubmed.ncbi.nlm.nih.gov/30710024/]
- 25. Dos and don'ts for molecular testing [https://www.who.int/teams/global-malaria-programme/case-management/diagnosis/nucleic-acid-amplification-based-diagnostics/dos-and-don-ts-for-molecular-testing]
- 26. How does PCR work and what are its 3 steps? | INTEGRA [https://www.integra-biosciences.com/united-states/en/blog/article/how-does-pcr-work]
- 27. Organizing and Optimizing Laboratory Space for Molecular ... [https://www.aphl.org/programs/newborn_screening/Pages/Molecular-Workflow.aspx]
- 28. Comparison of real-time PCR and nested PCR based on ... [https://pmc.ncbi.nlm.nih.gov/articles/PMC11153442/]
- 29. Development of Nested Polymerase Chain Reaction with ... [https://www.mdpi.com/2076-2615/13/20/3177]
- 30. Comparison of a one-step real-time RT-PCR and a nested ... [https://journals.plos.org/plosone/article?id=10.1371/journal.pone.0248581]
- 31. Real-Time PCR in Clinical Microbiology - PubMed Central - NIH [https://pmc.ncbi.nlm.nih.gov/articles/PMC1360278/]
- 32. Comparing Different Disinfectants [https://ehs.stanford.edu/reference/comparing-different-disinfectants]
- 33. Decontamination efficacy of sodium hypochlorite solutions ... [https://www.sciencedirect.com/science/article/pii/S1045105620300877]
- 34. Use of disinfectants: alcohol and bleach - NCBI [https://www.ncbi.nlm.nih.gov/books/NBK214356/]
- 35. Enhanced biocidal efficacy of alcohol based disinfectants ... [https://www.nature.com/articles/s41598-025-87811-0]
- 36. Efficacy of an alcohol‐based surface disinfectant formulation ... [https://pmc.ncbi.nlm.nih.gov/articles/PMC9306916/]
- 37. The effect of different concentrations of chlorine-containing ... [https://journals.plos.org/plosone/article?id=10.1371/journal.pone.0281802]
- 38. Ethanol-based disinfectant sprays drive rapid changes in ... [https://www.sciencedirect.com/science/article/pii/S2666911021000307]
- 39. A systematic review of chlorine-based surface disinfection ... [https://pmc.ncbi.nlm.nih.gov/articles/PMC7236738/]
- 40. Efficient nested-PCR-based method development for ... [https://www.nature.com/articles/s41598-021-00968-2]
- 41. Optimization of single-tube nested PCR for the diagnosis of ... [https://www.sciencedirect.com/science/article/pii/S0014489413000738]
- 42. Thermo Scientific™ Uracil-DNA Glycosylase (1 U/μL) [https://www.fishersci.ca/shop/products/fermentas-uracil-dna-glycosylase-udg-ung/p-4521375]
- 43. Specificity and Efficiency of the Uracil DNA Glycosylase- ... [https://pmc.ncbi.nlm.nih.gov/articles/PMC6883067/]
- 44. Uracil DNA Glycosylase (UDG), Heat-Labile (Glycerol-Free) [https://www.yeasenbio.com/products/10707]
- 45. Development of a Highly Sensitive Nested-PCR Procedure ... [https://pmc.ncbi.nlm.nih.gov/articles/PMC101457/]
- 46. Development and comparative evaluation of LAMP, nested ... [https://bmcmicrobiol.biomedcentral.com/articles/10.1186/s12866-025-04295-8]
- 47. A duplex one-step recombinase aided PCR assay for the ... [https://pmc.ncbi.nlm.nih.gov/articles/PMC11965886/]
- 48. Uracil DNA Glycosylase (1000U) [https://www.biobasic.com/us/uracil-dna-glycosylase-1000u]
- 49. UV Disinfection Equipment Market Outlook 2025-2032 [https://www.intelmarketresearch.com/uv-disinfection-equipment-market-16997]
- 50. Experimental investigation comparing Far-UVC (222nm) ... [https://www.sciencedirect.com/science/article/abs/pii/S0360132324011661]
- 51. Uv Disinfection Equipment Market Size 2025 Report [https://www.linkedin.com/pulse/uv-disinfection-equipment-market-size-2025-2o8of]
- 52. Uv Disinfection Equipment Market Size & Forecast, 2025- ... [https://www.coherentmarketinsights.com/market-insight/uv-disinfection-equipment-market-3609]
- 53. Performance study of a sterilization box using a combination ... [https://pmc.ncbi.nlm.nih.gov/articles/PMC8107062/]
- 54. The efficacy of ultraviolet light-emitting technology against ... [https://pmc.ncbi.nlm.nih.gov/articles/PMC8139389/]
- 55. Specific Nested PCR for the Detection of 16SrI and 16SrII ... [https://pmc.ncbi.nlm.nih.gov/articles/PMC12299459/]
- 56. Lab Sterilization: Steam, UV, or Chemicals? [https://aelabgroup.com/lab-sterilization-steam-uv-chemicals/]
- 57. Eliminate PCR Amplicon (but not real-time PCR?) Carry- ... [https://bitesizebio.com/4813/eliminate-pcr-amplicon-but-not-rtpcr-carry-over-with-ung/]
- 58. Prevention of PCR cross-contamination by UNG treatment ... [https://pubmed.ncbi.nlm.nih.gov/18987827/]
- 59. Nested PCR to optimize rpoB metabarcoding for low- ... [https://pmc.ncbi.nlm.nih.gov/articles/PMC12403564/]
- 60. Improving sensitivity of single tube nested PCR to detect ... [https://www.sciencedirect.com/science/article/pii/S2405844020300918]
- 61. Development of real-time PCR methods for quality control ... [https://www.frontiersin.org/journals/public-health/articles/10.3389/fpubh.2025.1572201/full]
- 62. Development of real-time PCR methods for quality control ... [https://pmc.ncbi.nlm.nih.gov/articles/PMC12058689/]
- 63. Define samples as no-template controls [https://ionreporter.thermofisher.com/ir/help/GUID-27D272DE-6804-4CC9-B1FA-1F63D2A84DE0.html]
- 64. Your Ultimate Guide to PCR Contamination Troubleshooting [https://www.clyte.tech/post/guide-to-pcr-contamination-troubleshooting?srsltid=AfmBOop1KKRf4nft5xg7n_S7jkdQ_Y8czJLwAYTt7aNQDYyA49TKGNHx]
- 65. Amplification of the No Template Control (NTC) [https://www.thermofisher.com/mx/en/home/life-science/pcr/real-time-pcr/real-time-pcr-learning-center/real-time-pcr-basics/real-time-pcr-troubleshooting-tool/gene-expression-quantitation-troubleshooting/amplification-no-template-control.html]
- 66. Laboratory efforts to eliminate contamination problems in ... [https://www.sciencedirect.com/science/article/abs/pii/S0167701209000086]
- 67. Optimization of the real-time PCR platform method using ... [https://www.nature.com/articles/s41598-025-16972-9]
- 68. How to prevent PCR contamination [https://www.minipcr.com/how-to-prevent-pcr-contamination/]
- 69. Nested PCR: Principle, Protocol and Application [https://www.bocsci.com/resources/nested-pcr-principle-protocol-and-applications.html?srsltid=AfmBOooP5B9fsRfhixVVo7MoQSC0mAfsUa-cAbFipVDb9bP-dtSMzDar]
- 70. Optimizing single-tube nested PCR for enhanced ... [https://www.sciencedirect.com/science/article/abs/pii/S0378111924007194]
- 71. An optimized DNA extraction protocol for reliable PCR-based ... [https://pmc.ncbi.nlm.nih.gov/articles/PMC12532460/]
- 72. A List of Sustainable Practices [https://re-advance.com/a-list-of-sustainable-practices/]
- 73. Proven tips for PCR primer design [https://www.neb.com/en-us/nebinspired-blog/proven-tips-for-pcr-primer-design?srsltid=AfmBOoqLdBVfrFIodRB1hWP5r73x_aOr5HabSvLGxKa4sTGs232IhmW0]
- 74. Primer design guide - 5 tips for best PCR results [https://the-dna-universe.com/2022/09/05/primer-design-guide-the-top-5-factors-to-consider-for-optimum-performance/]
- 75. qPCR primer design revisited - PMC - PubMed Central - NIH [https://pmc.ncbi.nlm.nih.gov/articles/PMC5702850/]
- 76. How to Simplify PCR Optimization Steps for Primer Annealing [https://www.thermofisher.com/us/en/home/brands/thermo-scientific/molecular-biology/molecular-biology-learning-center/molecular-biology-resource-library/spotlight-articles/pcr-annealing-optimization-universal-annealing.html]
- 77. A highly sensitive modified nested PCR to enhance case ... [https://bmcinfectdis.biomedcentral.com/articles/10.1186/s12879-019-4180-3]
- 78. Optimization of primer sets and detection protocols for ... [https://pmc.ncbi.nlm.nih.gov/articles/PMC7295692/]
- 79. Top Ten Pitfalls in Quantitative Real-time PCR Primer ... [https://www.thermofisher.com/us/en/home/references/ambion-tech-support/rtpcr-analysis/general-articles/top-ten-pitfalls-in-quantitative-real-time-pcr-primer.html]
- 80. Nested PCR amplification of the mitochondrial hypervariable ... [https://journals.plos.org/plosone/article?id=10.1371/journal.pone.0328633]
- 81. An Efficient Multistrategy DNA Decontamination Procedure of ... [https://journals.plos.org/plosone/article?id=10.1371/journal.pone.0013042]
- 82. DNA decontamination methods for internal quality ... [https://pmc.ncbi.nlm.nih.gov/articles/PMC6816905/]
- 83. Evaluation of Different Cleaning Strategies for Removal ... [https://www.mdpi.com/2073-4425/13/1/162]
- 84. Avoiding Contamination | Thermo Fisher Scientific - ES [https://www.thermofisher.com/us/en/home/life-science/pcr/real-time-pcr/real-time-pcr-learning-center/real-time-pcr-basics/good-laboratory-practice-avoid-contamination-qpcr-experiments.html]
- 85. Advantages & Limits of Nested PCR vs. Standard PCR | AAT Bioquest [https://www.aatbio.com/resources/application-notes/advantages-limits-of-nested-pcr-vs-standard-pcr]
- 86. Quality Control for DNA Contamination in Laboratories ... [https://www.sciencedirect.com/science/article/abs/pii/S0198885997000116]
- 87. How Nested PCR Machines Work — In One Simple Flow ... [https://www.linkedin.com/pulse/how-nested-pcr-machines-work-one-simple-flow-2025-viroonm-global-ssnjc/]
- 88. Validating Real-Time Polymerase Chain Reaction (PCR) Assays [https://pmc.ncbi.nlm.nih.gov/articles/PMC7834634/]
- 89. Is qPCR the same as real-time PCR? | PHCbi [https://www.phchd.com/eu/biomedical/knowledge-base/is-qpcr-the-same-as-real-time-pcr]
- 90. Comparison of real-time PCR and nested PCR for ... [https://bmcinfectdis.biomedcentral.com/articles/10.1186/s12879-021-06873-3]
- 91. Nested-PCR vs. RT-qPCR: A Sensitivity Comparison in the ... [https://www.mdpi.com/2673-8856/4/3/19]
- 92. Comparison of the specificity and sensitivity of PCR, nested ... [https://pubmed.ncbi.nlm.nih.gov/16252489/]
- 93. Digital PCR: from early developments to its future application ... [https://pubs.rsc.org/en/content/articlehtml/2025/lc/d5lc00055f]
- 94. Evaluation of Comparative and LAMP | IDR Nested PCR [https://www.dovepress.com/comparative-evaluation-of-lamp-and-nested-pcr-for-the-rapid-diagnosis--peer-reviewed-fulltext-article-IDR]
- 95. Loop-mediated isothermal amplification ( LAMP ) reaction as viable... [https://bmcbiotechnol.biomedcentral.com/articles/10.1186/s12896-020-00629-8]
- 96. Development and comparative evaluation of LAMP , nested and... PCR [https://link.springer.com/article/10.1186/s12866-025-04295-8]
- 97. Performance Evaluation of Nested Polymerase Chain ... [https://pmc.ncbi.nlm.nih.gov/articles/PMC9694681/]
- 98. Field-deployable, rapid diagnostic testing of saliva for SARS ... [https://pmc.ncbi.nlm.nih.gov/articles/PMC7943555/]
- 99. Recent advances in loop-mediated isothermal ... [https://www.sciencedirect.com/science/article/pii/S2666517422000177]
- 100. A Field-Deployable and Low-Cost PCR (FLC ... [https://pubmed.ncbi.nlm.nih.gov/33018446/]
- 101. Comparison of RT-PCR, RT-nested PCRs, and real-time ... [https://www.nature.com/articles/s41598-021-96066-4]
- 102. Early Detection of Fusarium oxysporum Infection in ... [https://pmc.ncbi.nlm.nih.gov/articles/PMC9693623/]
- 103. A socioeconomic and cost benefit analysis of Tropical Race 4 ... [https://journals.plos.org/plosone/article?id=10.1371/journal.pone.0311243]
- 104. Cost-benefit evaluation of preventive site-specific fungicide ... [https://www.sciencedirect.com/science/article/abs/pii/S0168169925009421]
- 105. Economic Assessment of Waterborne Outbreak of ... [https://pmc.ncbi.nlm.nih.gov/articles/PMC5621525/]
- 106. Best practices for molecular microbiology testing [https://www.sciencedirect.com/science/article/abs/pii/S0196439924000278]
- 107. Comparison of Conventional, Nested, and Real-Time PCR ... [https://pmc.ncbi.nlm.nih.gov/articles/PMC2546753/]